
Engine Security
Engine SAML2 Configuration 
Since
4.0.3
Important
This document only applies to CrafterCMS version 4.0.3 and later
Please see here for version 4.0.2 and earlier.
Note
This guide includes SAML2 specific configuration only, for a general guide see Engine Project Security Guide
Crafter Engine can be configured to support SAML2 SSO out of the box without using any additional plugin.
Requirements
A SAML2 compatible Identity Provider properly configured, this configuration will not be covered here
A private key and certificate. This can be generated like so:
openssl req -newkey rsa:2048 -nodes -keyout rp-private.key -x509 -days 365 -out rp-certificate.crtTake note of the values of the following options used to generate your key and certificate that will be used later for configuring Crafter Engine:
keyout: The value used for this option wil be used in the
crafter.security.saml.rp.privateKey.locationpropertyout: The value used for this option will be used in the
crafter.security.saml.rp.certificate.locationproperty
Update the Configuration
To configure Engine SAML2, in your Delivery installation, we need to enable SAML security then we’ll setup the required SAML configuration properties.
To enable SAML security, go to CRAFTER_HOME/bin, open the crafter-setenv.sh file and uncomment the line export SPRING_PROFILES_ACTIVE=crafter.engine.samlSecurity:
# -------------------- Spring Profiles --------------------
...
# Uncomment to enable SAML security
export SPRING_PROFILES_ACTIVE=crafter.engine.samlSecurity
# For multiple active spring profiles, create comma separated list
Next we’ll setup SAML configuration properties. Go to CRAFTER_HOME/bin/apache-tomcat/shared/classes/crafter/engine/extension and add/uncomment the following lines to server-config.properties (of course, make any appropriate configuration changes according to your system):
 1#############################
 2# SAML2 Security Properties #
 3#############################
 4# SAML attributes mapping
 5crafter.security.saml.attributes.mappings=DisplayName:fullname,Avatar:profilePicture
 6# SAML roles mapping
 7crafter.security.saml.roles.mappings=editor:ROLE_EDITOR
 8# SAML attribute role key
 9crafter.security.saml.attributeName.role=Role
10###############################################################
11##         SAML Security Relying Party (SP) configuration    ##
12###############################################################
13# {baseUrl} and {registrationId} are pre-defined macros and should not be modified
14# SAML relying party (SP) registration ID. {registrationId} macro will be replaced with this value
15crafter.security.saml.rp.registration.id=SSO
16# SAML relying party (SP) entity ID and metadata endpoint
17crafter.security.saml.rp.entity.id={baseUrl}/saml/metadata
18# SAML relying party (SP) login processing url. Must end with {registrationId}
19crafter.security.saml.rp.loginProcessingUrl=/saml/{registrationId}
20# SAML relying party (SP) assertion consumer service location. Must end with {registrationId}
21crafter.security.saml.rp.assertion.consumer.service.location={baseUrl}/saml/{registrationId}
22# SAML relying party (SP) assertion consumer service biding (POST or REDIRECT)
23crafter.security.saml.rp.assertion.consumer.service.binding=POST
24# SAML relying party (SP) logout URL
25crafter.security.saml.rp.logoutUrl=/saml/logout
26# SAML relying party (SP) single logout service location
27crafter.security.saml.rp.logout.service.location={baseUrl}/saml/logout
28# SAML relying party (SP) logout service binding (POST or REDIRECT)
29crafter.security.saml.rp.logout.service.binding=POST
30# SAML relying party (SP) metadata endpoint
31crafter.security.saml.rp.metadata.endpoint=/saml/metadata
32# SAML relying party (SP) private key location
33crafter.security.saml.rp.privateKey.location=classpath:crafter/engine/extension/saml/rp-private.key
34# SAML relying party (SP) certificate location
35crafter.security.saml.rp.certificate.location=classpath:crafter/engine/extension/saml/rp-certificate.crt
36###############################################################
37##      SAML Security Asserting Party (IdP) configuration    ##
38###############################################################
39# SAML asserting party (IdP) entity ID:
40crafter.security.saml.ap.entityId=https://ap.example.org/ap-entity-id
41# SAML asserting party (IdP) single sign on service location
42crafter.security.saml.ap.single.signOn.service.location=https://ap.example.org/sso/saml
43# SAML asserting party (IdP) single sign on service binding (POST or REDIRECT)
44crafter.security.saml.ap.single.signOn.service.binding=POST
45# SAML asserting party (IdP) logout service location
46crafter.security.saml.ap.single.logout.service.location=https://ap.example.org/slo/saml
47# SAML asserting party (IdP) logout service binding (POST or REDIRECT)
48crafter.security.saml.ap.single.logout.service.binding=POST
49# SAML asserting party (IdP) want authn request signed
50crafter.security.saml.ap.want.authn.request.signed=false
51# SAML asserting party (IdP) certificate location
52crafter.security.saml.ap.certificate.location=classpath:crafter/engine/extension/saml/idp-certificate.crt
53###############################################################
54##            SAML Security other configuration              ##
55###############################################################
56# SAML Web SSO profile options: authenticate the user silently
57crafter.security.saml.webSSOProfileOptions.passive=false
58# SAML Web SSO profile options: force user to re-authenticate
59crafter.security.saml.webSSOProfileOptions.forceAuthn=false
where:
crafter.security.saml.attributes.mappings: List of mappings to apply for attributes, every attribute sent by the IDP will be compared against this list and will be available as described in Access User Attributes. Each mapping is comprised of the original name of the attribute, sent by the IDP, and attribute which will be the new name of the attribute in Enginecrafter.security.saml.roles.mappings:List of mappings to apply for roles, every role sent by the IDP will be compared against this list. Each mapping is comprised of the original name of the role, sent by the IDP, and role which will be the new name of the role in Enginecrafter.security.saml.rp.privateKey.location: The path of the relying party (SP) private key in the classpathcrafter.security.saml.rp.certificate.location: The path of the relying party (SP) certificate in the classpathcrafter.security.saml.ap.entityId: The asserting party (IdP) entity IDcrafter.security.saml.ap.single.signOn.service.location: The asserting party (IdP) single sign on URLcrafter.security.saml.ap.single.logout.service.location: The asserting party (IdP) single logout URLcrafter.security.saml.ap.certificate.location: The path of the asserting party (IdP) certificate in the classpathcrafter.security.saml.webSSOProfileOptions.passive: Indicates if user is authenticated silentlycrafter.security.saml.webSSOProfileOptions.forceAuthn: Indicates if user will be forced to re-authenticate
The classpath is located in your CrafterCMS installation, under CRAFTER_HOME/bin/apache-tomcat/shared/classes. As shown in the example above, the relying party private key is located in your CrafterCMS installation under CRAFTER_HOME/bin/apache-tomcat/shared/classes/crafter/engine/extension/saml folder.
# SAML relying party (SP) private key location
crafter.security.saml.rp.privateKey.location=classpath:crafter/engine/extension/saml/rp-private.key
Restart your installation after configuring the above.
You should now be able to test the SAML2 authentication and if there are no configuration or communication errors you will be redirected to the SSO login page when trying to access a secured page and then automatically return to your project in Crafter Engine.
Note
If you are configuring SAML2 authentication in an authoring environment, you need to make sure that your IDP is
configured to allow the login to be displayed in an iframe element by setting the right values for the
Content-Security-Policy header. You can find more information
here.
Configure Headers Based Authentication
Crafter Engine is able to integrate with any authentication system that sends custom HTTP headers containing information that will be used to authenticate the user in Engine. This section details how to setup Engine for headers based authentication.
To enable Engine headers based authentication:
Set
security.headers.standalonetotrueSet the URLs requiring authentication
Additionally, optional role mappings are available that allows mapping names from the external authentication to simple role names to use in the page or URL restrictions. Optional attribute mappings are also available which allow exposing attributes from the external authentication authority.
To enable Engine headers based authentication, open the Engine project configuration file site-config.xml.
Set security.headers.standalone to true
Engine Project Configuration - Enable headers authentication<security> ... <headers> <standalone>true</standalone> </headers> </security>
Next, configure the URLs you require authentication by setting url to desired value and expression to
isAuthenticated() like below:
Engine Project Configuration - setup url restrictions<security> <urlRestrictions> <restriction> <url>/**</url> <expression>isAuthenticated()</expression> </restriction> </urlRestrictions> ... </security>
See Restrict URLs for more information on expressions that can be used.
From the above configuration, here are the headers that Engine expects to be provided:
CRAFTER_secure_key(required)CRAFTER_username(required)CRAFTER_email(required)CRAFTER_groupsCRAFTER_*
It is also possible to change the prefix and names for the headers:
 1<security>
 2  <headers>
 3    ...
 4    <names>
 5     <!-- Prefix that will be used for all headers, defaults to 'CRAFTER_' -->
 6     <prefix>MY_APP_</prefix>
 7
 8     <!-- Name for the header containing the username, defaults to 'username' -->
 9     <username>user</username>
10
11     <!-- Name for the header containing the email, defaults to 'email' -->
12     <email>address</email>
13
14     <!-- Name for the header containing the groups, defaults to 'groups' -->
15     <groups>roles</groups>
16
17     <!-- Name for the header containing the token, defaults to 'secure_key' -->
18     <token>verification</token>
19
20    </names>
21    ...
22  </headers>
23</security>
Note
For CrafterCMS versions prior to 3.1.14, the prefix for the headers is
MELLON_and can’t be changed via project configuration
The default value of the token is my_secure_token. Remember to replace the default value by setting
security.headers.token to secure your installation. In the example below, the token is now set to
CHANGE_MY_TOKEN_VALUE
Engine Project Configuration - Change the default value of the token<security> ... <headers> <token>CHANGE_MY_TOKEN_VALUE</token> </headers> </security>
Optional Role Mappings
To add optional role mappings, add the following inside the <headers> tag:
Engine Project Configuration - setup optional role mappings in header<security> <headers> ... <groups> <group> <name>APP_GROUP_NAME</name> <!-- The name of the group in the header --> <role>ROLE_name_of_role</role> <!-- The name of the role in the authentication object --> </group> </groups> ... </headers> </security>
where:
name: The name of the group in the header. The
APP_prefix shown above is just an example and could be anything.role: The name of the role in the authentication object. Remember to add ROLE_ to the name of the role in the authentication object. So, if mapping the role
user, it will be<role>ROLE_user</role>
Optional Attributes
To add optional attributes, add the following inside the <headers> tag:
Engine Project Configuration - setup optional attributes in header1<security> 2 <headers> 3 ... 4 <!-- Optional attribute mappings, allows to expose attributes from the external auth --> 5 <attributes> 6 <attribute> 7 <name>APP_ATTRIBUTE_NAME</name> <!-- The name of the attribute in the header, excluding the prefix --> 8 <field>name</field> <!-- The name of the attribute in the authentication object --> 9 </attribute> 10 </attributes> 11 ... 12 </headers> 13</security>
where:
name: The name of the attribute in the header, with the prefix removed. (if your prefix is
CRAFTER_then the header value would beCRAFTER_APP_ATTRIBUTE_NAME, and you should enterAPP_ATTRIBUTE_NAMEin this tag.)field: The name of the attribute that will be created in the authentication object.
- To get the value of the attribute passed in the header, use the following
authToken.principal.attributes.name, where
nameis the name of the attribute in the authentication object.
Example
Let’s take a look at an example of setting up Engine headers authentication using a project created using the Website
Editorial blueprint named My Editorial. We will also change the default value for the token header. We’ll then take a
look at an example of setting up Engine headers authentication with optional role mappings and attribute.
Simple Example Setting Up Engine Headers Authentication
Open the Engine site-config.xml file in Studio, by navigating from the Sidebar to
Project Tools > Configuration, and finally picking up the Engine Project Configuration option from the list.
You can also access the site-config.xml using your favorite editor under
CRAFTER_HOME/data/repos/sites/SITENAME/sandbox/config/engine/site-config.xml
Add the following, where we are enabling Engine headers authentication and requiring authentication for all URLs in the
project in addition to changing the default value for the token to my_updated_token. :
Engine Project Configuration - Example enabling headers authentication<?xml version="1.0" encoding="UTF-8"?> <site> <version>2</version> <security> <urlRestrictions> <restriction> <url>/**</url> <expression>isAuthenticated()</expression> </restriction> </urlRestrictions> <headers> <standalone>true</standalone> <token>my_updated_token</token> </headers> </security> </site>
Save your changes and remember to publish the file /config/engine/site-config.xml to see the Engine headers
authentication in action in delivery.
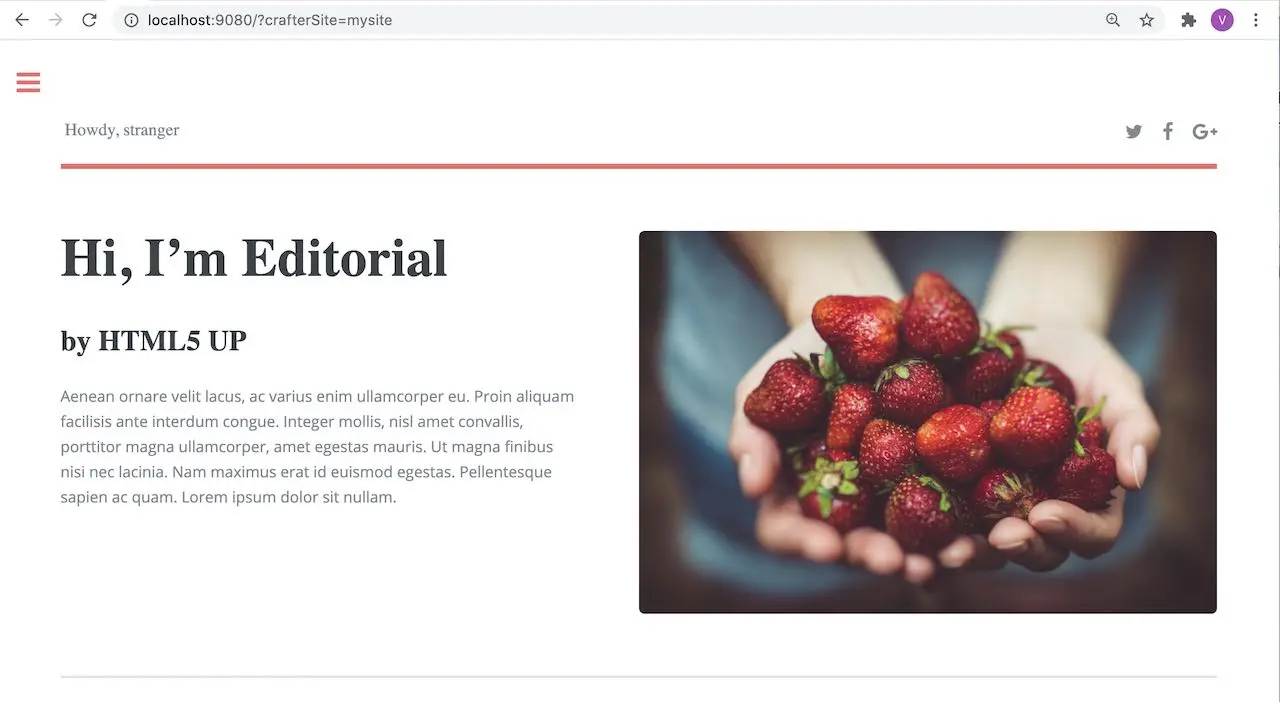
Now, try viewing the Home page without the header attributes required, by entering in your browser
localhost:9080?crafterSite=my-editorial. The Home page will not be displayed without the required header attributes.

This time, try viewing the Home page with the following header attributes and values:
CRAFTER_secure_key: my_updated_tokenCRAFTER_username: jsmithCRAFTER_email: jsmith@example.com
You should now see the Home page displayed
See Engine Configuration for more information on how to access the site-config.xml file.
Example Setting Up Engine Headers Authentication with Optional Role Mappings and Attributes
We’ll now take a look at another example where we setup optional role mappings and attributes.
We’ll setup the admin and the user roles and add the attribute APP_FULL_NAME. We’ll try to restrict
access to /articles/** for users with the user or admin role, then we’ll try to display the
APP_FULL_NAME value passed from the headers in our project. Remember that the ROLE_ prefix is required
Open the Engine site-config.xml file in Studio, by navigating from the Sidebar to
Project Tools > Configuration, and finally picking up the Engine Project Configuration option from the dropdown.
Add the following to setup the admin and user role, and the attribute APP_FULL_NAME:
Engine Project Configuration - Example Engine headers authentication with optional role mappings and attribute1<security> 2 <urlRestrictions> 3 <restriction> 4 <url>/articles/**</url> 5 <expression>hasAnyRole('user'\,'admin')</expression> 6 </restriction> 7 </urlRestrictions> 8 <headers> 9 <standalone>true</standalone> 10 <token>my_updated_token</token> 11 <!-- Optional role mappings, allows to map names from the external auth to simple role names to use in the page or url restrictions --> 12 <!-- The APP_ prefix is just an example, the values can be anything --> 13 <!-- The ROLE_ prefix is is required for the name of the role --> 14 <groups> 15 <group> 16 <name>APP_ADMIN</name> <!-- The name of the group in the header --> 17 <role>ROLE_admin</role> <!-- The name of the role in the authentication object --> 18 </group> 19 <group> 20 <name>APP_USER</name> <!-- The name of the group in the header --> 21 <role>ROLE_user</role> <!-- The name of the role in the authentication object --> 22 </group> 23 </groups> 24 <!-- Optional attribute mappings, allows to expose attributes from the external auth --> 25 <attributes> 26 <attribute> 27 <name>APP_FULL_NAME</name> <!-- The name of the attribute in the header --> 28 <field>name</field> <!-- The name of the attribute in the authentication object --> 29 </attribute> 30 </attributes> 31 </headers> 32</security>
For the expression in the URL restriction, remember to escape the comma as shown above
<expression>hasAnyRole('user'\,'admin')</expression>
When we send the following headers:
CRAFTER_secure_key: my_updated_tokenCRAFTER_username: jsmithCRAFTER_email: jsmith@example.com
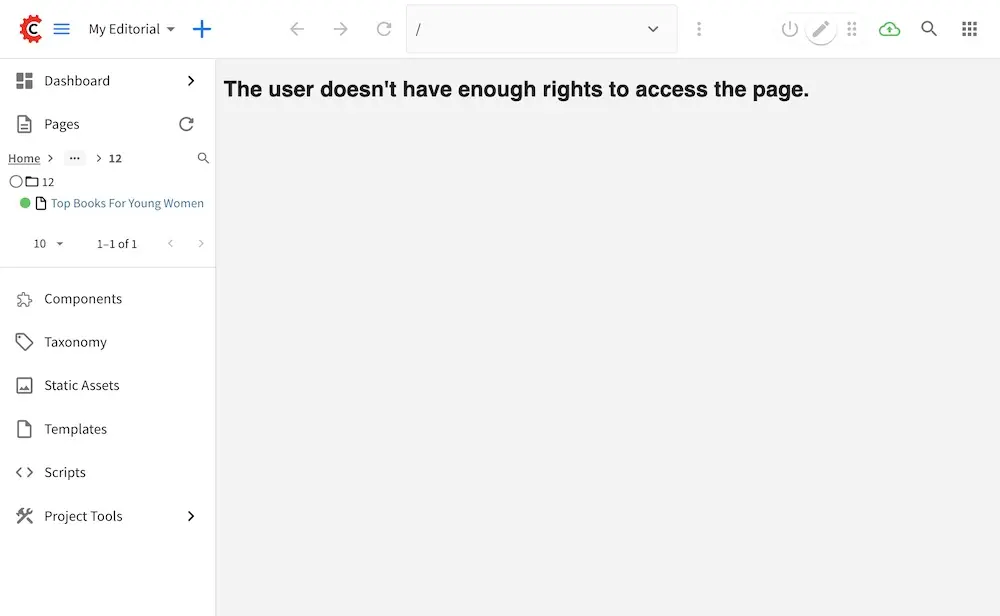
Notice that when we try to view an article, since the user does not have either admin or user role, the page
is not available and will display the following message: The user doesn't have enough rights to access the page.
In our example below, we tried previewing the article Top Books For Young Women with the headers listed above and
is shown the message below:
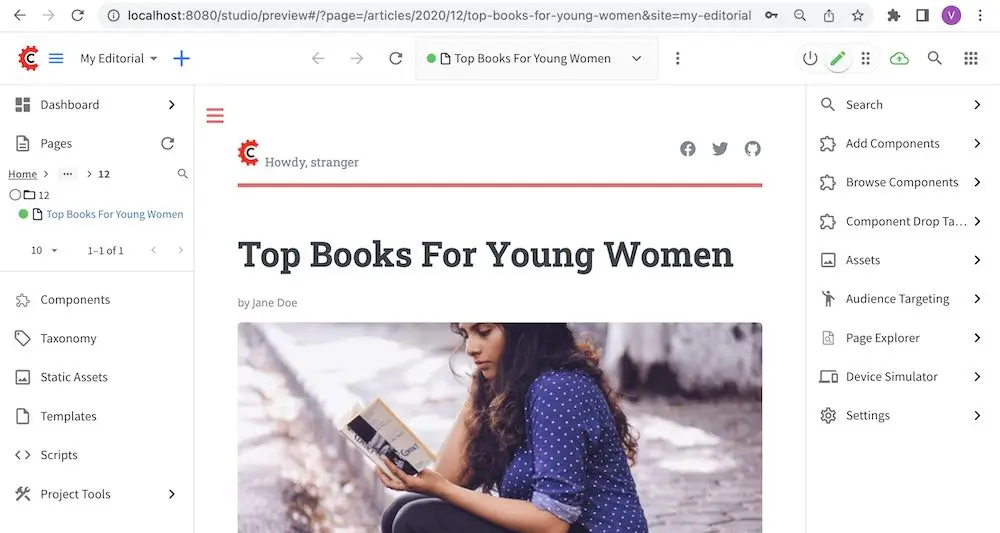
Let’s now try sending the headers again, but this time with the role APP_USER for our user
CRAFTER_secure_key: my_updated_tokenCRAFTER_username: jsmithCRAFTER_email: jsmith@example.comCRAFTER_groups: APP_USER
Notice that this time, we are able to preview the article correctly
The website editorial blueprint displays the value of the attribute with field name out of the box in the page
header. You can take a look at the header.ftl file on how the attribute is displayed. Open the Sidebar in
Studio, then navigate to /templates/web/components/ then right click on header.ftl and select Edit.
The authToken.principal.attributes.name contains the value passed for APP_FULL_NAME in the header
/templates/web/components/header.ftl1<#import "/templates/system/common/cstudio-support.ftl" as studio /> 2<header id="header" <@studio.componentAttr component=contentModel ice=true iceGroup="header"/>> 3 <a href="/" class="logo"><img border="0" alt="${contentModel.logo_text_t!""}" src="${contentModel.logo_s!""}"> 4 <#if (authToken.principal)??> 5 <#assign name = authToken.principal.attributes.name!"stranger" /> 6 <#else> 7 <#assign name = "stranger" /> 8 </#if> 9 10 Howdy, ${name} 11 12 </a> 13 ... 14</header>
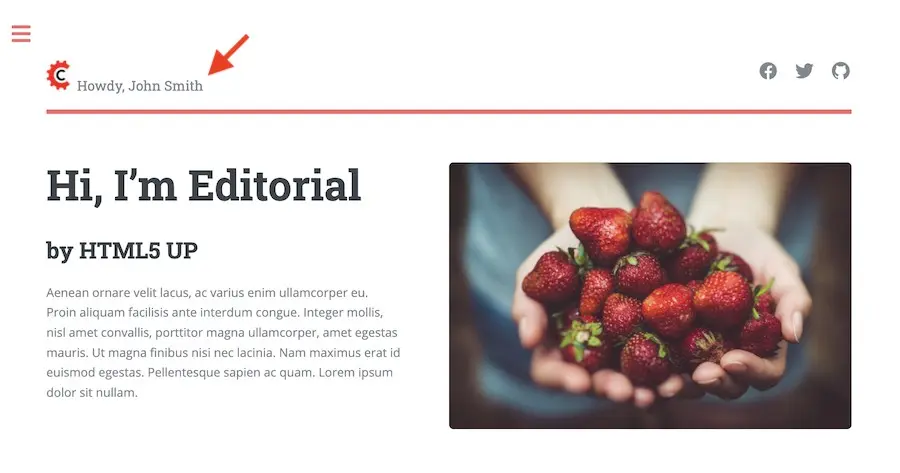
Let’s now try sending the headers again, but this time with the attribute APP_FULL_NAME
CRAFTER_secure_key: my_updated_tokenCRAFTER_username: jsmithCRAFTER_email: jsmith@example.comCRAFTER_groups: APP_USERCRAFTER_APP_FULL_NAME: John Smith
Note that when sending the attribute APP_FULL_NAME in the header, the header prefix must be added as shown above.
When we preview a page, the value in the custom header is displayed:
Engine Project Security Guide
The following guide will help you configure Crafter Engine to:
Add authentication for your project.
Add authorization so that access to certain pages and URLs of your project are restricted.
Crafter Engine is able to integrate with multiple authentication providers:
Using SAML2
To configure SAML 2.0, follow the instructions: Engine SAML2 Configuration
Using Crafter Profile
To configure Crafter Profile, follow the instructions: Engine Crafter Profile Configuration
Add Authentication
Add Login
To add a login page:
In Crafter Studio, create a Home > Login page.
- The page template should contain a form that POSTs to /crafter-security-login, sending the
username, passwordandrememberMeparameters, like in the following snippet:
 1<form action="/crafter-security-login" method="post">
 2    <label for="username">Username: </label>
 3    <input type="text" name="username"/>
 4    <br/>
 5    <label for="password">Password: </label>
 6    <input type="password" name="password"/>
 7    <br/>
 8    <input type="checkbox" name="rememberMe" value="true">Remember Me</input>
 9    <br/>
10    <button type="submit">Sign in</button>
11</form>
- The page template should contain a form that POSTs to /crafter-security-login, sending the
Add Logout
To add logout, just add a link in the global header that points to /crafter-security-logout:
1<a href="/crafter-security-logout">Log Out</a>
Add Authorization
Adding authorization allows restricted access to certain pages and URLs of your project depending on what is setup.
Restrict Pages
You can restrict pages based on whether a user is authenticated or has a certain role. To do this, you need to follow the next steps to create in the page content type a Repeating Group with a text Input for the roles:
In Studio, click on
 .
.Click on Content Types then Open Existing Type and select the content type for the pages that you want to restrict.
On Controls, select the Repeating Group and add it to any Form Section (you can even create an Authorization section just for these fields).
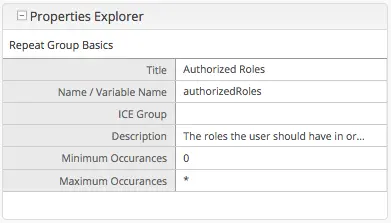
In the Repeating Group properties, set the Title field to “Authorized Roles” and the Name / Variable Name field to “authorizedRoles.”
Warning
The UI autofills the Name/ Variable Name field and adds postfixes as you’re typing in the Title field. Remember to remove the postfix
_o, asauthorizedRolesis a reserved variable name used by CrafterCMS. For a list of variable names used by CrafterCMS, see Form Control Variable Names for more informationThe
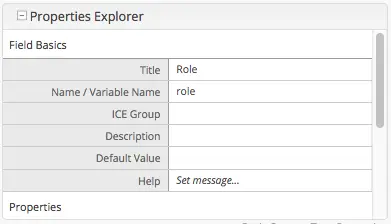
ROLE_prefix is optional for values inauthorizedRolesAdd an Input control inside the Repeating Group, with the Title field set to “Role” and the Name / Variable Name field set to “role”. Make this Input required by checking the checkbox under Constraints in the Required field in the Properties Explorer.
Warning
The UI autofills the Name / Variable Name field and adds postfixes as you’re typing in the Title field. Remember to remove the postfix
_o, as therolevariable name is used by CrafterCMS for enforcing access to a page. For a list of variable names used by CrafterCMS, see Form Control Variable Names for more informationSave the changes. The added fields should look like this:
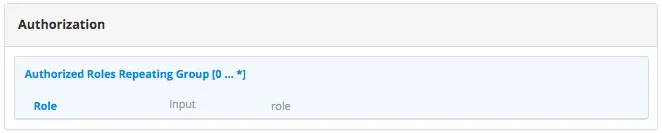
With these changes, now you or any other content author can go to any page of this content type and add the roles that
are required to access the page. Two special roles which indicate authentication state can be used besides the roles
that are included in user profiles: Anonymous and Authenticated. The complete access check algorithm executed
by Crafter Engine is described below:
If the page doesn’t contain any role, no authentication is needed.
If the page has the role
Anonymous, no authentication is needed.If the page has the role
Authenticated, just authentication is needed.If the page has any other roles, the user needs to be authenticated and have any of those roles.
Restrict URLs
Sometimes it is not enough to restrict a single page. Sometimes you need to restrict an entire project subtree, or restrict several static assets. For this, CrafterCMS provides configuration parameters that allow you to restrict access based on URL patterns. You just need to add configuration similar to the following in Config > Engine Project Configuration:
1<security>
2    <urlRestrictions>
3        <restriction>
4            <url>/user/*</url>
5            <expression>hasAnyRole({'user'\, 'admin'})</expression>
6        </restriction>
7    </urlRestrictions>
8</security>
The <urlRestrictions> can contain any number of <restriction> elements. Each restriction is formed by an
Ant-style path pattern (<url>) and a Spring EL expression (<expression>) executed against the current profile.
If a request matches the URL, and the expression evaluates to false, access is denied. The following expressions can
be used:
isAnonymous()isAuthenticated()hasRole('role')hasAnyRole({'role1'\, 'role2'})permitAll()denyAll()
Note
For the <url> Ant-style path pattern, <url>/*</url> indicates just one level of the URL and <url>/**</url> indicates all urls. For more information on Ant-style path pattern matching, see https://docs.spring.io/spring/docs/current/javadoc-api/org/springframework/util/AntPathMatcher.html
For the hasAnyRole expression, remember to escape the comma , separating the roles inside the expression as shown above.
For more information, check UrlAccessRestrictionCheckingProcessor.java and AccessRestrictionExpressionRoot.java
Access User Attributes
Once the authentication and authorization configurations are completed you can use the authToken object in
templates and scripts to access the current user attributes. The class of the object will change depending of the
authentication provider used, but you can always obtain an instance of CustomUser using the principal property.
<#if authToken??>
  Hello ${authToken.principal.attributes.firstName}!
<#else>
  <#-- show login button -->
</#if>
Note
You can find more details about the authToken variable in FreeMarker (Templating) API or Groovy/Java API
Migrating from Crafter Profile
Prior to version 3.1.5 Crafter Profile was the only security provider available, all projects created in previous
versions will continue to work without any changes, however if you need to migrate to a different provider like SAML2
you will need to replace all uses of the profile and authentication variables, both have been replaced with
authToken.
In templates and scripts you can replace all uses of profile with authToken and profile.attributes with
authToken.principal.attributes.
Note
Some advanced uses like custom security filters will need to be updated to integrate with Spring Security
Important
The variables
profileandauthenticationwill be null in most cases and should not be used anymore
Engine Crafter Profile Configuration
Note
This guide includes Crafter Profile specific configuration only, for a general guide see Engine Project Security Guide
Crafter Engine needs access tokens to use Crafter Profile’s API. Each project must have it’s own access token. Follow the next steps to create one:
Login to Crafter Profile Admin Console as a
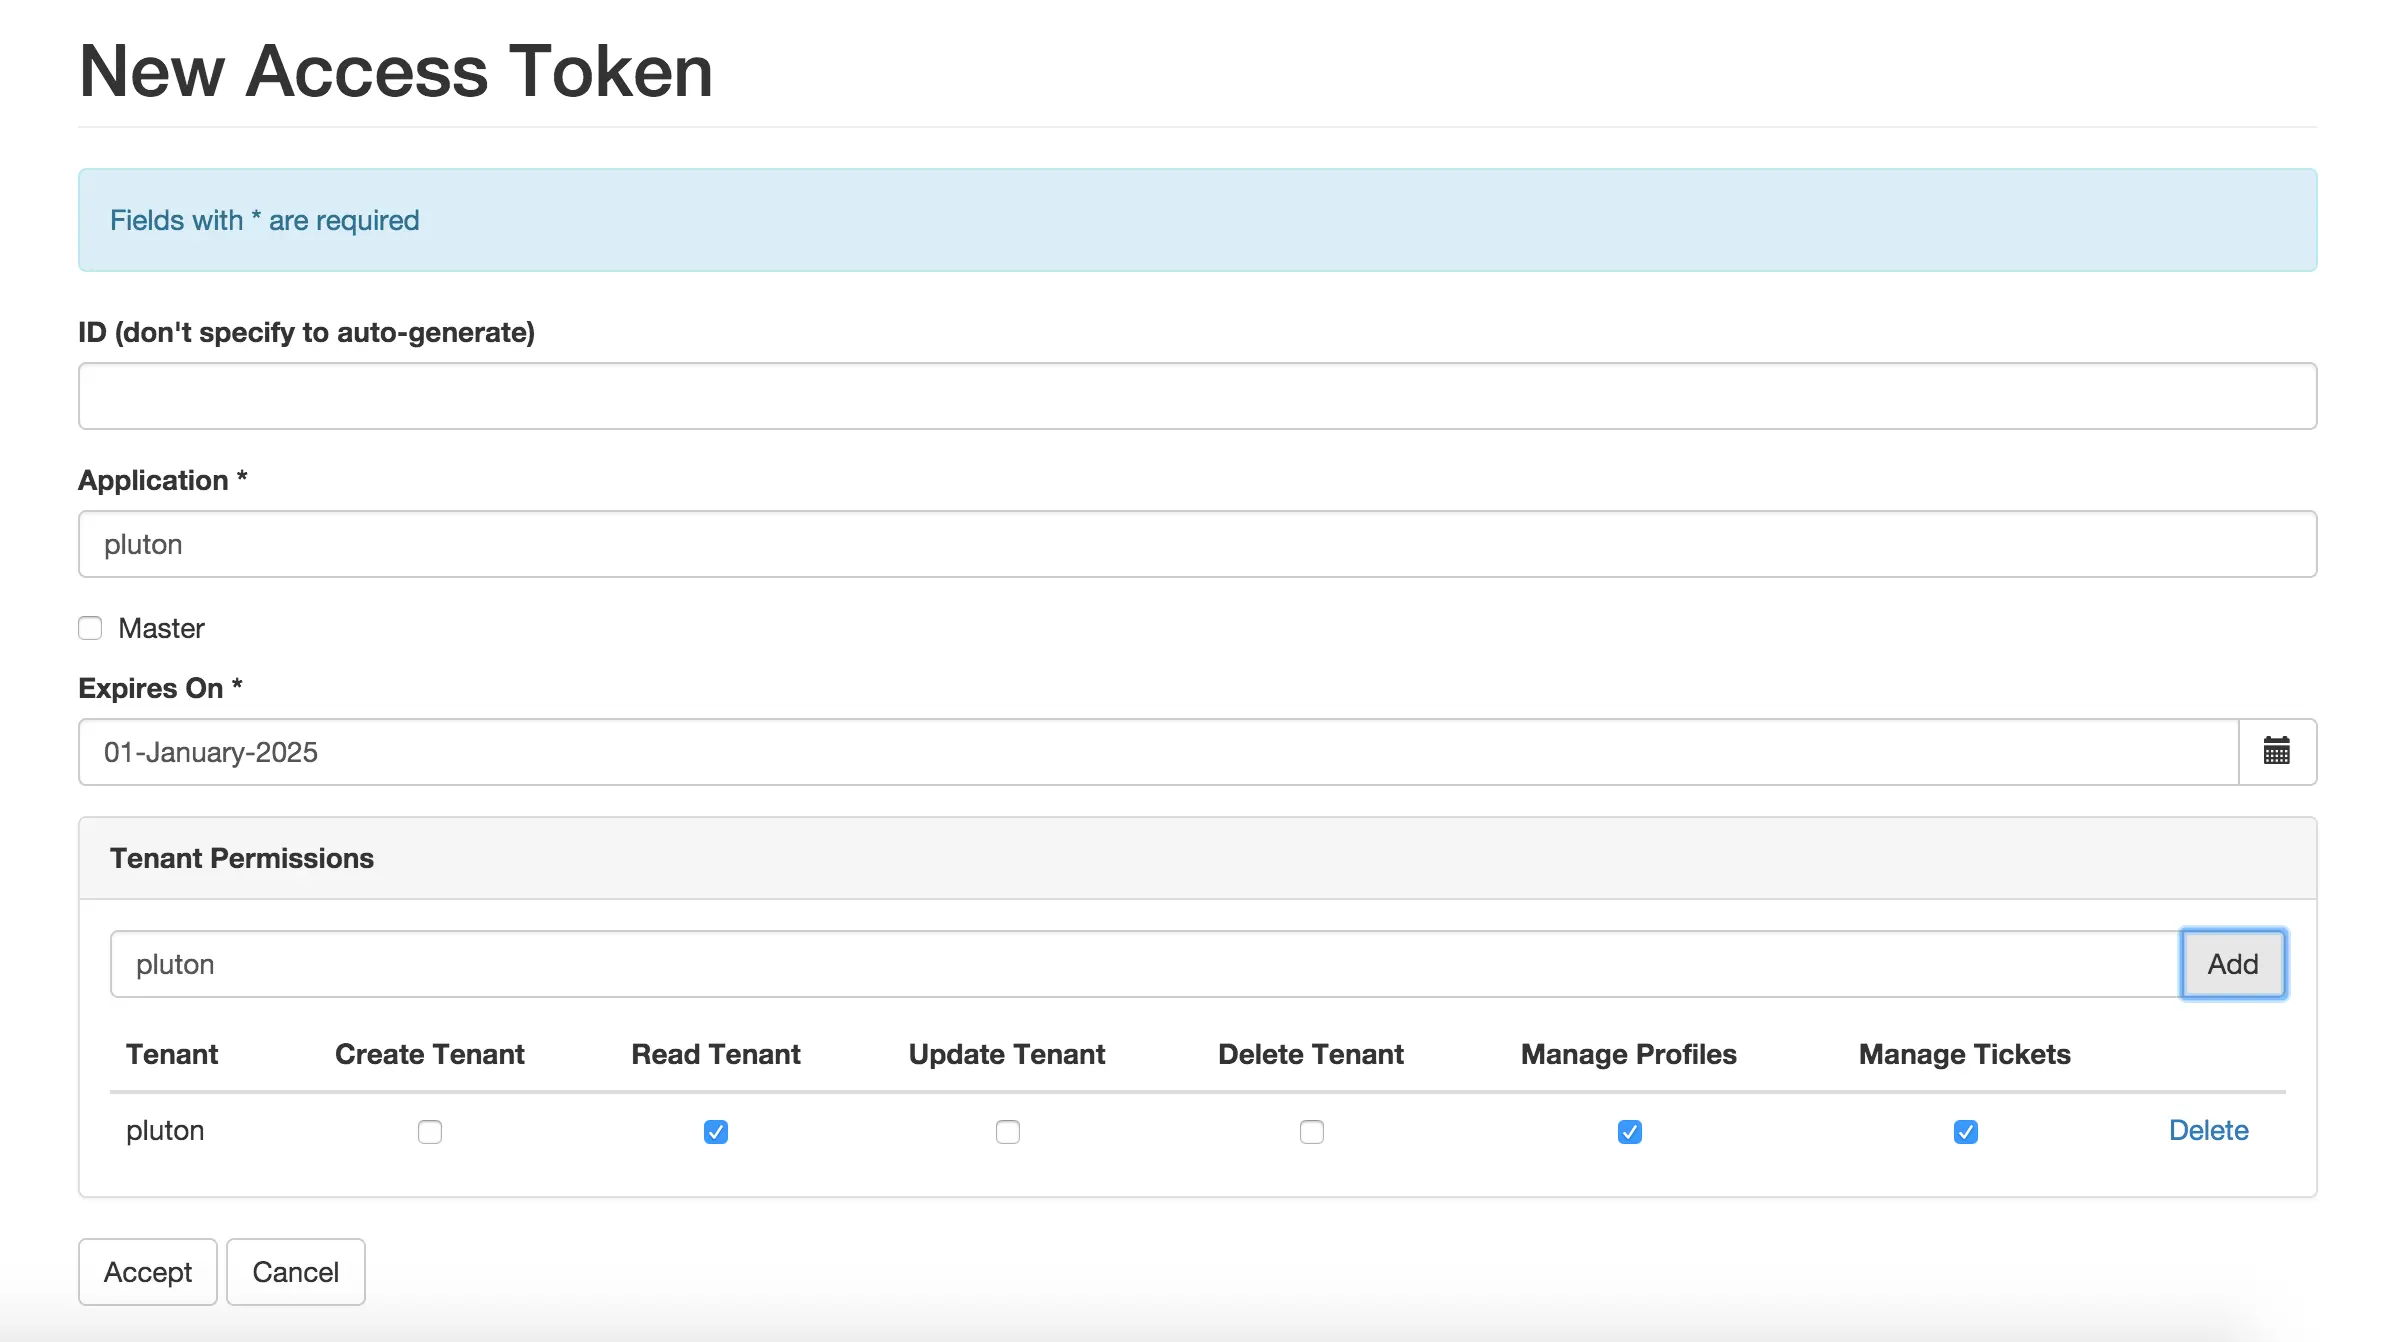
PROFILE_SUPERADMIN(by default the admin user has this role). See here for more information on the Crafter Profile Admin Console UI.Click on New Access Token in the navigation. Enter your project’s name on Application, leave the Master checkbox unselected, pick a proper Expiration Date (10 years from the current date is ok) and on Tenant Permissions add your tenant’s name to the input (Remember that your tenant’s name has to have the same name as your project. See the note below) and click on Add. By default the admin console auto-selects the 3 actions mentioned before. If you’re using the same access token as another environment (e.g. you want to use the same access token in dev and prod), copy the same access token ID from the other environment, and enter the same field values for Application, Master and Expiration Date. Finally, click on Accept.
Note
Authentication by default is done against a tenant with the same name as your project. See Tenants Management for more information on creating a tenant.
- Now that you have created the access token, you need to “tell” Engine to use it in your project. In Admin Console,
click on List Access Tokens in the navigation menu and copy the ID of the token you just created. Then, depending on the mode Engine is running, add one of the following configurations (preview is ignored because normally predefined Personas are used, so there’s no need to access the Crafter Profile app).
1<profile>
2    <api>
3        <accessTokenId>6604d59a-fe1b-4cb3-a76f-bdb1eb61e8c2</accessTokenId>
4    </api>
5</profile>
Accessing Crafter Profile REST API
The following property allows you to configure the access token required to call Profile REST APIs:
profile.api.accessToken: The access token to use for the Profile REST calls.
URLs
Login
The following properties allows you to configure various Login URLs:
The
security.login.formUrlproperty allows you to configure the URL of the login form page. The default is/login.The
security.login.defaultSuccessUrlproperty allows you to configure the URL to redirect to if the login was successful and the user couldn’t be redirected to the previous page. The default is/.The
security.login.alwaysUseDefaultSuccessUrlproperty allows you to configure whether to always redirect to the default success URL. The default isfalse.The
security.login.failureUrlproperty allows you to configure the URL to redirect to if the login fails. The default is/login?login_error=true.
<security>
  <login>
    <formUrl /> (The URL of the login form page)
    <defaultSuccessUrl /> (The URL to redirect to if the login was successful and the user could not be redirected to the previous page)
    <alwaysUseDefaultSuccessUrl /> (Sets whether to always redirect to the default success URL after a successful login)
    <failureUrl /> (The URL to redirect to if the login fails)
  </login>
</security>
Logout
The security.logout.successUrl property allows you to configure the URL to redirect to after a successful logout.
The default is /.
<security>
  <logout>
    <successUrl /> (The URL to redirect after a successful logout)
  </logout>
</security>
Access Denied
The security.accessDenied.errorPageUrl property allows you to configure the URL of the page to show when
access has been denied to a user to a certain resource. The default is /access-denied.
<security>
  <accessDenied>
    <errorPageUrl /> (The URL of the page to show when access has been denied to a user to a certain resource)
  </accessDenied>
</security>
URL Restrictions
The security.urlRestrictions: property allows you to configure URL restrictions. It contains any number of
restriction elements. Each restriction is formed by an Ant-style path pattern (<url>) and a Spring EL
expression (<expression>) executed against the current profile. If a request matches the URL, and the
expression evaluates to false, access is denied. For more information, check
UrlAccessRestrictionCheckingProcessor.java
and AccessRestrictionExpressionRoot.java
Note
For the <url> Ant-style path pattern, <url>/*</url> indicates just one level of the URL and <url>/**</url> indicates all urls. For more information on Ant-style path pattern matching, see https://docs.spring.io/spring/docs/current/javadoc-api/org/springframework/util/AntPathMatcher.html
<security>
  <urlRestrictions> (Contains any number of restriction elements)
    <restriction> (Restriction element, access is denied if a request matches the URL, and the expression evaluates to false)
      <url /> (URL pattern)
      <expression /> (Spring EL expression)
    </restriction>
  </urlRestrictions>
</security>