
Static Content Access
Static content comprises text and binary assets not part of the actual content, templates and scripts. These include: - Rich media assets, like images, videos, and documents (PDFs, Word, Excel, etc.) - CSS, JavaScript, and HTML files - Other binary files - SPA application files and related artifacts
These files are typically stored in /static-assets in the Studio project’s Git repository.
Internally Managed Static Assets
Static assets can be internal to the project (site) and managed by Studio. While Git is wonderful for managing and tracking textual content, it’s not ideal for binary files. That’s why CrafterCMS provides a blob store for managing binary files.
Blob Store Files
The blob store is a Git-like repository for binary files. It’s managed by Studio and is part of the project’s Git repository. The blob store is a great way to manage binary files that are part of the project’s workflow and publishing processes.
The blob store is normally configured for all static-assets files, except for developer managed assets like /static-assets/app which are best kept in Git.
Learn more about configuring the blob store for your project by reading Blob Stores.
Externally Managed Static Assets
Some static assets have their lifecycle in a different system, but are required to be surfaced/used by the CrafterCMS project/site. CrafterCMS provides a way to reference these assets in your content and templates.
AWS Asset Access
AWS provide a number of useful services that ultimately produce content or store content that needs to be used by the CrafterCMS project/site. We will cover S3 and Video Transcoding as two examples.
S3 Asset Access
For very large externally managed artifacts, AWS S3 is a great option.
Note
This mechanism allows CrafterCMS to point to assets in S3, but not manage it. This is not the same as the blob store. While the blob store is backed by S3, it’s still an internally managed store that supports the project’s workflow and publishing processes.
The following guide is an example to illustrate how to:
Configure Studio to use an S3 bucket (this is not the same as the blob store).
Optionally upload documents to the S3 bucket using the AWS data sources
Select the S3 object using the item selector control in Studio.
Generate public links that users can use to access these documents.
Prerequisites
Create an AWS S3 bucket to upload the assets.
Create a site based on the Editorial blueprint.
Step 1: Add the S3 configuration in Studio
Go to ![]() >
> Configurations and in the dropdown select AWS Profiles. If you click on
View Sample, you’ll see the available configuration profiles. In particular, the configuration for an S3
profile is the following:
1<profile>
2 <id/>
3 <credentials>
4   <accessKey/>
5   <secretKey/>
6 </credentials>
7 <region/>
8 <bucketName/>
9</profile>
Where:
profile.id: the ID that AWS data sources will use to refer to this profile.
credentials: the AWS credentials (access key and secret key) use to access the S3 bucket.
region: the AWS region where the bucket resides.
bucketName: the name of the bucket where the assets will be put.
For this guide, the AWS Profiles should look like this (replace the X's for actual AWS credentials and
bucket name for the actual bucket where you’re storing the documents):
 1<?xml version="1.0" encoding="UTF-8"?>
 2<aws>
 3  <version>2</version>
 4  <s3>
 5    <profile>
 6      <id>s3-default</id>
 7      <credentials>
 8        <accessKey>XXXXXXXXXX</accessKey>
 9        <secretKey>XXXXXXXXXXXXXXXXXXXX</secretKey>
10      </credentials>
11      <region>us-east-1</region>
12      <bucketName>mybucket</bucketName>
13    </profile>
14  </s3>
15</aws>
Please see Managing Secrets for more information on how to manage/encode your AWS credentials.
Step 2: Add the controls and data source for uploading files to your S3 bucket to the content type
For our example, we’ll add an Attachment field, which is of type node-selector that is bound to an AWS file upload
data source, to the Page - Article content type. To do this:
Go to
 and open the
 Page - Articlecontent type definition.We’ll add a data source where to upload our files. At the end of the Data Sources section, add a
File Uploaded to S3 Repositorydata source with Title S3 Upload and Name s3Upload. In the Profile Id property, enter the name ofprofile.idconfigured in step 1.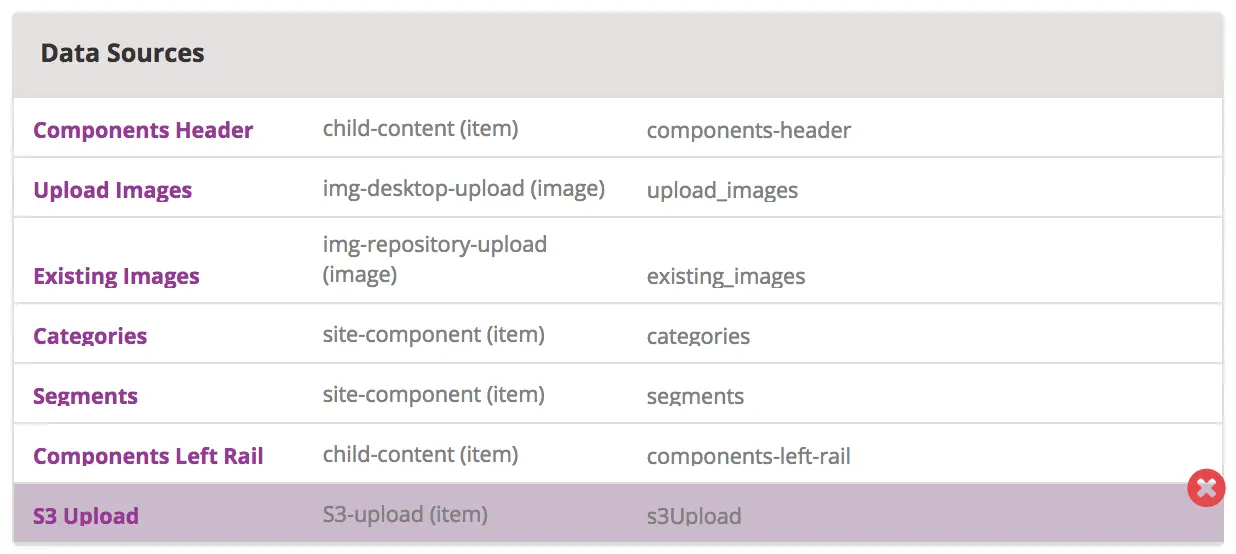
At the end of the Content section, add a
Repeating Groupcontrol with Title Attachments and Name attachments.Add an
Inputcontrol inside the repeating group with Title Attachment Name and Name attachmentName.Add an
Item Selectorcontrol with Title Attachment and Name attachment. We will bind the data source we added above to theItem Selectorcontrol by opening the Properties, then scroll toItem Managerand check the box next to the data source we added earlier, S3 Upload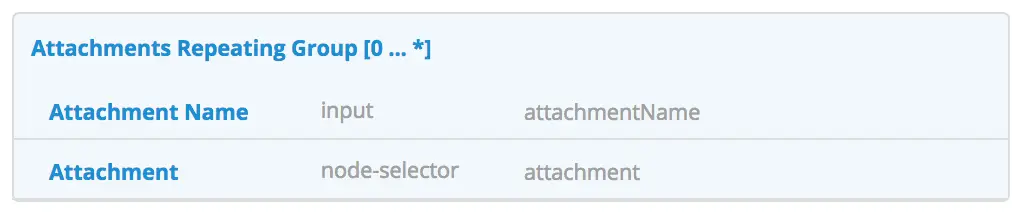
Note
If you’re using Freemarker as your view layer, follow the steps below after adding the data source and controls for uploading files to your S3 bucket to the content type:
We need to add the Freemarker code that will render the URLs. In
the Templates > web > pages > article.ftl, add the following lines after the
<#list contentModel.sections.item as item>...</#list> lines:
1<#if contentModel.attachments??>
2  <h2>Attachments</h2>
3  <ul>
4    <#list contentModel.attachments.item as a>
5      <li><a href="${a.attachment.item.key}">${a.attachmentName}</a></li>
6    </#list>
7  </ul>
8</#if>
Step 3: Add some attachments and test the changes
If all the previous steps have been done correctly, you should be able to add any number of attachments and they should appear underneath the last content sections when the page is rendered. For example, after adding a couple of PDF catalogs in the Men Styles For Winter article:
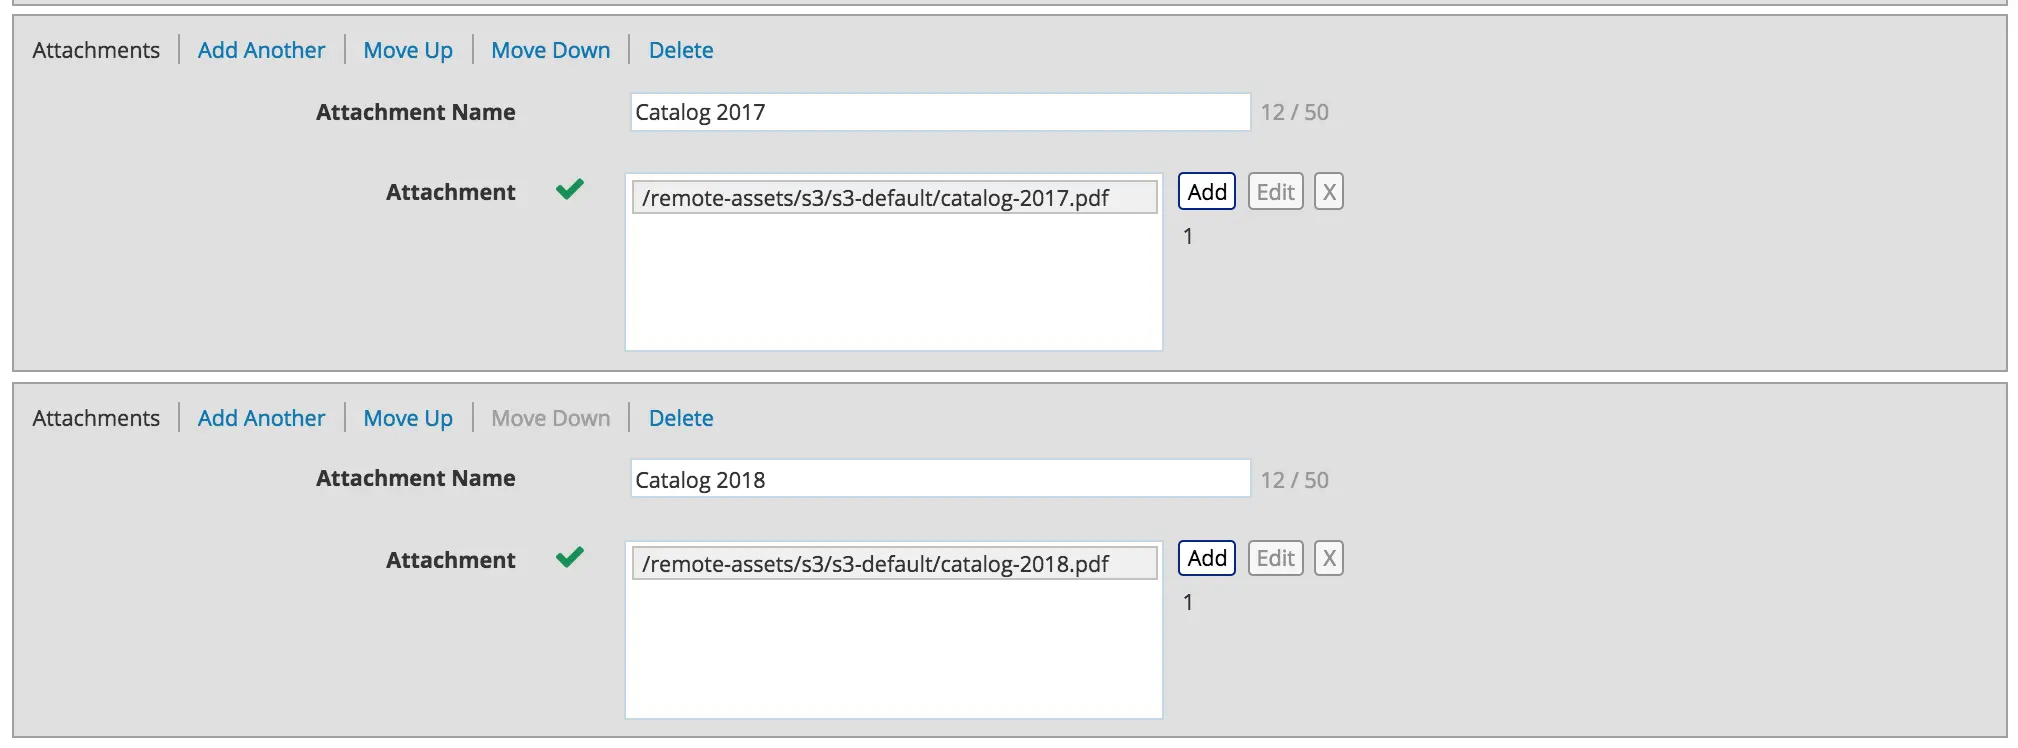
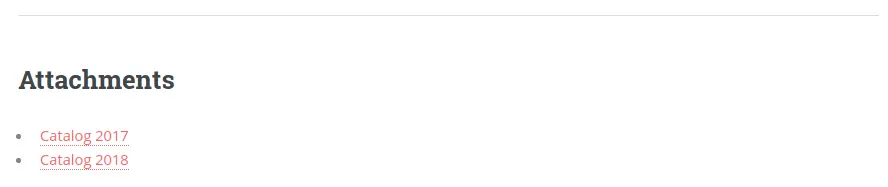
The bottom of the page looks like this when you preview your page:
Step 4: Publish the changes
The next step is to publish the changes. Remember to publish not just the page where we added the S3 assets,
but also the article.ftl and the aws.xml files too.

Box Asset Access
Box is a good option when you need to store media and documents that are quite large. The following guide explains how to:
Configure Studio to use Box.
Upload documents to Box using the
box-file-uploadcontrol in Studio.Generate public links in Engine that users can use to access these documents.
Prerequisites
Create a Box profile to upload the assets.
Create a project based on the Editorial blueprint.
Step 1: Add the Box configuration in Studio
Go to ![]() >
> Configuration and in the dropdown select Box Profiles. If you click on View Sample, you’ll see the available configuration profiles. In particular, the configuration for a Box profile is the following:
 1<profile>
 2    <id/>
 3    <clientId/>
 4    <clientSecret/>
 5    <enterpriseId/>
 6    <publicKeyId/>
 7    <privateKey/>
 8    <privateKeyPassword/>
 9    <uploadFolder/>
10</profile>
where:
id: the ID that
box-file-uploadcontrols will use to refer to this profile.clientId: Box client id
clientSecret: Box client secret
enterpriseId: Box enterprise id
publicKeyId: Box public key id
privateKey: Actual private key text in a CDATA
privateKeyPassword: Password used to decrypt the private key (passphrase)
uploadFolder: Name of the folder where files will be uploaded in Box
For this guide, the Box Profiles should look like this (replace the ...’s for actual Box credentials and videos for the actual upload folder where you’re storing the documents):
 1<box>
 2  <box>
 3    <profile>
 4      <id>box-default</id>
 5      <clientId>...</clientId>
 6      <clientSecret>...</clientSecret>
 7      <enterpriseId>...</enterpriseId>
 8      <publicKeyId>...</publicKeyId>
 9      <privateKey>
10<![CDATA[...]]>
11      </privateKey>
12      <privateKeyPassword>...</privateKeyPassword>
13      <uploadFolder>videos</uploadFolder>
14    </profile>
15  </box>
16</box>
Please see Managing Secrets for more information on how to manage/encode your Box credentials
Step 2: Enable the Box File Upload Control
In ![]() > Configuration > Project Config Tools, in the <controls> section, enable the Box File Upload by adding the following lines:
> Configuration > Project Config Tools, in the <controls> section, enable the Box File Upload by adding the following lines:
1<control>
2  <name>box-file-upload</name>
3  <icon>
4    <class>fa-square-o</class>
5    <stackedclass>fa-upload</stackedclass>
6  </icon>
7</control>
Step 3: Add the Box File Upload Control to the content type
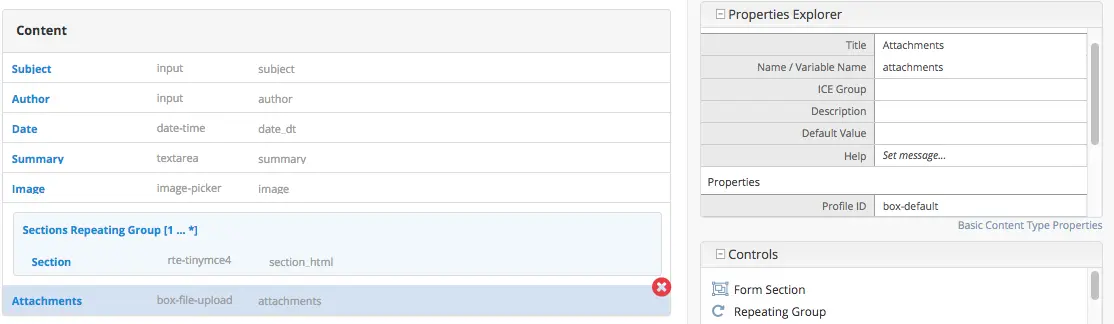
For our example, we’ll add an Attachments field, which is of type box-file-upload, to the Article
content type. To do this:
Go to
Project Toolsand open theArticlecontent type definition.At the end of the Content section, add a
Box File Uploadcontrol with Title Attachments and Name attachments (the control has a property called Profile ID. If you changed the name ofprofile.idin step 1, you need to change it in the property too). Remember to put a check mark on theEnable UploadandEnable Multiple Selectionproperties of the Box File Upload control so the users will be able to upload assets to Box and be able to select multiple assets.
Step 4: Add Freemarker code to render the URLs
We need to add the Freemarker code that will render the URLs. In the Templates > web > pages > article.ftl, add the following lines after the <#list contentModel.sections.item as item>...</#list> lines:
<#if contentModel.attachments??>
   <h2>Attachments</h2>
   <ul>
     <#list contentModel.attachments.item as a>
       <li><a href="${a.url}">${a.name}</a></li>
     </#list>
   </ul>
</#if>
Step 5: Add some attachments and test the changes
If all the previous steps have been done correctly, you should be able to add any number of attachments and they
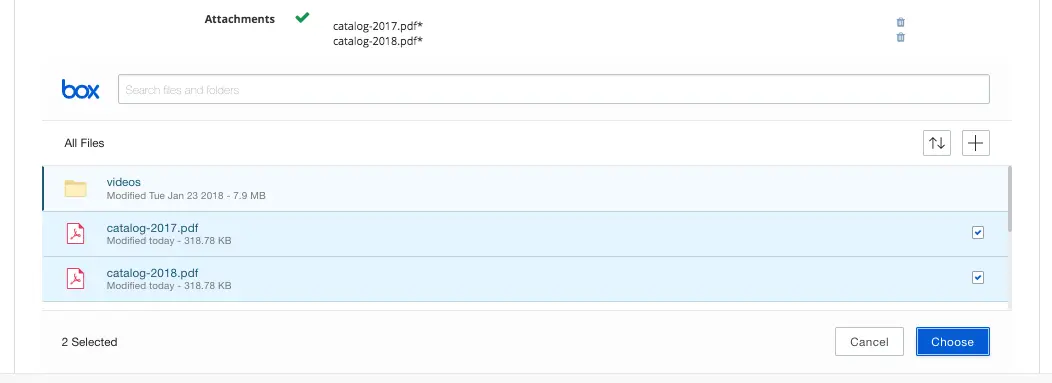
should appear underneath the last content sections when the page is rendered. To upload files to Box, click on the + button in the Box widget and select Upload, then drag or browse for the files you want to upload. Click on the Upload button after selecting the files you want to upload. After the upload finishes, click on the Close button on the left side of the Box widget and you’ll be able to see the files you just uploaded to Box. You’d then put a check mark next to the files that you want to add as attachment for the page, then click on the Choose button.
For example, after adding a couple of PDF catalogs in the Men Styles For Winter article:
The bottom of the page looks like this when you preview your page:

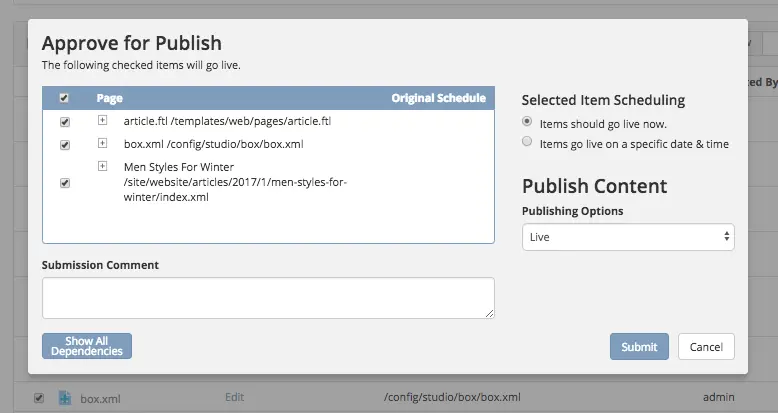
Step 6: Publish the changes
The next step is to publish the changes. Remember to publish not just the page where we added the Box assets,
but also the article.ftl and the box.xml files too.
WebDAV Asset Access
External assets can also be hosted on a WebDAV server. CrafterCMS provides a way to reference these assets in your content and templates. Learn how to configure WebDAV profiles in Studio by reading WebDAV Profiles Configuration.
Referencing Externally Managed Assets
The Site Administrators section
contains information on how to configure CrafterCMS to access services used for storing assets remotely
here: Studio Configuration.
Browser access to remote assets on your site is provided by Crafter Engine’s remote assets controller
via the URL pattern /remote-assets/STORE-TYPE/PROFILE-ID/PATH-TO-ASSET, where:
STORE-TYPE the remote repository storage used, for our example above, S3
PROFILE-ID ID used to refer to remote repository profile
PATH-TO-ASSET path to asset in the remote repository
Disabling /remote-assets Access
Sometimes you may want to disable access to remote repositories. To do this, in your authoring or delivery
install, open the file rendering-context.xml under apache-tomcat/shared/classes/crafter/engine/extension/
and edit the file to define a set of crafter.urlMappings without the remote-asset controller, like this:
1<util:map id="crafter.urlMappings">
2    <entry key="/api/**" value-ref="crafter.restScriptsController"/>
3    <entry key="/api/1/services/**" value-ref="crafter.restScriptsController"/> <!-- Deprecated mapping, might be removed in a later version -->
4    <entry key="/static-assets/**" value-ref="crafter.staticAssetsRequestHandler"/>
5    <!--entry key="/remote-assets/**" value-ref="crafter.remoteAssetsRequestHandler"/-->
6    <entry key="/*" value-ref="crafter.pageRenderController"/>
7</util:map>
Note
Please take note that if you disable /remote-access in your authoring install, preview of remote assets will be broken.
By-passing /remote-assets in Delivery for WebDAV
To avoid proxying the WebDav /remote-assets in Delivery, the Delivery Deployer target should be configured
to have a find and replace processor that changes the /remote-assets URL to an actual Apache static asset
delivery URL.
1- processorName: findAndReplaceProcessor
2  textPattern: /remote-assets/webdav(/([^"<]+)
3  replacement: 'http://apache.static-asset.delivery.url$1'
Asset Processing
Most projects contains images that are viewed in different display sizes (desktops/laptops, mobile phones, tablets, of which comes in different sizes, etc.), or videos at different bit-rates, resolutions, and size. CrafterCMS supports image and video renditioning as detailed below.
Image Transformation
To ensure the same experience on your project through various display sizes, the images would need to be converted to different sizes and formats. CrafterCMS supports automatic image processing that allows you to upload just one image that gets converted to the different sizes or formats required by your project for various display sizes. This automatic image processing is one form of asset processing and can be configured in Studio through the Asset Processing configuration file.
Asset processing allows you to define transformations for static assets (currently only images), through a series of processor pipelines that are executed when the assets are uploaded to Studio. A processor is an application that can manipulate your assets to your desired formats such as compress and optimize JPEG and PNG images, etc. Each processor pipeline in the configuration let’s you manipulate the asset to a desired format/size. You can specify just one or as many processors as needed. You can also specify just one or as many pipelines as required by your project. (Say, you want an image appropriate for mobile devices and an image appropriate for desktop browsers, you’ll have two pipelines setup in the configuration.)
Configuring Image Processing
The pipelines can be configured by going to the Sidebar in Studio, then from the Sidebar, go to
Project Tools > Configurations > Asset Processing. Each pipeline has the following structure:
<pipeline>
  <inputPathPattern/>
  <keepOriginal/>
  <processors>
    <processor>
      <type/>
      <params/>
      <outputPathFormat/>
    </processor>
  </processors>
</pipeline>
Where:
inputPathPattern:regex that the assets need to match in order to be processed by the pipeline. Groups that are captured by this regex are available later to theoutputPathFormat.keepOriginal (optional):if the original asset (without changes) should be saved.type:the type of the processor. Right now 2 types are supported:ImageMagickTransformerandTinifyTransformer:outputPathFormat (optional): the format of the output path. Variables that have a dollar sign ($) and an index are later replaced by groups that resulted during input path matching, to form the final output path. If not specified, then the same input path is used as the output path.
Note
Please note the following:
We currently support 2 types of image processors, ImageMagickTransformer and TinifyTransformer
You can have one or multiple pipelines setup, but, a pipeline must have at least one processor configured.
Image Transformation Example
The following example specifies 2 different asset processing pipelines: the first one converts any image put
under /static-assets/images/upload/ into another one that’s compressed and suitable to be displayed in a desktop
browser, while the second one converts the same image for display on mobile devices:
<assetProcessing>
    <pipelines>

        <!-- Web transformer pipeline -->
        <pipeline>
            <inputPathPattern>^/static-assets/images/upload/(.+)\.jpg$</inputPathPattern>
            <keepOriginal>false</keepOriginal>
            <processors>
                <processor>
                    <type>ImageMagickTransformer</type>
                    <params>
                        <options>-level 0,100%,1.3 -gaussian-blur 0.05 -quality 20% -strip</options>
                    </params>
                    <outputPathFormat>/static-assets/images/compressed/web/$1-compressed.jpg</outputPathFormat>
                </processor>
            </processors>
        </pipeline>

        <!-- Mobile transformer pipeline -->
        <pipeline>
            <inputPathPattern>^/static-assets/images/upload/(.+)\.jpg$</inputPathPattern>
            <keepOriginal>false</keepOriginal>
            <processors>
                <processor>
                    <type>ImageMagickTransformer</type>
                    <params>
                        <options>-level 0,100%,1.3 -gaussian-blur 0.05 -quality 20% -strip -resize 226x164</options>
                    </params>
                    <outputPathFormat>/static-assets/images/compressed/mobile/$1-compressed.png</outputPathFormat>
                </processor>
                <processor>
                    <type>TinifyTransformer</type>
                </processor>
            </processors>
        </pipeline>

    </pipelines>
</assetProcessing>
Using the above example, if an image called logo.jpg would be put under /static-assets/images/upload,
Studio would generate 2 files: the web version, under /static-assets/images/compressed/web/logo-compressed.jpg,
and the mobile version, under /static-assets/images/compressed/mobile/logo-compressed.png. The original file
would be discarded.
Footnotes
Video Transcoding
Crafter Studio allows users to upload and transcode videos using AWS MediaConvert using a data source in the content type. The following guide explains how to:
Configure Studio to use AWS MediaConvert and S3 for uploading and transcoding video.
Upload video to AWS using the transcoded video picker control and AWS data sources in Studio that then triggers a transcoding job.
Generate public links that users can use to display the transcoded videos.
Prerequisites
Create an AWS S3 bucket for uploading the transcoded videos.
Create an AWS Elemental MediaConvert Job template
For development purposes, the following permissions work but you may want to use less in your production setting:
MediaConvert IAM role withAmazonS3FullAccessandAmazonAPIGatewayInvokeFullAccessFor more information on available permissions for AWS Elemental MediaConvert, see https://aws.permissions.cloud/iam/mediaconvert
Create a site based on the Website Editorial blueprint.
Step 1: Add the S3 and MediaConvert configuration in Studio
Go to ![]() >
> Configuration and in the dropdown select AWS Profiles. If you click on
View Sample, you’ll see the available configuration profiles.
In particular, the configuration for the AWS MediaConvert profile is the following:
 1    <mediaConvert>
 2         <profile>
 3             <id>mediaconvert-default</id>
 4             <credentials>
 5                 <accessKey>xxxxxxxxx</accessKey>
 6                 <secretKey>xxxxxxxxx</secretKey>
 7             </credentials>
 8             <region>us-west-1</region>
 9             <endpoint>https://XXXXXXXX.mediaconvert.us-east-1.amazonaws.com</endpoint>
10             <role>arn:aws:iam::XXXXXXXXXXXX:role/...</role>
11             <queue>arn:aws:mediaconvert:us-east-1:XXXXXXXXXXXX:queues/...</queue>
12             <inputPath>example-bucket/folder/videos</inputPath>
13             <template>Example Template</template>
14         </profile>
15     </mediaConvert>
Where:
profile.id: the ID that AWS data sources will use to refer to this profile.
credentials: the AWS credentials (access key and secret key) use to access the S3 bucket.
region: the AWS region where the bucket resides.
endpoint: URL specific for the account, can be found in the AWS MediaConvert dashboard
role: ARN of the role used to create transcoding jobs found in the AWS MediaConvert dashboard
queue: ARN of the queue used to create transcoding jobs found in the AWS MediaConvert dashboard
inputPath: Name of the S3 bucket and optional path to upload files
template: Name of the Job Template used to create transcoding jobs found in the AWS MediaConvert dashboard
We also need an S3 profile where the transcoded videos will be uploaded. See S3 Asset Access on how to configure the profile for AWS S3.
For this guide, the AWS Profiles should look like this (replace the X's for actual AWS credentials,
mybucket for the actual bucket where you’re storing the transcoded videos, mybucket/folder/videos for the actual folder setup in AWS where the transcoded videos will be stored, Example Template for the actual AWS MediaConvert job template name):
 1    <?xml version="1.0" encoding="UTF-8"?>
 2    <aws>
 3      <s3>
 4        <profile>
 5          <id>s3-default</id>
 6          <credentials>
 7            <accessKey>XXXXXXXXXX</accessKey>
 8            <secretKey>XXXXXXXXXXXXXXXXXXXX</secretKey>
 9          </credentials>
10          <region>us-east-1</region>
11          <bucketName>mybucket</bucketName>
12        </profile>
13      </s3>
14
15      <mediaConvert>
16        <profile>
17          <id>mediaconvert-default</id>
18          <credentials>
19            <accessKey>xxxxxxxxx</accessKey>
20            <secretKey>xxxxxxxxx</secretKey>
21          </credentials>
22          <region>us-east-1</region>
23          <endpoint>https://XXXXXXXX.mediaconvert.us-east-1.amazonaws.com</endpoint>
24          <role>arn:aws:iam::XXXXXXXXXXXX:role/...</role>
25          <queue>arn:aws:mediaconvert:us-east-1:XXXXXXXXXXXX:queues/...</queue>
26          <inputPath>mybucket/folder/videos</inputPath>
27          <template>Example Template</template>
28        </profile>
29      </mediaConvert>
30    </aws>
Please see Managing Secrets for more information on how to manage/encode your AWS credentials.
Step 2: Add the control and data source for uploading video to AWS for transcoding, to the content type
For our example, we’ll add the Video Transcoding from S3 datasource and a Transcoded Video picker control to the Page - Article content type. To do this:
Go to
-> Content Types and open the Page - Articlecontent type definition.We’ll add a data source where to upload a video that will be transcoded. At the end of the Data Sources section, add a
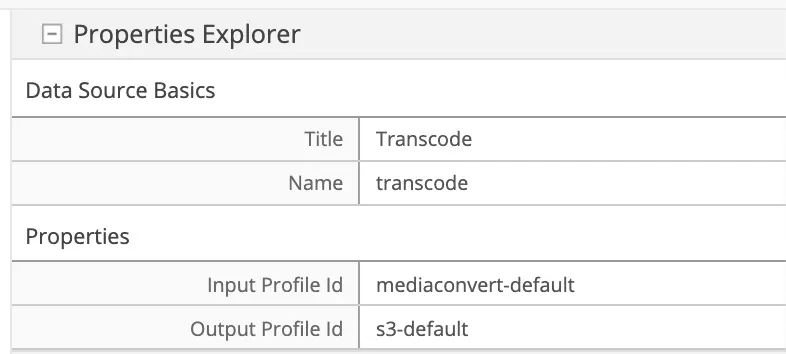
Video Transcoding from S3data source with Title Transcode and Name transcode. In the Input Profile Id property, enter the MediaConvertprofile.idconfigured in step 1, used for uploading and triggering the transcode job (mediaconvert-defaultfrom the example in step 1). In the Output Profile Id property, note the S3profile.idconfigured in step 1, used to access the files generated by the transcode job (s3-defaultfrom the example in step 1).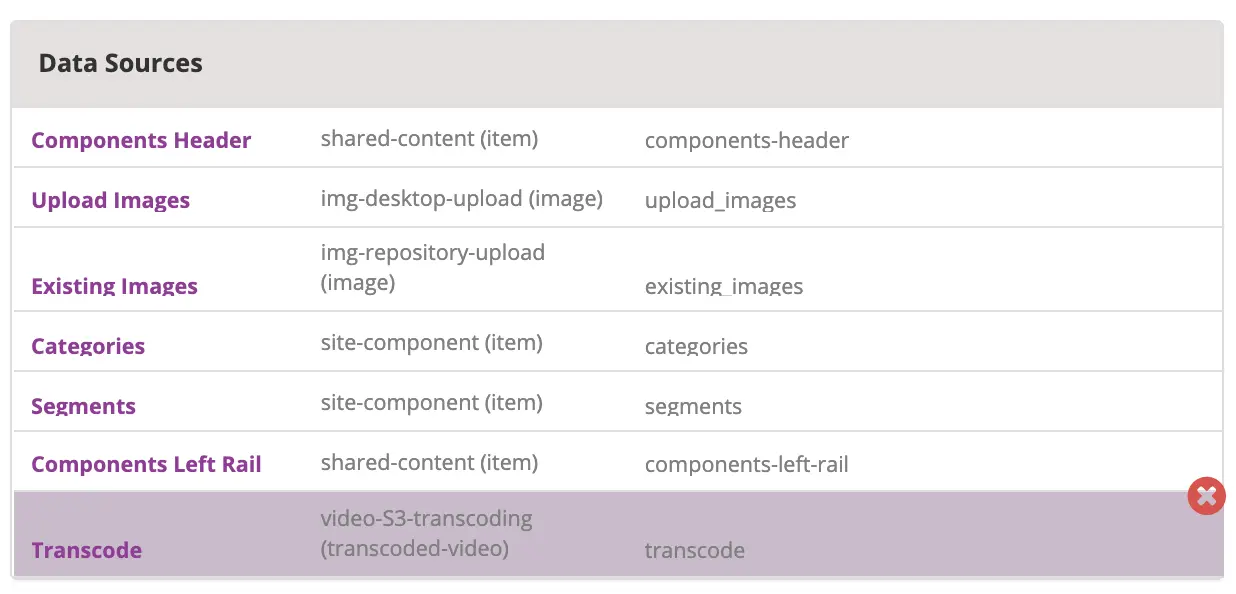
At the end of the Content section, add a
Transcoded Videocontrol with Title Transcoded Video and Name transcodedVideo_o.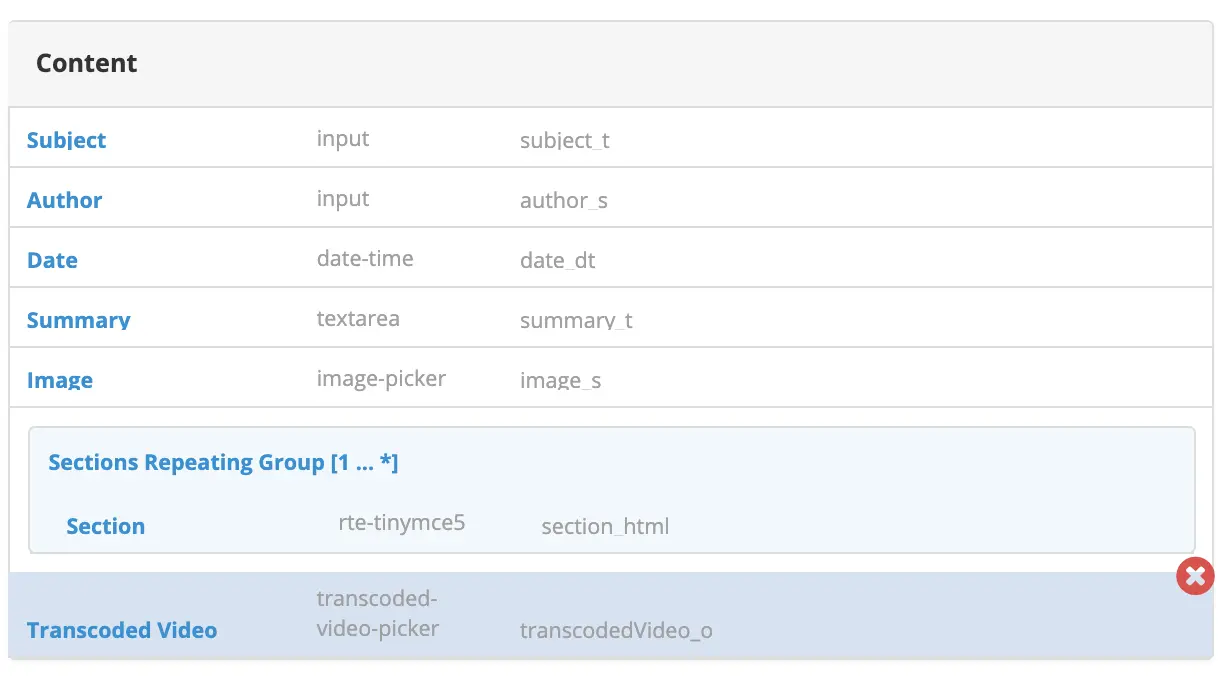
Note
If you’re using FreeMarker as your view layer, follow the steps below after adding the data source and control for uploading video to AWS for transcoding, to the content type:
We need to add the FreeMarker code that will render the URLs. In the example below, we will display one of the transcoded videos.
In the
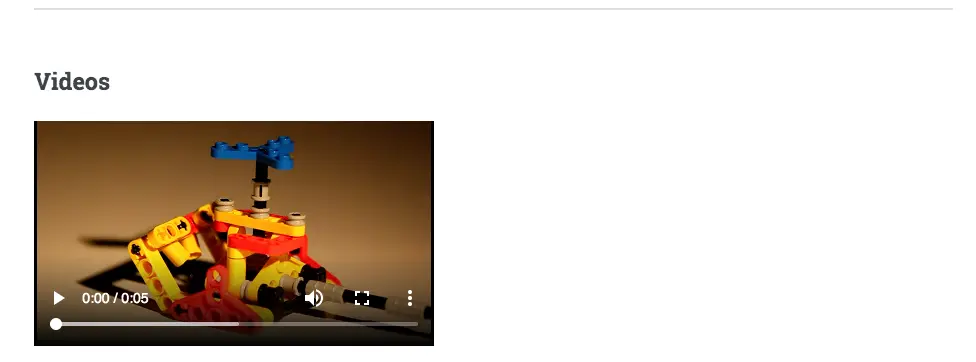
Templates>web>pages>article.ftl, add the following lines after the<section><header class="main" <@studio.iceAttr iceGroup="subject"/>>...</#section>lines:1<!-- AWSVideoTranscoding --> 2<section id="transcodedVideos"> 3 <h2>Videos</h2> 4 <video width="400" controls> 5 <source src="${ contentModel.transcodedVideo_o.item[0].url }" type="video/mp4"> 6 Your browser does not support HTML5 video. 7 </video> 8</section>
Step 3: Upload a video and test the changes
If all the previous steps have been done correctly, you should be able to add a video that will be transcoded into the formats specified in your job template, and in the case of our example, one of the videos will be available for viewing when the page is rendered.
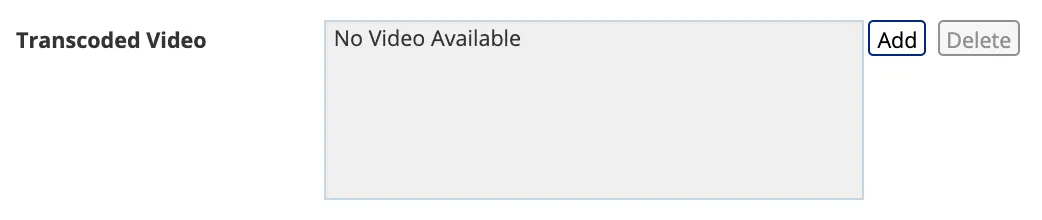
To upload a video, click on the Add button. We will be uploading the video remoteRepos.mp4:
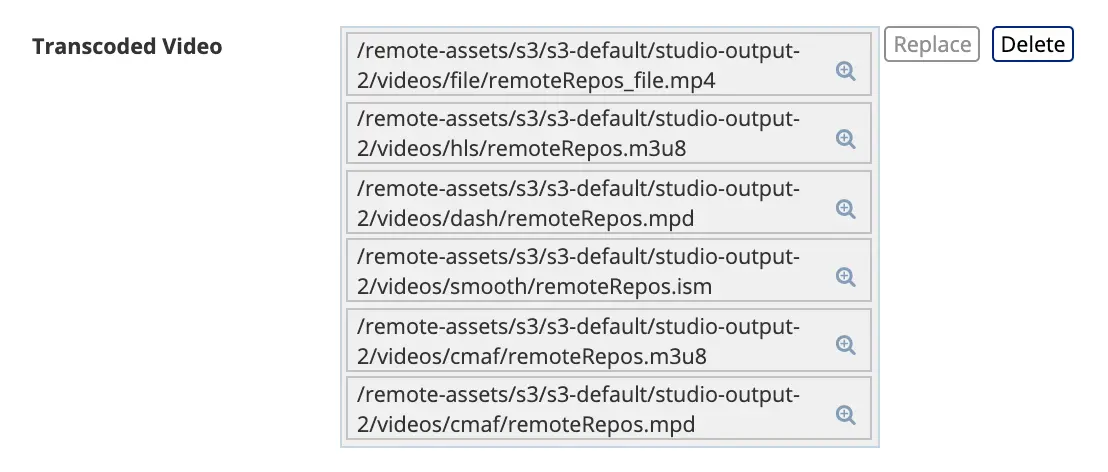
Here’s how it will look like in the form edit after uploading a video and the transcoding job is finished. Notice that in the job template, the uploaded video will be transcoded into 5 formats:
Here’s how it will look like when we preview the page where we added the video:
Step 4: Publish the changes
The next step is to publish the changes. Remember to publish not just the page where we added the AWS MediaConvert data source,
but also the article.ftl and the aws.xml files too.