
Upgrade Notes
This sections contains important notes when updating your install.
Upgrade Notes for CrafterCMS 3.1.28 and later 
CrafterCMS 3.1.28 sets a default esapi library via the environment variable CRAFTER_ESAPI_DEFAULT_CONFIGURATION.
When upgrading to CrafterCMS 3.1.28 and later from CrafterCMS 3.1.27 and earlier, please add the following, as needed, in your authoring and delivery installs:
export CRAFTER_ESAPI_DEFAULT_CONFIGURATION=${CRAFTER_ESAPI_DEFAULT_CONFIGURATION:="org.owasp.esapi.reference.DefaultSecurityConfiguration"}
JAVA_OPTS="$JAVA_OPTS -Dtomcat.shutdown.port=$TOMCAT_SHUTDOWN_PORT -Dorg.owasp.esapi.SecurityConfiguration=$CRAFTER_ESAPI_DEFAULT_CONFIGURATION"
Upgrade Notes for Fixing Template Not Found Error
Template not found error
When upgrading to CrafterCMS version 3.1.15 or later, if a user encounters the following error:
freemarker.template.TemplateNotFoundException: Template not found for name "static-assets/app/js/js.hash"
This means your application is using templates that are outside of the templates folder.
The following Engine Site configuration property or global server-config.properties property needs to be added to allow templates to be loaded outside of the templates folder:
For files that applies to all your sites in Crafter CMS, add your file/s path to the
crafter.engine.site.default.templates.allowed.pathsproperty in theserver-config.propertiesfileCRAFTER_HOME/bin/apache-tomcat/shared/classes/crafter/engine/extension/server-config.properties# List of regular expressions to allow templates to be loaded outside of the templates folder, separated by comma crafter.engine.site.default.templates.allowed.paths=/?static-assets/app/js/js\\.hash
For site specific files, add your file/s path to your Engine site configuration file
CRAFTER_HOME/data/repos/sites/SITENAME/sandbox/config/engine/site-config.xml<templates> <allowed>/?static-assets/app/js/js\\.hash,....</allowed> </templates>
Upgrade Notes for Fixing Backup Error
After upgrading to CrafterCMS 3.1.7 or later versions up to 3.1.9, when using the backup script, the crafter embedded database user is not backed up and causes an error when starting up Crafter Studio after running the restore script. To get the authoring install to work, the crafter embedded database user needs to be manually added to the database after running the restore script. (Instructions on using the backup and restore scripts are available here: Backup and Recovery)
After running the restore script, when the authoring install is started, you may see the following error in the tomcat logs:
[ERROR] 2020-06-03T14:11:41,650 [localhost-startStop-1] [context.ContextLoader] | Context initialization failed
...
Caused by: org.mariadb.jdbc.internal.util.dao.QueryException: Could not connect: Access denied for user 'crafter'@'localhost' (using password: YES)
To get the authoring install working, do the following:
Start the database
Login to the database
Add user
crafter
After performing the steps above, you may now startup the authoring install.
Let’s begin adding the crafter user after backing up and running the restore script.
The first thing that needs to be done is to start the database. To start the database, run the following:
CRAFTER_HOME/bin/dbms/bin/mysqld --no-defaults --console --max_allowed_packet=64M --basedir=CRAFTER_HOME/bin/dbms --datadir=CRAFTER_HOME/data/db --port=33306 --socket=/tmp/MariaDB4j.33306.sock
This is the output when running the command above:
➜  bin CRAFTER_HOME/bin/dbms/bin/mysqld --no-defaults --console --max_allowed_packet=64M --basedir=CRAFTER_HOME/bin/dbms --datadir=CRAFTER_HOME/data/db --port=33306 --socket=/tmp/MariaDB4j.33306.sock
2020-06-04  6:21:50 0 [Note] /Users/myuser/craftercms/crafter-authoring/bin/dbms/bin/mysqld (mysqld 10.4.6-MariaDB) starting as process 70558 ...
2020-06-04  6:21:50 0 [Warning] Setting lower_case_table_names=2 because file system for /Users/myuser/craftercms/crafter-authoring/data/db/ is case insensitive
2020-06-04  6:21:50 0 [Note] InnoDB: Mutexes and rw_locks use GCC atomic builtins
...
2020-06-04  6:21:50 0 [Note] Added new Master_info '' to hash table
2020-06-04  6:21:50 0 [Note] /Users/myuser/craftercms/crafter-authoring/bin/dbms/bin/mysqld: ready for connections.
Version: '10.4.6-MariaDB'  socket: '/tmp/MariaDB4j.33306.sock'  port: 33306  CrafterCms
Login to the database by running the following command then entering the database root password:
CRAFTER_HOME/bin/dbms/bin/mysql -u <db_root_user> -p --socket=/tmp/MariaDB4j.33306.sock
The <db_root_user> by default is
rootwith password set torootor empty. Remember to replace <db_root_user> with the actualrootuser (MARIADB_ROOT_USER) value and enter the actual password (MARIADB_ROOT_PASSWD) value used in your system, which can be found in thecrafter-setenv.shfile under theCRAFTER_HOME/binfolder.In the sample run below, the default root user
rootis used and password <empty> is used:➜ CRAFTER_HOME/bin/dbms/bin/mysql -u root -p --socket=/tmp/MariaDB4j.33306.sock Enter password: Welcome to the MariaDB monitor. Commands end with ; or \g. Your MariaDB connection id is 9 Server version: 10.4.6-MariaDB CrafterCms Copyright (c) 2000, 2018, Oracle, MariaDB Corporation Ab and others. Type 'help;' or '\h' for help. Type '\c' to clear the current input statement. MariaDB [(none)]>
Add the user
crafterand grant permissions by running the following commands:CREATE USER 'crafter'@'localhost' IDENTIFIED BY 'crafter' ; GRANT ALL PRIVILEGES ON <crafter_schema_name>.* TO 'crafter'@'localhost' WITH GRANT OPTION ; CREATE USER 'crafter'@'%' IDENTIFIED BY 'crafter' ; GRANT ALL PRIVILEGES ON <crafter_schema_name>.* TO 'crafter'@'%' WITH GRANT OPTION ;
The schema name by default is
crafter. Remember to replace <crafter_schema_name> with the actual schema name (MARIADB_SCHEMA) used in your system (if the default value is not used), which can be found in thecrafter-setenv.shfile under theCRAFTER_HOME/binfolder.Here’s the sample run with the schema name
crafter:MariaDB [(none)]> CREATE USER 'crafter'@'localhost' IDENTIFIED BY 'crafter' ; Query OK, 0 rows affected (0.012 sec) MariaDB [(none)]> GRANT ALL PRIVILEGES ON crafter.* TO 'crafter'@'localhost' WITH GRANT OPTION ; Query OK, 0 rows affected (0.010 sec) MariaDB [(none)]> MariaDB [(none)]> CREATE USER 'crafter'@'%' IDENTIFIED BY 'crafter' ; Query OK, 0 rows affected (0.011 sec) MariaDB [(none)]> GRANT ALL PRIVILEGES ON crafter.* TO 'crafter'@'%' WITH GRANT OPTION ; Query OK, 0 rows affected (0.011 sec)
After performing the steps above, stop the database then startup your authoring install as usual.
Upgrade Notes for Re-encrypting Values
CrafterCMS uses the Apache commons-codec library for encrypting/decrypting sensitive information. CrafterCMS 3.1.8 and earlier versions was expecting the salt to be encoded in base64 but because of a bug in the Apache commons-codec library, invalid characters were being used to encrypt the values.
To prevent this from causing issues, the upgrade manager will automatically re-encrypt values for installations upgraded to CrafterCMS 3.1.9.
Important
CrafterCMS versions later than 3.1.9 needs encrypted properties re-encrypted.
If you are upgrading to a version later than CrafterCMS 3.1.9, you need to upgrade to CrafterCMS 3.1.9 first before upgrading to a later version.
However, there may be some cases that the upgrade manager may not be able to automatically re-encrypt values and a manual re-encryption will be required. The range of valid base64 characters are: A–Z, a–z, 0–9, +, / and =. If any of the values encrypted contained other characters aside from the ones previously listed, say an @ character, the re-encryption process being performed by the upgrade manager will fail with a message that looks like the following:
Caused by: java.lang.IllegalStateException: The current configuration doesn't support values encrypted with a base64 encoded salt                                                                        │
   at org.craftercms.commons.crypto.impl.PbkAesTextEncryptor.decrypt(PbkAesTextEncryptor.java:80) ~[crafter-commons-utilities-3.1.9E.jar:3.1.9E]                                                        │
   at org.craftercms.studio.impl.v2.upgrade.operations.site.ConfigEncryptionUpgradeOperation.updateFile(ConfigEncryptionUpgradeOperation.java:61) ~[classes/:3.1.9E]
Manually Re-encrypt Values
To manually re-encrypt values you’ll need the following:
CrafterCMS command line encryption tool version 3.1.8 or earlier for decrypting the existing values with the bad base64 salt
CrafterCMS command line encryption tool version 3.1.9 or later for encrypting the old values (the ones decrypted) using the new salt
To re-encrypt values:
Find all values that need to be re-encrypted e.g. configuration files & remote repository credentials
For this step, we need to use the CrafterCMS command line encryption tool version 3.1.8 or earlier.
Using the old key and salt, decrypt the values using the CrafterCMS command line encryption tool (See Using the Encryption Tool for more information on the tool).Run the following command to decrypt the values:
java -jar {JARNAME} -d CIPHER_TEXT -p PASSWORD -s BASE64_SALT
where:
JARNAME: The CrafterCMS command line encryption tool crafter-commons-utilities-VERSION-enctool.jar. Remember to replace
VERSIONin the jar name with the actual version you are using, e.g.3.1.8or3.1.6, etc.CIPHER_TEXT: The old encrypted value we want to decrypt
PASSWORD: The key for decrypting the value
BASE64_SALT: The old salt for decrypting the value
Example:
$ java -jar crafter-commons-utilities-3.1.8-enctool.jar -d VkHxBsaSZ9DXrXk52uK9And+CEZlqiy7Wb23GxBFOSXD6KBOCh1ojp8fUw7w11IxpxBipiI4HsSg3cdl9TgTQg== -p klanFogyetkonjo -s S25pT2RkeWk=
Clear text: mySup3rsecret#@hello
For this step, we need to use the CrafterCMS command line encryption tool version 3.1.9 or later.
Choose a new salt then encrypt all values and replace the old ones with the new encrypted values. Run the following command to encrypt the values using the new salt:java -jar {JARNAME} -e CLEAR_TEXT -p PASSWORD -s NEW_SALT
where:
JARNAME: The CrafterCMS command line encryption tool crafter-commons-utilities-VERSION-enctool.jar. Remember to replace
VERSIONin the jar name with the actual version you are using, e.g.3.1.9or3.1.10, etc.CLEAR_TEXT: The value we want to encrypt
PASSWORD: The key for encrypting the value
NEW_SALT: The new salt for encrypting the value
Example:
$ java -jar crafter-commons-utilities-3.1.10-enctool.jar -e mySup3rsecret#@hello -p klanFogyetkonjo -s Sdf25pT2RkeWk=
Cipher text (in Base 64): CCE-V1#fQ5sZ3zfIezQzmWl38+FPph2BwVsLstkwGeWuqKAhbFCN3I1PM3ahAHkrMYCytFV
After updating configuration files that needs to be re-encrypted, commit the files by using
gitso the changes will be picked up by CrafterCMS.$ git add <config_file_modified> $ git commit -m "Comment for the commit"
For the remote repository credentials, you could also just remove the existing remotes, then add them again to avoid manually changing the database. See Remote Repositories for more information on adding/removing remotes in Studio
Upgrade Notes for Fixing Stored Procedure Error
After upgrading to CrafterCMS 3.1.10 or later versions it is possible that the stored procedures created by Crafter Studio are missing the right user and the startup process will be stopped with an error similar to this:
[INFO] 2021-04-06T09:16:25,632 [localhost-startStop-1] [db.DbScriptUpgradeOperation] | Executing db script upgrade-3.1.10.5-to-3.1.11.1.sql
Error executing: call addColumnIfNotExists('crafter', 'site', 'sync_repo_lock_owner', 'VARCHAR(255) NULL')
.  Cause: java.sql.SQLException: (conn:21) The user specified as a definer (''@'') does not exist
Query is : call addColumnIfNotExists('crafter', 'site', 'sync_repo_lock_owner', 'VARCHAR(255) NULL')
To get the authoring install working, do the following:
Note
If it is possible to start the previous version of CrafterCMS you can skip the step to start the database
Start the database
Login to the database
Find the affected stored procedures
Update the affected stored procedures
After performing the steps above, you may now startup the authoring install.
The first thing that needs to be done is to start the database. To start the database, run the following:
CRAFTER_HOME/bin/dbms/bin/mysqld --no-defaults --console --max_allowed_packet=64M --basedir=CRAFTER_HOME/bin/dbms --datadir=CRAFTER_HOME/data/db --port=33306 --socket=/tmp/MariaDB4j.33306.sock
This is the output when running the command above:
➜  bin CRAFTER_HOME/bin/dbms/bin/mysqld --no-defaults --console --max_allowed_packet=64M --basedir=CRAFTER_HOME/bin/dbms --datadir=CRAFTER_HOME/data/db --port=33306 --socket=/tmp/MariaDB4j.33306.sock
2020-06-04  6:21:50 0 [Note] /Users/myuser/craftercms/crafter-authoring/bin/dbms/bin/mysqld (mysqld 10.4.6-MariaDB) starting as process 70558 ...
2020-06-04  6:21:50 0 [Warning] Setting lower_case_table_names=2 because file system for /Users/myuser/craftercms/crafter-authoring/data/db/ is case insensitive
2020-06-04  6:21:50 0 [Note] InnoDB: Mutexes and rw_locks use GCC atomic builtins
...
2020-06-04  6:21:50 0 [Note] Added new Master_info '' to hash table
2020-06-04  6:21:50 0 [Note] /Users/myuser/craftercms/crafter-authoring/bin/dbms/bin/mysqld: ready for connections.
Version: '10.4.6-MariaDB'  socket: '/tmp/MariaDB4j.33306.sock'  port: 33306  CrafterCms
Login to the database by running the following command then entering the database root password:
CRAFTER_HOME/bin/dbms/bin/mysql -u <db_root_user> -p --socket=/tmp/MariaDB4j.33306.sock
The <db_root_user> by default is
rootwith password set torootor empty. Remember to replace <db_root_user> with the actualrootuser (MARIADB_ROOT_USER) value and enter the actual password (MARIADB_ROOT_PASSWD) value used in your system, which can be found in thecrafter-setenv.shfile under theCRAFTER_HOME/binfolder.In the sample run below, the default root user
rootis used and password <empty> is used:➜ CRAFTER_HOME/bin/dbms/bin/mysql -u root -p --socket=/tmp/MariaDB4j.33306.sock Enter password: Welcome to the MariaDB monitor. Commands end with ; or \g. Your MariaDB connection id is 9 Server version: 10.4.6-MariaDB CrafterCms Copyright (c) 2000, 2018, Oracle, MariaDB Corporation Ab and others. Type 'help;' or '\h' for help. Type '\c' to clear the current input statement. MariaDB [(none)]>
Find the affected stored procedures by running the following command:
SELECT routine_name, definer FROM information_schema.routines WHERE routine_type = 'PROCEDURE';
Here’s the sample:
+----------------------+----------------+
| routine_name         | definer        |
+----------------------+----------------+
| addColumnIfNotExists | @              |
| addIndexIfNotExists  | @              |
| addUniqueIfNotExists | @              |
| dropColumnIfExists   | @              |
| dropIndexIfExists    | @              |
| AddGeometryColumn    | root@localhost |
| DropGeometryColumn   | root@localhost |
+----------------------+----------------+
Update the affected stored procedures by running the following command:
UPDATE `mysql`.`proc` p SET definer = 'root@localhost' WHERE definer='@';
After performing the steps above, stop the database then startup your authoring install as usual.
Upgrade Notes for CrafterCMS 3.1.4
Remove References to Outdated Studio Freemarker Templates
When upgrading to CrafterCMS 3.1.4, outdated Studio Freemarker template files will be removed and is now replaced by templates provided by the Engine. Here are the old template files that will be removed when upgrading to CrafterCMS 3.1.4:
/templates/system/common/components-support.ftl
/templates/system/common/crafter-support.ftl
/templates/system/common/cstudio-support.ftl
/templates/system/common/search-support.ftl
/templates/system/common/craftercms-common.ftl
/templates/system/common/craftercms-geo-lib.ftl
There are some sites that included the following template files craftercms-common.ftl, craftercms-geo-lib.ftl and search-support.ftl (which is removed by the upgrader when upgrading to CrafterCMS 3.1.4) even though it is not being used. After upgrading to CrafterCMS 3.1.4, please remove references to those templates that have been removed through the upgrade as required.
Replace “overlayCallback” with “modePreview” in Freemarker/Groovy Code
Some early Crafter sites used siteContext.overlayCallback to check if Engine was running in preview mode. In a later release, the modePreview boolean variable was introduced to more clearly indicate that Engine is in preview mode.
The overlayCallback has been removed in CrafterCMS 3.1.4. Please change your Freemarker/Groovy code to use modePreview instead. For example, if a Freemarker code snippet contains the following: <#if siteContext.overlayCallback??>, change it to <#if modePreview>. See the first note here for more information.
In-Context Editing Macros and Attributes
Non-FTL/SPA
When using FTL templates, you may be using the built-in macros to write the necessary HTML attributes to get in-context editing pencils and/or drag & drop of components. If you added the attributes manually, you’ll need to - in addition to the previous set of attributes you may already be using - do the following:
Add
data-studio-embedded-item-idattribute to embedded component elements. The value should be the objectId property of the embedded content item model.Add
data-studio-zone-content-typeattribute to component container elements (drop zones). The value should be the content type id/path of the component container drop zone.
Freemarker Templates
The
@studio.componentContainerAttrmacro has been updated. The tag attributeobjectIdis now replaced with the tag attributecomponent.<@studio.componentContainerAttr target="..." objectId="contentModel.objectId"/>➜<@studio.componentContainerAttr target="..." component=contentModel/>The
@studio.componentAttrmacro has been updated. The tag attributepathis now replaced with the tag attributecomponent<@studio.componentAttr path=contentModel.storeUrl ... />➜<@studio.componentAttr component=contentModel .../>
Docker/Kuber Instructions for Upgrading to CrafterCMS 3.1.3 from 3.1.0 version
To upgrade 3.1.0 Docker/Kuber deployments to 3.1.3:
Compare the custom shared/classes volume-mounted config files with the ones from 3.1.3, and make any necessary changes:
For authoring_tomcat: https://github.com/craftercms/craftercms/tree/v3.1.3/resources/env/authoring/tomcat-config/crafter
For delivery_tomcat: https://github.com/craftercms/craftercms/tree/v3.1.3/resources/env/delivery/tomcat-config/crafter
Change the image version to 3.1.3 and restart containers.
Wait for the containers to come up, the
authoring_tomcatlog should show some DB errors.tomcat_1 | Caused by: org.craftercms.studio.api.v2.exception.UpgradeException: Error executing sql script upgrade-3.1.0.34-to-3.1.0.35.sql ... tomcat_1 | Caused by: org.apache.ibatis.jdbc.RuntimeSqlException: Error executing: DROP PROCEDURE IF EXISTS addColumnIfNotExists tomcat_1 | . Cause: java.sql.SQLException: (conn:10) Column count of mysql.proc is wrong. Expected 21, found 20. Created with MariaDB 100134, now running 100406. Please use mysql_upgrade to fix this error tomcat_1 | Query is : DROP PROCEDURE IF EXISTS addColumnIfNotExists ... tomcat_1 | Caused by: java.sql.SQLException: (conn:10) Column count of mysql.proc is wrong. Expected 21, found 20. Created with MariaDB 100134, now running 100406. Please use mysql_upgrade to fix this error tomcat_1 | Query is : DROP PROCEDURE IF EXISTS addColumnIfNotExists ... tomcat_1 | Caused by: org.mariadb.jdbc.internal.util.dao.QueryException: Column count of mysql.proc is wrong. Expected 21, found 20. Created with MariaDB 100134, now running 100406. Please use mysql_upgrade to fix this error tomcat_1 | Query is : DROP PROCEDURE IF EXISTS addColumnIfNotExists ...
Run
/opt/crafter/bin/crafter.sh upgradedbinside the authoring_tomcat container. (Below is a docker example)docker-compose exec tomcat gosu crafter /opt/crafter/bin/crafter.sh upgradedb
Restart the authoring_tomcat container. The DB errors shouldn’t appear anymore.
Instructions for Upgrading to CrafterCMS 3.1.0 from a previous 3.0.x version
This section details how to upgrade your CrafterCMS installation to version 3.1.0
Before Upgrading
Starting with version 3.1.0, CrafterCMS has an upgrade manager that automatically upgrades the system, some configuration files and blueprints. Here’s a list of items auto handled by the upgrade manager when you start CrafterCMS:
Site Config updates
There are a number of updates that has been made to the tools available in
 .
.Here’s the upgraded
tools: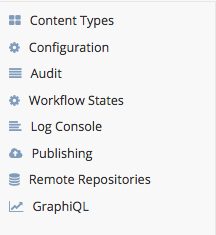
The following items are auto added/removed from your site after starting your new CrafterCMS install:
Remote Repository tool is auto added
Groups tool is auto removed
Log level setting is auto removed
GraphiQL is auto added
Version File Added
Starting with version 3.1.0 CrafterCMS will use a special file studio_version.xml to track the version of each site and automatically apply upgrades for future releases. The studio_version.xml file is auto installed and looks like this:
/config/studio/studio_version.xml<?xml version="1.0" encoding="UTF-8"?> <studio> <version>3.1.0</version> </studio>
Note
If your site is heavily customized and you would like to prevent CrafterCMS from trying to upgrade it in the future you can set the version value to any random string, for example <version>DISABLED</version>.
Managed Configuration Files
Starting in version 3.1.0 CrafterCMS will also track an individual version for some configurations files in order to keep them up to date. These configuration files are auto updated by the upgrade manager
Note
These upgrades can also be disabled by setting the version to a random string, just like the site version.
Important
If one of the files do not contain a version tag then all existing upgrades will be applied.
This is the list of files currently managed by CrafterCMS:
/config/studio/role-mappings-config.xmlCurrent version: 2. In 3.0.x groups were handled by site and starting in 3.1.0 they became global, during the database upgrade existing groups will be renamed to{site}_{role}and this file needs to match./config/studio/administration/config-list.xmlCurrent version: 3. There are new configuration files for URL Rewrite and WebDAV Profiles./config/studio/administration/site-config-tools.xmlCurrent version: 2. There are new datasources for WebDAV file management.
If you are certain that one of those files is already up to date in your site, you can add the version tag with the latest value to prevent the upgrades from being applied to it.
Groups Update
Groups are now at the system level instead of per site. As mentioned above, the Groups tool has been removed from
and is now in the Main Menu. By default, CrafterCMS has the following groups available after a fresh install: system_admin,site_admin,site_author,site_developer,site_publisher, andsite_reviewer. Users added to the system_admin group has the role system_admin that has permissions to create users, create site, add users to groups, etc. Users added to any of the default groups has permissions for all sites created in Studio.Site Membership Update
Site membership of a user is now determined by a mapping of group membership to roles within a site using the mapping file
role-mappings.xml(see Role Mappings on how to configure the role mappings). Note the new default groups when you create a site as noted above, these are automatically mapped to roles when using the built-in blueprints.When upgrading a site, the default groups in the site are auto updated as follows:
3.0 Default Groups ==>3.1 Default GroupsAdmin{site_name}_adminAuthor{site_name}_authorDeveloper{site_name}_developerPublisher{site_name}_publisherReviewer{site_name}_reviewerFor example, if user
johnis a member of groupDeveloper(one of the default groups) in the sitemysite, after upgrading, userjohnwill be a member of groupmysite_developer.
Some More Things to Note
There are a few more things to note when upgrading to CrafterCMS 3.1 from 3.0.
Studio authentication now uses a chain, with the internal database as the Studio default authentication. For more information, see Configuring Studio Security
The LDAP authentication configuration has been updated. The attribute
siteIdhas been removed and is no longer needed since site membership of a user is now determined by group membership. Please see Configure LDAP Authentication for the updated configuration.The headers based authentication configuration has been updated. The
groupsheader value should just be a comma separated list of groups that a user belongs to. In the previous version, 3.0.x, thegroupsheader value contained a comma separated list of sites and groups. Please update thegroupsheader value of users to contain only a comma separated list of groups the user belongs to. Please see Configure Headers Based Authentication for the updated configuration.The default search engine for CrafterCMS is now Elasticsearch as opposed to Solr, learn more at Why Elasticsearch.
If you’re happy with Solr, you can keep using it as it is fully supported. However, please bear in mind:
New features, like GraphQL support, require Elasticsearch.
Studio requires Elasticsearch for authoring search, so that will get installed and used regardless.
If you’d like to switch to Elasticsearch, please read Migrating a site from Solr to Elasticsearch.
Let’s begin upgrading your CrafterCMS install.
Upgrade CrafterCMS
Review the release notes for the version you are upgrading to, which contains specific information on the changes that have been made and how it may affect you when upgrading to that specific version.
Backup your CrafterCMS 3.0.x install
Download the CrafterCMS 3.1.0 binary archive version and extract the files
In your CrafterCMS 3.0.x install, copy/paste or move the data folder
CRAFTER_3.0.x_INSTALLATION/datato your newCRAFTER_3.1.0_INSTALLATIONinstall folderMigrate sites to Elasticsearch (recommended) by following this guide: Migrating a site from Solr to Elasticsearch. You can continue using Crafter Search and Solr as the search engine, by following Using Crafter Search and Solr
Start your upgraded CrafterCMS, then follow the steps below for Create Authoring Targets, Update the Index Format of the Preview Targets and Update the Paths in the Targets for all upgraded sites.
If a site has not been migrated to Elasticsearch, follow additionally the steps under Updates for Solr.
If a site uses a default dependency resolver configuration file from a previous CrafterCMS installation version, consider deleting your dependency resolver configuration file and it will then use the default dependency resolver configuration with rules matching what’s in this sample
CRAFTER_3.1.0_INSTALLATION/data/repos/global/configuration/dependency/resolver-config.xmlIf a site has a customized dependency resolver configuration file, please compare your dependency resolver configuration with the default dependency resolver file
CRAFTER_3.1.0_INSTALLATION/data/repos/global/configuration/dependency/resolver-config.xmland make changes as required.
Verify that the authoring and delivery environments are functioning as intended.
Update the Index Format of the Preview Targets
The preview Deployer targets in the Authoring environment need to be updated to include the new preview index format:
Go to
AUTHORING_INSTALL_DIR/data/deployer/targets.For each target YAML file ending in
-preview, below thelocalRepoPathproperty, add the following property with the same indentation:search: indexIdFormat: '%s-preview'
Update the Paths in the Targets
The Deployer targets needs the repository path to be updated to point to the new local repository path:
For Authoring environments, to update the local repository path:
Go to
AUTHORING_INSTALL_DIR/data/deployer/targets.For each target YAML file ending in
-preview, modify thelocalRepoPathproperty value with the new path of the site sandbox repository:1localRepoPath: AUTHORING_INSTALL_DIR/data/repos/sites/SITE_NAME/sandbox
For Delivery environments, to update the repository path:
Go to
DELIVERY_INSTALL_DIR/data/deployer/targets.For each target YAML file ending in
-default, modify thedeployment:pipeline:remoteRepo:url:property value with the new path of the site published repository:1deployment: 2 pipeline: 3 - processorName: gitPullProcessor 4 remoteRepo: 5 url: AUTHORING_INSTALL_DIR/data/repos/sites/SITE_NAME/published
Updates for Solr
The following are updates only required if you’re going to keep using Solr as your search engine.
Enable Crafter Search in the Targets
You need to update the Authoring and Delivery Deployer targets to enable Crafter Search use:
Go to
CRAFTERCMS_INSTALL_DIR/data/deployer/targets.For each target YAML file ending in
-previewin case of Authoring, or in-default.yamlin case of Delivery, below thelocalRepoPathproperty, add the following property with the same indentation:crafterSearchEnabled: true
Upgrade Solr Cores
After upgrading your CrafterCMS install, you will need to recreate the Solr cores and reindex all content.
For Authoring environments, use the following commands to upgrade the Preview cores:
Delete the existing core.
1curl --request POST \
2  --url http://localhost:8080/crafter-search/api/2/admin/index/delete/SITE_NAME
Create the new core.
1curl --request POST \
2  --url http://localhost:8080/crafter-search/api/2/admin/index/create \
3  --header 'content-type: application/json' \
4  --data '{
5  "id": "SITE_NAME-preview"
6}'
Reindex all content.
1curl --request POST \
2  --url http://localhost:9191/api/1/target/deploy/preview/SITE_NAME \
3  --header 'content-type: application/json' \
4  --data '{
5  "reprocess_all_files": true
6}'
For Delivery environments that can have downtime during the upgrade you can use the following commands:
Delete the existing core.
1curl --request POST \
2  --url http://localhost:9080/crafter-search/api/2/admin/index/delete/SITE_NAME
Create the new core.
1curl --request POST \
2  --url http://localhost:9080/crafter-search/api/2/admin/index/create \
3  --header 'content-type: application/json' \
4  --data '{
5  "id": "SITE_NAME"
6}'
Reindex all content.
1curl --request POST \
2  --url http://localhost:9192/api/1/target/deploy/default/SITE_NAME \
3  --header 'content-type: application/json' \
4  --data '{
5  "reprocess_all_files": true
6}'
For Delivery environments that cannot have downtime you can follow the guide for Reindexing Content Without Disrupting Service in Production