Groups Management
Groups Management allows you to administrate the groups created on CrafterCMS. You can add, remove, edit, and manage the users that will belong to the groups and you can also add and remove groups.
Here’s a list of predefined groups and roles in CrafterCMS:
Group
|
Description
|
Role
|
|---|---|---|
system_admin
|
System administrator
|
system_admin
|
site_admin
|
Site administrator
|
admin
|
site_author
|
Site author
|
author
|
site_developer
|
Site developer
|
developer
|
site_reviewer
|
Site reviewer
|
reviewer
|
site_publisher
|
Site publisher
|
publisher
|
You can add more groups defined whenever needed. The list above is just a starting point for when you first create your project. The following sections will give you more details on users and groups. The next sections, Permission Mappings and Role Mappings describes how to setup/assign permissions and roles.
To find this section through studio follow the next instructions:
Click on
Navigation Menu at the top right of your browser.
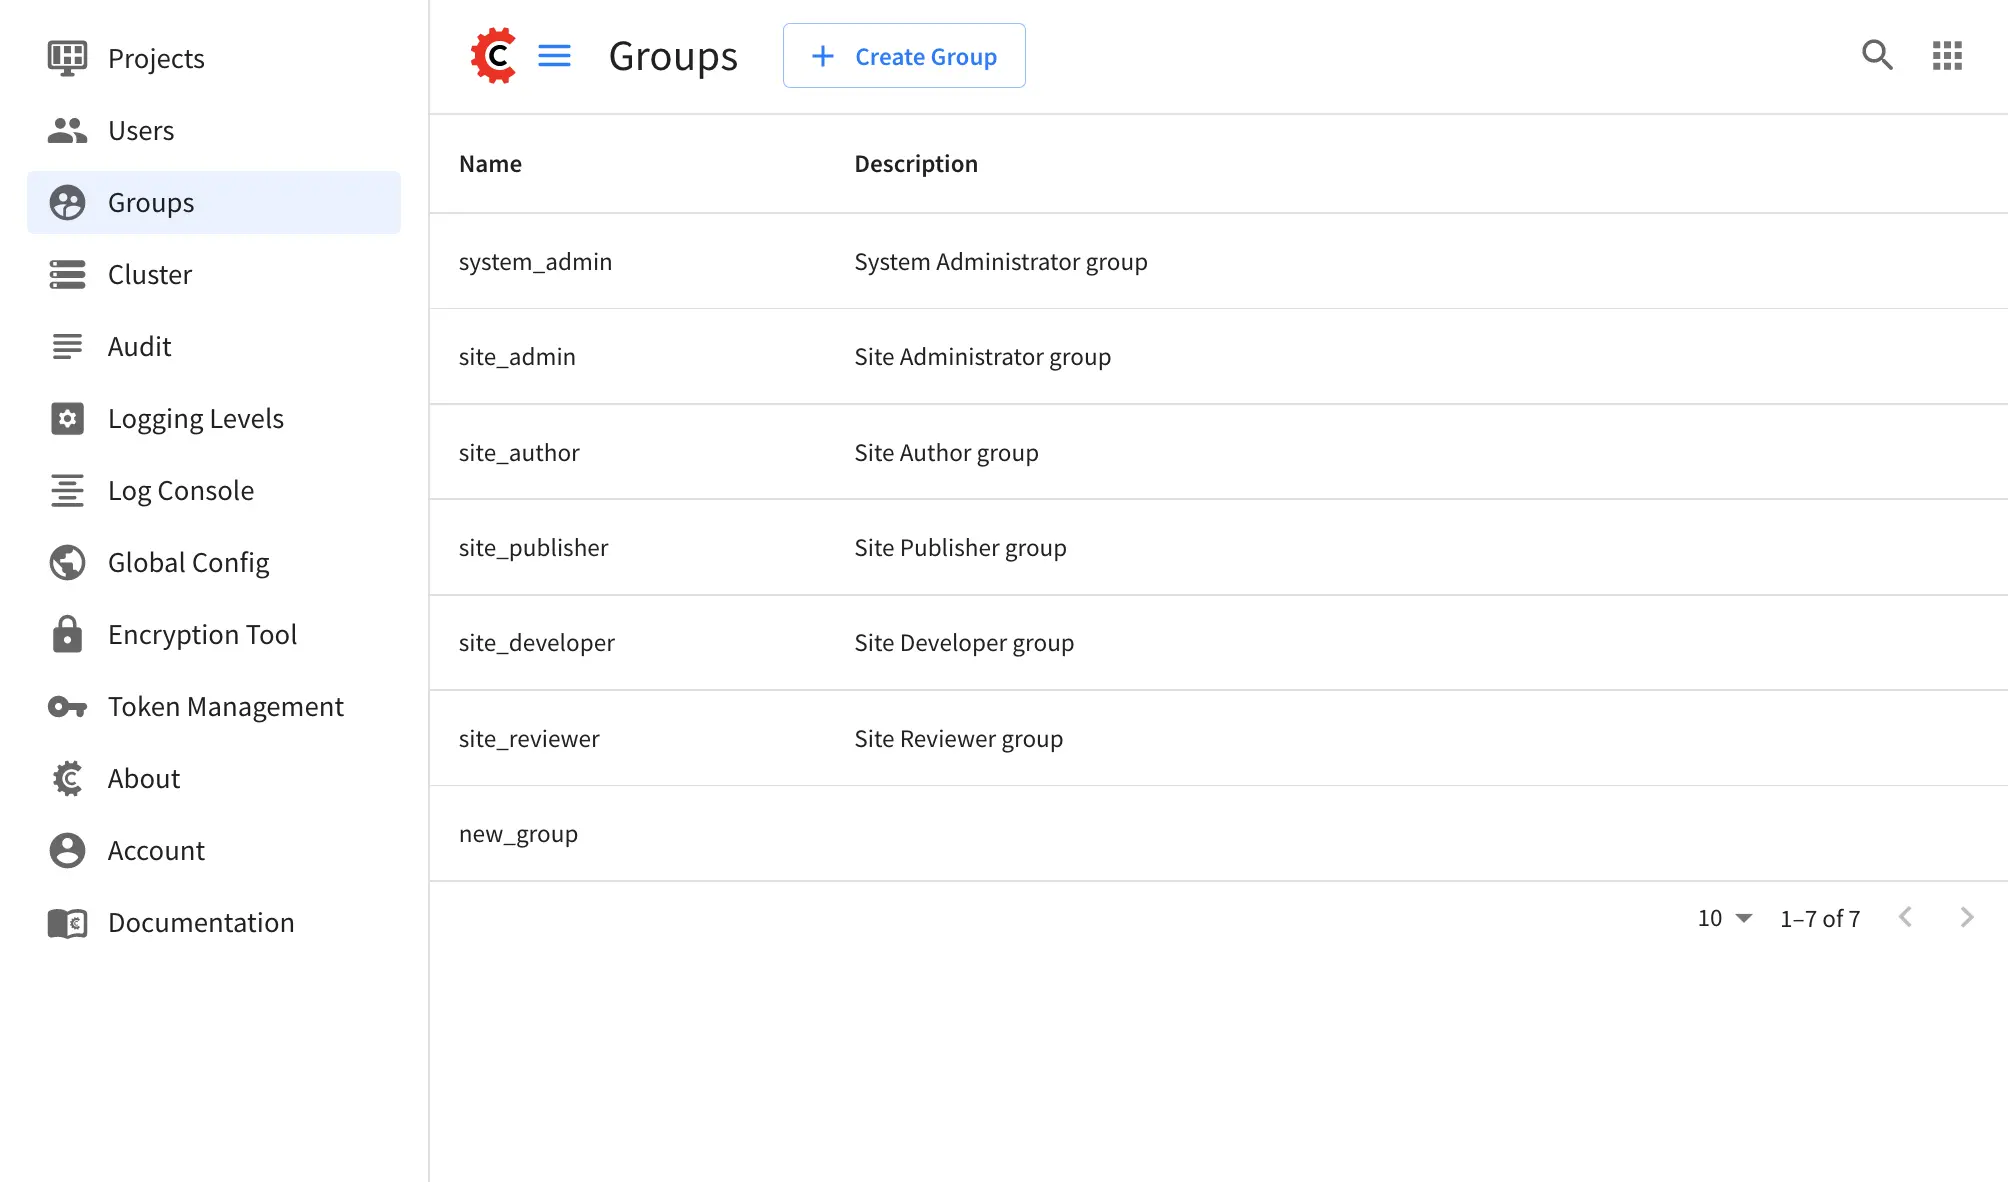
Click on Groups from the main menu on the left side of your browser.
Searching Groups
You can search for groups by their properties (Display Name, Description), simply enter your search term into the search bar by clicking on the magnifying glass icon on the top right and it will show results that match your search term.

Adding a New Group
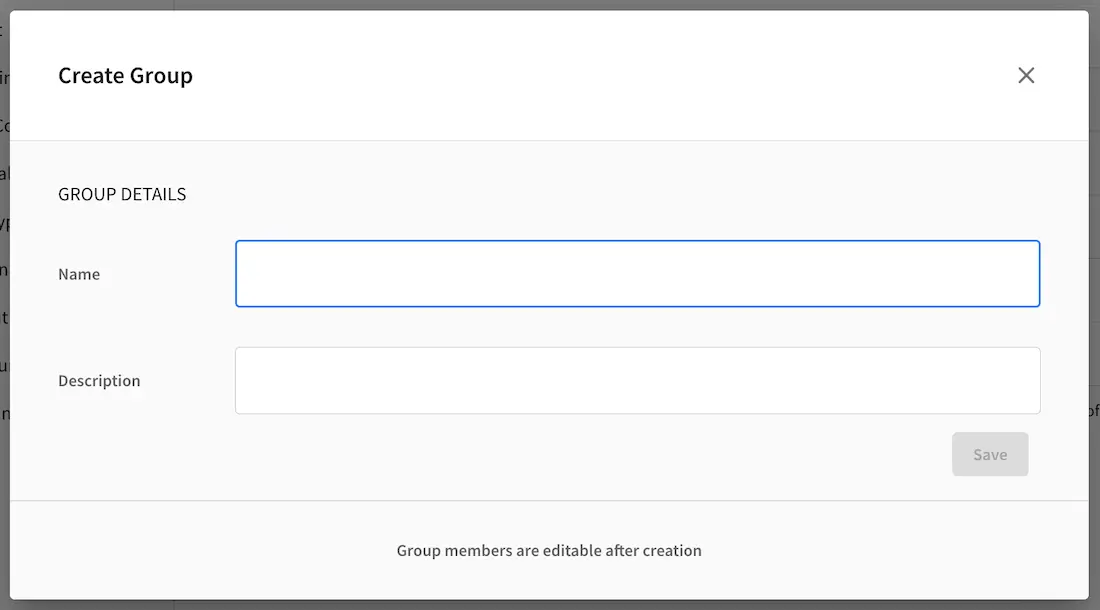
To create a new group, you just need to click on the “Create Group” button,

then, a modal dialog will show up with the required fields for the group creation. Enter a display name and a short description for the new group. After filling the form, click on Save, and the new group will show in the groups table.
A notification of successful group creation will pop up for a few seconds after clicking on the Create button.

Removing a Group
To remove a group, select a group from the list which will open a dialog for the selected group. Click on the trash can icon on the top right of the group dialog.
A confirmation popup will appear asking you if you want to delete the group, as seen above. Click on Yes to remove the group.
On successful removal of the group, a notification will appear for a few seconds that the group has been deleted.

Editing an Existing Group
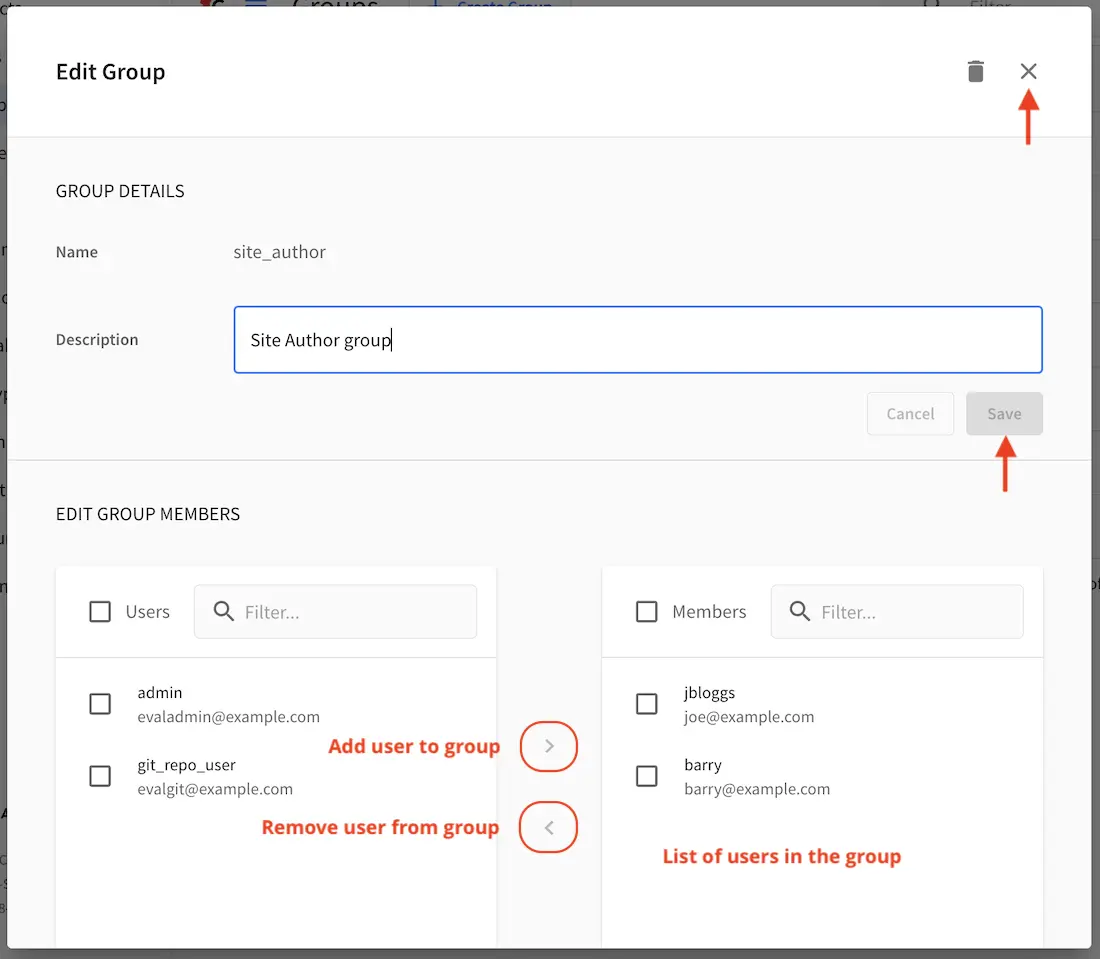
To edit a group, select a group from the list which will open a dialog for the selected group. In this dialog, you can modify the group description, just click on the Save button after making your changes. You can also add/remove users from the group. Finally, you’ll see a list of all users that belong to the group. To return to the list of all groups in your project, click on the X at the top right of the dialog.
Adding Users to a Group
To add a user to a group, click on the group you want to add users. In the Users column found on the left
in the Edit Group Members section, you can click on the search box then type in the name, username or
email of the user you want to add to the group.
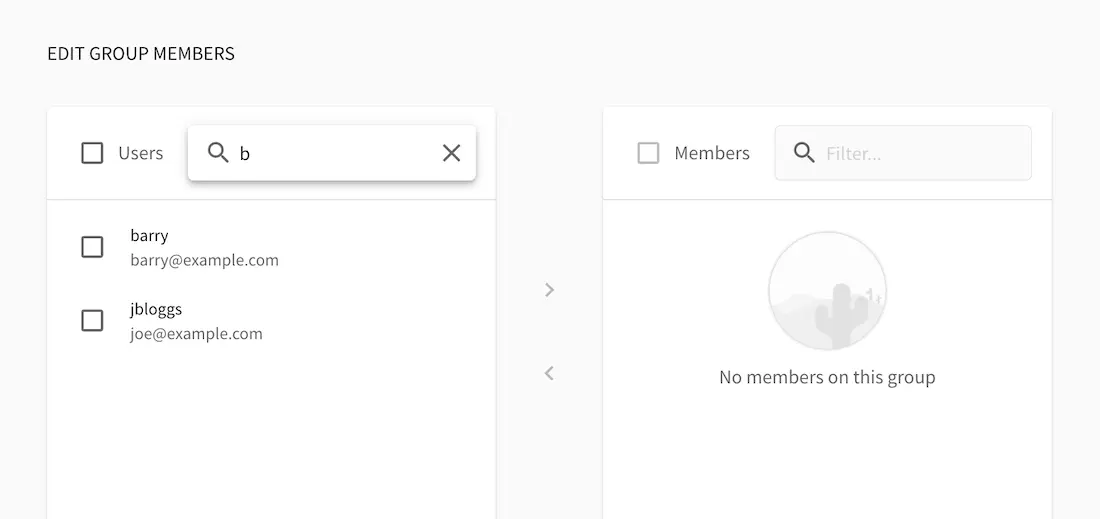
Notice that it will give you a list of matching users, select the user you want to add by clicking on the checkbox next to it, and if you want to add some more users to the group, just type in the names, and put a checkmark next to them, then click on the > (greater than icon) button.
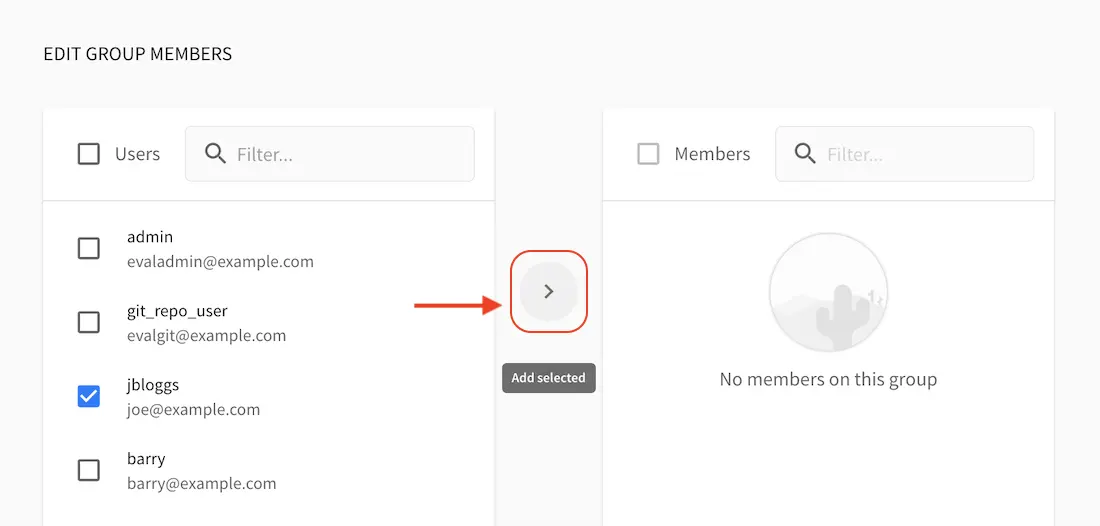
It will then give you a notification that the user(s) has been successfully added to the group.

Removing Users from a Group
To remove a user from a group, click on the group you want to remove users. In the Members column
found on the right in the Edit Group Members section, you can click on the search box then type in
the name, username or email of the user you want to remove from the group. Select the user you want to
remove from the group by clicking on the checkbox next to it, and if you want to remove some more users
from the group, just type in the names and put a checkmark next to them, then click on
the < (less than icon) button.
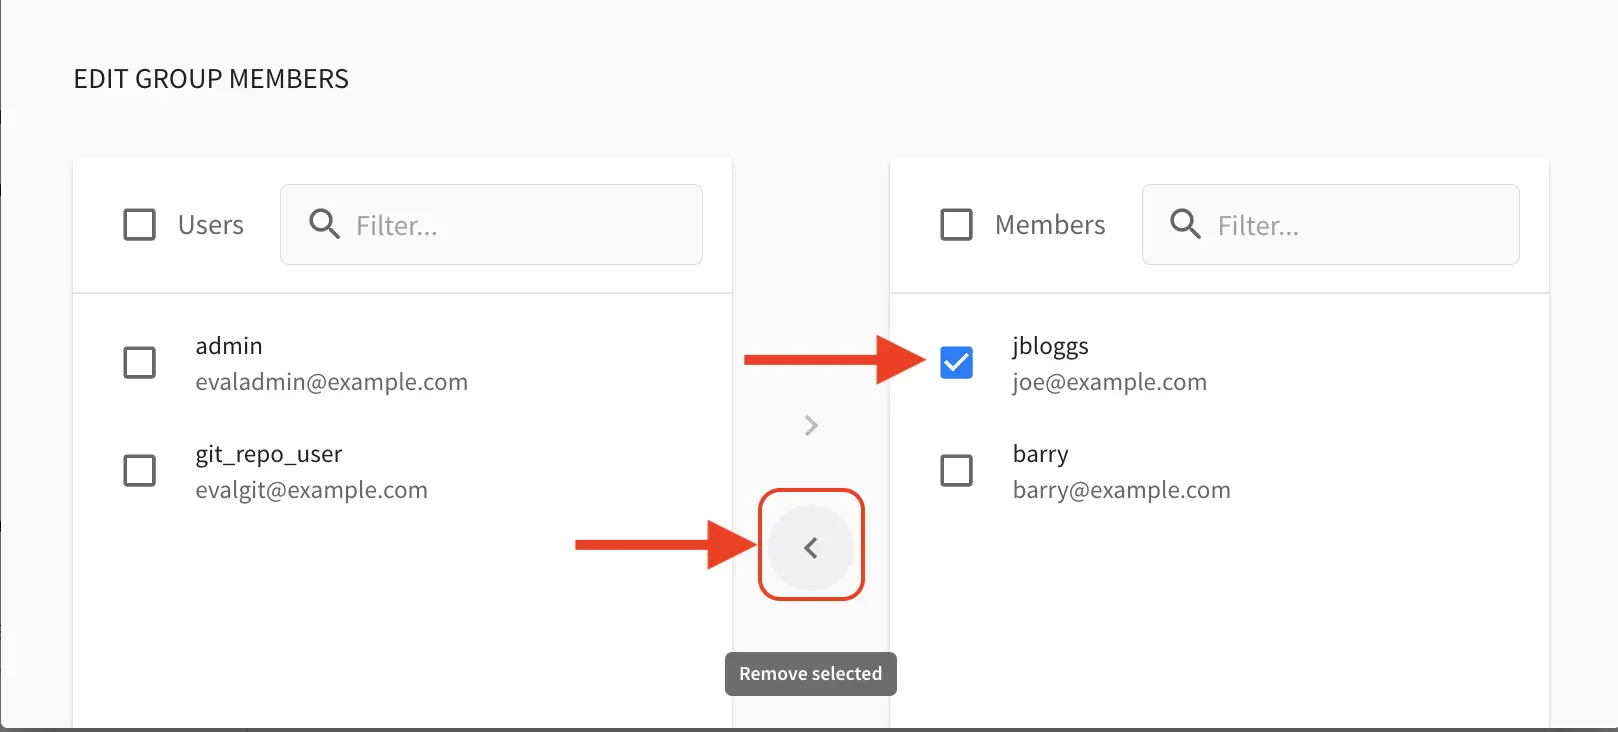
It will then give you a notification that the user(s) has been successfully deleted from the group.
