Site Creation with Remote Repositories
Crafter Studio supports site creation with remote repositories and provides two options:
Create site based on remote Git repository
Create site based on a blueprint then push to remote bare Git repository
To start creating a site with remote repository, from the Sites screen, click on the Create Site button. A Create Site dialog will be launched. This dialog changes depending on what you choose. For both options, there will be a screen where the Remote Git Repository Name and Remote Git Repository URL needs to be filled out and the rest is optional and only needs to be filled out if required by the remote git repository being used.
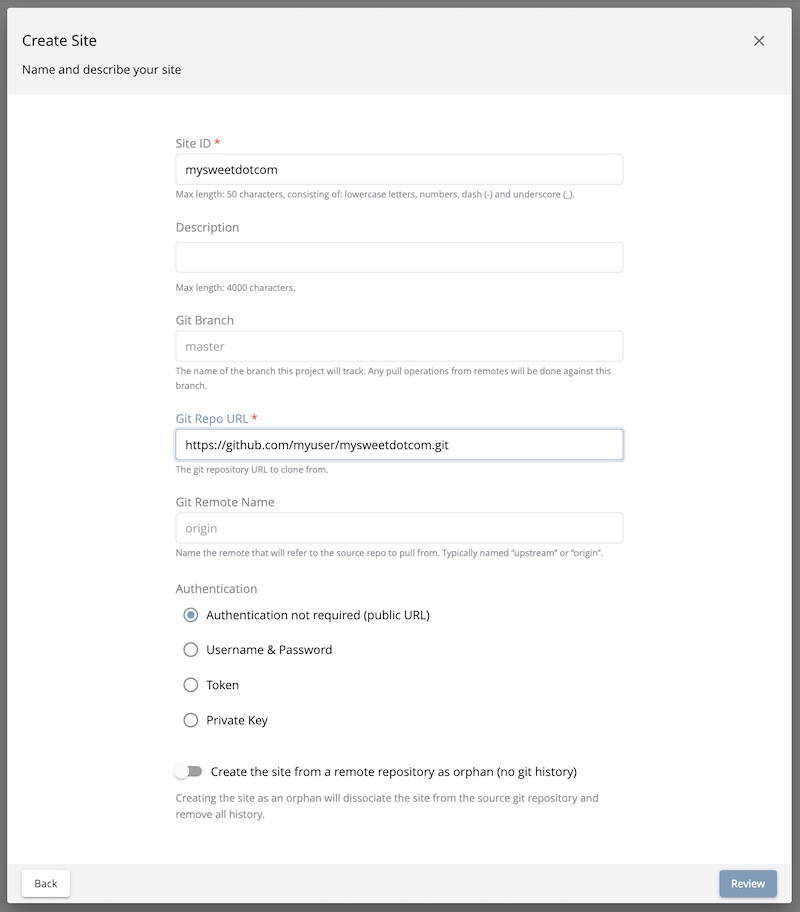
Let’s take a look at the fields where the remote repository details needs to be filled in:
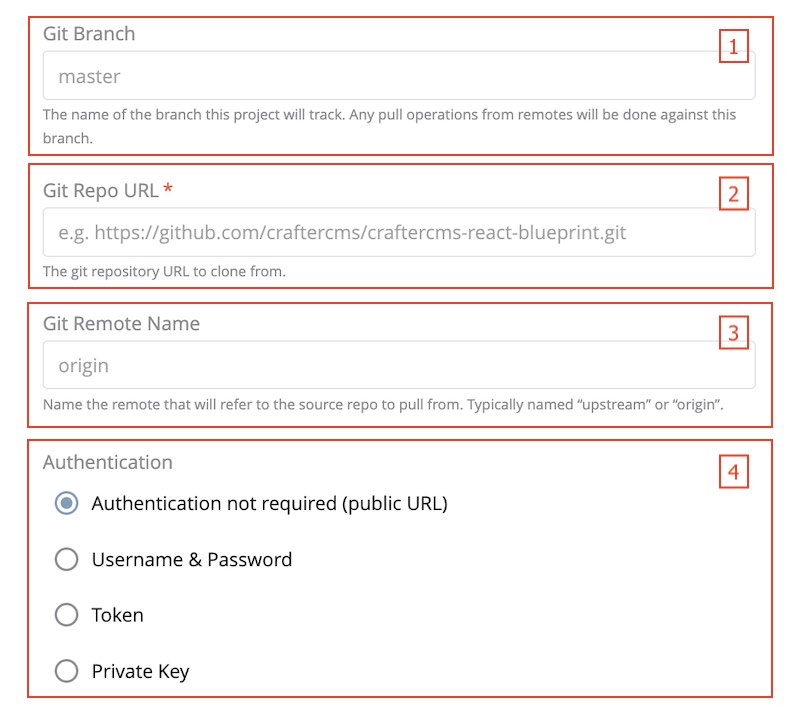
In the Git Branch field, you can supply a branch name, but can be left blank, which in turn would default to the
masterbranch.In the Git Repo URL field you must provide the link to the Git repository you would like to use
In the Git Remote Name field you want to provide a repository name that makes sense. It’s common to use “origin” or “upstream.”
In the Authentication field you must select the authentication method to be used to access the Git repository in the previous field.
CrafterCMS supports the following authentication types to use to access remote repository:
Authentication not required (Public URL) - no credentials needed to access remote repository
Username & Password - for this method, you will be asked for a Remote Git Repository Username and a Remote Git Repository Password. Supply your username and password
Token - for this method, you will be asked for a Remote Git Repository Username (if required) and a Remote Git Repository Token. This method is usually used when two-factor authentication is configured on the remote repository to be accessed. Supply your username if required and token.
Private Key - for this method, you will be asked for a Remote Git Repository Private Key. This method is a key-based authentication. Supply your private key.
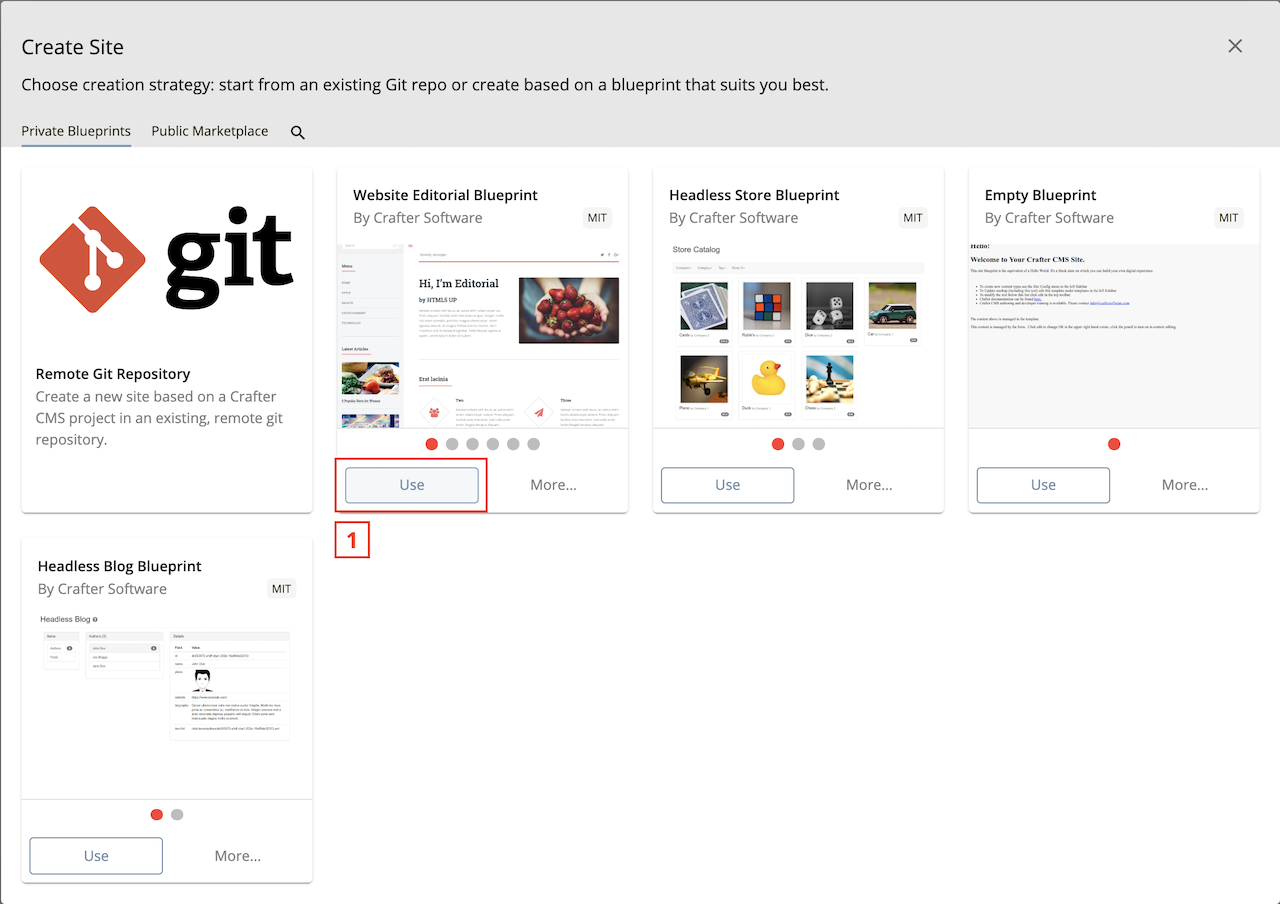
Create site based on a blueprint then push to remote bare Git repository
To create a site based on a blueprint then push to a remote bare git repository, click on Create Site from Sites, then select the blueprint you would like to use
The next step is to fill in the Site ID

Click on the Push the site to a remote Git repository after creation slider button, this will open up the options where we can fill in all the information for our remote repository as described above.
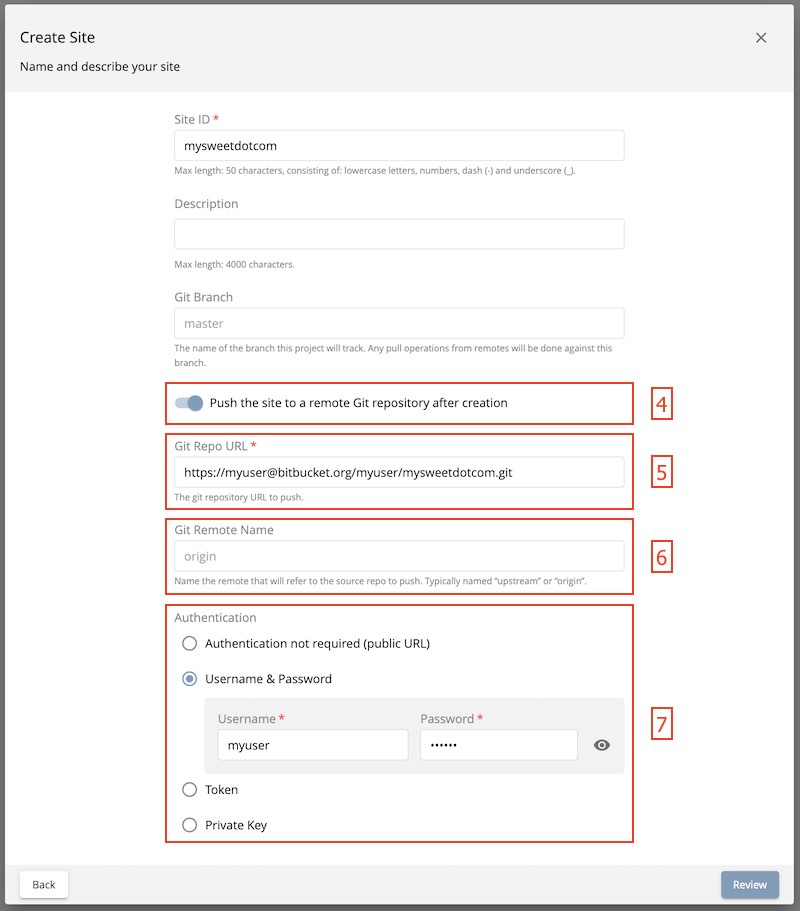
Click on the Review button, then finally, the Create Site button.
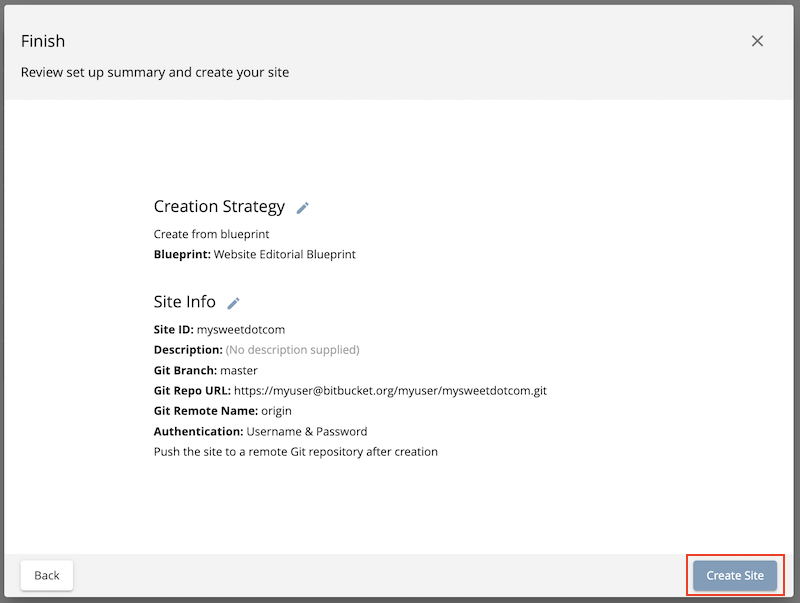
Your site should be created in a short while, and then pushed on to the remote bare Git repository specified in the field Git Repo URL. Remember that the remote repository needs to be a bare git repository, otherwise the site creation will fail.
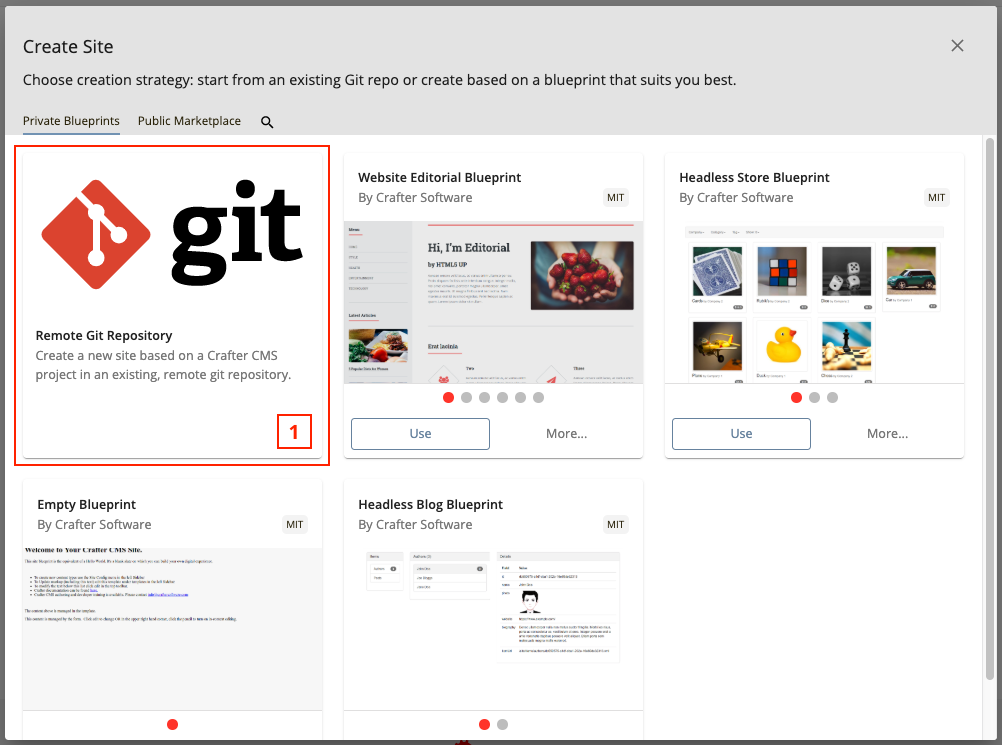
Create site based on a remote Git repository
Creating a site based on a remote Git repository is basically exporting a site from one Studio and importing it into another one.
To create a site based on remote Git repository, after clicking on Create Site, Click on Remote Git Repository in the Private Blueprints tab create site screen
Click on the Site ID field where you’ll need to give your site an ID. Scroll down to see where you can fill in all the information for the remote repository we are importing. The Git Repo URL is the import site’s sandbox repository git url (the site you want to bring over to your Studio). Below are sample urls for the site being imported:
Here is a sample Git url from GitHub: https://github.com/username/hello-test.git Here is a sample Git url using ssh: ssh://[user@]host.xz[:port]/path/to/repo/ or alternatively for ssh: [user@]host.xz:path/to/repo/
Click on the Review button, then finally, the Create Site button.
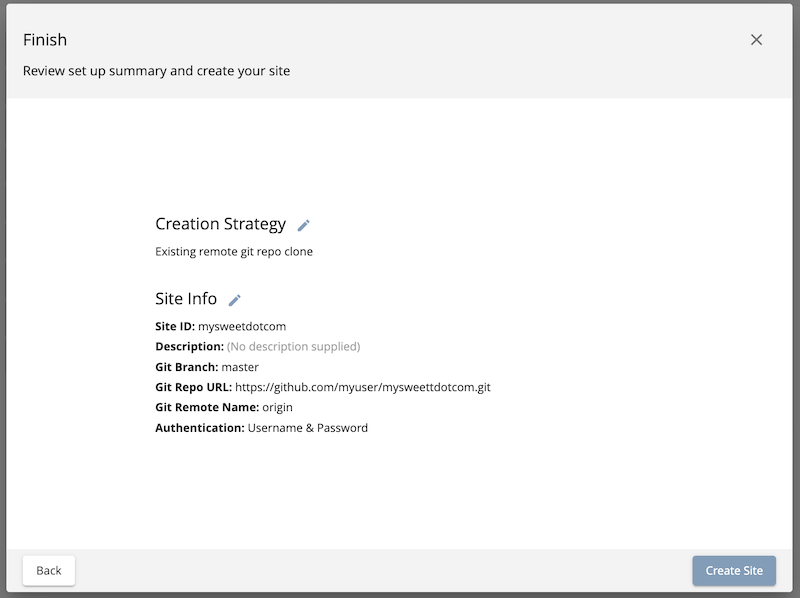
After a short while, your site will be imported.
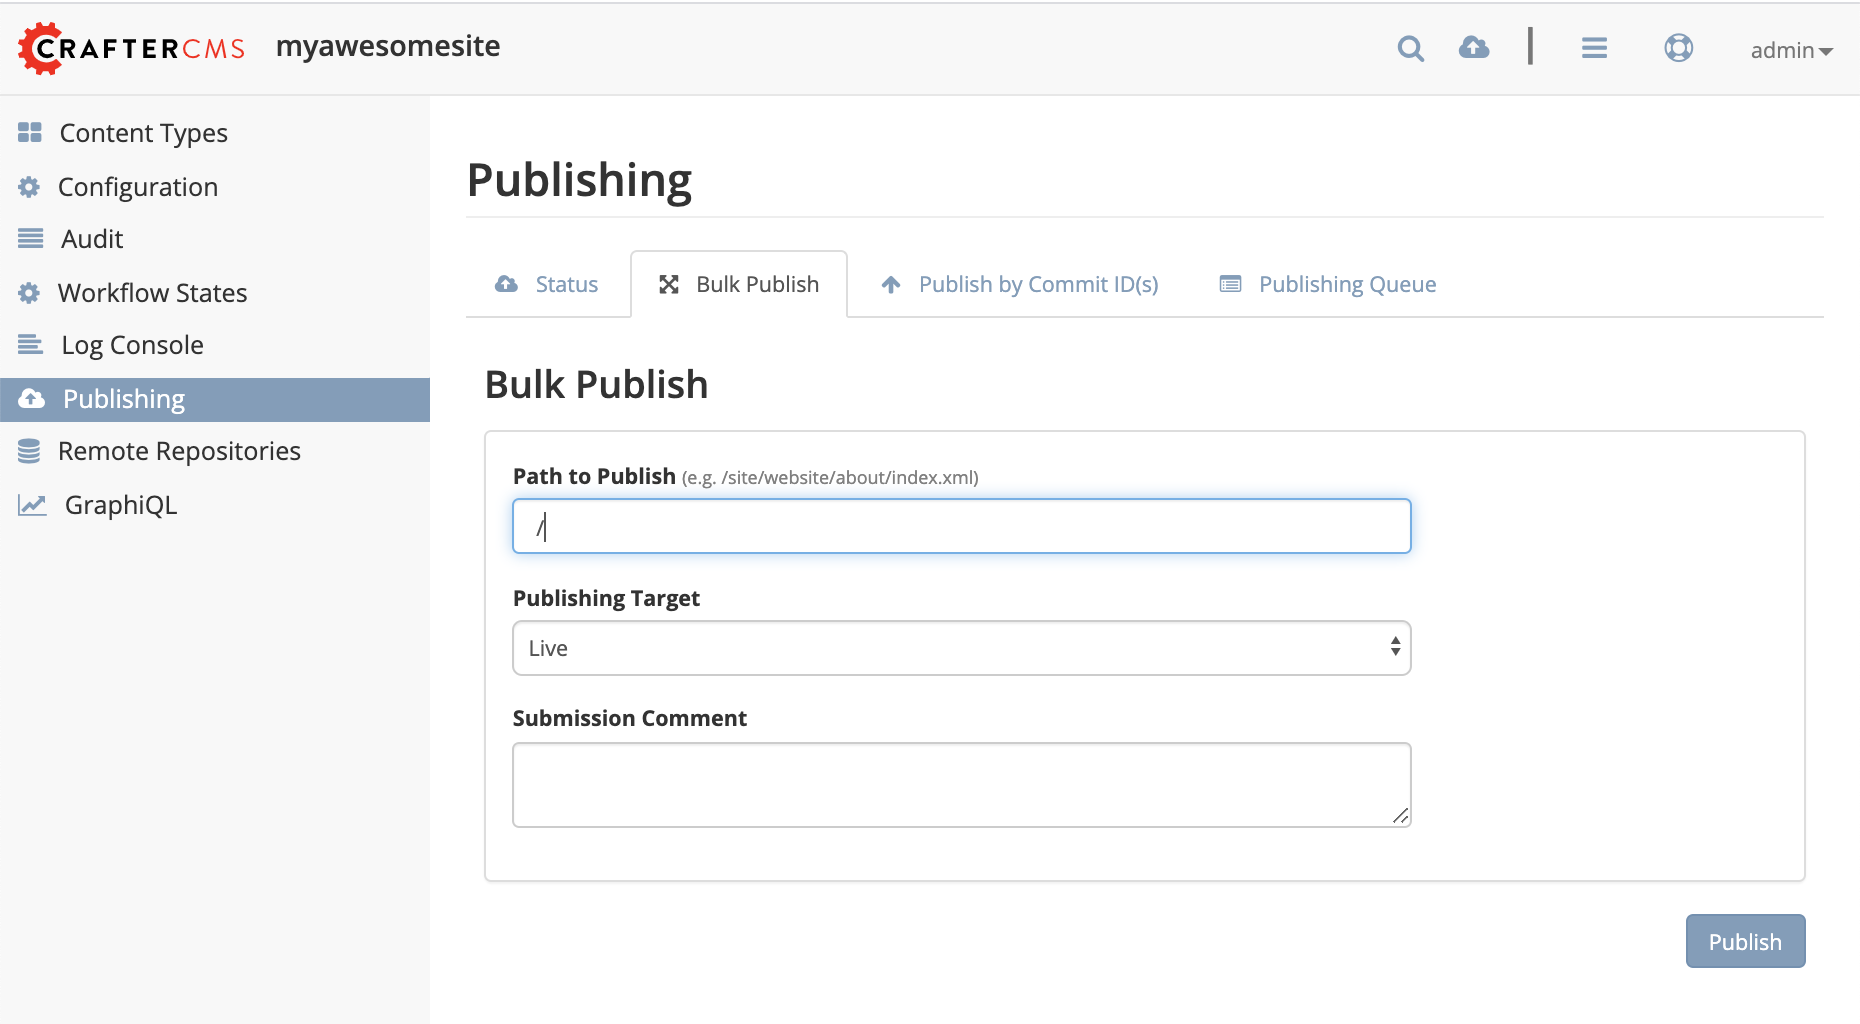
In case you want to publish the entire site, follow these optional steps:
In the site you just imported, click on
 , then click on Publishing
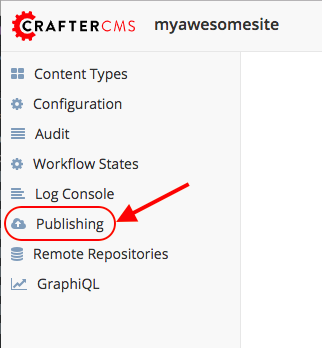
In the Publishing screen, click on the Bulk Publish tab, and in the Path to Publish field, just enter
/, then click on the Publish button to publish the whole site.