Integrating CrafterCMS with GitLab
This section details how to create a new project in GitLab and then start a new project in CrafterCMS in a way that connects to GitLab as an upstream remote repository.
Create a New Project and Connect it to GitLab
Step 1: Create a Project in GitLab
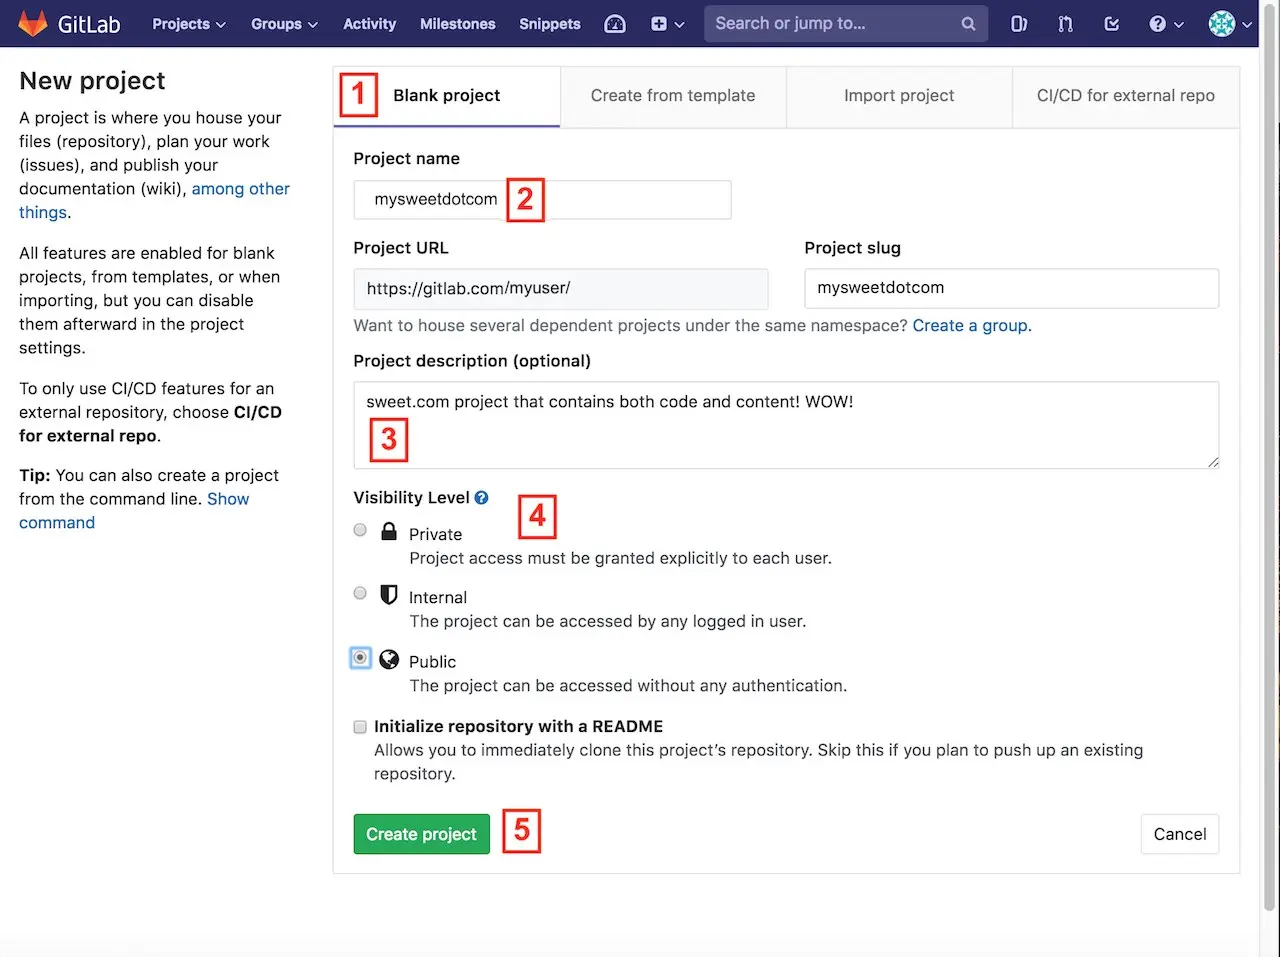
Figure 1: Create a project in GitLab
Select Blank Project to create a bare project
Enter your project name
Provide a project description
Choose your security level
Click create project
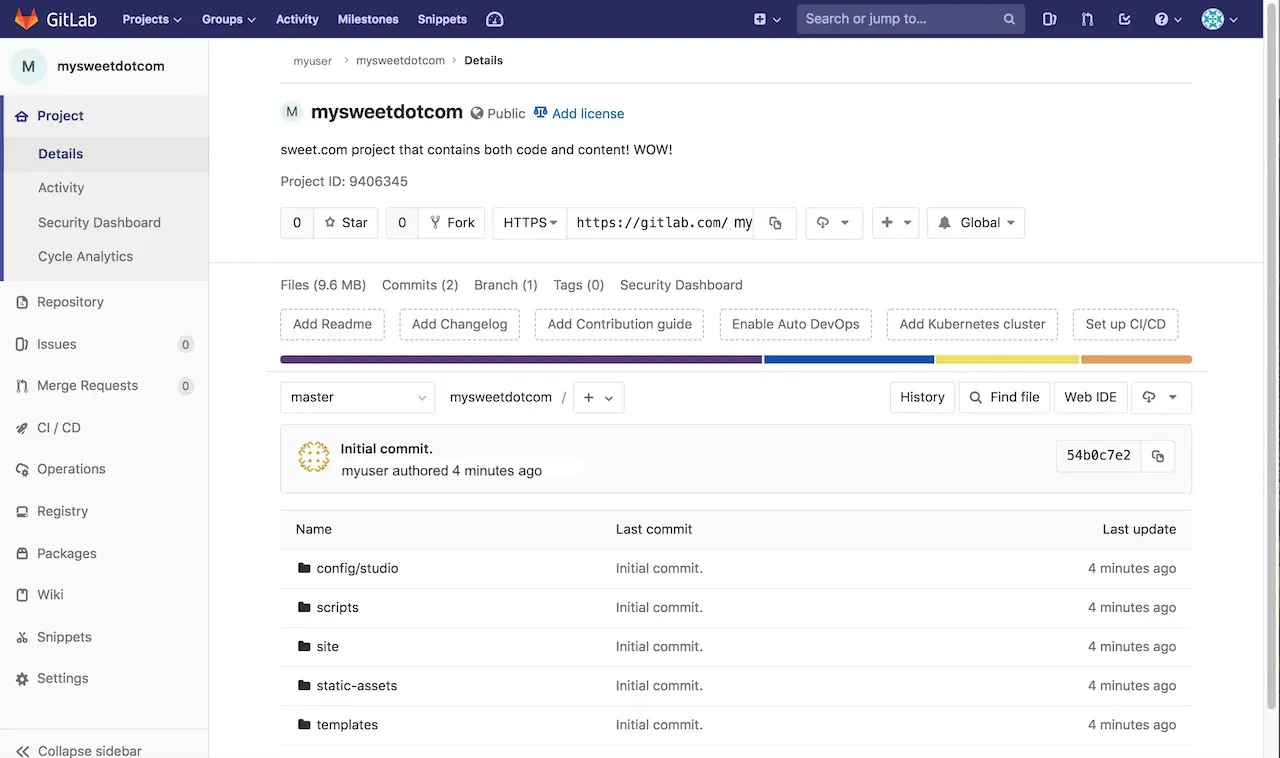
Once your repository is created you will see a screen similar to the one below. You want to make note of the Git URL for the project. You will need this URL in the next step.
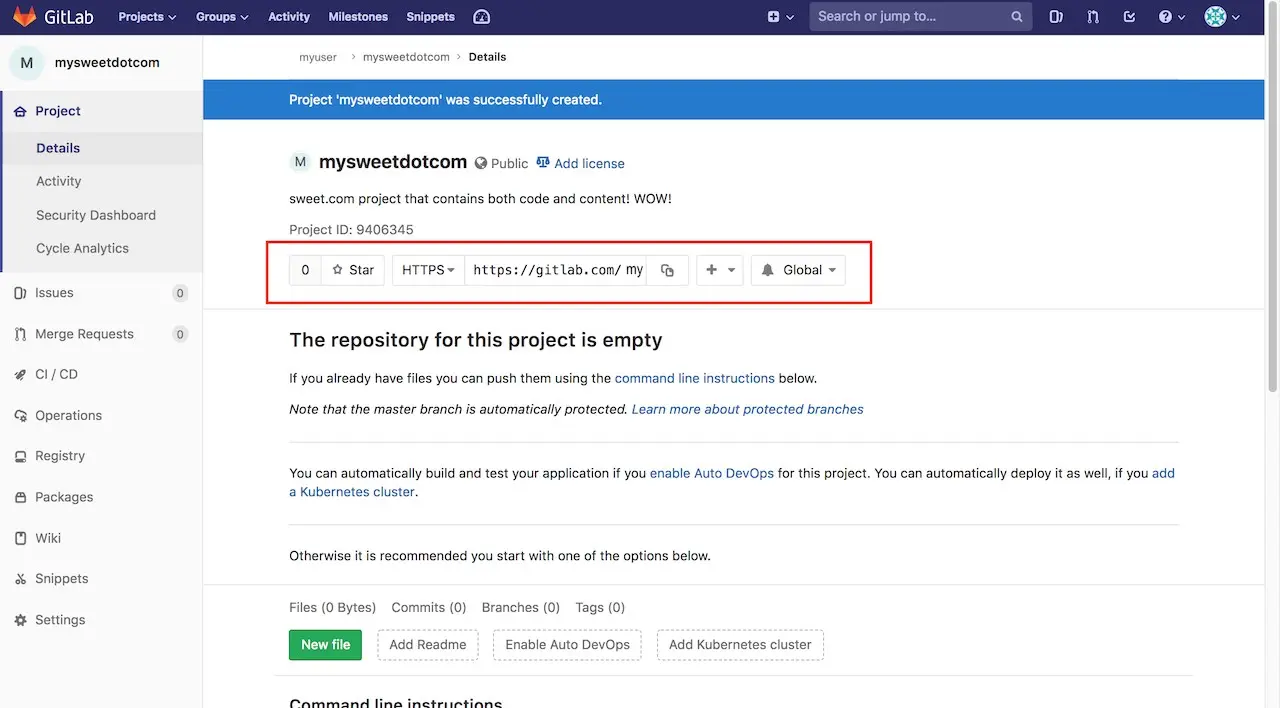
Figure 2: New Project in GitLab
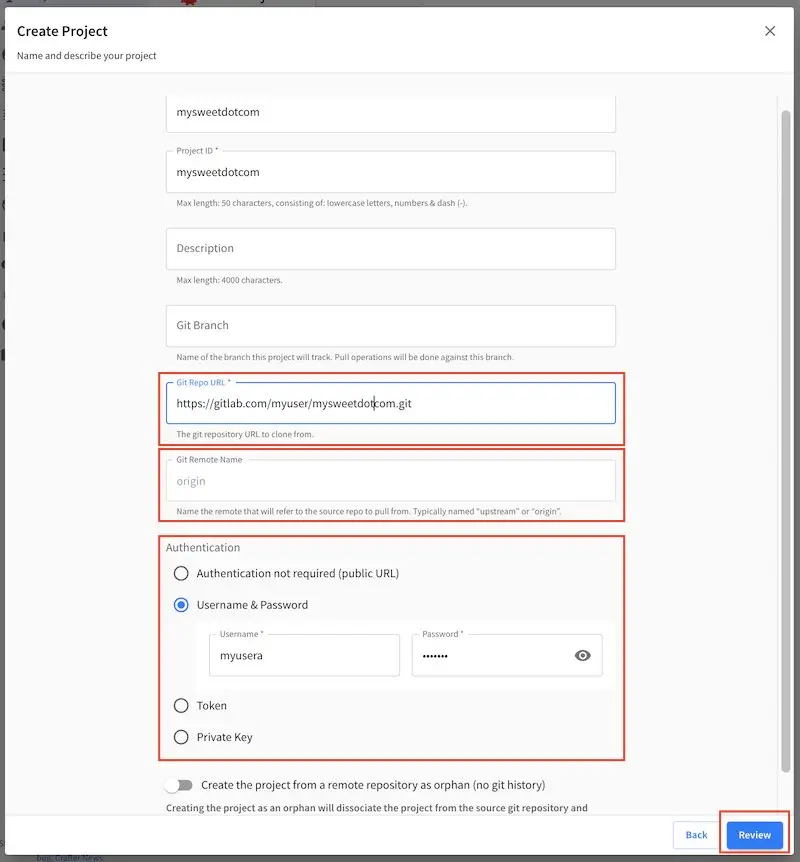
Step 2: Create Your Project In Crafter Studio
Next, you want to log in to Crafter Studio as the admin user. The admin user has the rights to create new projects. Click Create Project.
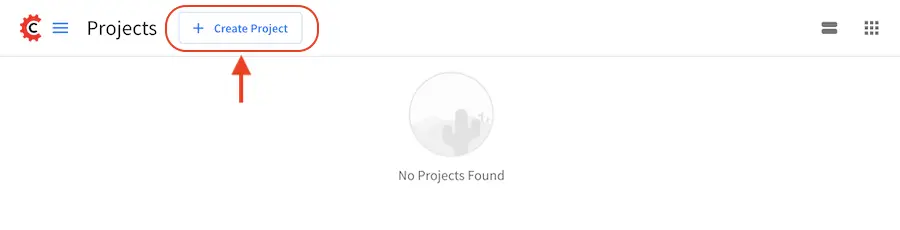
Figure 3: Create project via Crafter Studio
Clicking Create Project will present you with the Create Project dialog. This dialog changes depending on what you choose. Below is an example of the dialog filled out in a way that creates your project locally. We will then add the GitLab repository as its upstream remote and push the initial project contents to the upstream repository.
Let’s walk through each part of the dialog:
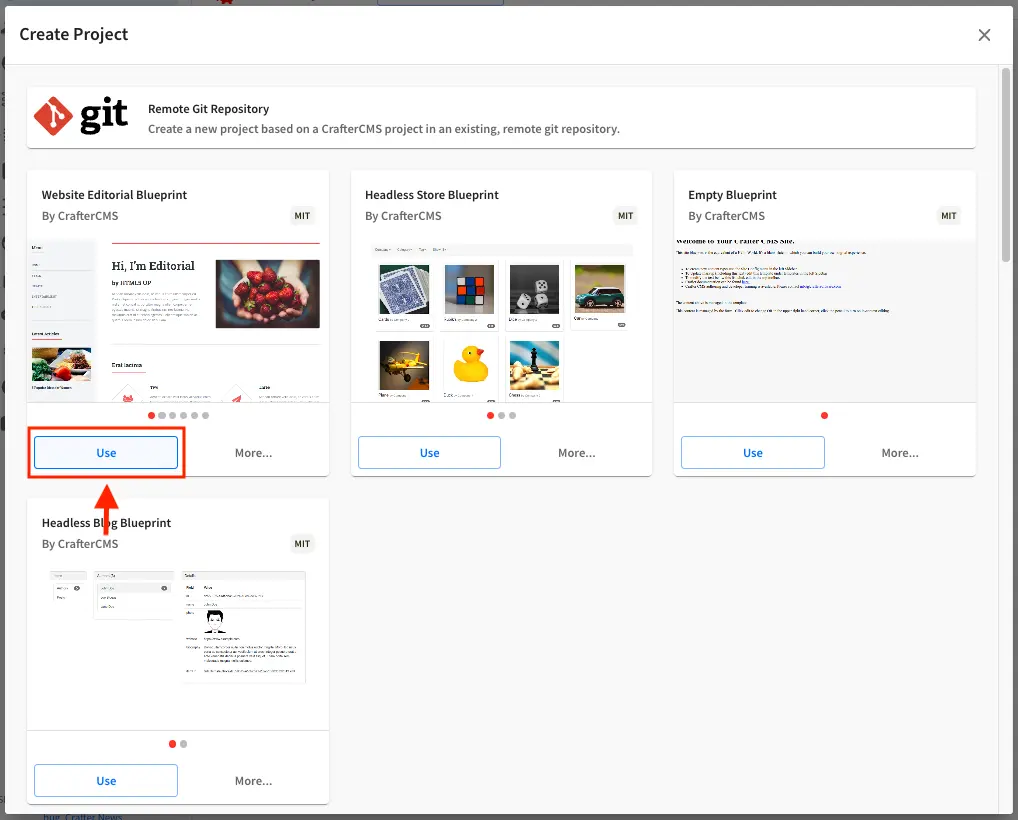
The first thing you need to do is to choose your blueprint. There are several out of the box blueprints provided by default. Choose one of these or one of your own. For our example, we’ll choose the Website Editorial blueprint.

The next thing to do is give your project an ID. The ID itself doesn’t matter in a sense. It doesn’t need to match anything per se, technically speaking the only requirement is that it’s unique. That said, it’s a best practice to provide an ID that is meaningful/recognizable to the team. If your website is called FreshFlowers.com a good ID might be “freshflowerscom”.
Click on the Review button, then finally click on the Create Project button to create your project. CrafterCMS will create the local repositories, search index and internal data structures required to support the project and install the blueprint. Your project should be created in a short while.
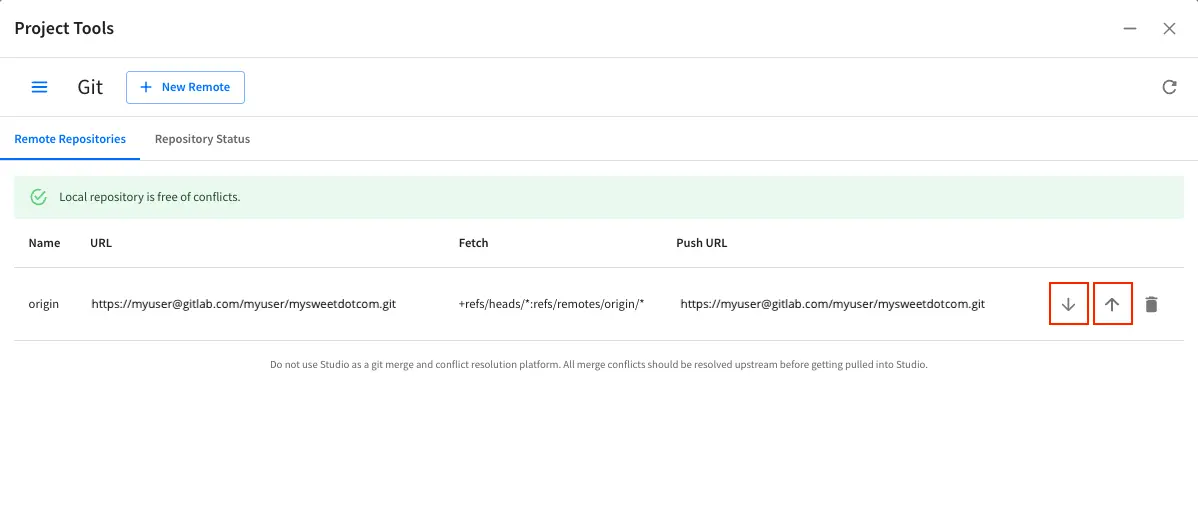
Once your project is created, the next step is to add a remote repository to your newly created project. Open the Sidebar then click on Project Tools -> Git, then click on the New Remote button on the top right.
This will open up a dialog where we can fill in all the information for our remote repository.
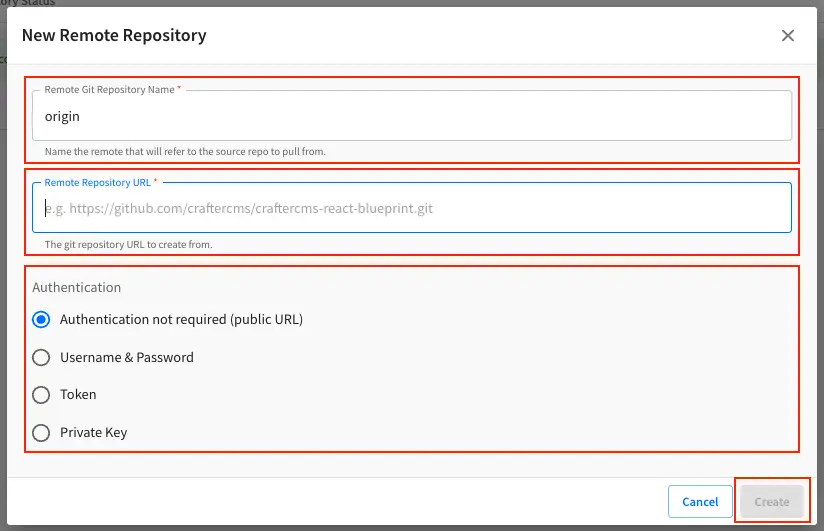
In the Remote Git Repository Name field you want to provide a repository name that makes sense. It’s common to use “origin” or “upstream.”
In the Remote Git Repository URL field you must provide the link to the Git repository discussed in Step #1:
https://gitlab.com/myuser/mysweetdotcom.gitProvide your credentials based on the authentication method selected. For example, if we chose
Username & Passwordas the authentication method, we’ll need to fill in Username and PasswordNote
When using ssh keys for authentication, the keys can be generated using one of the following:
RSA,ECDSA,ED25519orDSAas the algorithm and withno passphrase(Crafter currently doesn’t support using a passphrase with SSH keys.)To generate your Secure Shell (SSH) keys for authentication, run the following command:
Generate an RSA SSH keypair with a 4096 bit private key
ssh-keygen -t rsa -b 4096
Generate an DSA SSH keypair with a 2048 bit private key
ssh-keygen -t dsa -b 1024
Generate an ECDSA SSH keypair with a 521 bit private key
ssh-keygen -t ecdsa -b 521
Generate an ed25519 SSH keypair- this is a new algorithm added in OpenSSH.
ssh-keygen -t ed25519
Your output should look something like this:
✗ ssh-keygen -m PEM -b 4096 -t rsa
Generating public/private rsa key pair.
Enter file in which to save the key (/Users/myuser/.ssh/id_rsa):
Enter passphrase (empty for no passphrase):
Enter same passphrase again:
Your identification has been saved in /Users/myuser/.ssh/id_rsa.
Your public key has been saved in /Users/myuser/.ssh/id_rsa.pub.
.
.
After generating your private and public keys, you will need to add your new public key to where your remote git repository is located. If you are using GitHub, you will need to add your public key (e.g.,
id_rsa.pub) into your GitHub account. If your remote Git repository is hosted on a server, you will need to copy your public key (e.g.,id_rsa.pub) to the host server.Once you’re satisfied with your entries for your remote repository, click on the Create button. Once complete we can now connect to the upstream and push the contents of the Sandbox repository to the remote by clicking on the
Pushbutton (button with the up arrow).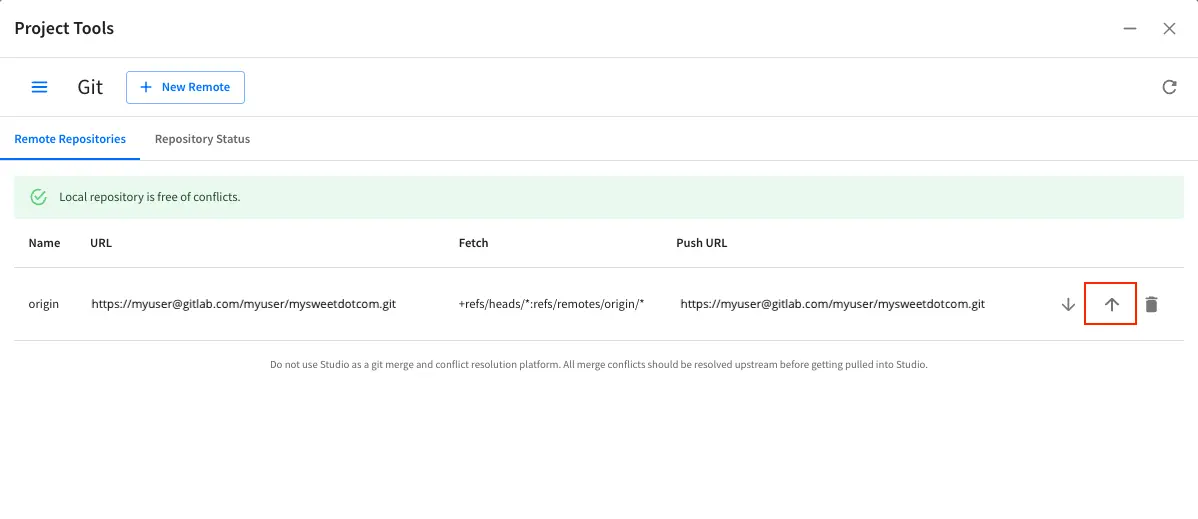
Figure:: Project is created and a remote repository added
Step 3: Check GitLab to Make Sure Your Project is There
Go back to your GitLab project and refresh the screen. You will see the contents of your CMS project in the repository.
Your project is there!
Pushing and Pulling from the Remote Repository
Crafter Studio helps you manage and interact with your remote repositories via the user interface and via API. Using Crafter Studio’s remote repositories console, you can add any remotes to the project you like and sync with them via pull and push operations at any time.
Now you are ready to set up your entire development process and CI/CD automation.
Creating a Project in CrafterCMS Based on an Existing GitLab Project
Let’s consider for a moment that you’re a new developer joining the team. The topology above is already set up and you just want to get a local environment up and going. Simple. Follow these instructions.
Install Crafter Studio locally (Binaries download or Source build)
Login as Admin
Fill out the Create Project Form as in a similar fashion described in Step 2 above, except this time, instead of selecting a blueprint, select the Remote Git Repository to create your project based on an existing upstream repository. This can be your team’s branch or your own fork. The exact workflow is up to you.