Multi-Environment Configuration
Users may want multiple environments setup with different configurations for each environment, e.g. QA, Prod, Dev, etc. To setup an environment, do the following:
Create a folder under
CRAFTER_HOME/data/repos/site/my-awesome-editorial/sandbox/config/studiocalledenvInside the folder, create a directory called
myenv(or whatever you want to call the environment)Copy the configuration file you want to override in the new environment you are setting up, inside your
myenvfolder following the folder structure underconfig/studio.Remember to commit the files copied so Studio will pick it up.
In the
crafter-setenv.shfile inTOMCAT/binset the following property to desired environment:CRAFTER_HOME/bin/crafter-setenv.sh# -------------------- Configuration variables -------------------- export CRAFTER_ENVIRONMENT=${CRAFTER_ENVIRONMENT:=myenv}
Restart Studio
Note
Once an environment has been created, when adding a new configuration file to the environment, the file must be created in the repo and not through Studio UI. Remember to commit the new file created for the environment so Studio will pick it up
Example
Let’s take a look at an example of creating a new environment, called mycustomenv with the rte-setup-tinymce5.xml file overridden in the new environment:
We’ll create a folder called
envunderCRAFTER_HOME/data/repos/site/my-awesome-editorial/sandbox/config/studio1data/ 2 repos/ 3 sites/ 4 my-awesome-editorial/ 5 sandbox/ 6 config/ 7 studio/ 8 administration/ 9 content-types/ 10 data-sources/ 11 dependency/ 12 env/ 13 permission-mappings-config.xml 14 role-mappings-config.xml 15 site-config.xml 16 studio_version.xml 17 translation-config.xml 18 ui.xml 19 workflow/
Inside the
envfolder, create a directory calledmycustomenvWe will now copy the configuration file for the
ui.xmlthat we want to override in the new environment we are setting up, inside ourmycustomenvfolder, following the folder structure underconfig/studio. For our example, theui.xmlfile is underconfig/studio/:env/ mycustomenv/ ui.xmlRemember to commit the files copied so Studio will pick it up.
➜  sandbox git:(master) ✗ git add .
➜  sandbox git:(master) ✗ git commit -m "Add updated ui.xml file for mycustomenv"
Open the
crafter-setenv.shfile inTOMCAT/binand set the value ofCRAFTER_ENVIRONMENTto the environment we setup above to make it the active environment:CRAFTER_HOME/bin/crafter-setenv.sh# -------------------- Configuration variables -------------------- export CRAFTER_ENVIRONMENT=${CRAFTER_ENVIRONMENT:=mycustomenv}
Restart Studio. To verify our newly setup environment, open the
Sidebarand click on , then select
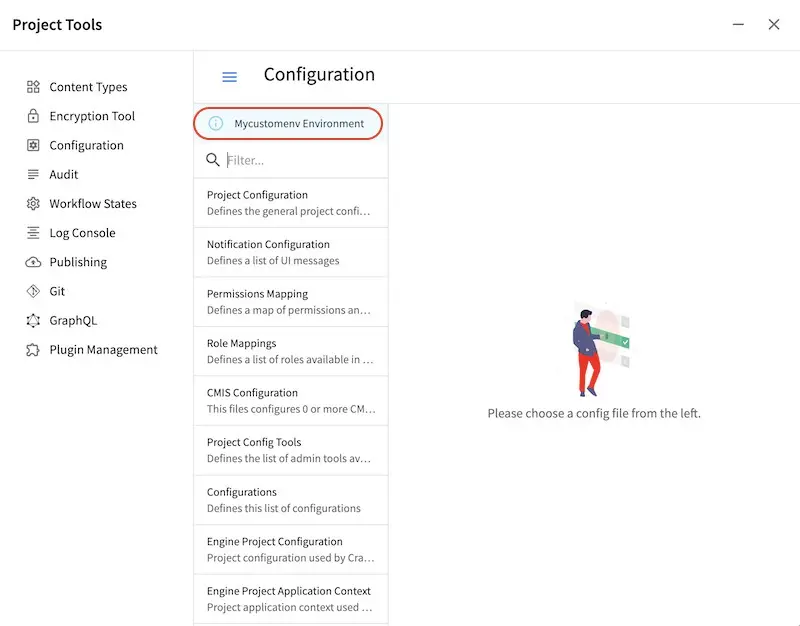
 Configuration. Notice that the active environmentmycustomenvwill be displayed on top of the configurations list: