Debugging Publishing Issues
When publishing fails, here are some things to consider to help track down the cause of publishing issues.
Inspect Publishing Queue
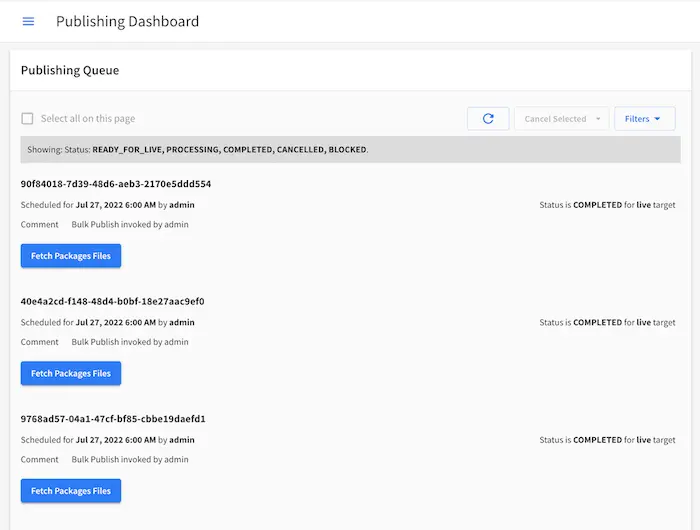
The publishing queue (items that are in the queue for publishing) can be viewed through Studio from ![]() ->
-> Publishing, then scroll down to the Publishing Queue. Here, the user can narrow down the queue for inspection by specifying filters. For more information see Publishing Queue

Another way to get the publishing queue, is to execute the following SQL query:
SELECT * FROM publish_request
WHERE site = 'a_site_id'
ORDER BY scheduleddate
Additionally, a query can be filtered by item state and scheduled data to narrow down the queue for inspection.
Item states:
READY_FOR_LIVE - item is scheduled and waiting in the queue to be published
PROCESSING - item is being published
COMPLETED - item has been published
CANCELLED - item has been removed from the queue (publishing was cancelled)
BLOCKED - item is blocking the publishing queue
Unblock Publishing Queue
The publishing queue can be blocked or stuck in an infinite loop by trying to publish the same item over and over again. It usually happens when there is some error in publishing some content.
To discover which item is blocking publishing, the most common method is to inspect the queue and determine which item is first in the queue (state READY_FOR_LIVE), together with all the other items that are scheduled with the same timestamp.
Once you determine where the publishing queue is blocked/stuck, you can determine the reason by inspecting the log files and the repository.
If it is possible to fix the publishing queue blockage, the system should be allowed to continue normally.
After the queue has been unblocked, the publishing process needs to be enabled again. This can be done through Studio, by clicking on the Start button in ![]() ->
-> Publishing -> Status. Status contains more information on the Publishing Status tab in Studio.
Another way to enable the publishing process is to call the Start Publisher Rest API to start publishing.
If it is not possible to fix the publishing queue blockage, a workaround can be applied to unblock publishing. The workaround can be any valid intervention on the database and the repository to simulate the publishing process.
Manual Syncing of Repositories
One of the general workaround to unblock the publishing queue is by manual syncing of repositories. Manual syncing is done by cloning published repository from sandbox.
# navigate to published repository
> cd path_to_published
> cd ..
# delete published repository
> rm -rf published
# clone published repository from sandbox
> git clone path_to_sandbox published
Warning
By executing this command, all content in the sandbox will become published, and the published history will be replaced with authoring history.
To avoid unnecessary operations and confusion within the system, the database should also be updated by canceling everything remaining in the publishing queue and setting item states to Live
UPDATE publish_request
SET state = 'CANCELLED'
WHERE site = 'a_site_id'
AND state = 'READY_FOR_LIVE';
UPDATE item_state
SET state = 'EXISTING_UNEDITED_UNLOCKED', system_processing = 0
WHERE site = 'a_site_id';
After successful manual syncing of repositories the publishing process needs to be enabled again. This can be done through Studio, by clicking on the Start button in ![]() ->
-> Publishing -> Status. Status contains more information on the Publishing Status tab in Studio.
Another way to enable the publishing process is to call the Start Publisher Rest API to start publishing.
Publishing Issues When Moving Projects Around in Disk
Publishing may fail when moving projects around in disk. When moving projects around, the reference between the published repository and the sandbox repository may not be valid anymore. To resolve the issue, the reference between the published repository and the sandbox repository needs to be updated.
Typically, the configuration for the published repository can be found in the file path_to_published_repo/published/.git/config and the reference to sandbox may look like this:
[remote "origin"]
        url = ../sandbox
        fetch = +refs/heads/*:refs/remotes/origin/*
In some cases, the configuration looks like this:
[remote "origin"]
        url = /my/absolute/path/to/crafter_install/crafter-auth-env/bin/../data/repos/sites/mysite/sandbox
        fetch = +refs/heads/*:refs/remotes/origin/*
To manually fix the configuration problem, either set the url value as a relative path between the published and the sandbox repositories (default ../sandbox) or set it as the absolute path of the sandbox repository.
Publishing Issues When Commit ID for a content is NULL in Database
Publishing issues may be caused if content does not have a commit id value in the metadata table. To detect which content has NULL for commit id, execute the following query:
SELECT site, path FROM item_metadata WHERE commit_id is NULL;
When all content with NULL commit id is detected, the content needs to be edited manually by adding a change that will not affect content itself but will cause a Git change. (e.g. html or xml comment block, blank space etc.). The change needs to be committed in Git repo, then the sync repository feature will update the commit id in database.
Publishing Issues Caused by ‘Ghost’ Content in Database
‘Ghost’ content is content that has been deleted from repository, but its metadata remained in database. The only solution to this problem is to remove this content manually from database. Once ‘ghost’ content is identified the following queries need to be executed:
DELETE FROM item_state WHERE site = 'mysite' and path = 'ghostcontent';

DELETE FROM item_metadata WHERE site = 'mysite' and path = 'ghostcontent';
Publishing Issues Upon a Cluster Restart
It’s possible for the publisher to lock itself out upon a cluster restart where the nodes are based on k8s and IP/identifiers change with every restart.
To unlock publishing, open the Sidebar in Studio, then click on Project Tools -> Publishing. Click on the Status tab then click on the unlock publishing button (button with open padlock). Next, follow the instructions in the dialog to confirm action in order to unlock the publisher.
See Status for more details on the unlock publisher button.