
Putting it all together - Users, Groups, Roles and Permissions
In this section, we’ll see how users, groups, roles and permissions work together in giving users access to certain folders in a site.
We’ll create a new role, group and user, add permissions for the new role and finally assign the newly created user to the new group setup.
In preparation for our example, we will be using the Website_editorial blueprint. We’ll add a news folder under Home, by navigating to Pages -> Home, then right click on Home and select New Folder. Enter news in the Folder Name field. We will be using the news folder for our example in setting up permissions to folders based on roles. Users assigned to the newseditor role will then have access to publish and add/edit content in the news folder.
Create a new group
Let’s begin by creating a new group.
To create a new group, click on
 Main Menu from the top right, then click on Groups.
Click on the New Group button.
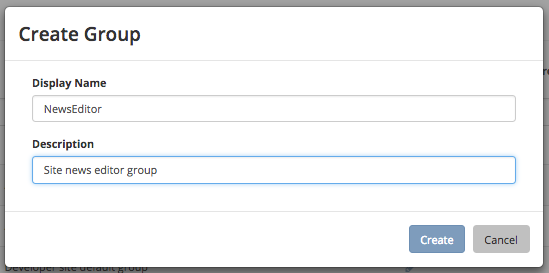
Enter a name for the new group being created in the Display Name field.
Enter a description of the new group being created in the Description field.
Click on the Create button. A notification will appear that your new group has been created.
Below are the information used to create a new group:
For more information on adding a new group to a site, please see Adding a New Group
Create a new role
We’ll now create a new role for the new group we just created.
To create a new role, click on
 from the Sidebar, then click on Configuration.
From the dropdown box, select Role Mappings
Add your new group and role in the editor
 1<role-mappings>
 2  <groups>
 3    <group name="Admin">
 4        <role>admin</role>
 5    </group>
 6    <group name="Developer">
 7        <role>developer</role>
 8    </group>
 9    <group name="Author">
10        <role>author</role>
11    </group>
12    <group name="Publisher">
13        <role>publisher</role>
14    </group>
15    <group name="Reviewer">
16        <role>reviewer</role>
17    </group>
18    <group name="NewsEditor">
19        <role>newseditor</role>
20    </group>
21  </groups>
22</role-mappings>
Click on the Save button.
For more information about role mappings, please see: Role Mappings
Adding permissions
To add permissions to the new role we just created, click on
from the Sidebar, then click on Configuration.From the dropdown box, select Permissions Mappings
Add in the permissions that you would like to give to the new role that we just created. For our example below, we are giving the role newseditor permission to publish from the dashboard and the following permissions for the news folder and assets folder:
read
write
create content
create folder
publish
 1<role name="newseditor">
 2   <rule regex="/site/website/news/.*">
 3     <allowed-permissions>
 4       <permission>Read</permission>
 5       <permission>Write</permission>
 6       <permission>Create Content</permission>
 7       <permission>Create Folder</permission>
 8       <permission>Publish</permission>
 9     </allowed-permissions>
10   </rule>
11   <rule regex="/static-assets/.*">
12     <allowed-permissions>
13       <permission>Read</permission>
14       <permission>Write</permission>
15       <permission>Delete</permission>
16       <permission>Create Content</permission>
17       <permission>Create Folder</permission>
18       <permission>Publish</permission>
19     </allowed-permissions>
20   </rule>
21   <rule regex="~DASHBOARD~">
22     <allowed-permissions>
23       <permission>Publish</permission>
24     </allowed-permissions>
25   </rule>
26 </role>
Click on the Save button to save your changes.
For more information about permission mappings, please see: Permission Mappings
Adding users to the role
We can now add users to the role by adding the users to the group mapped to the role. In the role mappings configuration file, we mapped the role newseditor to the group NewsEditor. To add users to the group NewsEditor,
Click on
from the top right of Studio, then select Groups on the left hand sideClick on the pencil (edit icon) next to the group name you want to edit. In our example, the group NewsEditor
Click on the box for the field Add new members, enter the users you’d like to add, then click on the Add members button.
For more information about adding users to a group, please see: Adding Users to a Group
Your new role with users and permissions assigned are now ready!