Users Management
Description
User Management allows you to control and set up who can access and manage the sites. All users are listed on the User Management page.
To find the Users Management console follow the next instructions:
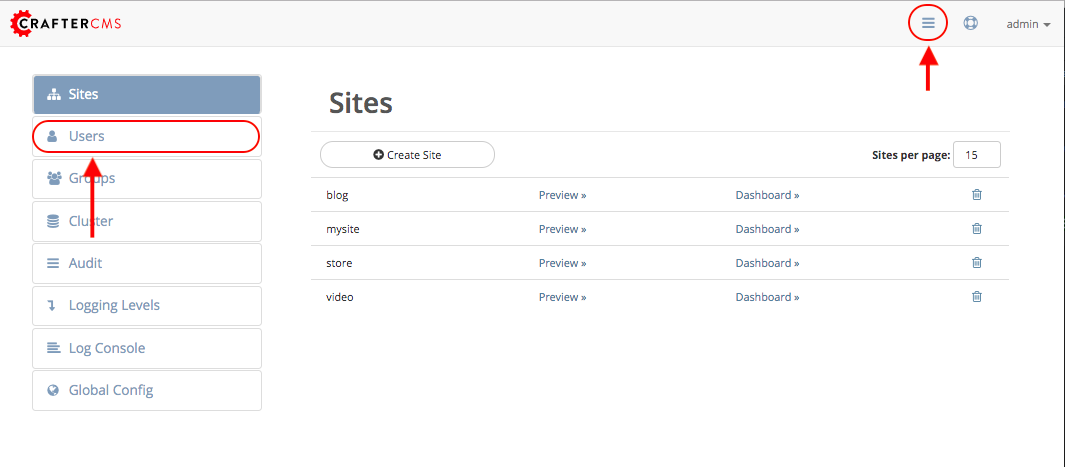
Click on the Main Menu
 option located at the top right of the browser, then click on Users in the main menu located on the left side of the browser:
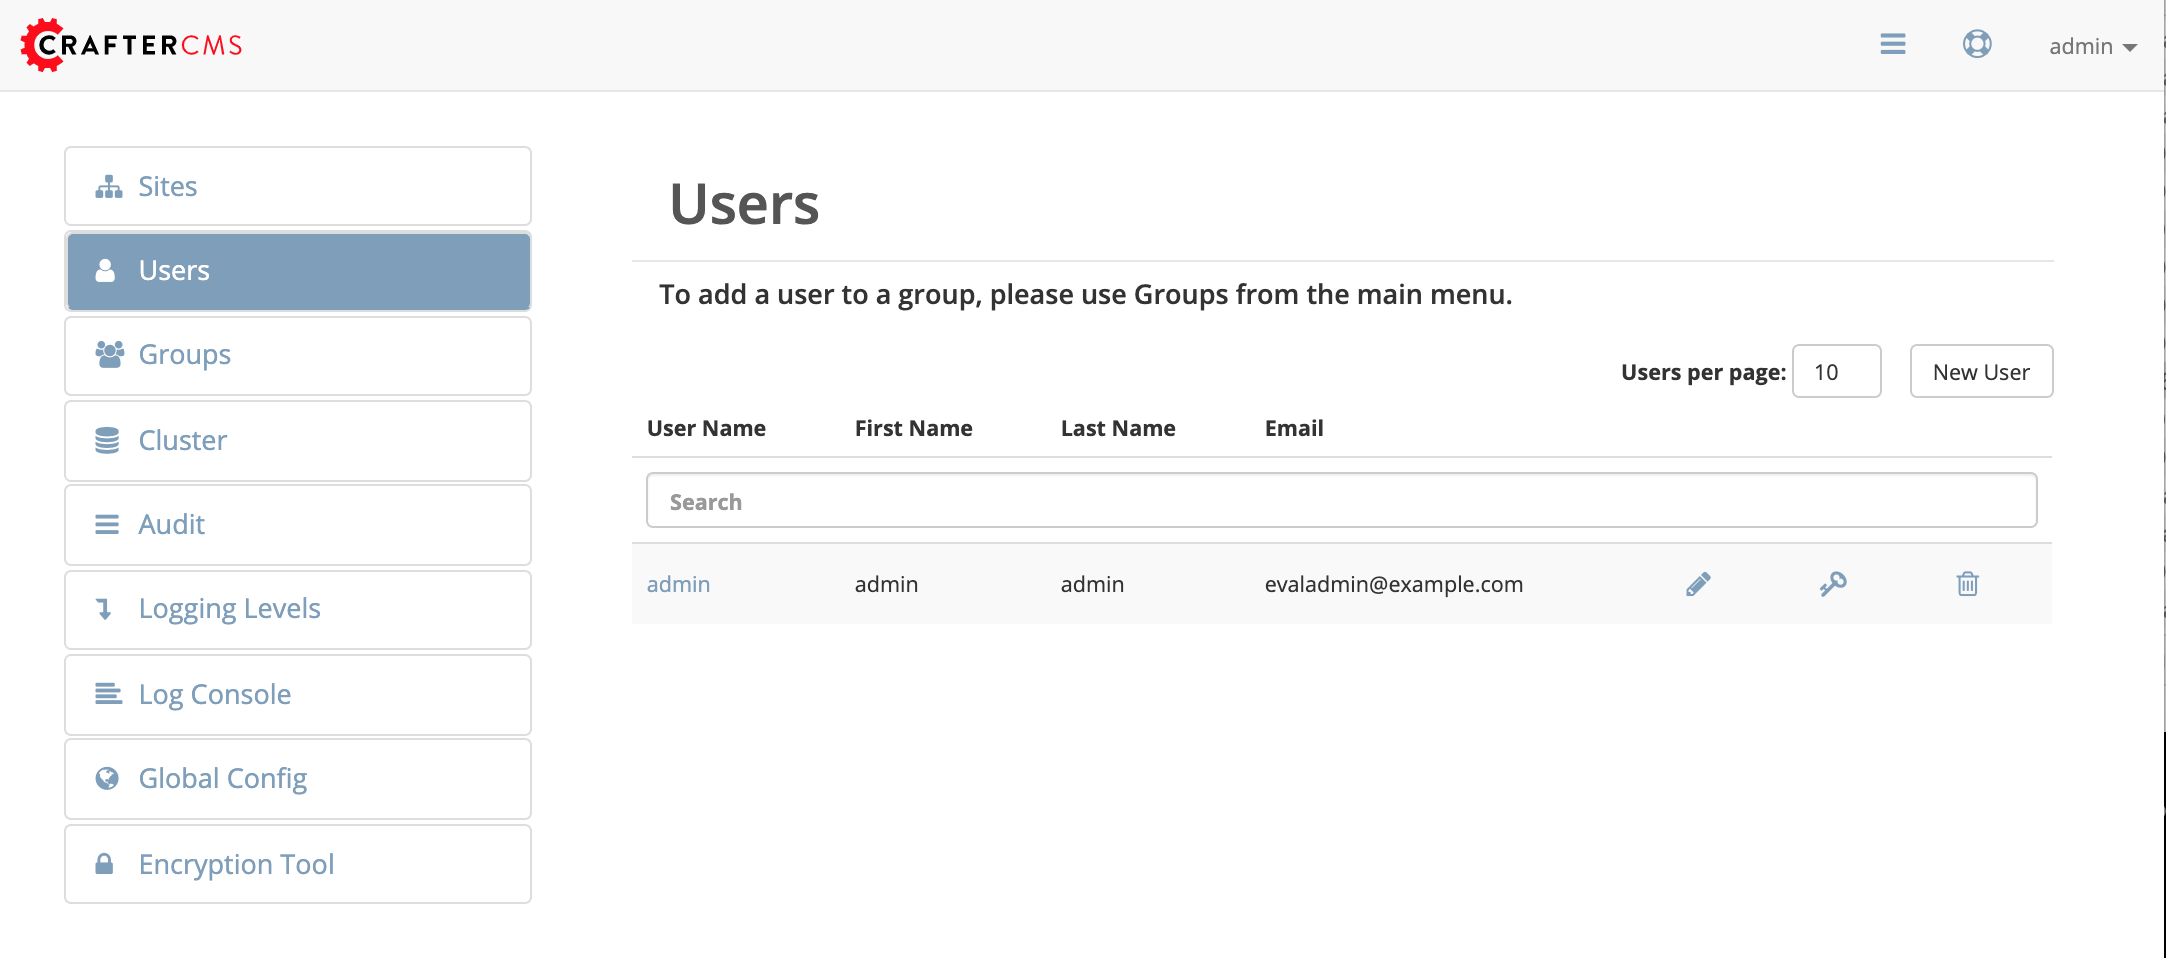
Here’s the dialog that will appear after clicking on Users in the main menu
Actions
You can list, search, add or delete users, as well as view specific information.
Listing Users
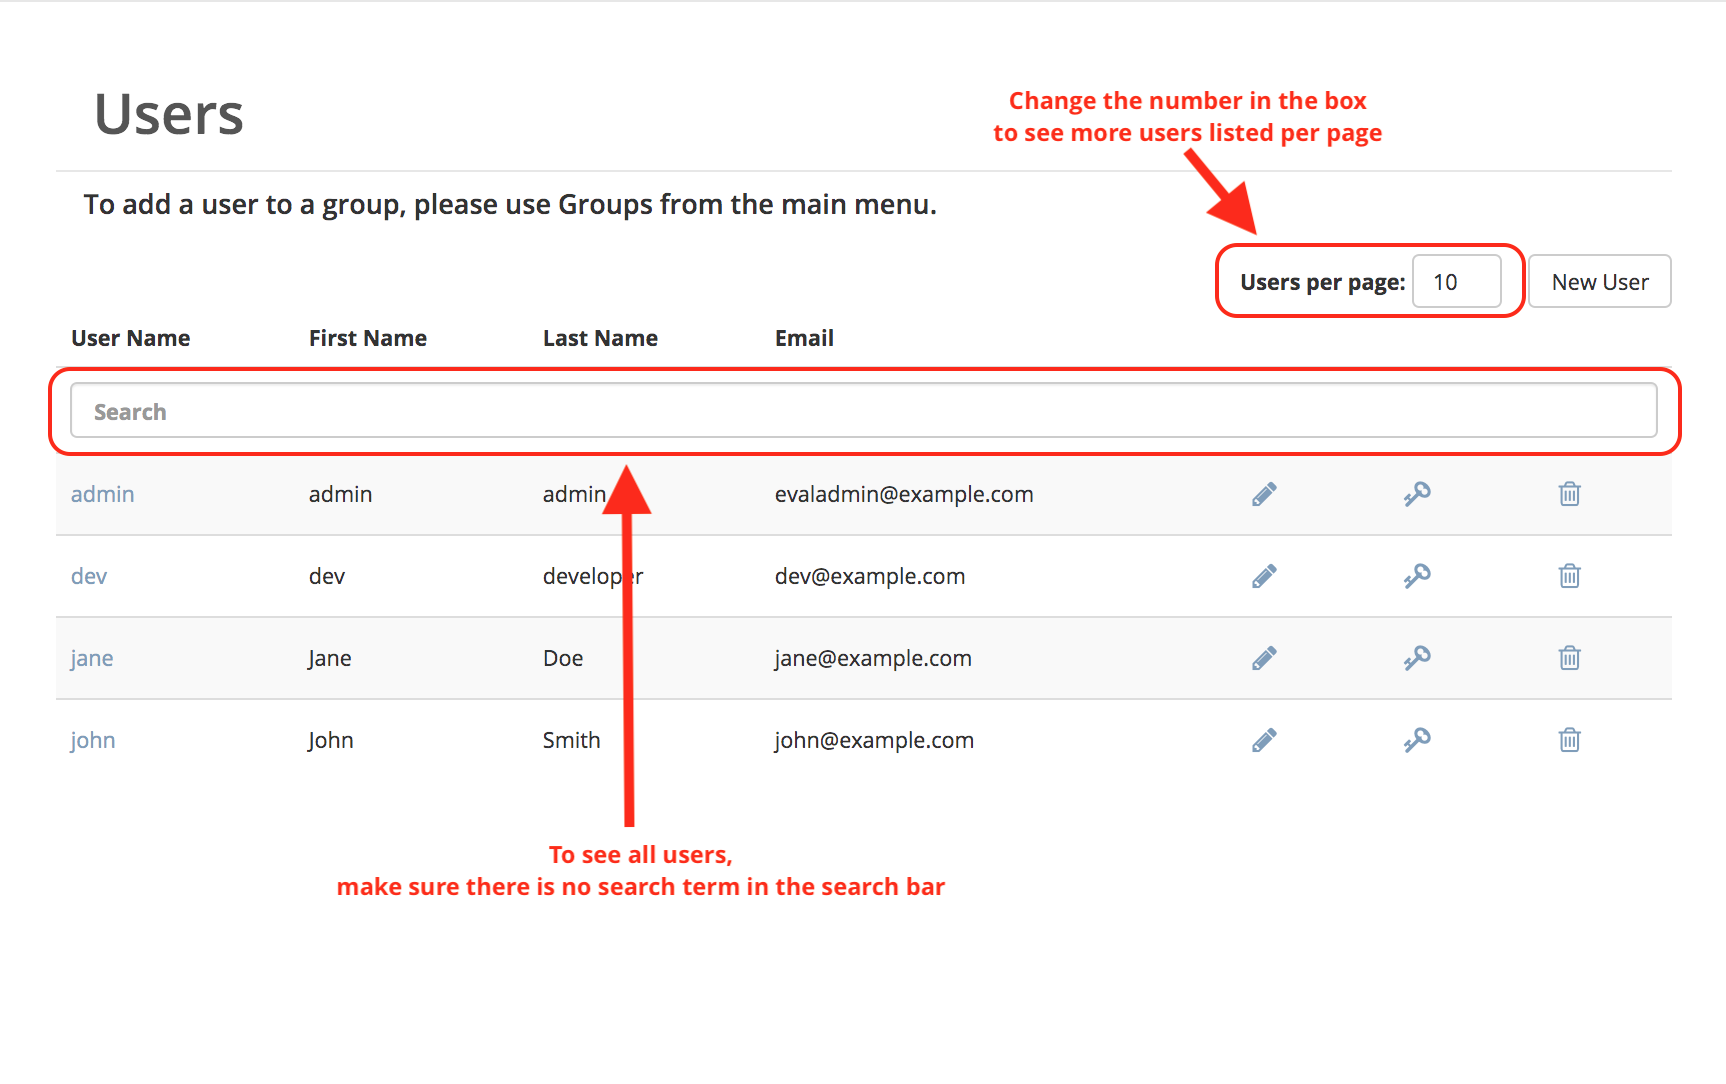
To see a list of all existing users, make sure that there are no search terms entered in the search bar. You can also change the number of users listed per page by changing the number in the Users per page input field at the top right
Searching Users
You can search for a specific user. To search users, go to the search field and type user name, last name, user name or mail. In the following example we typed “Ross”, we obtained only one related user: “Rossana”.

Creating a New User
To create a new user, please click on the “New User” button at the right of the page.

A modal dialog will be displayed, please fill out all the fields and finally click on the “Save” button. If you do not want to create a new user, please click on the “Cancel” button.
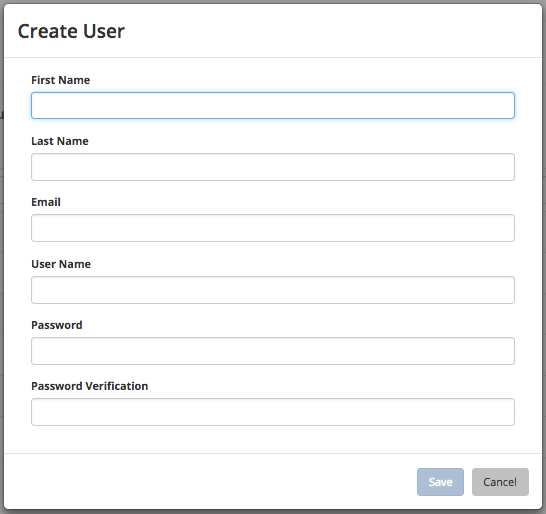
A notification will appear on the screen for a few seconds on successful creation of a new user

Viewing an Existing User
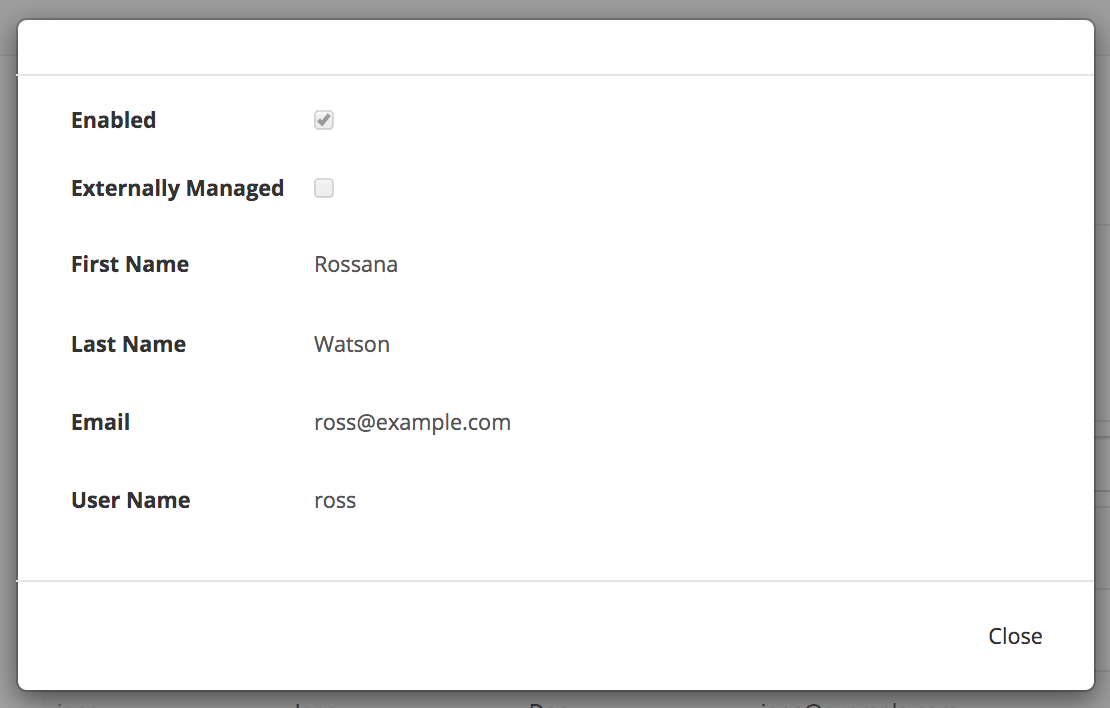
To view a specific user, please click on the name property located inside the result table as shown in the following example.

A modal dialog will be displayed with the user information. To finish view mode, click on the “Close” button.
Editing an Existing User
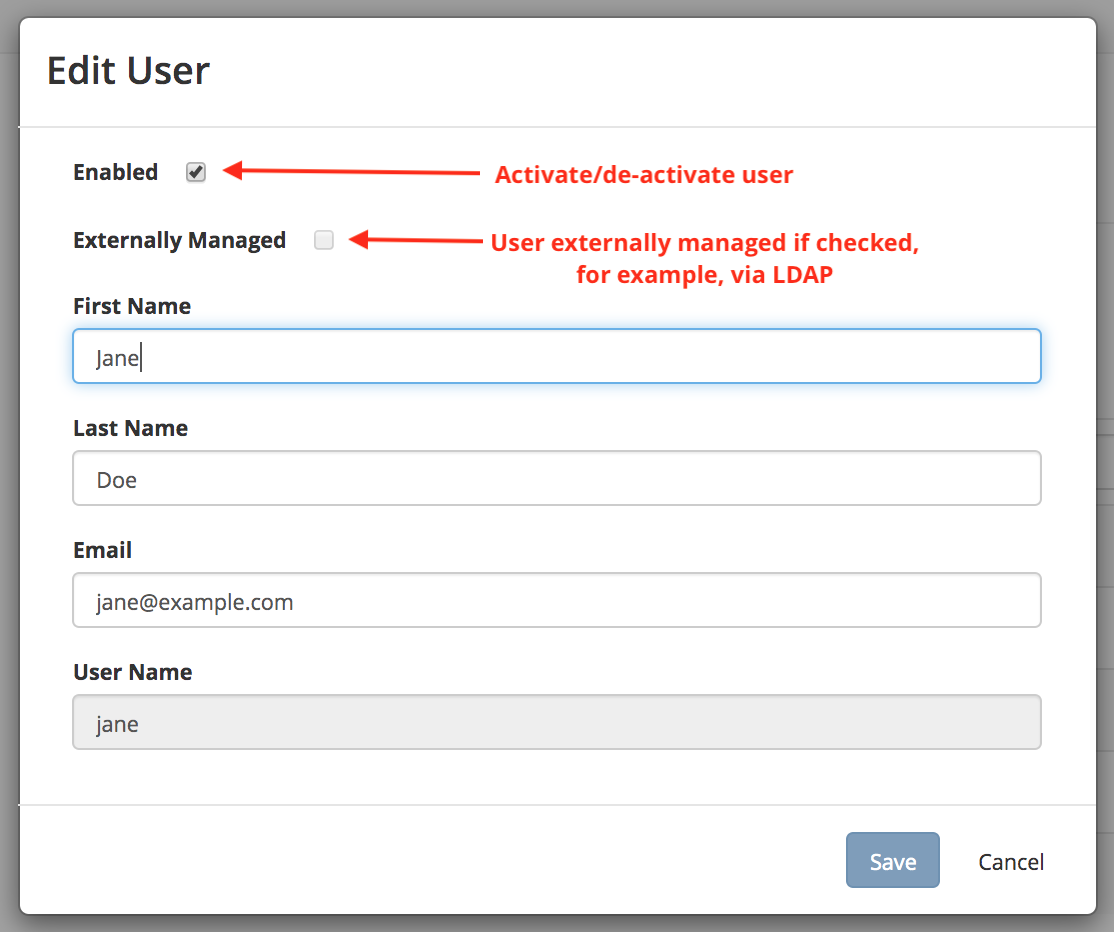
To edit a specific user, please click on the pencil icon located inside the result table as shown in the following example.

A modal dialog will be displayed, please edit the fields you want to change and then click on the “Save” button. If you do not want to edit the user, please click on the “Cancel” button. In this dialog, you can modify the user information such as email, first name, last name and user name. You can also activate/de-activate the user currently being viewed by checking/unchecking the checkbox labeled Enabled. The Externally Managed checkbox indicates whether the user is externally managed or not, such as the case in LDAP.
Resetting an Existing User’s Password
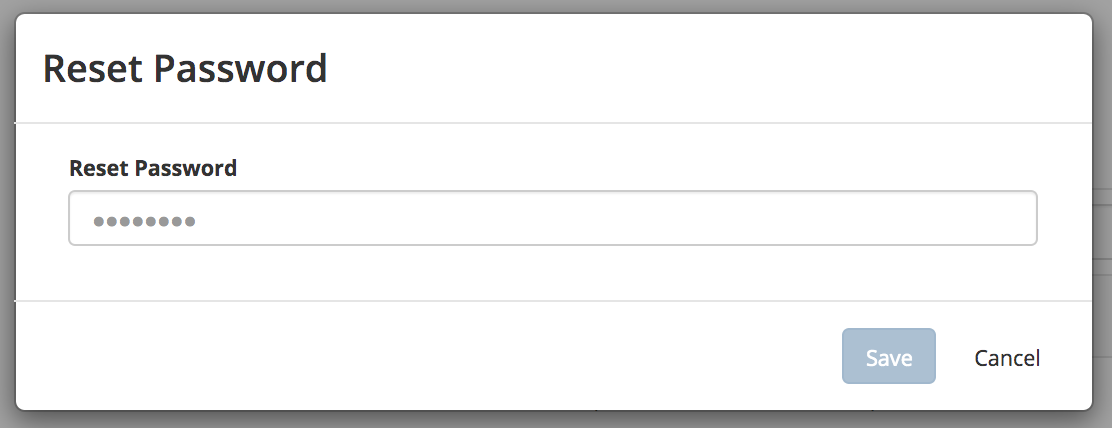
To reset the password of a specific user, please click on the key icon located inside the result table as shown in the following example.

A modal dialog will be displayed, where the admin can reset the users password. Click on Save to reset the password.
Removing an Existing User
To remove a specific user, please click on the trash can icon located inside the result table as shown in the following example.

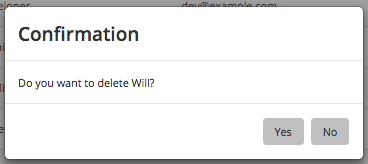
A confirmation pop up will be displayed, please click on “Yes” to remove the user and click on “No” if you do not want to remove it.
A notification will appear on the screen for a few seconds on successful deletion of a user
