Workflows
This section describes the simple default workflow available from CrafterCMS.
Workflow and Scheduled Deployments
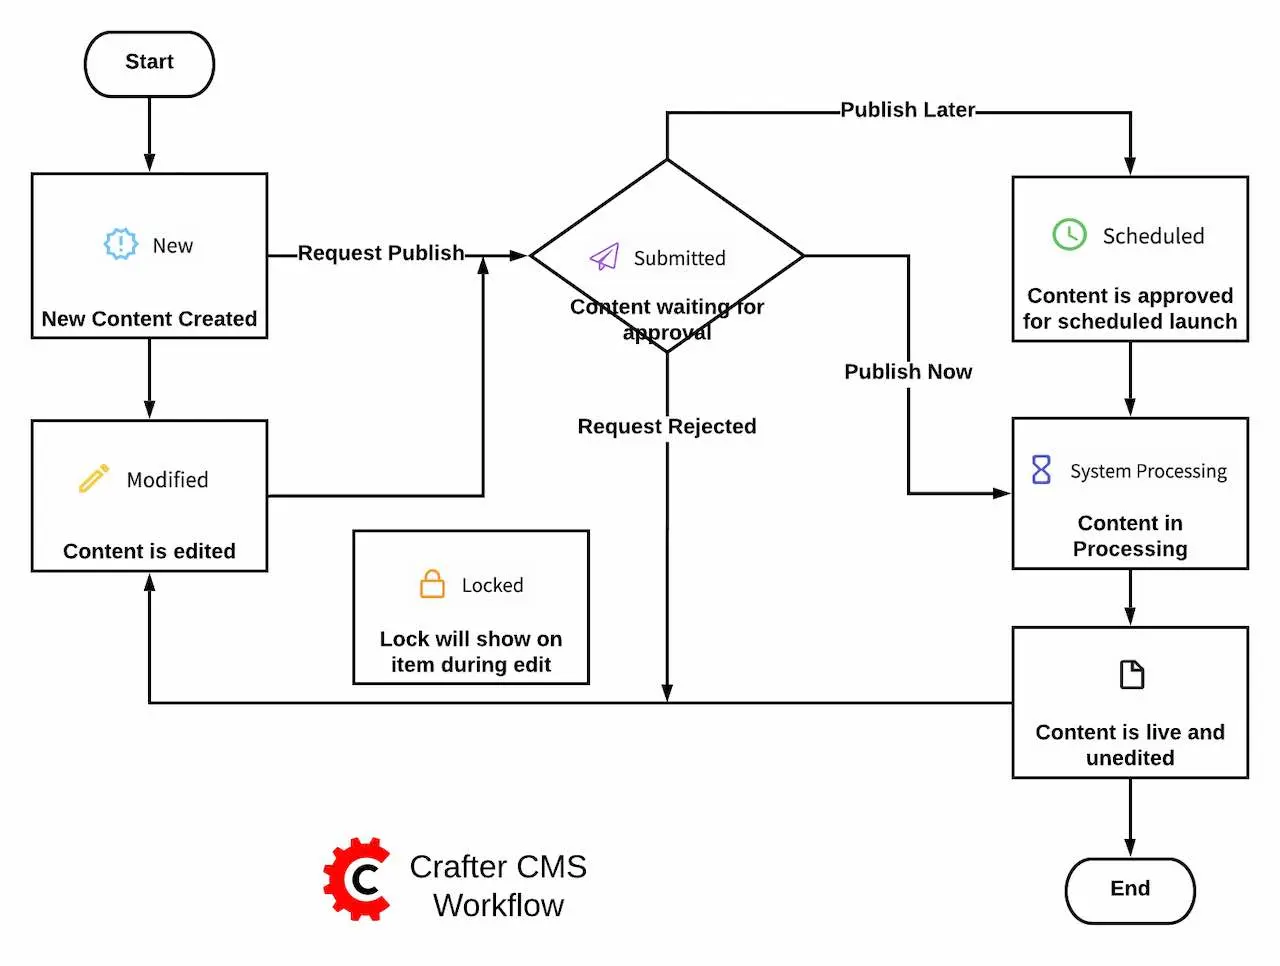
Workflow is the act of moving content through its lifecycle. A simple workflow option that includes submission, review/reject and approve and publish immediate / publish on a schedule options are provided by default. Workflow options are available to specific content, such as pages or static assets, etc. The available workflow options for users depends on the Role the users are assigned with. As the content goes through the workflow options, notification emails are sent out to corresponding users based on the workflow option. To setup the email addresses, please see the section Site Administrators, Configure Simple Workflow Notifications and Dialog Messages and Users/Groups Management. Below is a diagram showing the default workflow steps.
We will be looking at the workflow steps in this section. Workflow is managed through dialogs. Below is a sample dialog:
Submitting Content for Approval
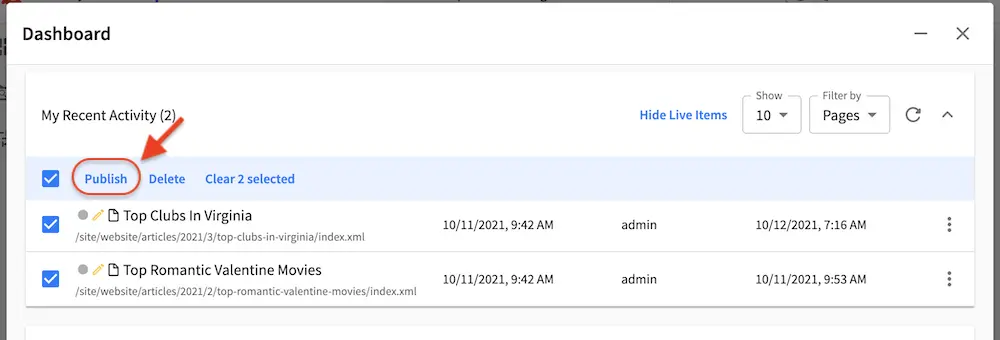
After creating/editing content, a request to publish content can be done by clicking on Publish. A Publish submission can be initiated from a preview screen through the toolbar by clicking on the three dots next to the address bar or by clicking on the three dots next to the article in the Sidebar (for single items), or from the Dashboard (where items can be batch checked).
Initiate a Publish through the toolbar at the top:

Initiate Publish batch checked through the dashboard:
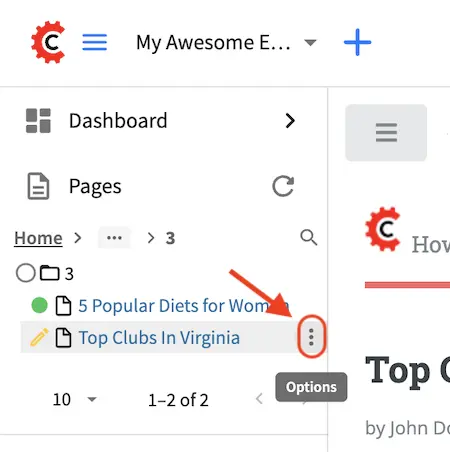
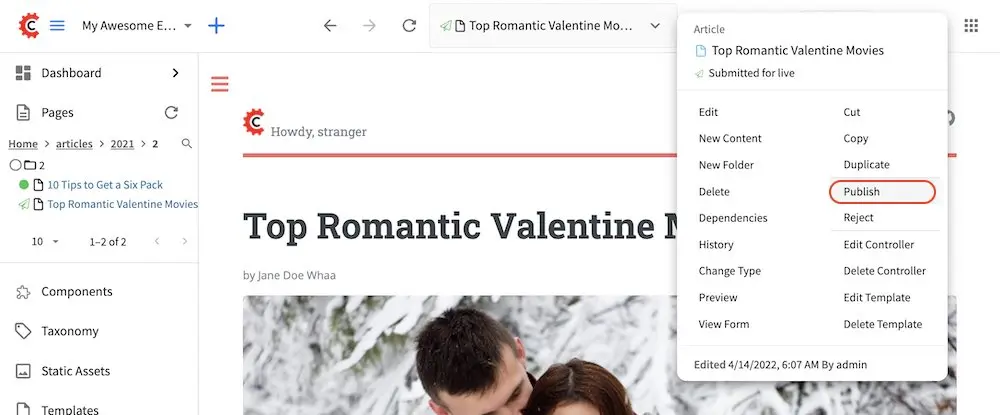
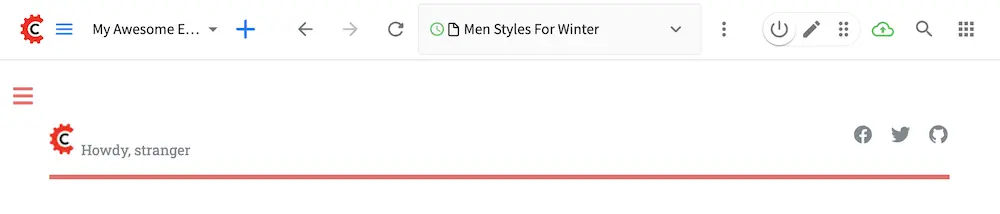
Initiate Publish by clicking on the three dots next to the content from the Sidebar:
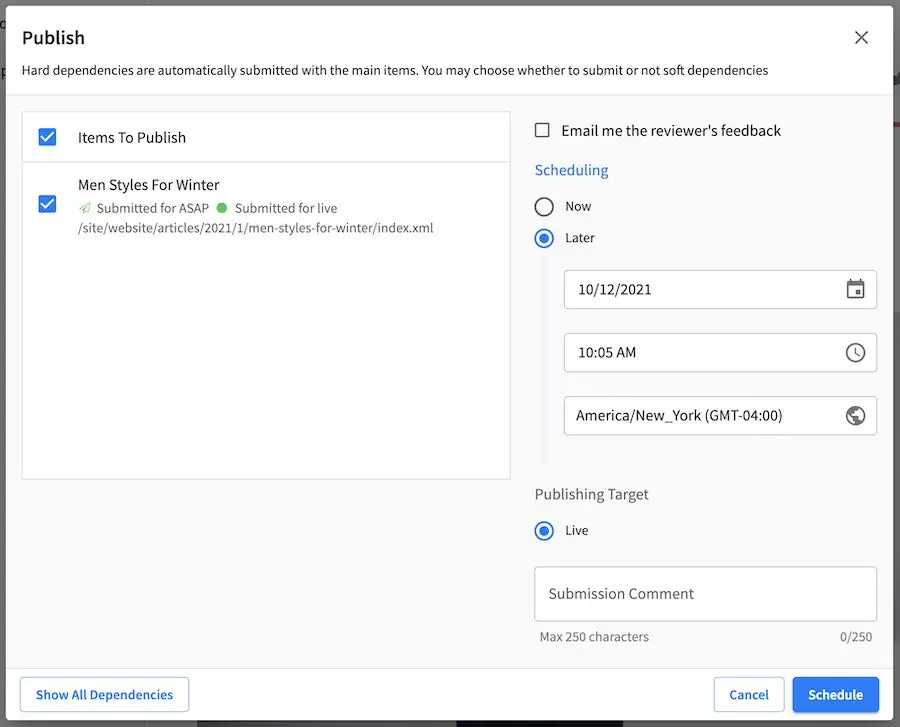
When sending the request for publish, you have the option of requesting to publish your content now, or to schedule publishing of your content at a later time and date.
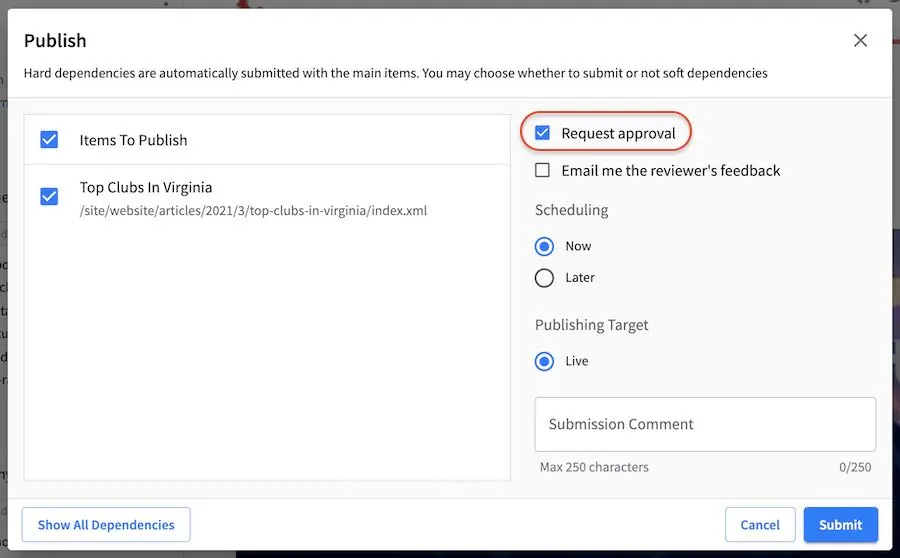
Users with permission to publish can also make changes and request approval for publishing their changes
by checking the Request approval checkbox in the Publish dialog
To make approval mandatory for publish requests for users with publish permission, see here.
After clicking on the Submit or Schedule button (depending on the option selected for publishing now or later), a notification email will be sent to the project’s approvers. Notice also, that the toolbar now displays the icon for Submitted

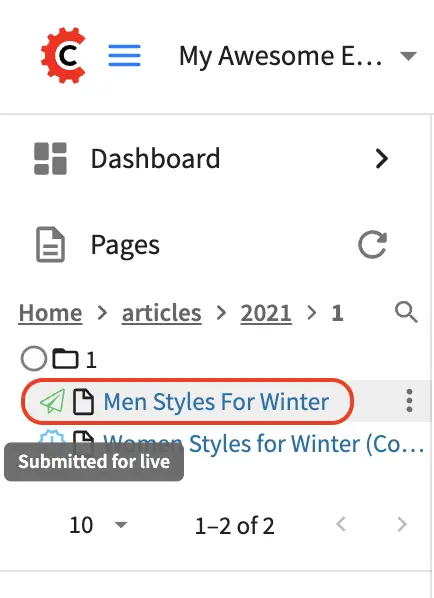
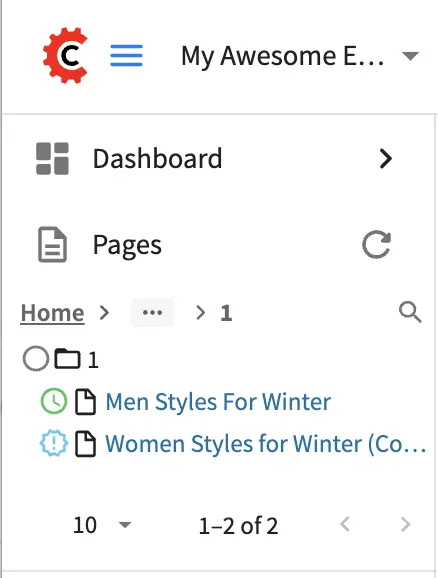
You’ll also notice the Submitted icon is displayed next to the content item in the Sidebar for the content you just submitted a request for publish and contains the text Submitted for live
The Submitted icon also appears next to the content submitted for publish in the dashboard:

Publishing Content
After a request for publish has been sent, the next step in the workflow is for an approver (a user with publishing rights) to approve or reject the request for publishing. Notification emails are sent out when an item has been approved for publish or rejected.
Approve & Publish Request
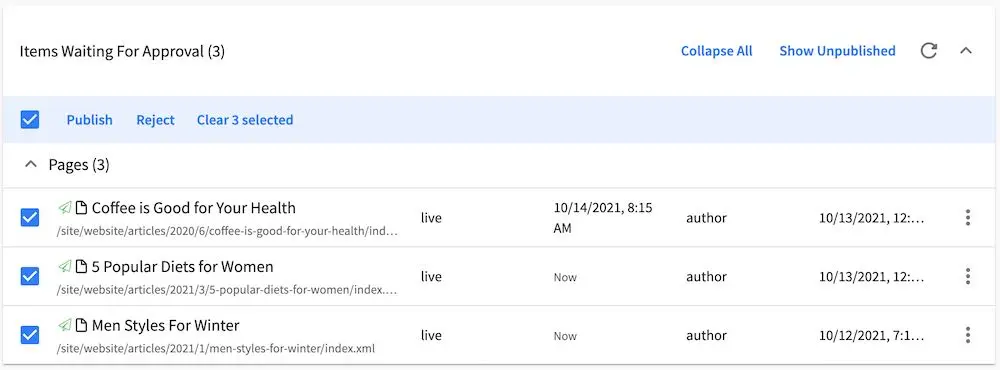
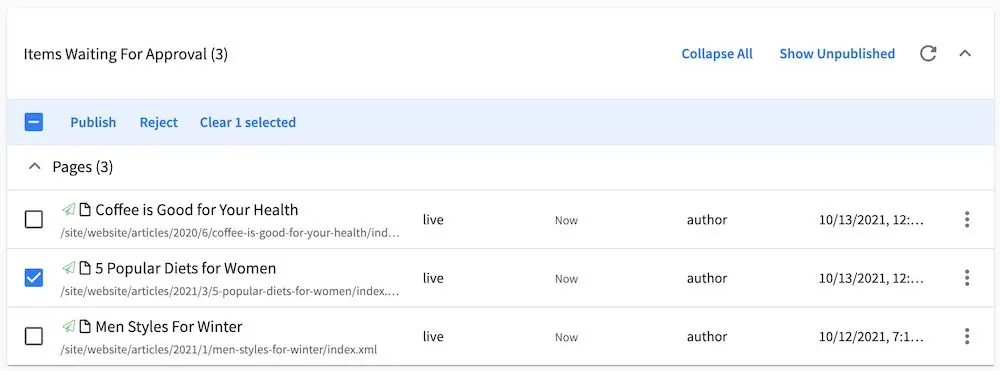
To approve content for publishing, there are a few ways to access the Publish workflow option for approving a publish request. One way is by going to the dashboard, then in the Items Waiting For Approval dashlet, look for the article you want to approve, then put a check mark next to it.

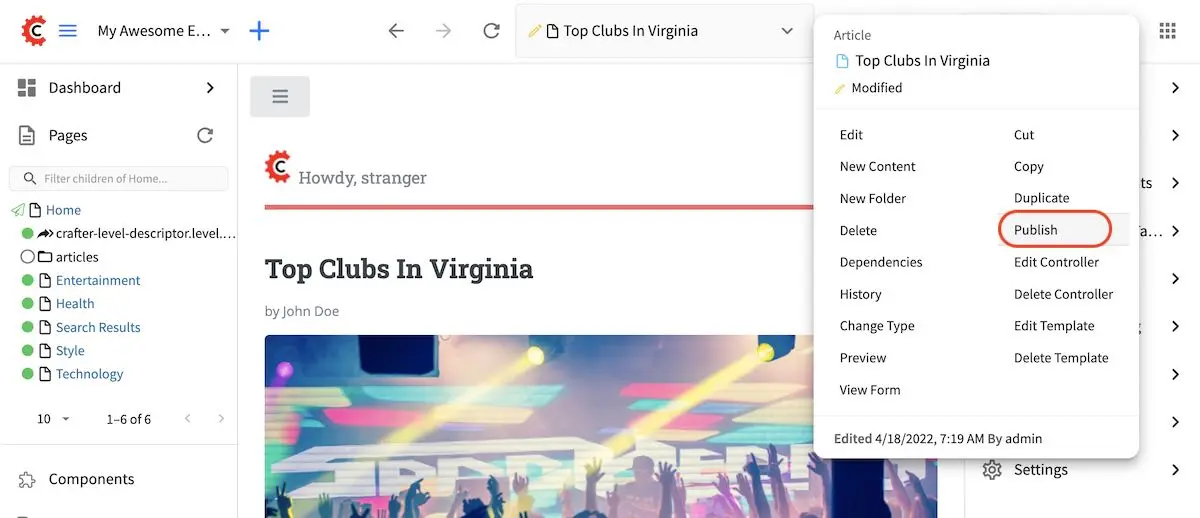
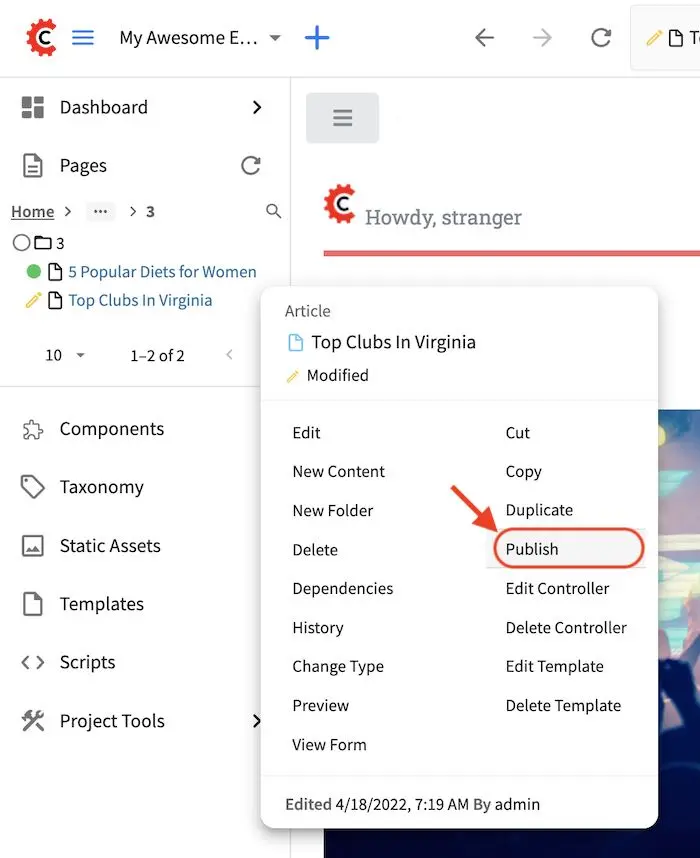
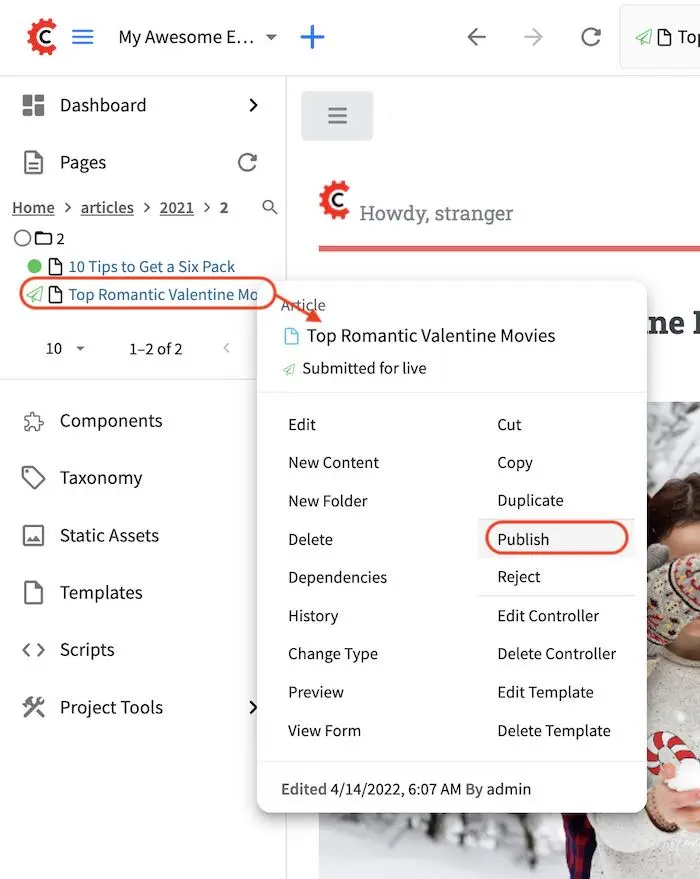
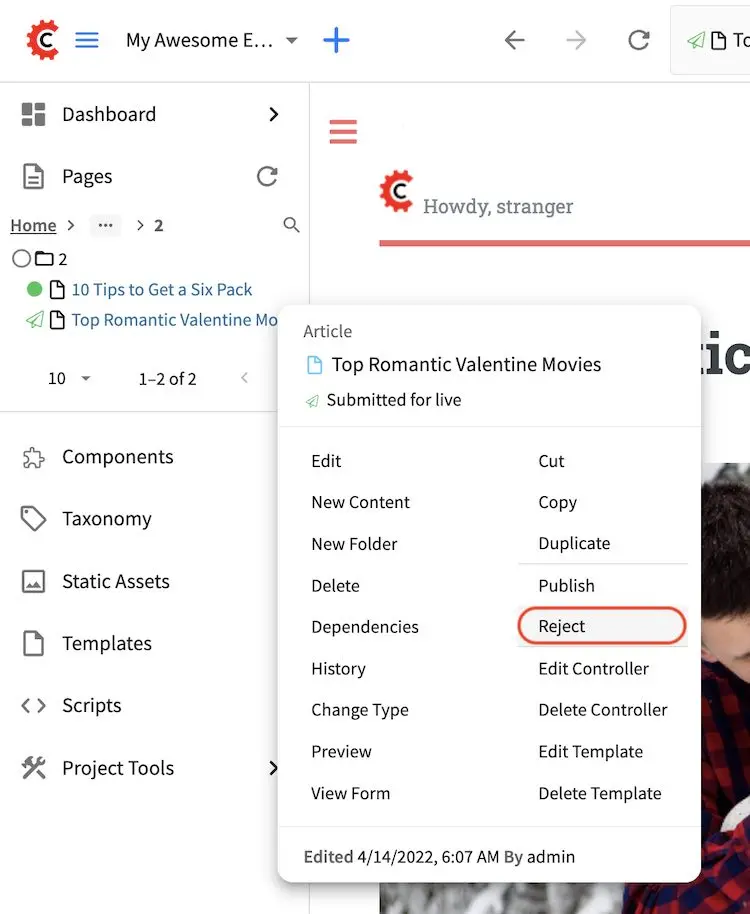
Another way to access the Publish option is by going to the Sidebar, then navigate to the article you want to approve, then click on Options (the three dots next to it).
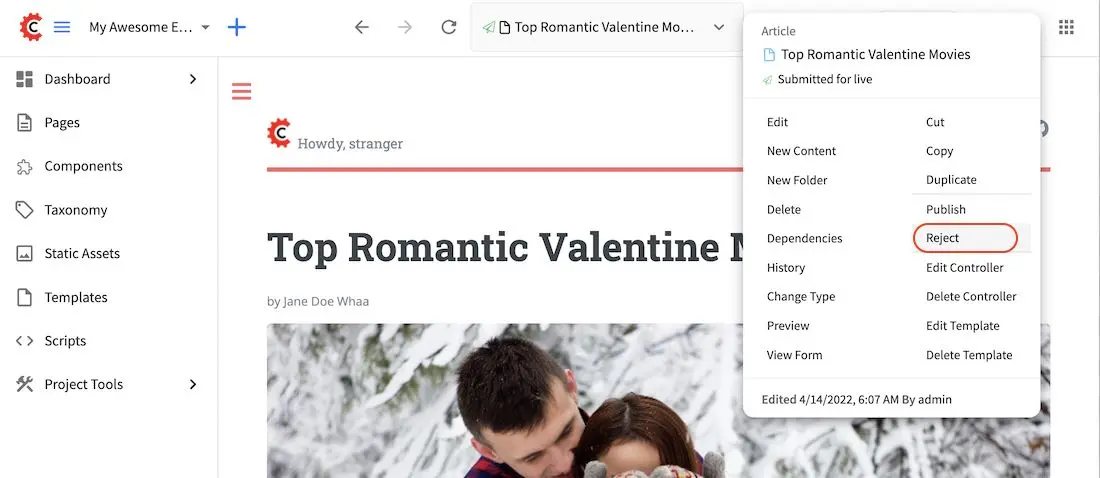
Yet another way to access the Publish option is by going to the Sidebar and then navigating to the article and opening it for preview. After opening the article for preview, go to the toolbar and click on Options (three dots) next to the address bar.
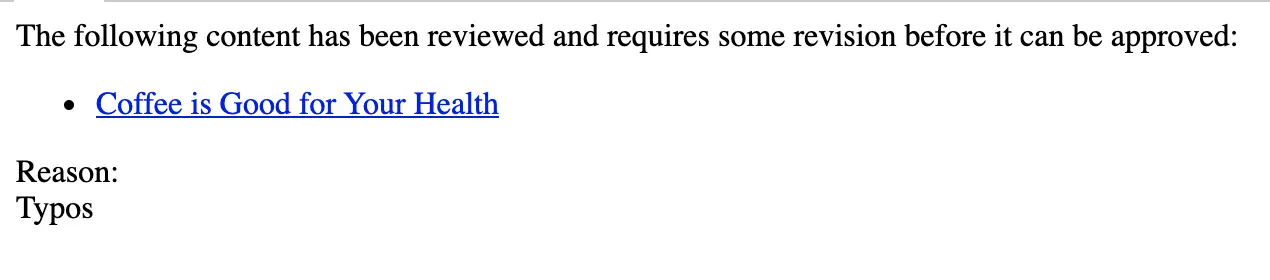
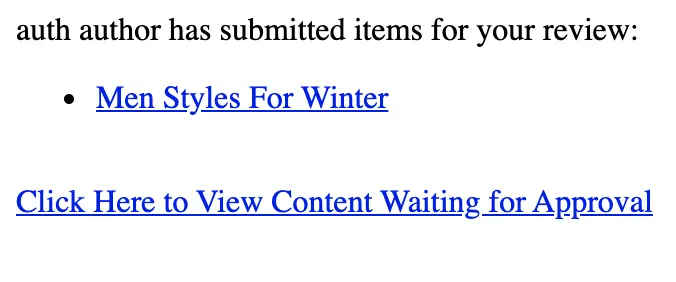
You can also preview the article that you want to approve by clicking on the link provided in the email sent to the approver, which should give you the Publish option too in the toolbar Options. Below is a sample notification email sent to the approver when user author sent a request to publish content. To modify/setup your notification emails, please contact your site administrator. To see more details on how to configure your notification emails, see the section for Site Administrators in Configure Simple Workflow Notifications and Dialog Messages
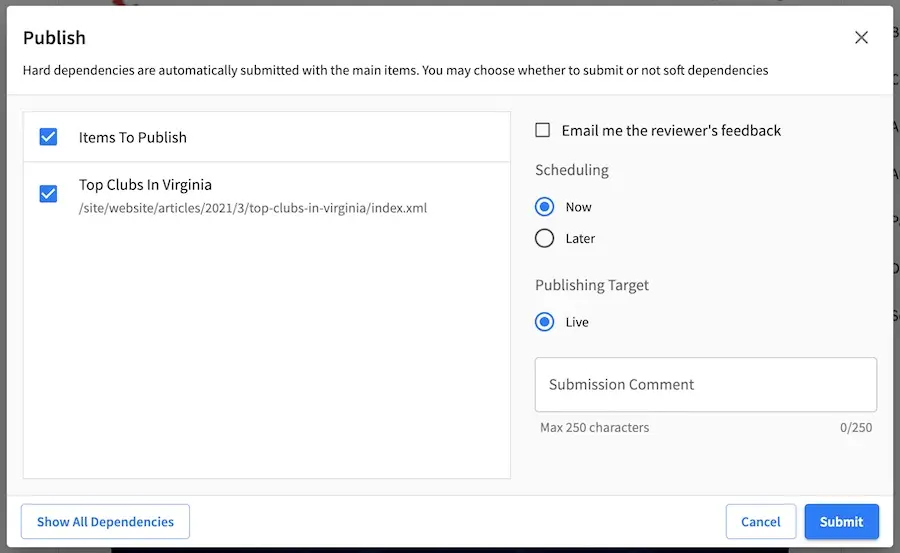
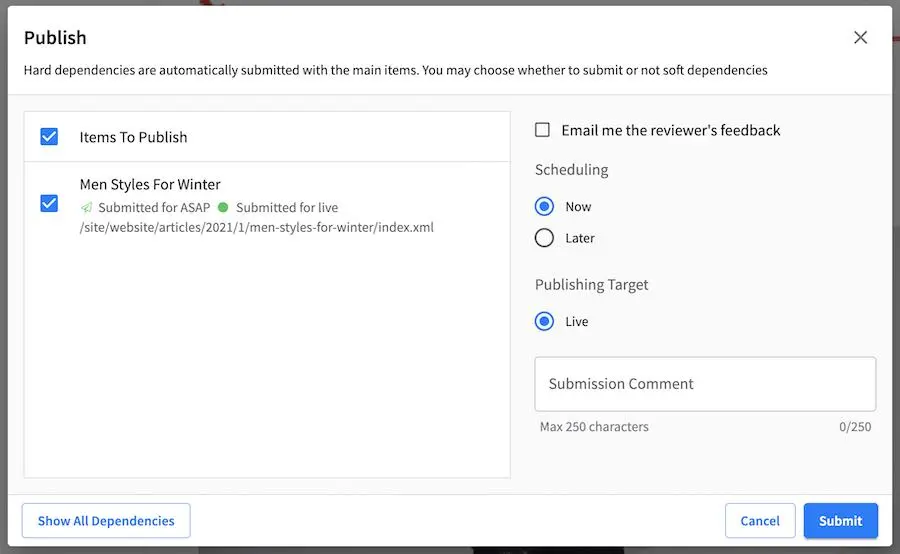
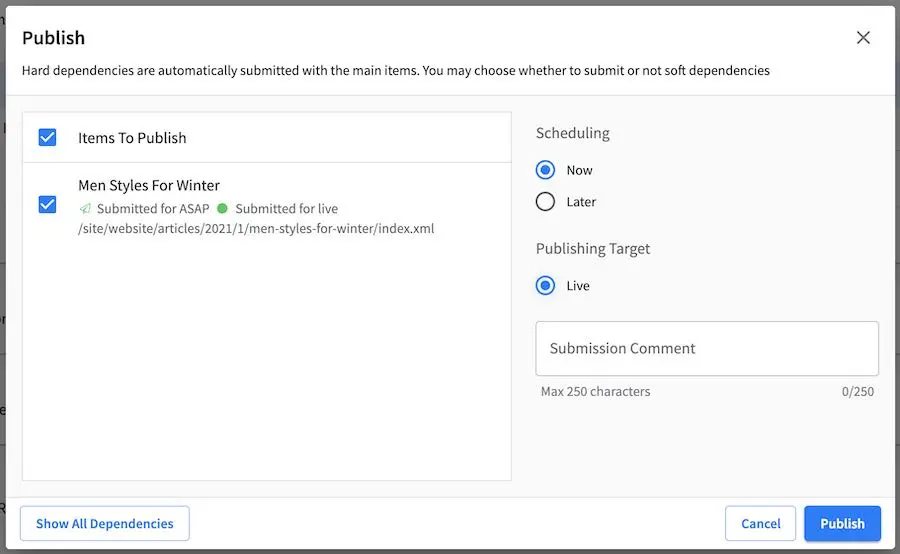
Below is the dialog that loads after clicking on Publish. The item scheduling selected in the dialog depends on what the requester has chosen when the request to publish was sent. In the image below. the selected scheduling for the item is for the Now. Click on Publish to publish the content now.
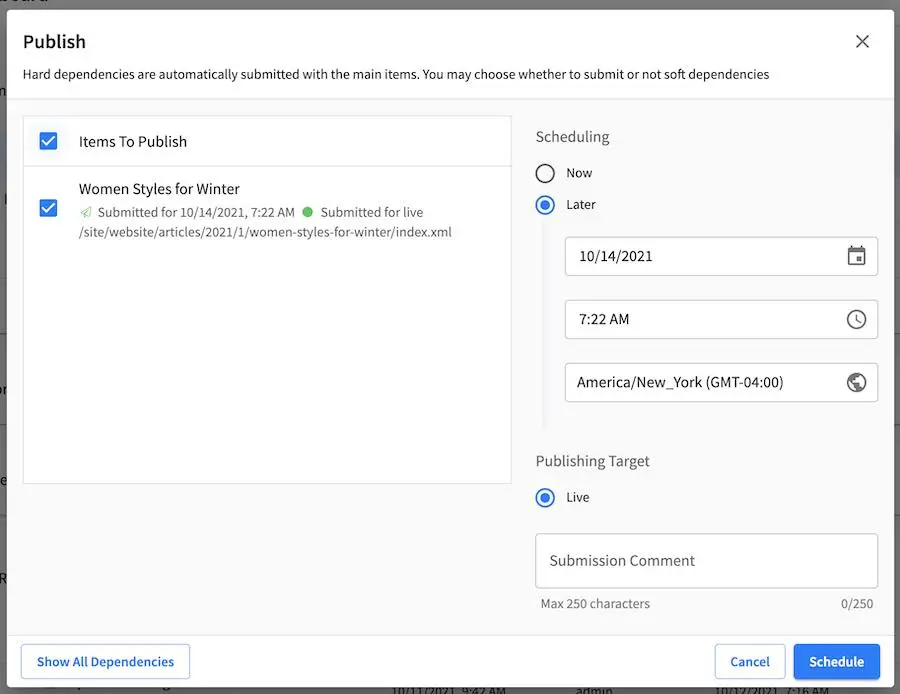
In the image below, the requester sent the request to publish with a schedule. Click on the Schedule button to schedule the publishing of the item. The dialog with the date and time when selecting the Later radio button allows the approver to schedule or reschedule the submitted item.
Once an item has been scheduled to be published, notice the workflow icon next to the article in the Sidebar nav tree, the dashboard and in the context nav when you preview the scheduled for publish item.
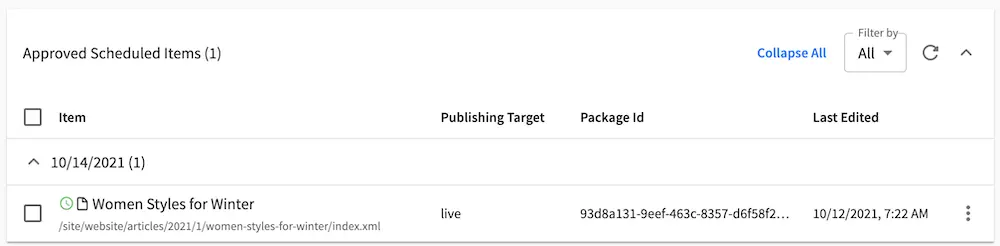
The dashboard allows batches of scheduled and non-scheduled items to be pushed live at the same time. Clicking on Publish will change the schedule of all items to be pushed live at the same time.
Reject Publish Request
To reject a request for publish, open the item for preview, then in the toolbar Options, select Reject. Another way to access the Reject option is by opening the dashboard and placing a check mark next to the item to be rejected, Reject should now be available in the context nav.
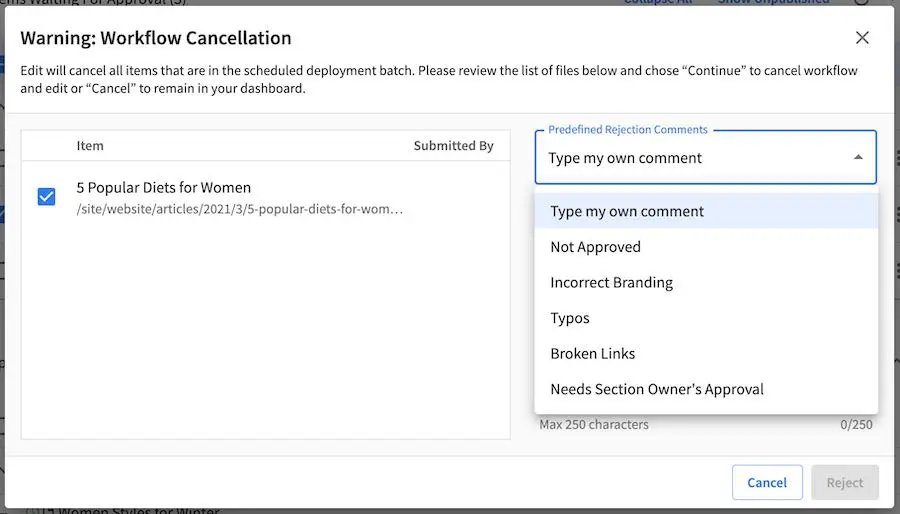
Approvers may type their own rejection comments or pick canned rejection reasons from the drop-down menu. Once selected, the editable text area field will be filled with the corresponding rejection notice / ready for comments in the Rejection Comment box.
Once an item has been rejected, a notification email will be sent to the requester. Below is an example notification email of rejection: