
Page Content Type
Page content types are top level container types that lets you define the layout/structure and functionality of content/components. To create a new page content type, click on ![]() from the Sidebar
from the Sidebar
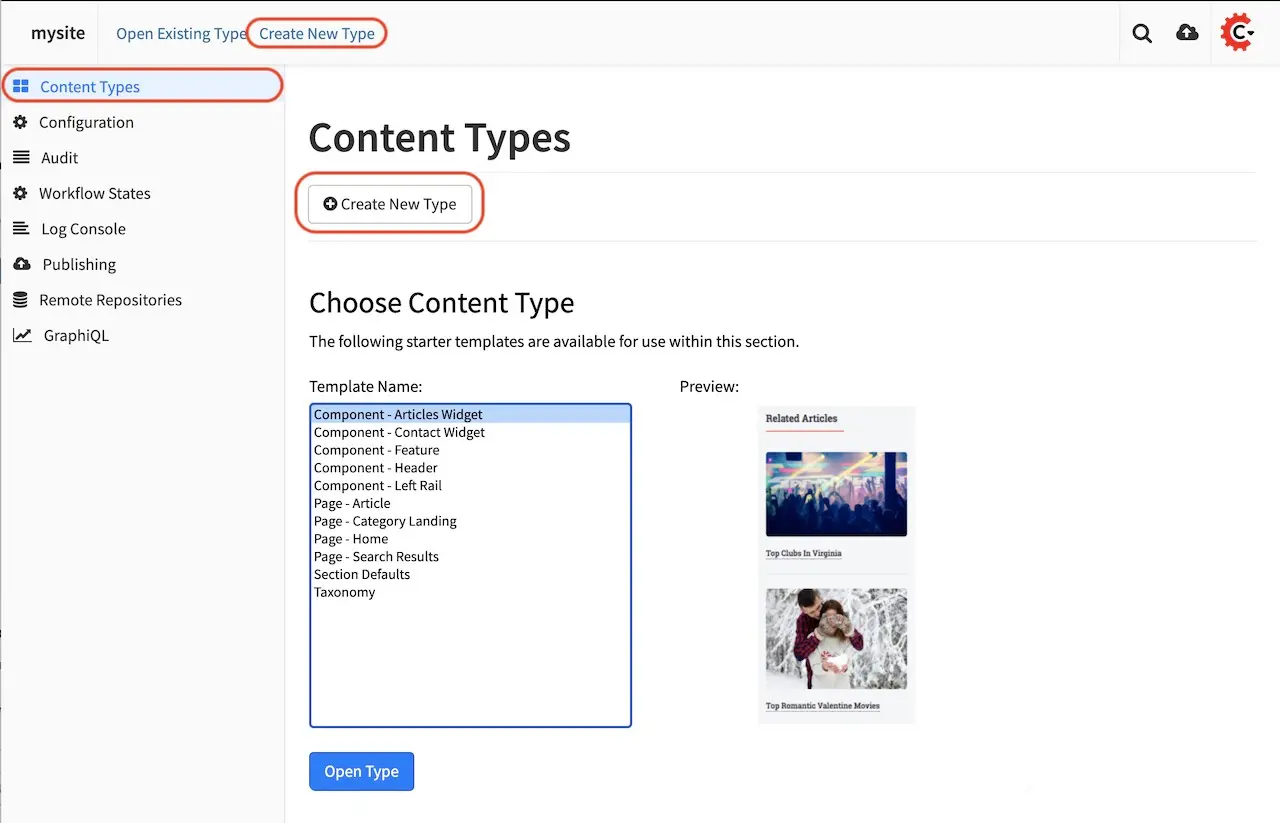
Click on Content Types, then select Create New Type
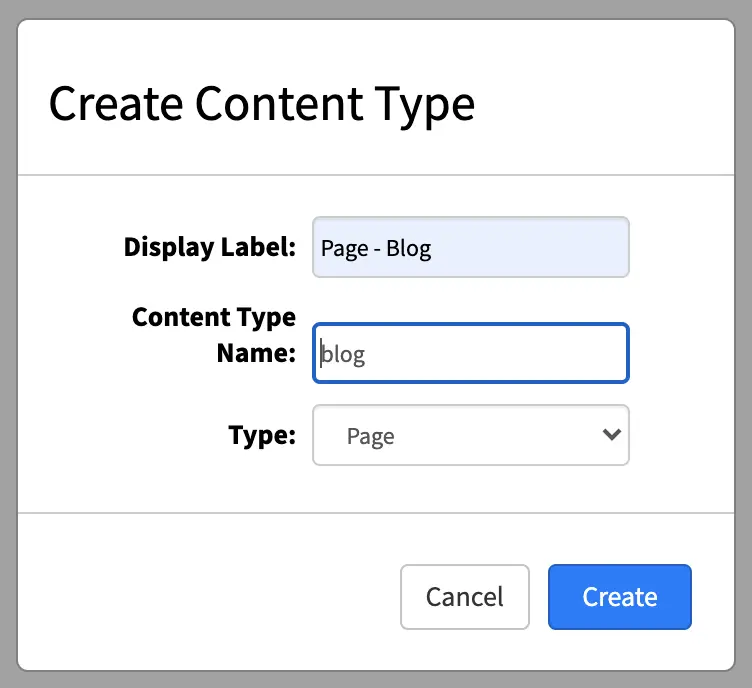
Enter a Display Label and content type name for your new page content type, then select Page as Type and then click on the Create button
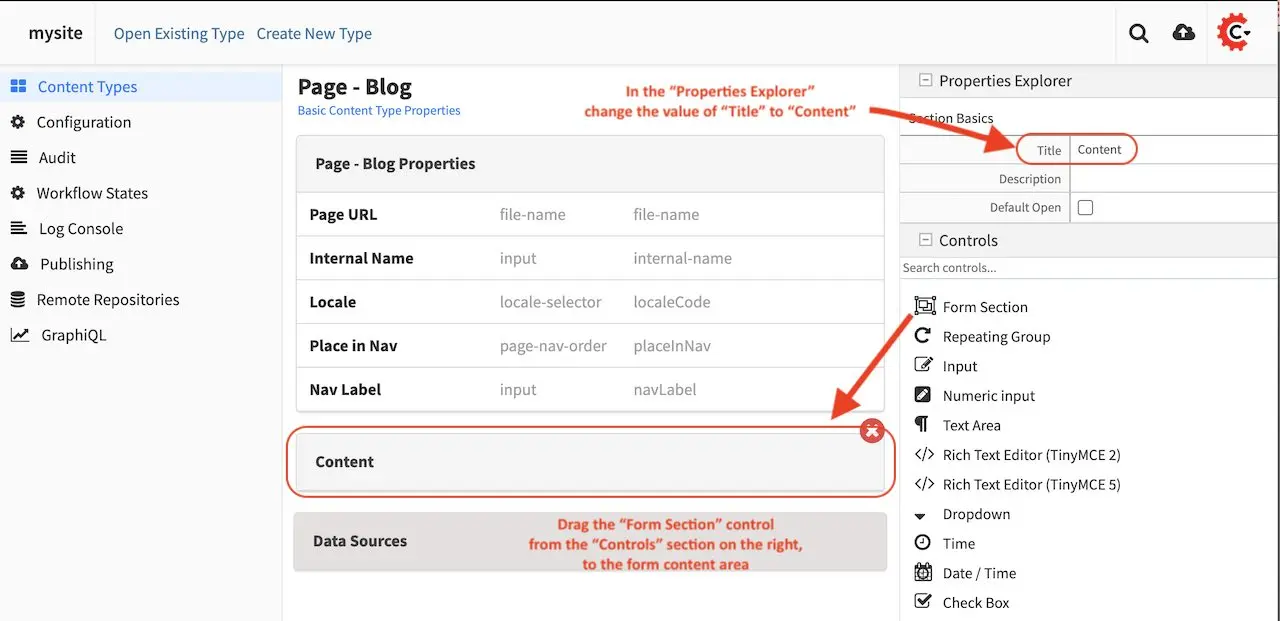
We’ll now start to construct the layout of the page. A content type has three ingredients: the model, the view and the controller.
Model
We’ll start building the model first, which is the form that Authors will be using to enter content into. We’ll add a form section called Content to the form and name it accordingly.
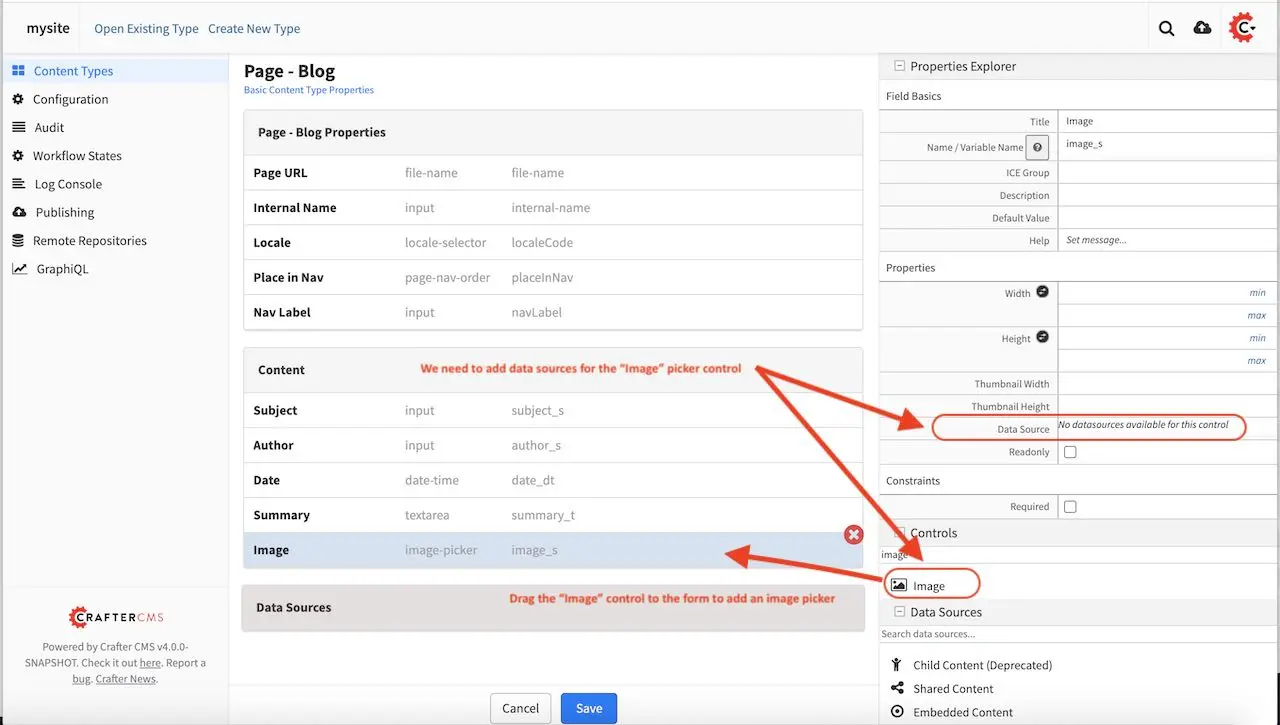
We’ll add a few more things to our model by dragging controls and data sources to the form. We’re creating a page template for a blog entry, so at a minimum, we’ll add some input fields for the title and author names, a date/time field, an image picker and it’s corresponding data sources and a rich text editor inside a repeating group control so Authors can add as many sections as they want.

Here we’re adding an image picker to the form. Notice that we’ll need to add data sources for the image picker to get images from. There are at least two sources that the image picker can get images from. One is from images uploaded from the desktop, the other is for existing images listed in the Static Assets folder in the Sidebar.
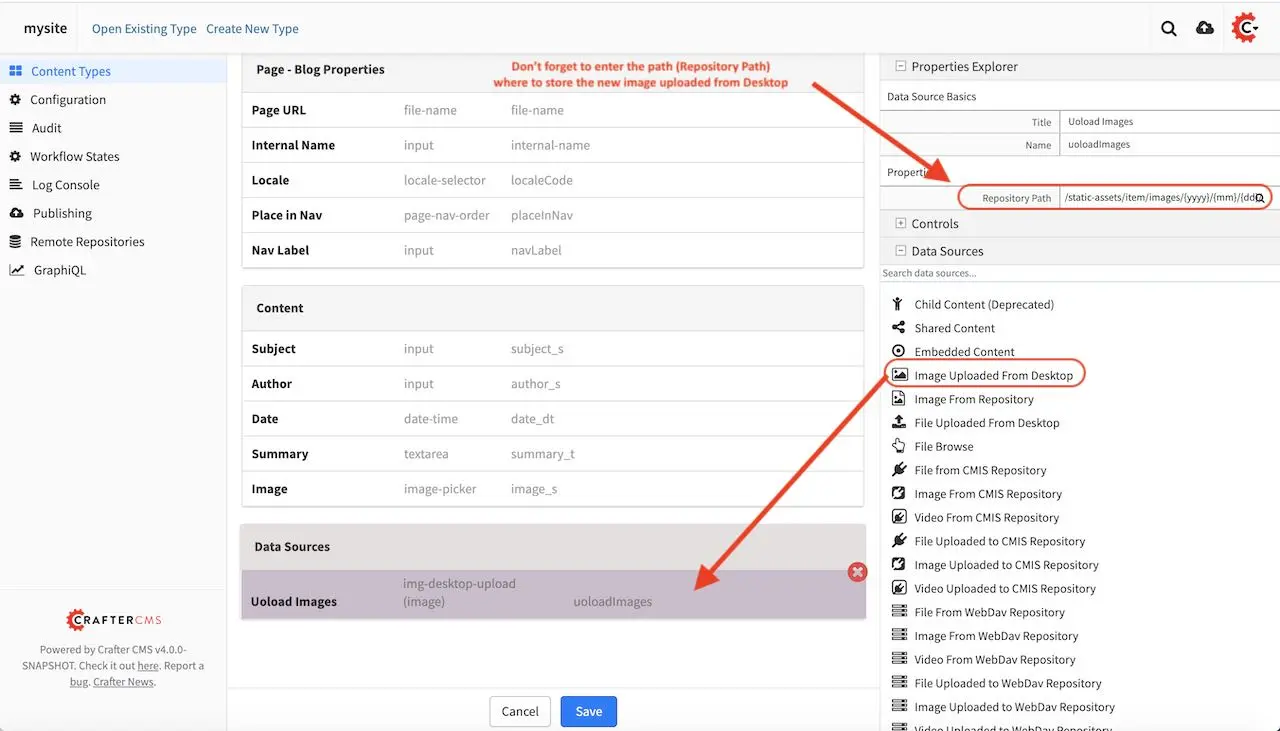
We’re now going to add a data source for our image picker, by dragging the Image Uploaded from Desktop from the Data Sources list on the right to the form in the section Data Sources. Don’t forget to enter the path where to store the new image uploaded from desktop in the Repository Path field under the Properties Explorer
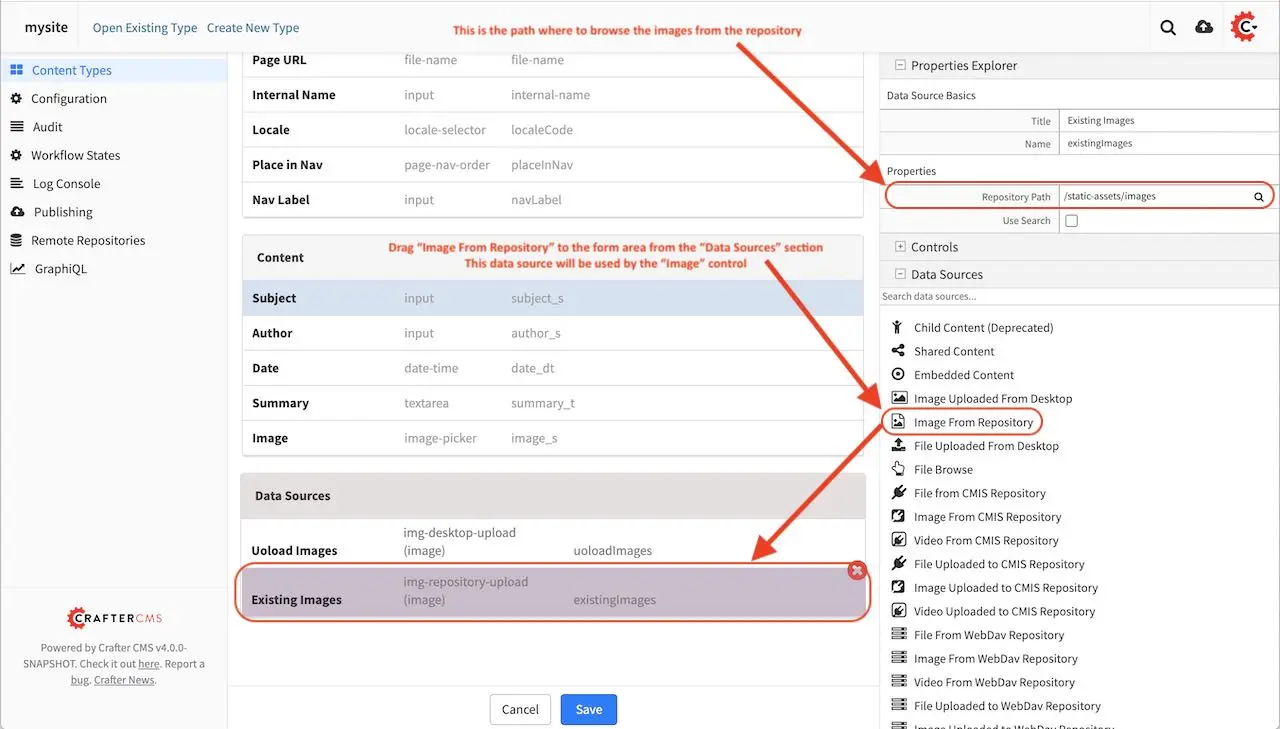
We’ll also add the data source Image From Repository by dragging it to the Data Sources section in the form. Don’t forget to add the path where to browse existing images from the repository
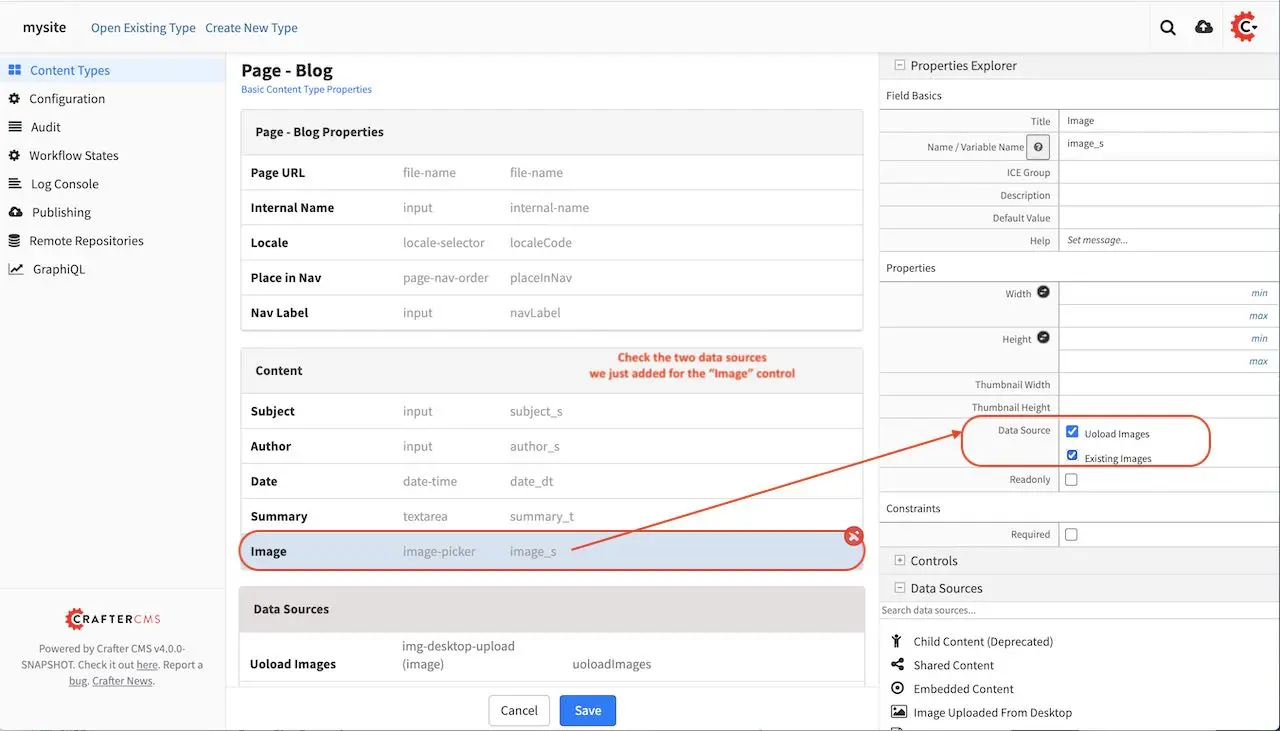
We’ll go back to the Image Picker control on the form to make sure the two data sources we added are checked as sources for the Image Picker
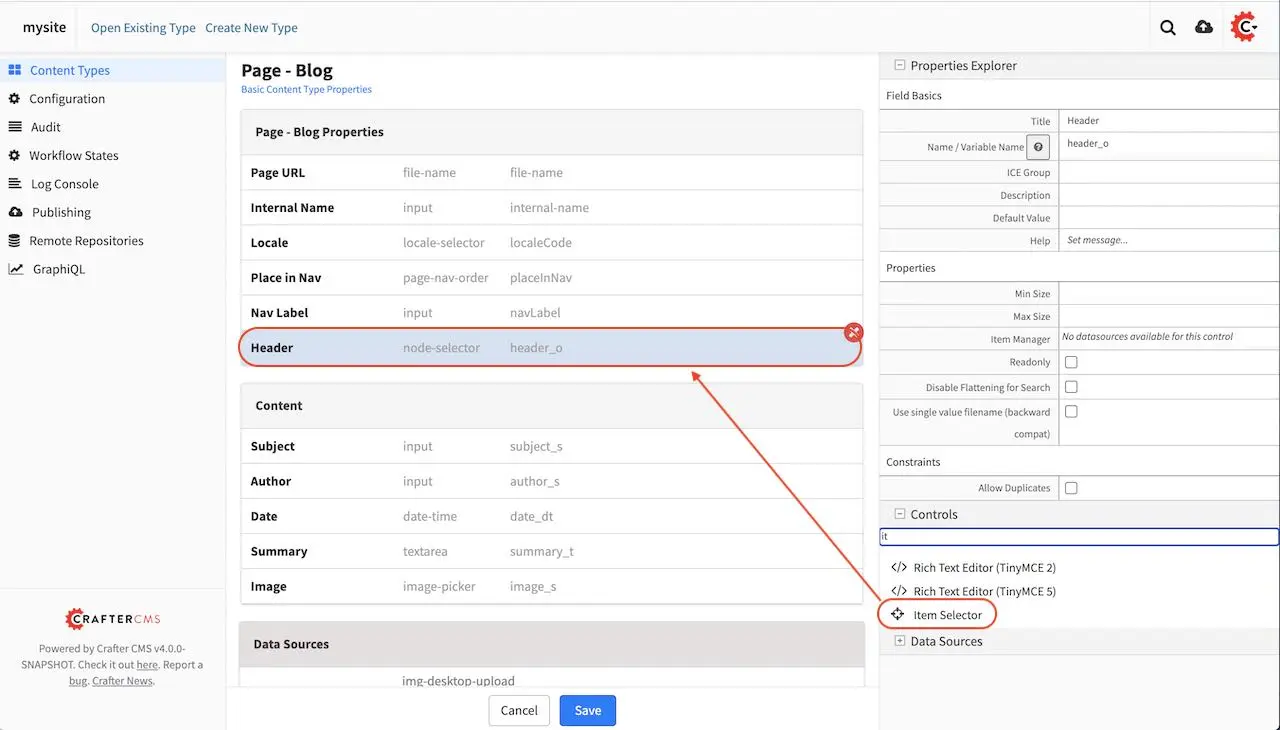
We’ll be adding a header component and a left-rail component inherited from the home page. To add a component to the form, drag the Item Selector control to the form in the Page - Blog Properties section. We’ll be adding two components to the form, one for the Header and one for the Left-rail
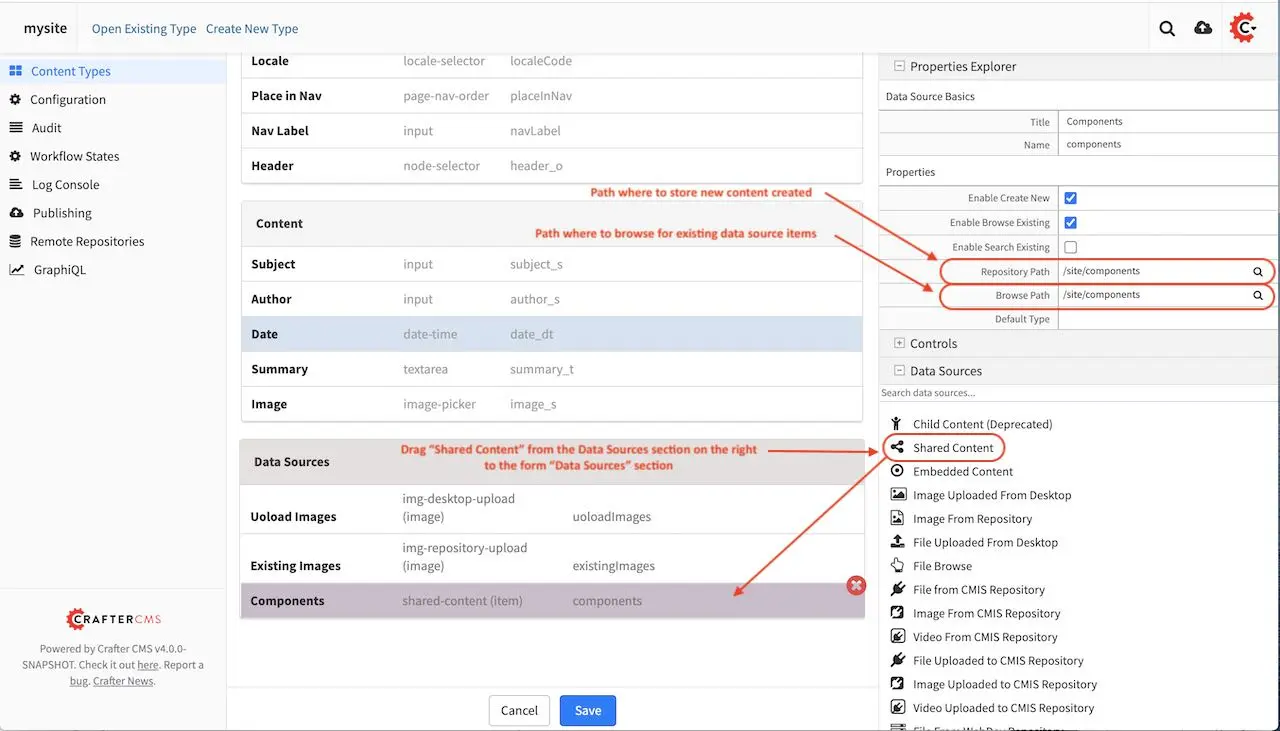
We’ll need to add a data source for the two Item Selectors we just added to the form by dragging Shared Content to the Data Sources section to the form and naming it Components. Don’t forget to add the path where to store new content created under the Repository Path field in the Properties Explorer.
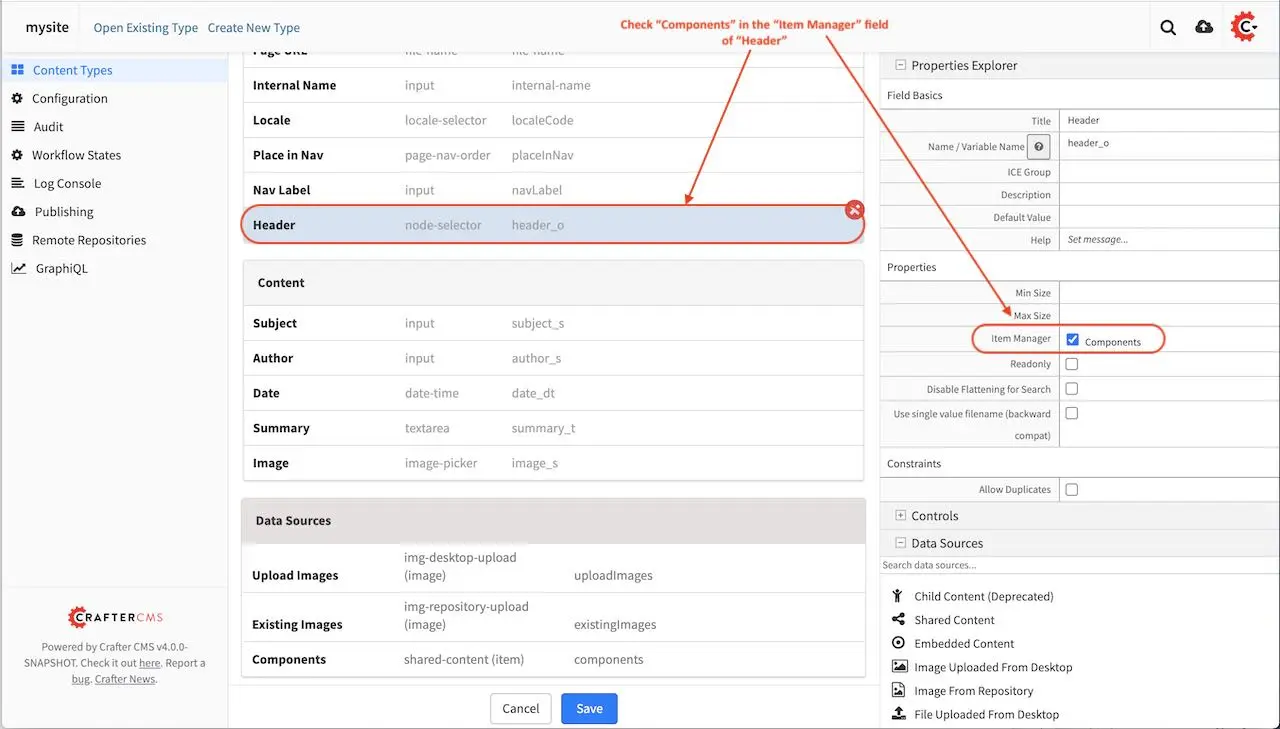
We’re going back to the Item Selectors we added to the form and check Components as data source for our control
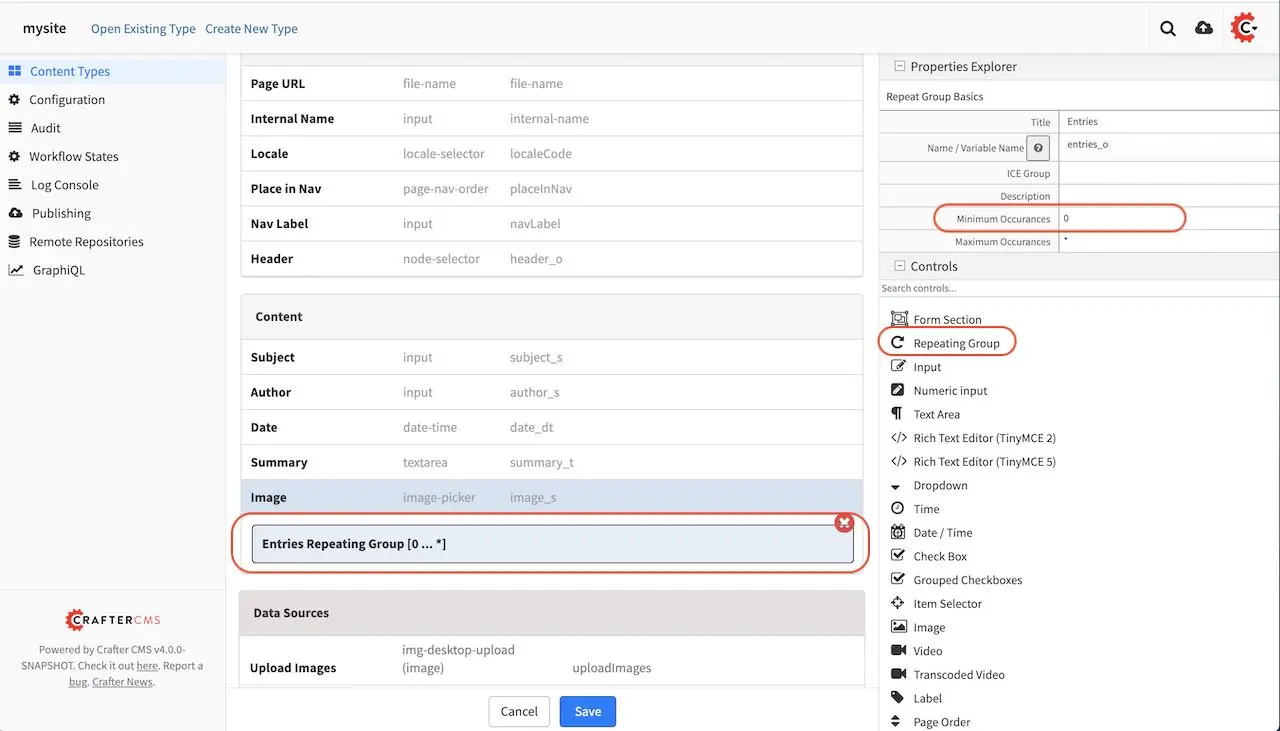
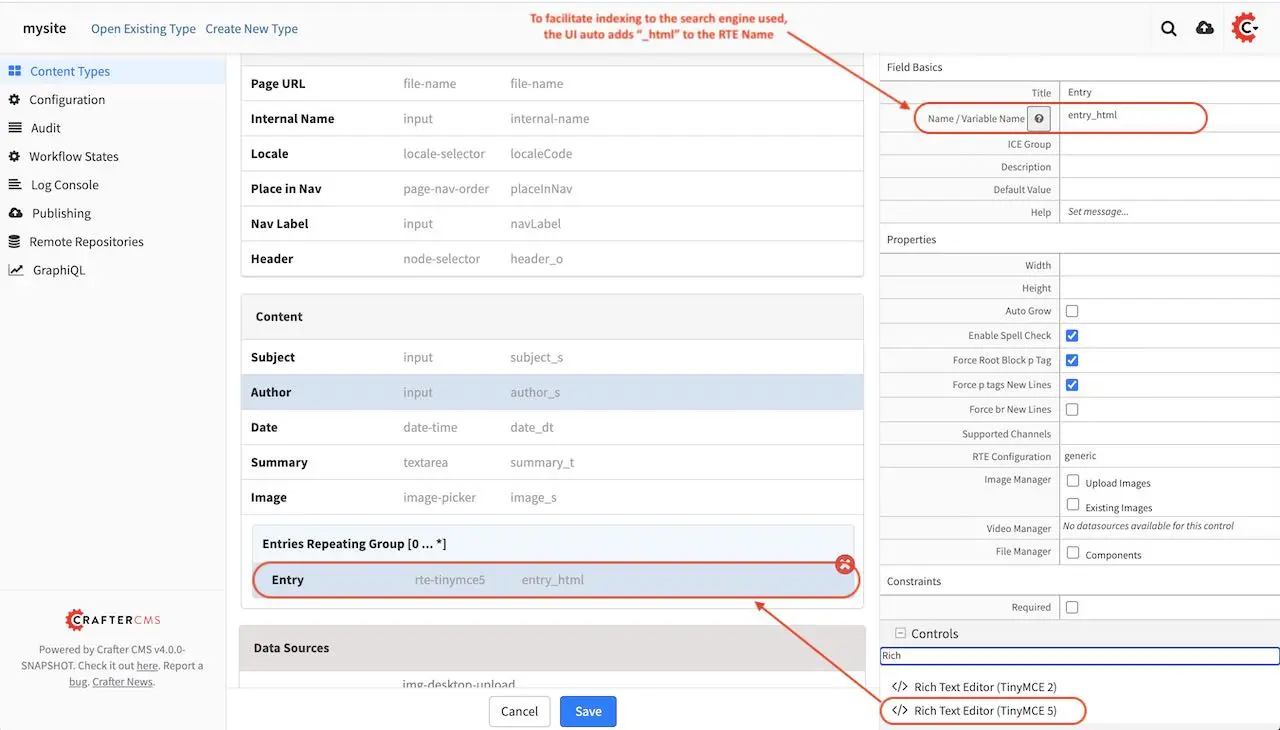
Next we’ll add a Repeating Group control to the form, with a minimum of 1 occurrence, which can be specified in the Properties Explorer section, in the Minimum Occurrences field
In the Repeating Group control, we will add an RTE (Rich Text Editor). In order for the content to be searchable, it needs to be indexed. To facilitate indexing, the suffix _html should be appended to the variable name given to the RTE. In this case, the RTE’s variable name is entry_html. For more information on variable names and search indexing , please see the section Form Control Variable Names
The model for our template is done. You can add some other controls by dragging and dropping controls from the Controls section to the form. To learn more about all the controls available, please see Form Controls. To learn more about the data sources available, please see Data Sources.
View
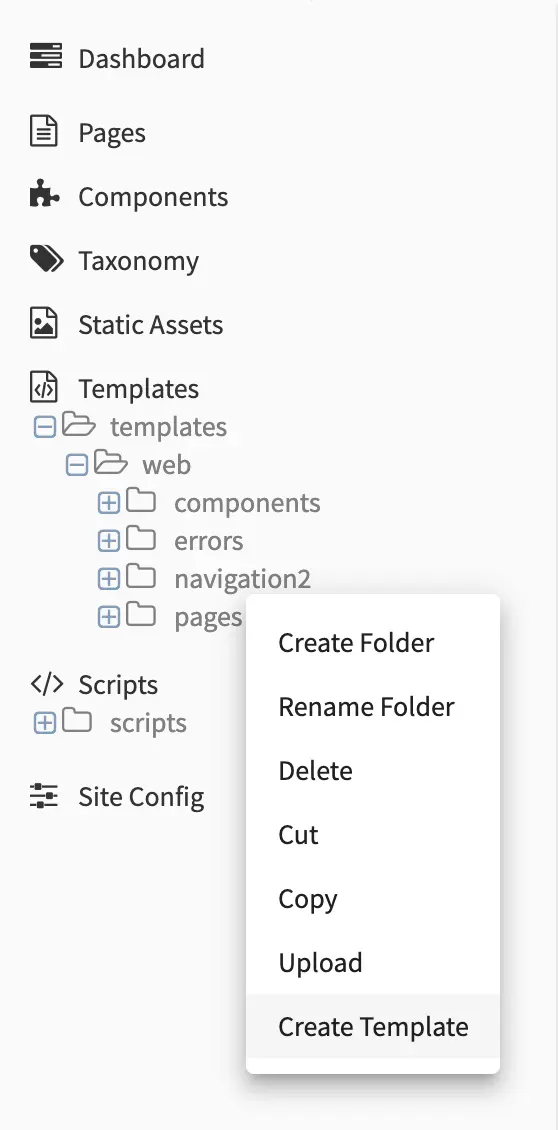
We’ll now build the view for our template, which is the freemarker template file that renders the content, typically to HTML markup. There are two ways to create the freemarker template file for our template. One way is to open the Sidebar menu in Studio, then navigate to the Templates folder, depending on how your project is setup, you may want to navigate to the subfolder in your Templates folder where you want to create the freemarker template file. Once you are in the desired subfolder, right click on that folder then select Create Template
The other way of creating your freemarker template, is to go to the Properties Explorer in the Content Type model, then click on the Display Template field, a magnifying glass and a pencil will appear on the field. To create a template, click on the pencil.
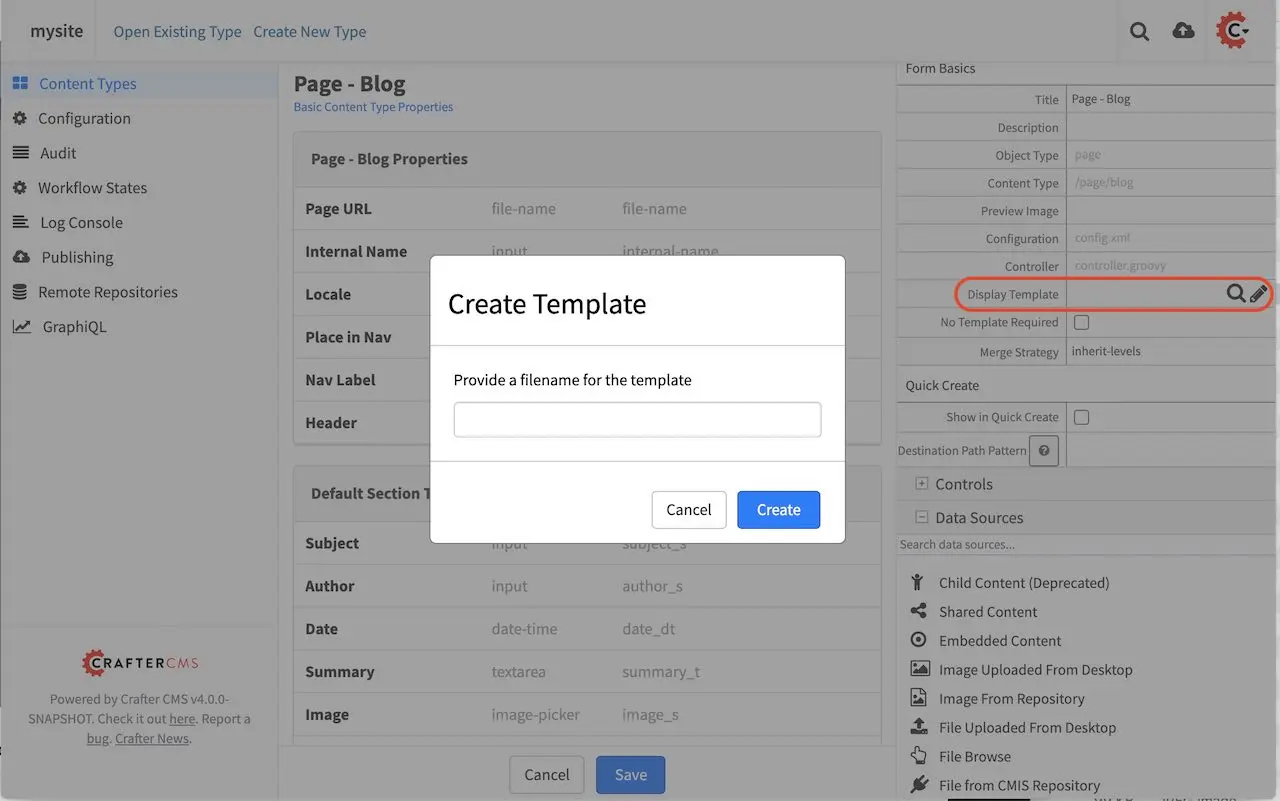
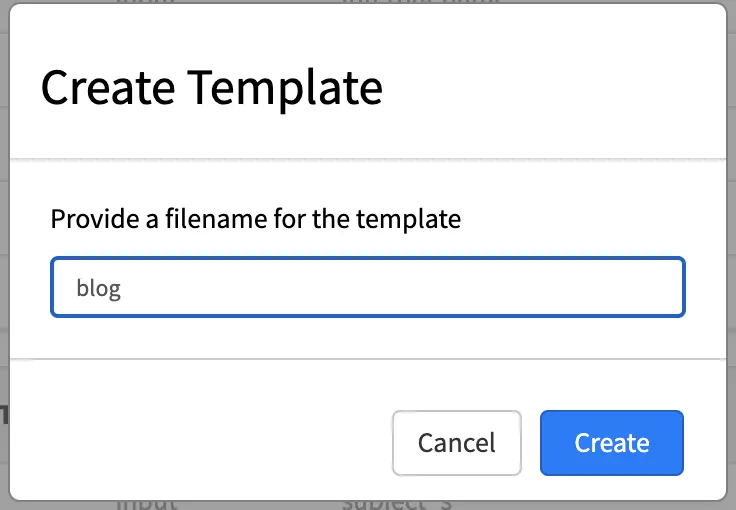
Either way of starting to create your new ftl template, a Create Template dialog will appear. It will then ask you for a filename for the freemarker template you’re creating, then click on the Create button.
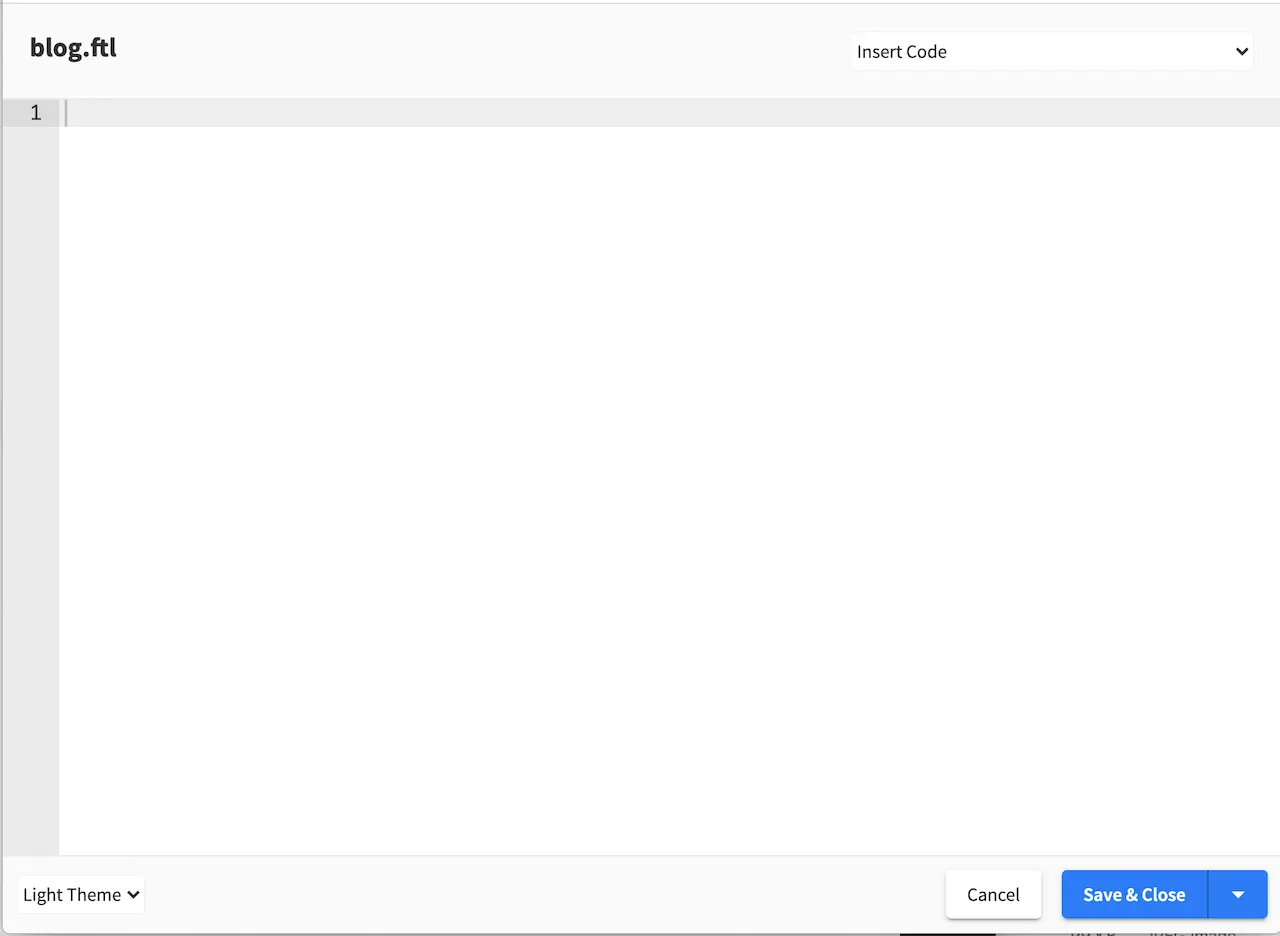
A dialog will appear with a blank template.
At the top right of the dialog, you can use some Template code examples from a drop down list with the caption Insert Code. Here’s the list of available template code examples.
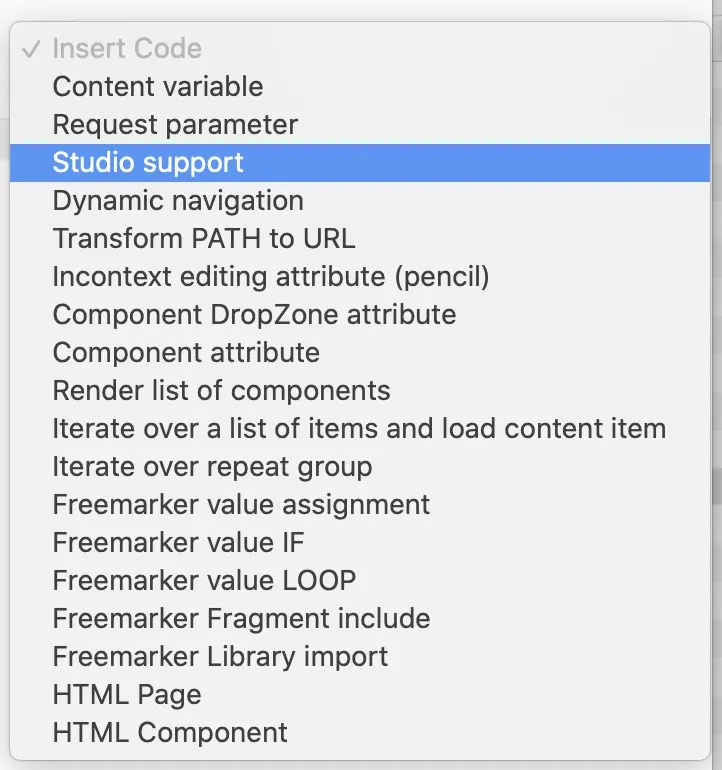
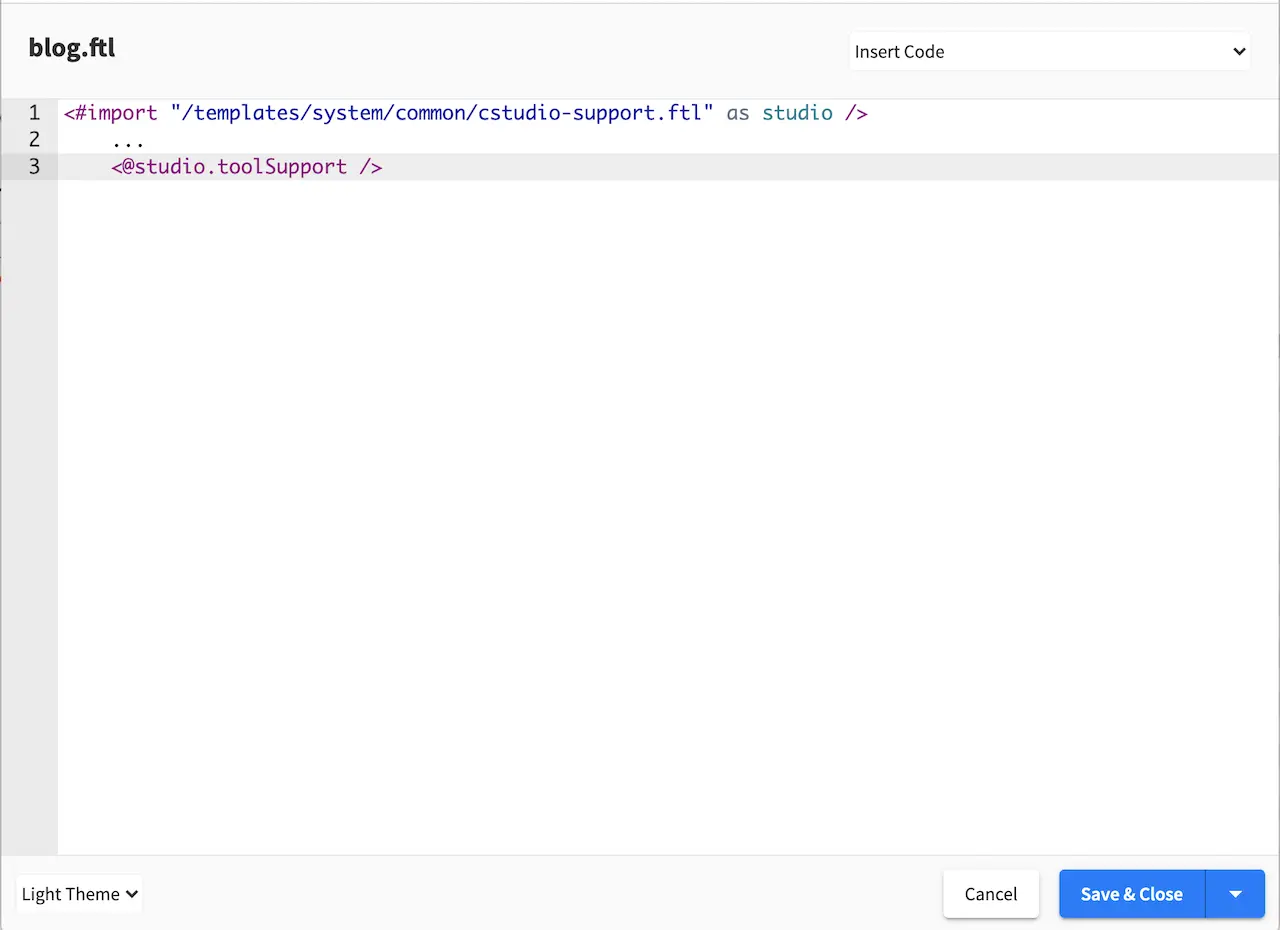
For the template we are creating, we will select Studio support from the drop down list to enable authoring support.
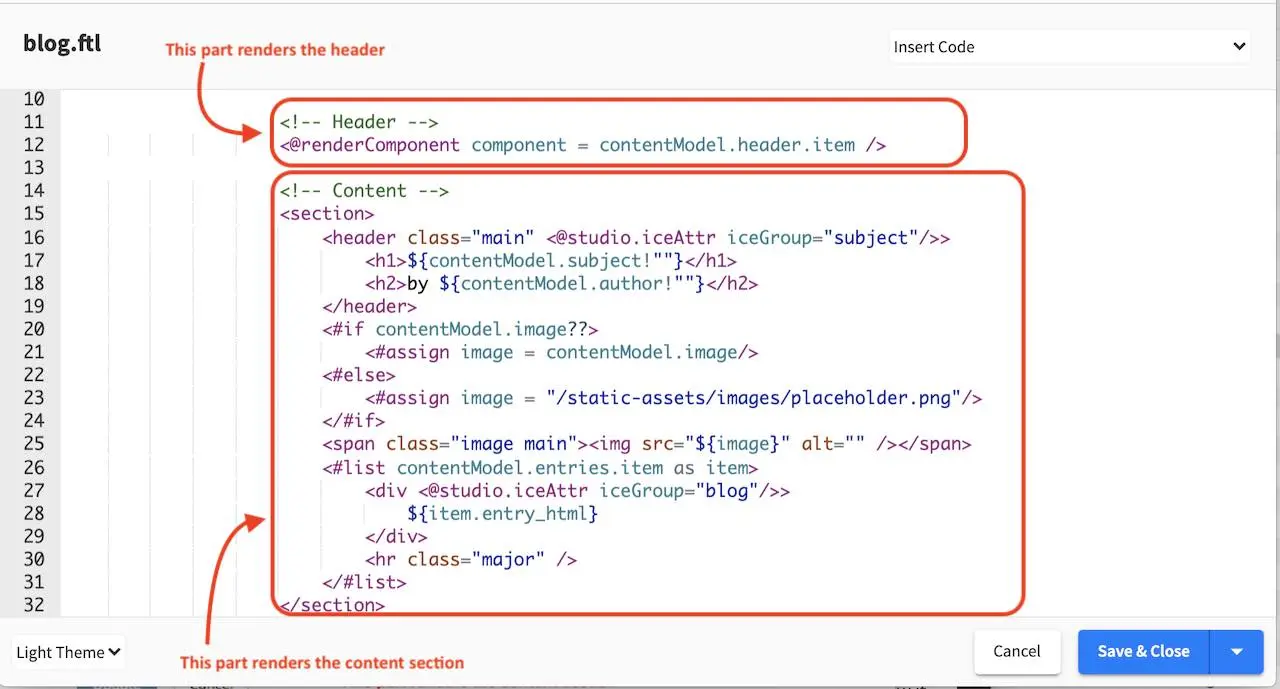
We will now start filling in the template of how we want the content captured in the model is rendered to html in this case. In the image below, we render the header component and the other fields in the Content section of our model. Please note how fields in the model are rendered through the FTL template. To learn more, please see the section FreeMarker (Templating) API
<!-- Header -->
    <@renderComponent component = contentModel.header.item />
 1<!-- Content -->
 2  <section>
 3    <header class="main" <@studio.iceAttr iceGroup="subject"/>>
 4      <h1>${contentModel.subject!""}</h1>
 5      <h2>by ${contentModel.author!""}</h2>
 6    </header>
 7    <#if contentModel.image??>
 8      <#assign image = contentModel.image/>
 9    <#else>
10      <#assign image = "/static-assets/images/placeholder.png"/>
11    </#if>
12    <span class="image main"><img src="${image}" alt="" /></span>
13    <#list contentModel.entries.item as item>
14      <div <@studio.iceAttr iceGroup="blog"/>>
15        ${item.entry_html}
16      </div>
17      <hr class="major" />
18    </#list>
19  </section>
Controller
A controller is not necessary for a content type. To show how to create a controller for our new content type, we will create a custom controller. In the preceding section, we created a new content type (template) Page - Blog. We will now add a couple of featured articles at the bottom of the page depending on the active segment set in targeting. To be able to display articles depending on the active segment set, we will need to get a list of articles tagged for the active segment. This can be done by adding a script that gets executed to get the list of articles tagged for the segment selected before the page is rendered.
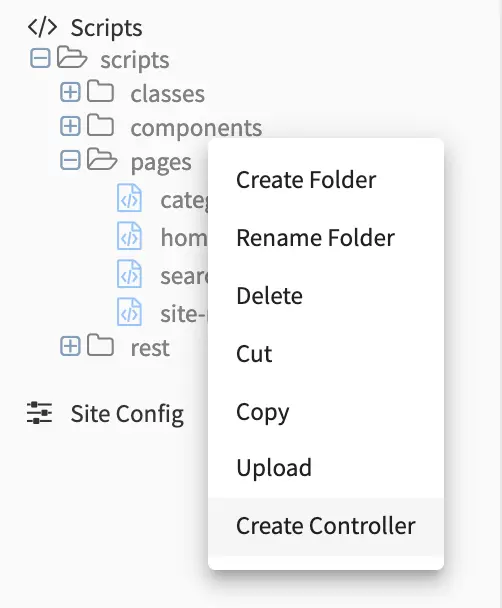
Open the Sidebar menu and navigate to the Scripts folder. Click on the Scripts folder then scripts. Right click on the folder pages, then select Create Controller
Enter a name for the controller, then click on the Create button. Since we are creating this controller for our Page-Blog template, we will name the script blog.groovy. Putting the script under scripts->pages and naming it after the page content type, binds the script to our page.
We can now start adding the script to get a list of articles depending on the active segment.
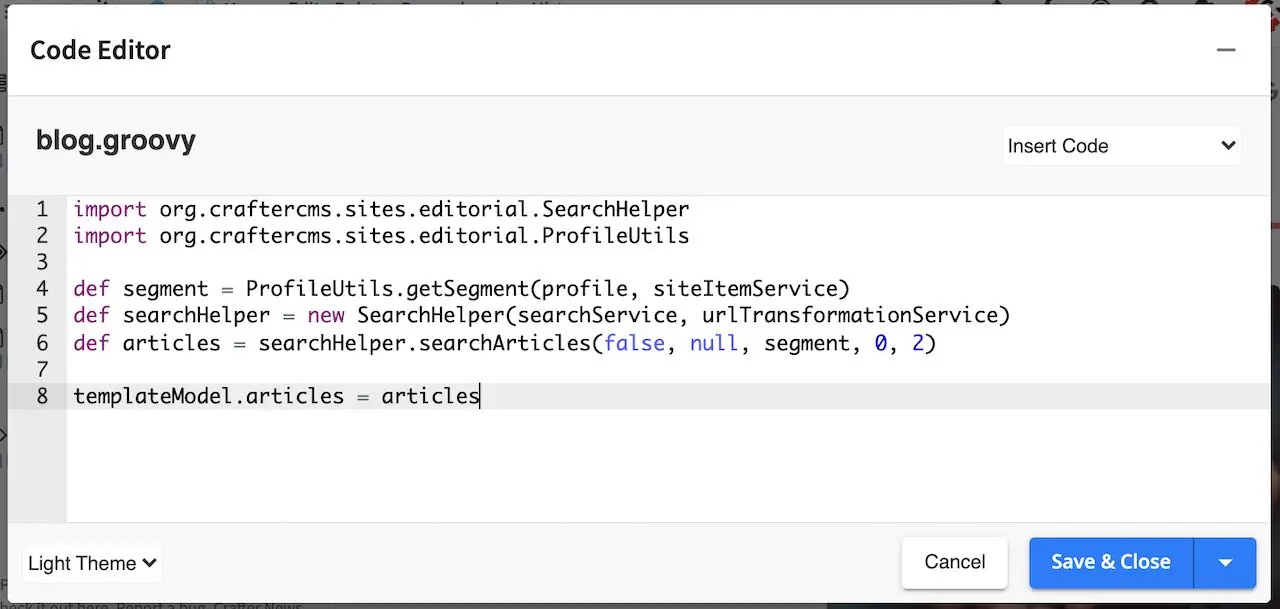
1import org.craftercms.sites.editorial.SearchHelper
2import org.craftercms.sites.editorial.ProfileUtils
3
4def segment = ProfileUtils.getSegment(profile, siteItemService)
5def searchHelper = new SearchHelper(searchService, urlTransformationService)
6def articles = searchHelper.searchArticles(false, null, segment, 0, 2)
7
8templateModel.articles = articles
There are two ways to bind a script/controller to a page/component. The first way, as we have seen is to put the script under Scripts->Pages or Scripts->Components, and name the script after the page or component type. We’ll show the other way how to bind a script to a page/component in the next section Component Content Type
To find out more about page and component scripts, please see Page and Component Scripts.
Now that we have our controller, we just need to add code to the freemarker template (view) to display the list of articles returned by the script.
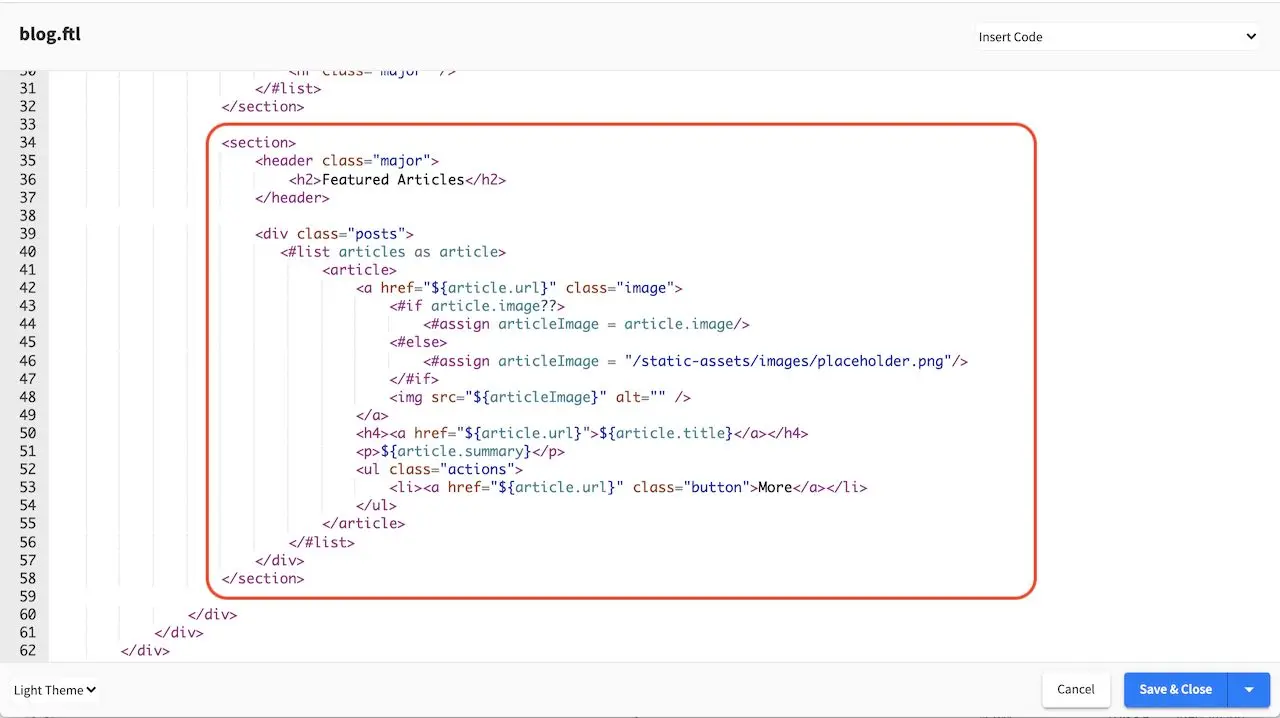
 1<section>
 2  <header class="major">
 3    <h2>Featured Articles</h2>
 4  </header>
 5
 6  <div class="posts">
 7    <#list articles as article>
 8      <article>
 9        <a href="${article.url}" class="image">
10          <#if article.image??>
11            <#assign articleImage = article.image/>
12          <#else>
13            <#assign articleImage = "/static-assets/images/placeholder.png"/>
14          </#if>
15          <img src="${articleImage}" alt="" />
16        </a>
17        <h4><a href="${article.url}">${article.title}</a></h4>
18        <p>${article.summary}</p>
19        <ul class="actions">
20          <li><a href="${article.url}" class="button">More</a></li>
21        </ul>
22      </article>
23    </#list>
24  </div>
25</section>
As you can see from the controller we just added, the controller is used to customize your page by enabling you to run codes before the page is rendered. To find out more about groovy APIs in CrafterCMS, please see the section Groovy API.