Setting up an LDAP server for development/testing using Apache Directory Studio
In this section, we will describe how to setup an LDAP server using Apache Directory Studio to test the LDAP authentication in Crafter Studio.
First, we’ll configure LDAP authentication in Crafter Studio ![]() , then proceed to install and setup the LDAP server using Apache Directory Studio, then finally login to Crafter Studio with the users setup in the LDAP server.
, then proceed to install and setup the LDAP server using Apache Directory Studio, then finally login to Crafter Studio with the users setup in the LDAP server.
Configure LDAP authentication in Crafter Studio 
We will first configure LDAP authentication in Crafter Studio ![]() . In your Authoring installation, go to
. In your Authoring installation, go to CRAFTER_HOME/bin/apache-tomcat/shared/classes/crafter/studio/extension and add the following lines to studio-config-override.yaml. (The server url, bindDN and password are all default values of the Apache Directory Studio) Stop and restart Crafter Studio after making your changes.
 1# Studio authentication chain configuration
 2studio.authentication.chain:
 3  # Authentication provider type
 4  - provider: LDAP
 5    # Authentication via LDAP enabled
 6    enabled: true
 7    # LDAP Server url
 8    ldapUrl: ldap://localhost:10389
 9    # LDAP bind DN (user)
10    ldapUsername: uid=admin, ou=system
11    # LDAP bind password
12    ldapPassword: secret
13    # LDAP base context (directory root)
14    ldapBaseContext: dc=example,dc=com
15    # LDAP username attribute
16    usernameLdapAttribute: uid
17    # LDAP first name attribute
18    firstNameLdapAttribute: cn
19    # LDAP last name attribute
20    lastNameLdapAttribute: sn
21    # Authentication header for email
22    emailLdapAttribute: mail
23    # LDAP groups attribute
24    groupNameLdapAttribute: ou
25    # LDAP groups attribute name regex
26    groupNameLdapAttributeRegex: .*
27    # LDAP groups attribute match index
28    groupNameLdapAttributeMatchIndex: 0
For more information on configuring LDAP authentication in Crafter Studio, please follow the guide here: Configure LDAP Authentication
Please note that the LDAP attributes are configurable and in our example above, we are using ou for the attribute for groupName instead of crafterGroup as listed in Configure LDAP Authentication
Install Apache Directory Studio
Download and install Apache Directory Studio from here: http://directory.apache.org/studio/
Setup the LDAP server
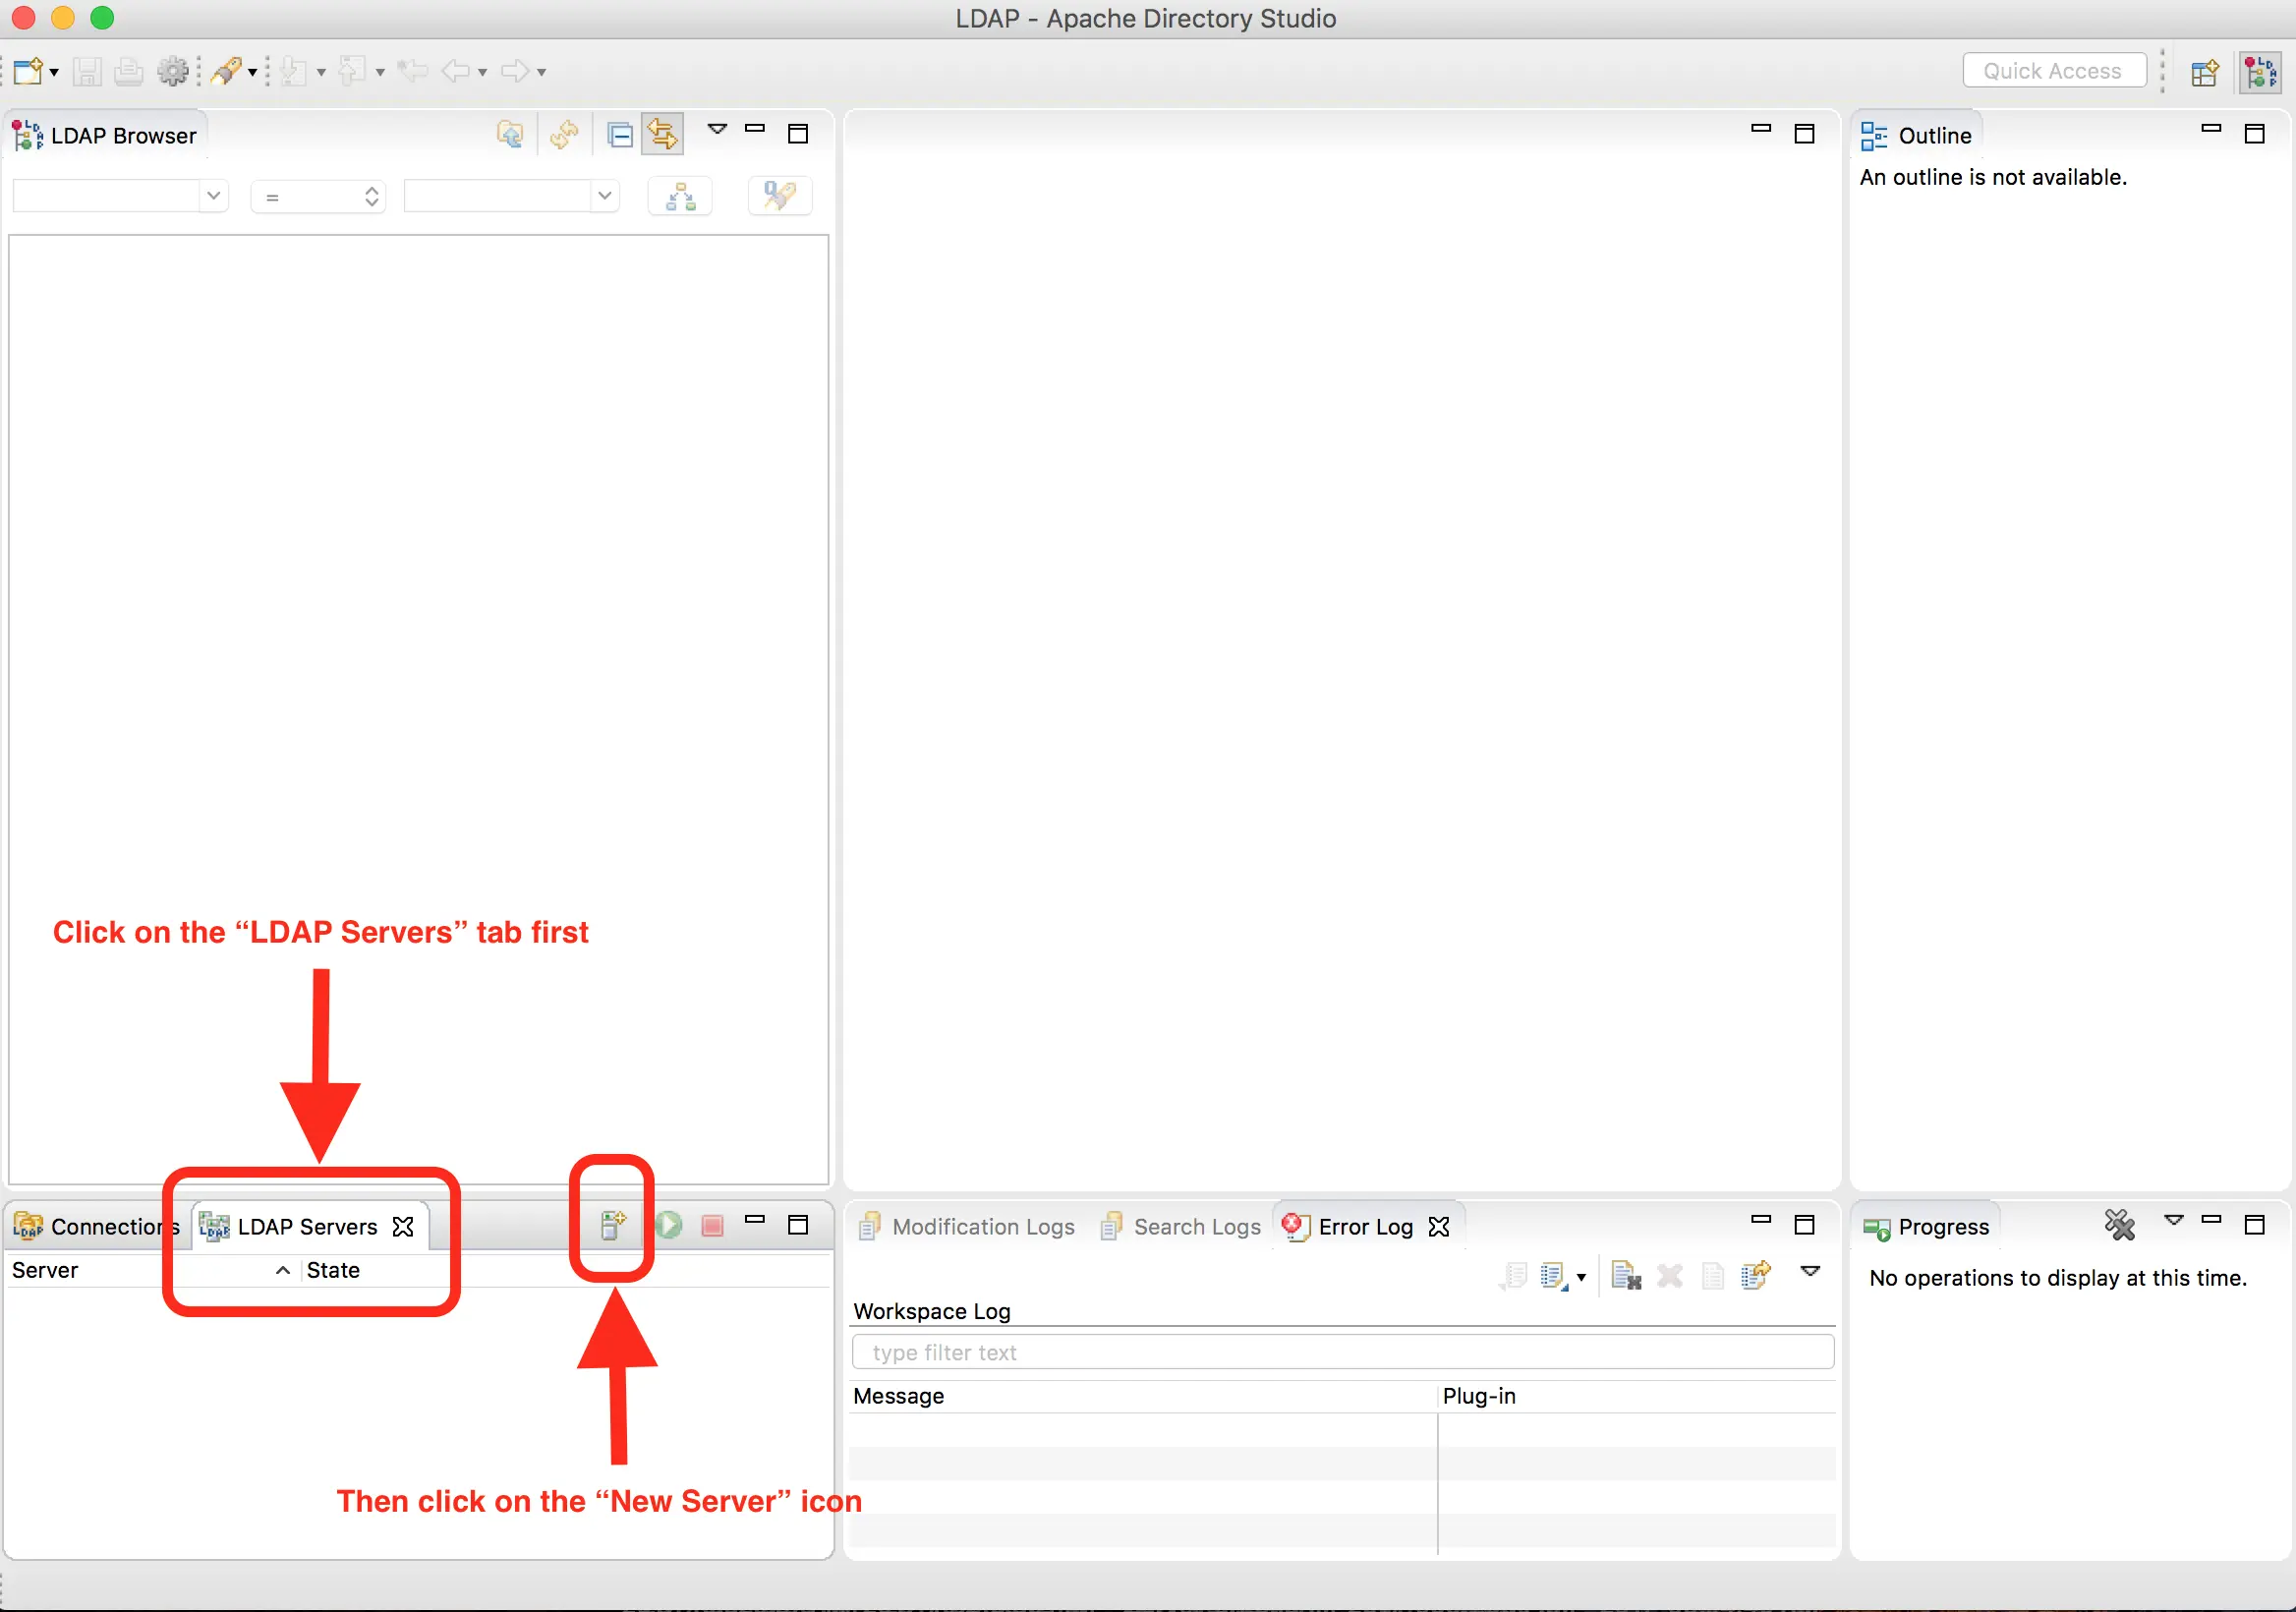
We will first create our LDAP server. Launch your Apache Directory Studio application. Notice the tabs on the lower left hand corner. Click on the LDAP Servers tab. To create the server, click on the New Server icon, the first icon to the right of the LDAP Servers tab.
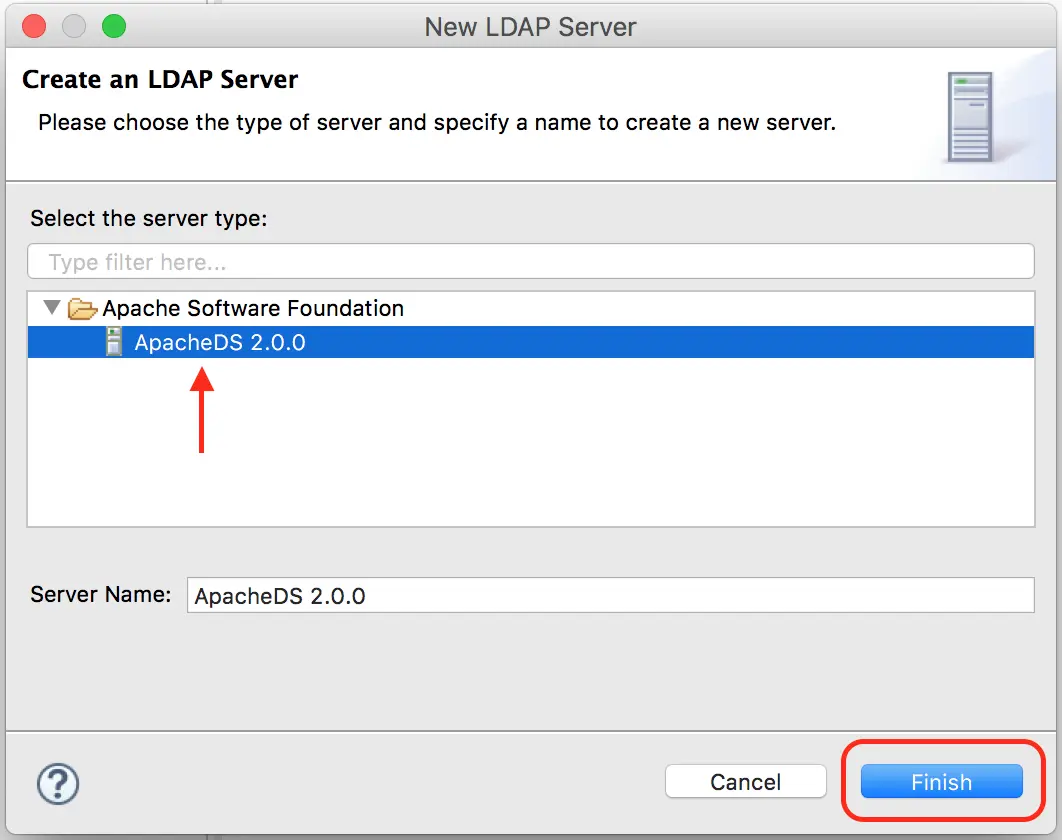
A dialog to create the server will appear, go the the Select the server type: section of the dialog. For our example, select ApacheDS 2.0.0 then click on the Finish button.
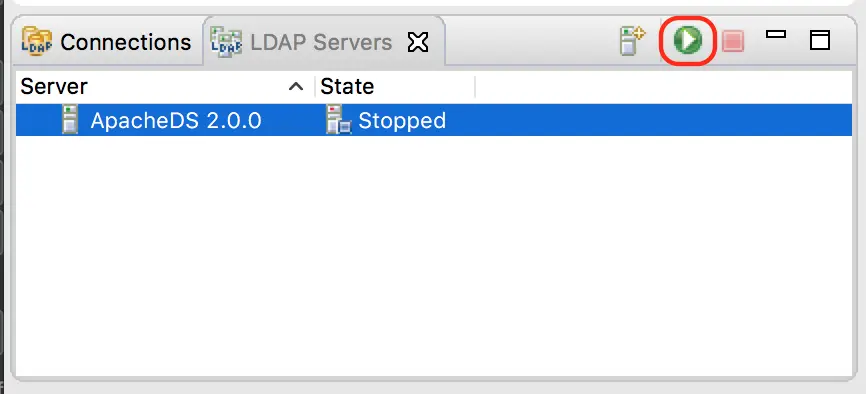
Next we’ll start our LDAP server. Click on the LDAP server we just created, ApacheDS 2.0.0, which will be displaying the status Stopped. To start the server, click on the green button right next to the tabs:
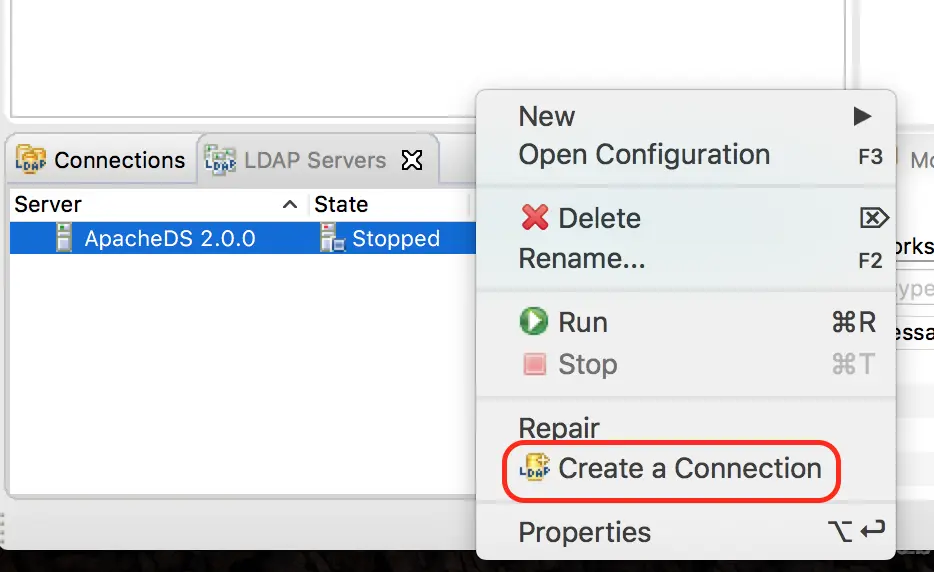
We’ll now need to connect the LDAP browser to our newly created LDAP server. To connect to the server, in the LDAP Server tab, right click on the server ApacheDS 2.0.0, then select Create a Connection
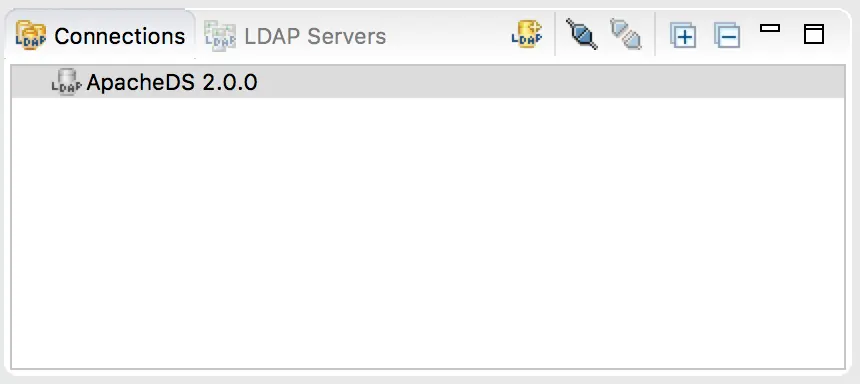
Click on the Connections tab, you should now see ApacheDS 2.0.0 listed.
Load some data into the LDAP Server
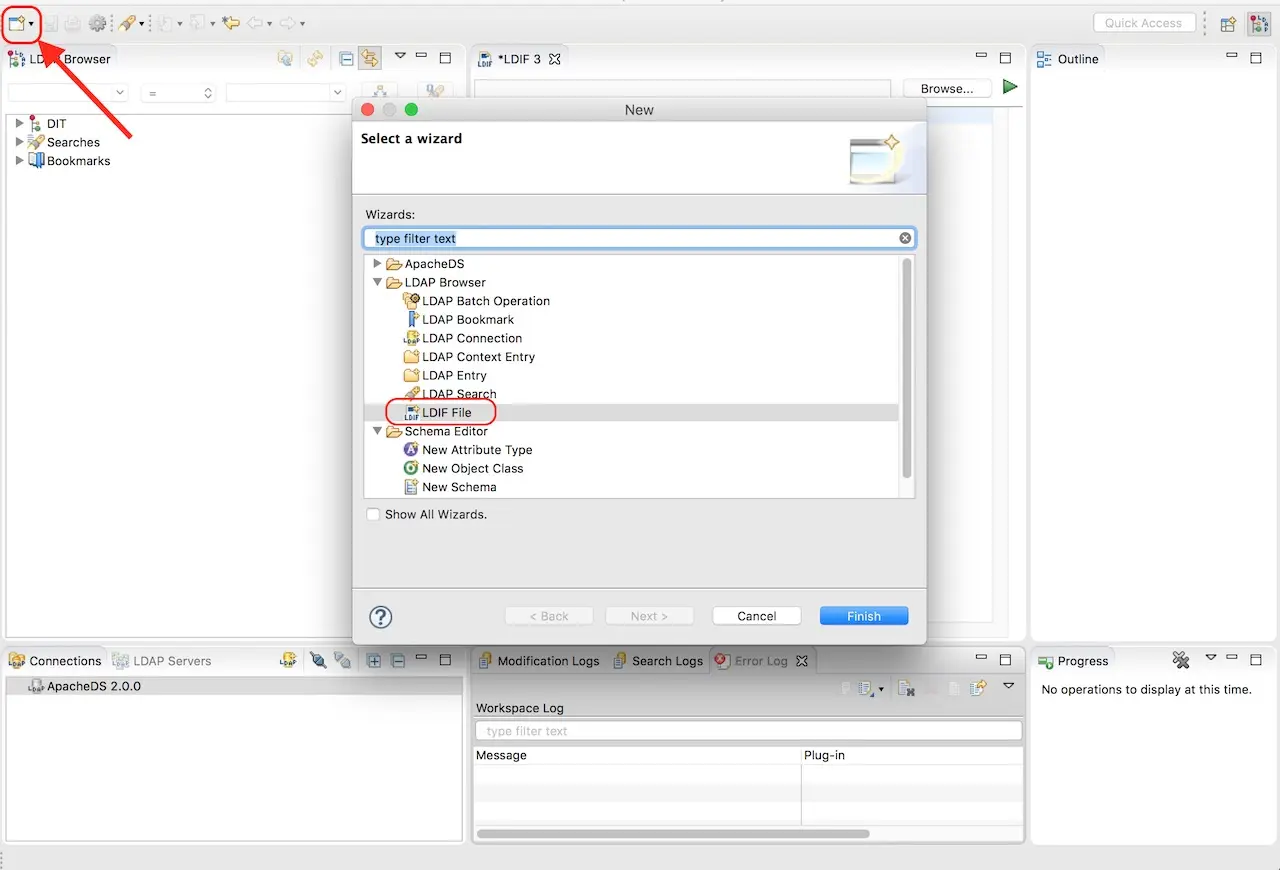
The server we setup earlier does not have any data yet. We will now load some data by using the LDIF editor. LDIF or LDAP Data Interchange Format, is a text format for representing LDAP data and commands. To open an LDIF editor, click on the New icon at the top left, or click File -> New, a dialog will appear with a list, select LDIF File under LDAP Browser
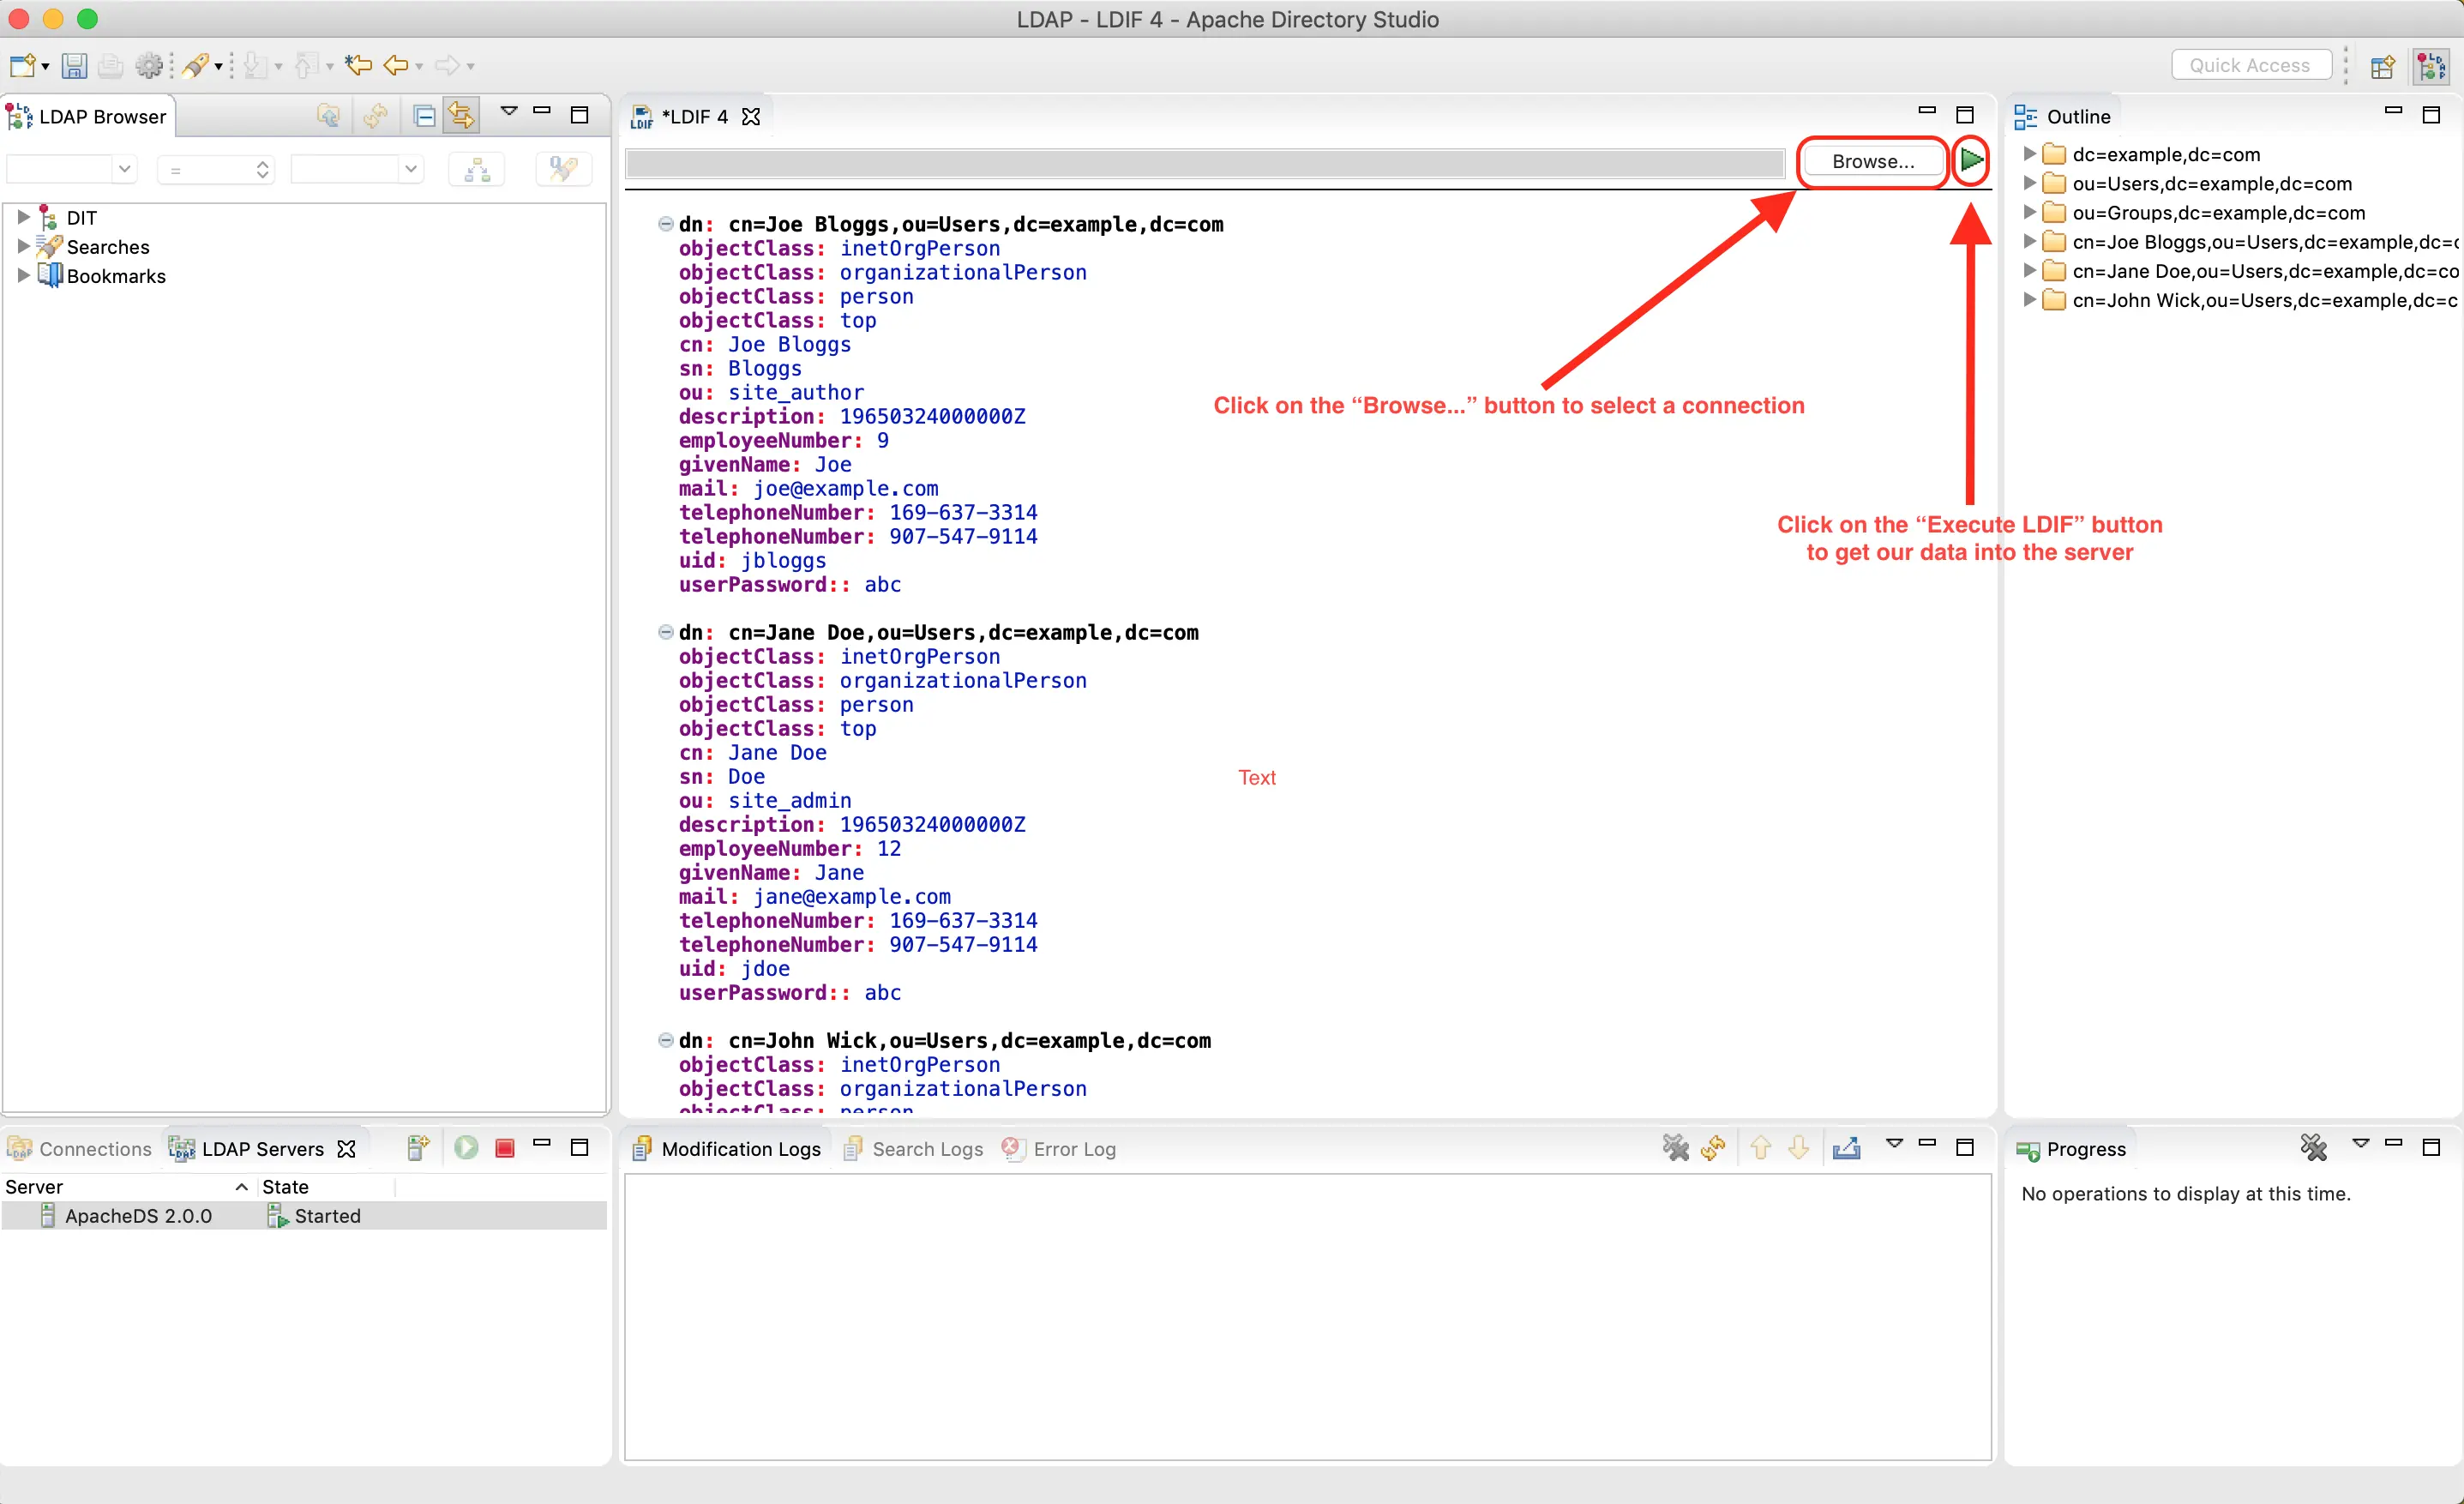
An empty file in the middle of your ApacheDS will appear. This is the LDIF editor. We will now enter some data into it to create users that Crafter Studio can authenticate through the LDAP Server we just setup. We will add three users, each belonging to a different group for the site myawesomesite in Crafter Studio. Please make sure that the attributes listed in the Crafter Studio LDAP configuration is configured in the LDAP server for each user. Copy and paste the data listed below into the LDIF editor. Make sure that there is an empty line after the last entry.
 1dn: dc=example,dc=com
 2objectClass: domain
 3objectClass: top
 4dc: example
 5
 6dn: ou=Users,dc=example,dc=com
 7objectClass: organizationalUnit
 8objectClass: top
 9ou: Users
10
11dn: ou=Groups,dc=example,dc=com
12objectClass: organizationalUnit
13objectClass: top
14ou: Groups
15
16dn: cn=Joe Bloggs,ou=Users,dc=example,dc=com
17objectClass: inetOrgPerson
18objectClass: organizationalPerson
19objectClass: person
20objectClass: top
21cn: Joe Bloggs
22sn: Bloggs
23ou: site_author
24description: 19650324000000Z
25employeeNumber: 9
26givenName: Joe
27mail: joe@example.com
28telephoneNumber: 169-637-3314
29telephoneNumber: 907-547-9114
30uid: jbloggs
31userPassword:: abc
32
33dn: cn=Jane Doe,ou=Users,dc=example,dc=com
34objectClass: inetOrgPerson
35objectClass: organizationalPerson
36objectClass: person
37objectClass: top
38cn: Jane Doe
39sn: Doe
40ou: site_admin
41description: 19650324000000Z
42employeeNumber: 12
43givenName: Jane
44mail: jane@example.com
45telephoneNumber: 169-637-3314
46telephoneNumber: 907-547-9114
47uid: jdoe
48userPassword:: abc
49
50dn: cn=John Wick,ou=Users,dc=example,dc=com
51objectClass: inetOrgPerson
52objectClass: organizationalPerson
53objectClass: person
54objectClass: top
55cn: John Wick
56sn: Wick
57ou: site_reviewer
58description: 19650324000000Z
59employeeNumber: 8
60givenName: John
61mail: john@example.com
62telephoneNumber: 169-637-3314
63telephoneNumber: 907-547-9114
64uid: jwick
65userPassword:: abc
Please note that a user can belong to multiple groups. To add another groupName value in the ldif file, just add another line specifying the attribute and the value. Notice the multiple values for the attribute ou (groupName)
 1dn: cn=John Wick,ou=Users,dc=example,dc=com
 2objectClass: inetOrgPerson
 3objectClass: organizationalPerson
 4objectClass: person
 5objectClass: top
 6cn: John Wick
 7sn: Wick
 8ou: site_publisher
 9ou: site_editor
10description: 19650324000000Z
11employeeNumber: 8
12givenName: John
13mail: john@example.com
14telephoneNumber: 169-637-3314
15telephoneNumber: 907-547-9114
16uid: jwick
17userPassword:: abc
To add the data we entered in the LDIF file into the LDAP Server, first, click on the Browse button in the LDIF editor and select the connection we setup (ApacheDS 2.0.0), then click on the green (Execute LDIF) button next to the Browse button to get our data into the server.
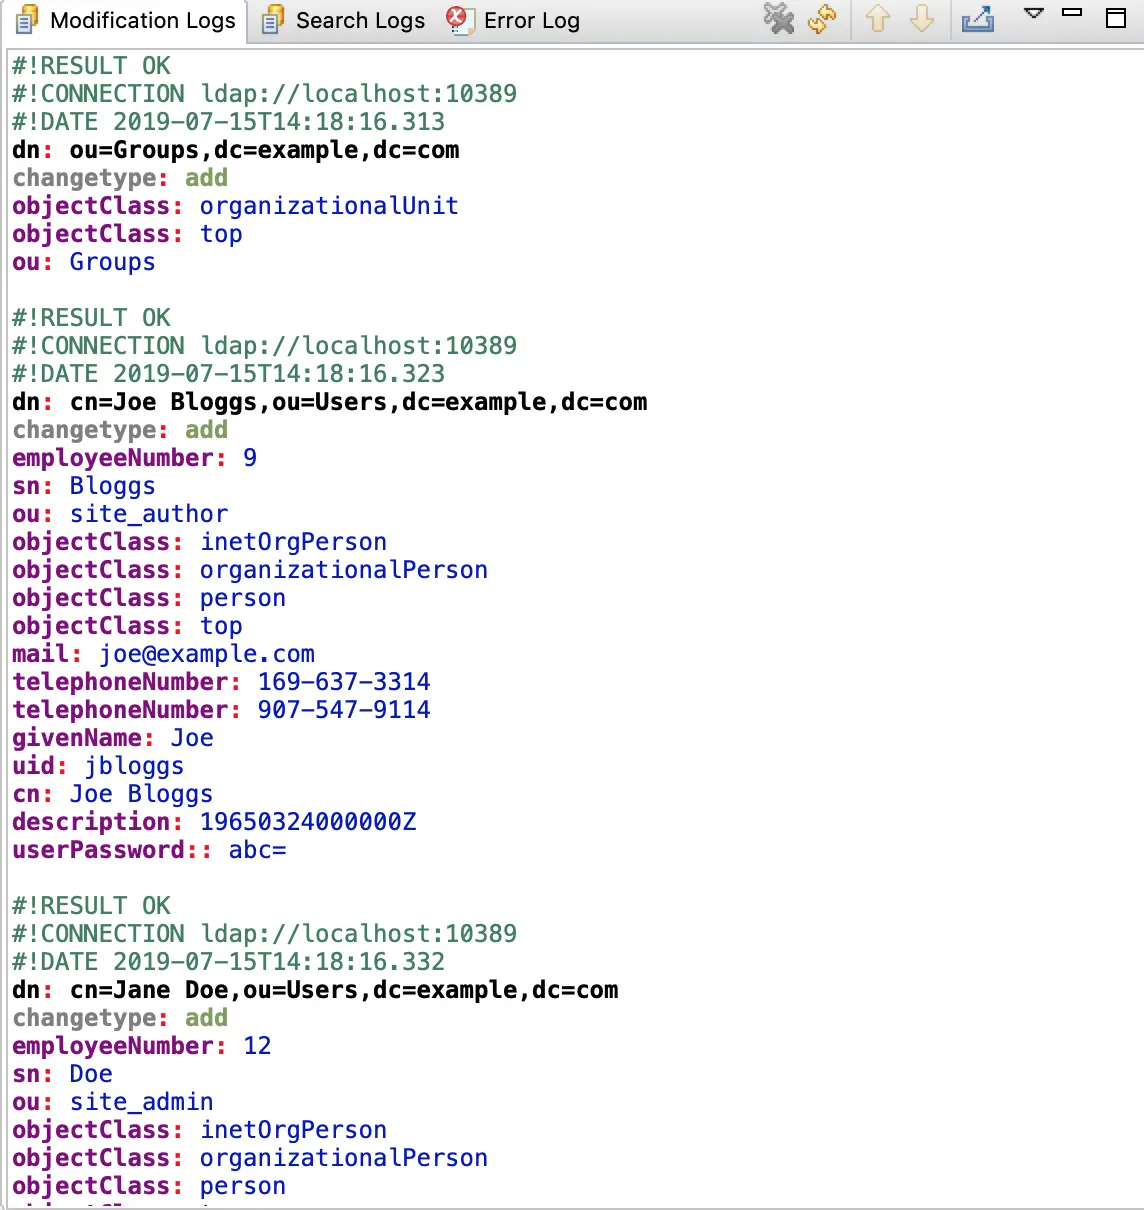
After executing the LDIF file, you should see the results in the Modification Logs tab at the bottom of the LDIF Editor and should look something like the image below:
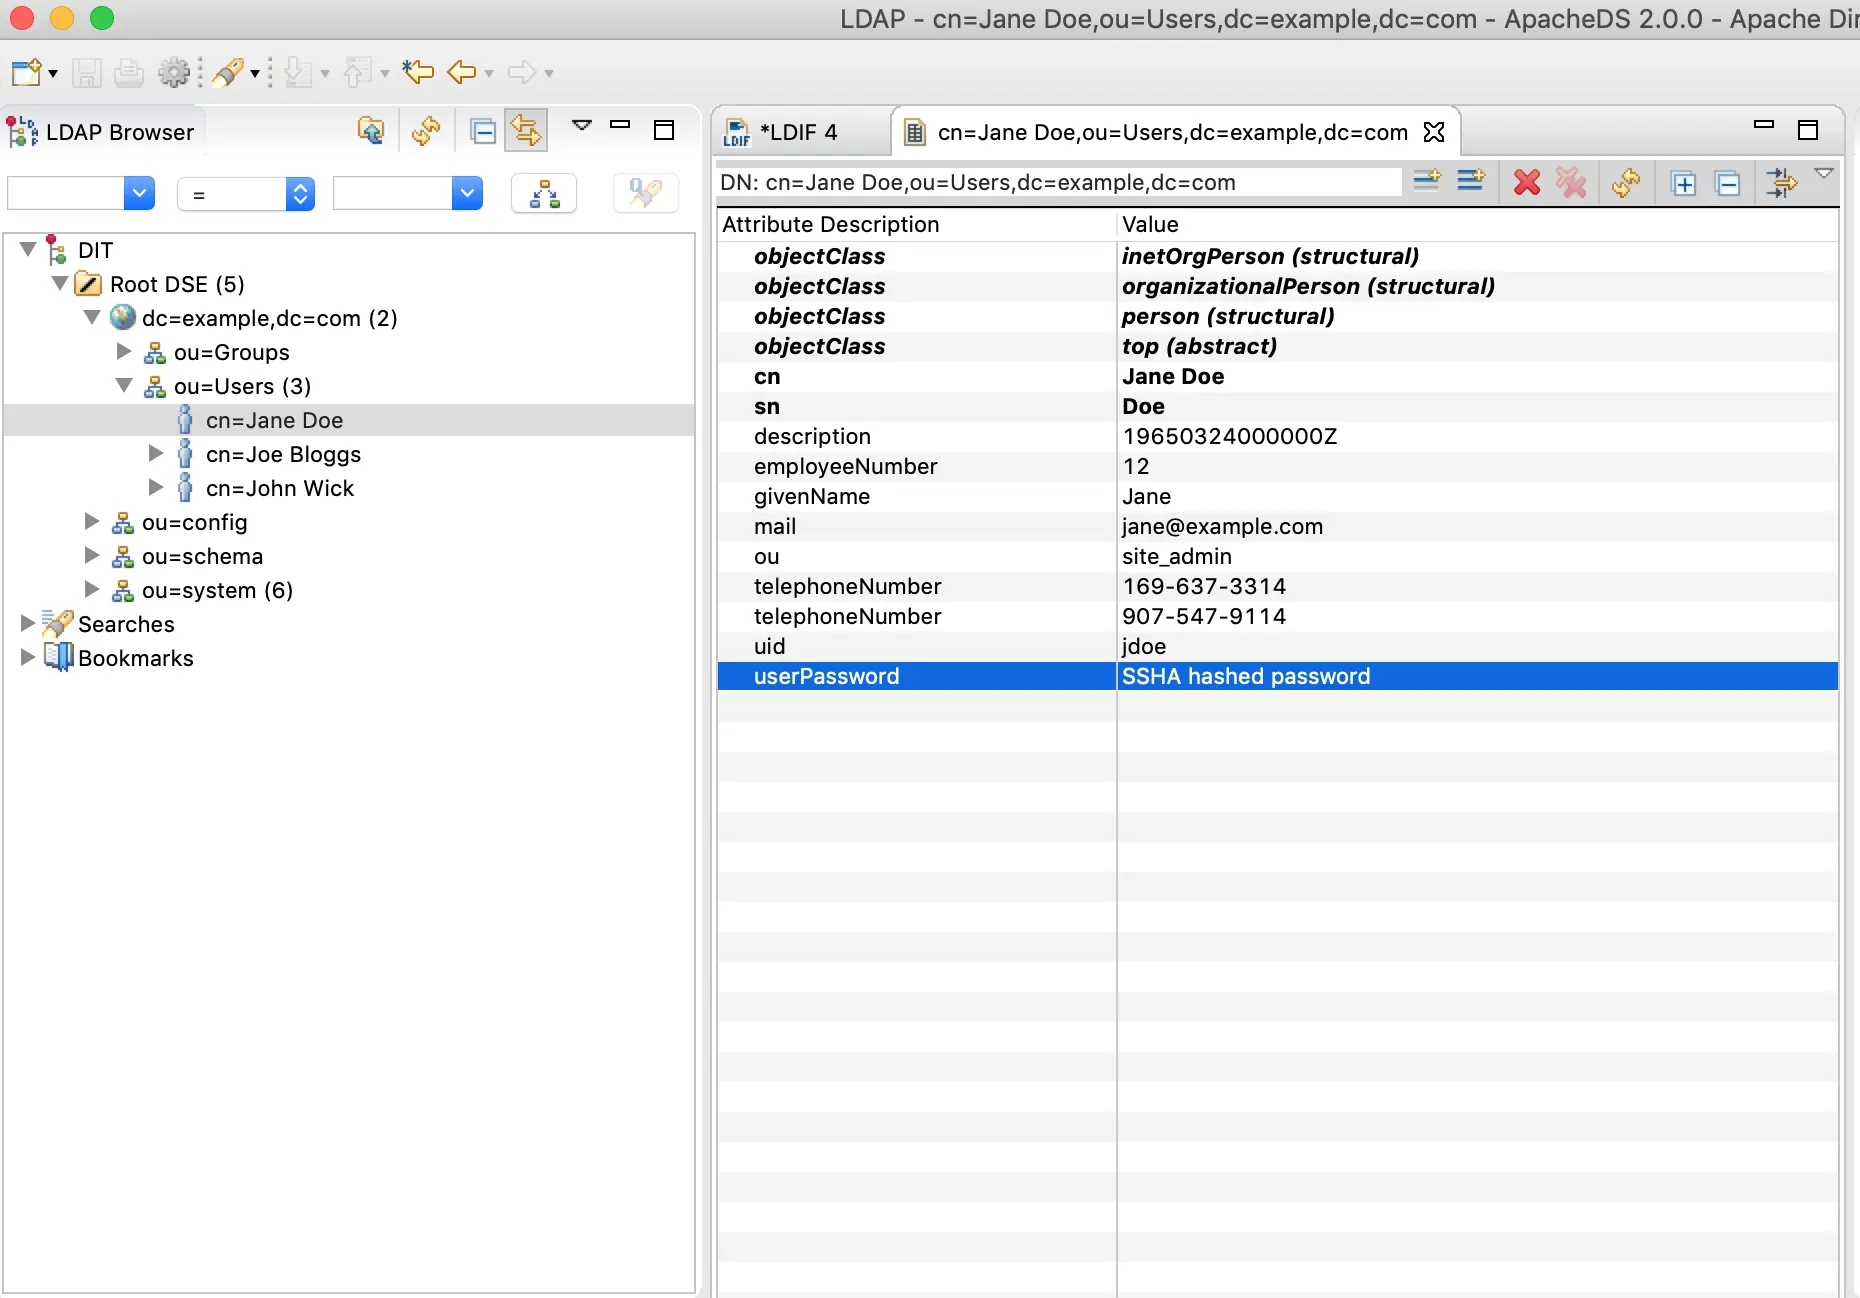
We should also be able to see the three users we just added in the LDAP browser

Changing a user’s password in the LDAP server
Notice that we set the password to the same characters for all the users. Let’s change the password for all the users. To do this, from the LDAP Browser tab, navigate to DIT -> Root DSE -> dc=example,dc=com -> ou=Users, then click on the name os a user. We’ll click on user Jane Doe. A new tab will open in the middle of your ApacheDS with all the attributes for user Jane Doe. Double click on userPassword to change the user’s password.
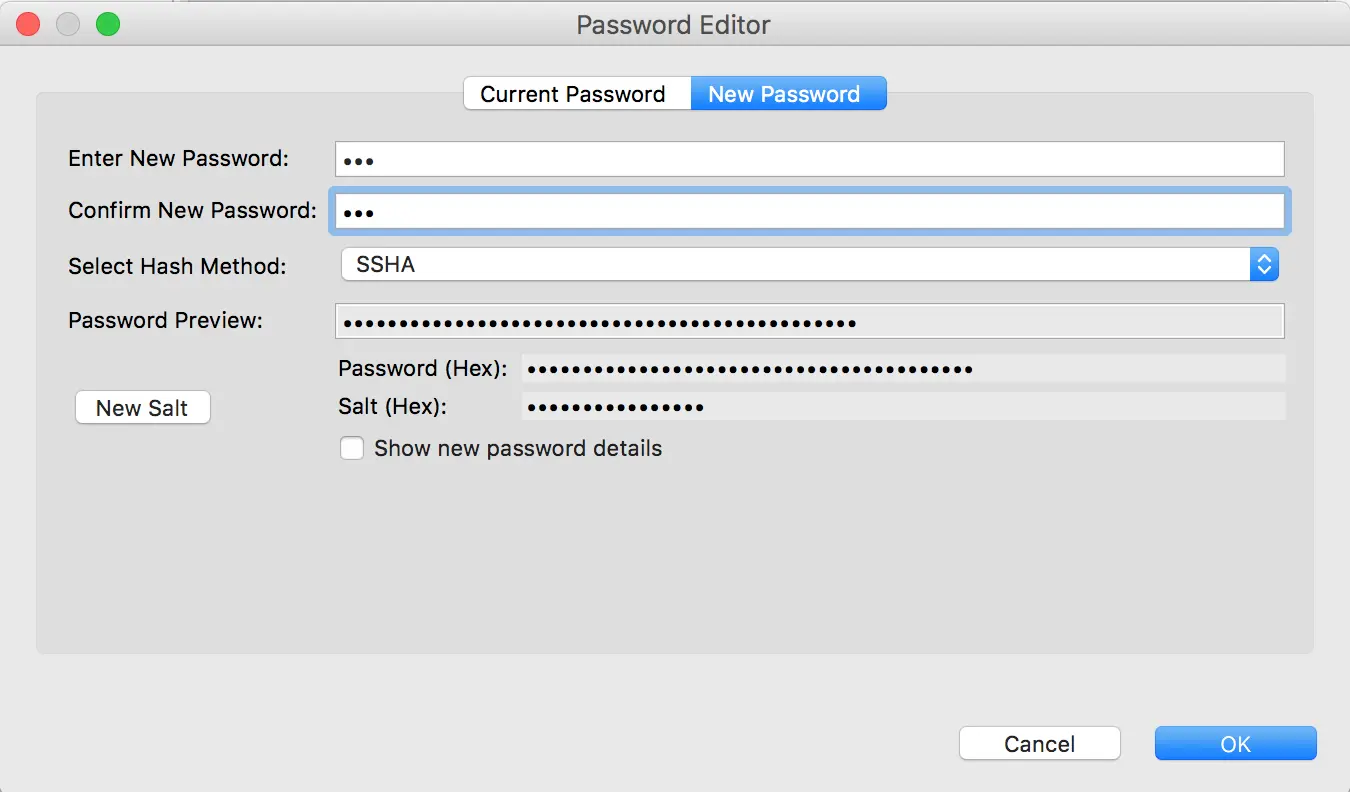
The Password Editor dialog will now be in focus. Click on New Password at the middle top and fill in the Enter New Password and Confirm New Password fields in the form, then click on the OK button
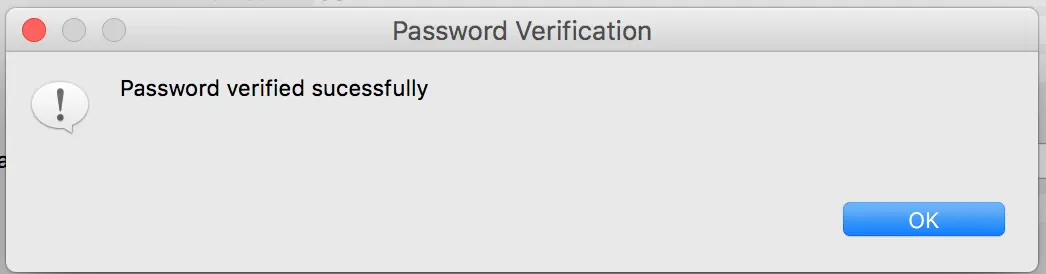
To test the new password you just entered, double click on userPassword attribute of the user, then click on Current Password in the Password Editor dialog. Enter the new password in the Verify Password field, then click on the Verify button.
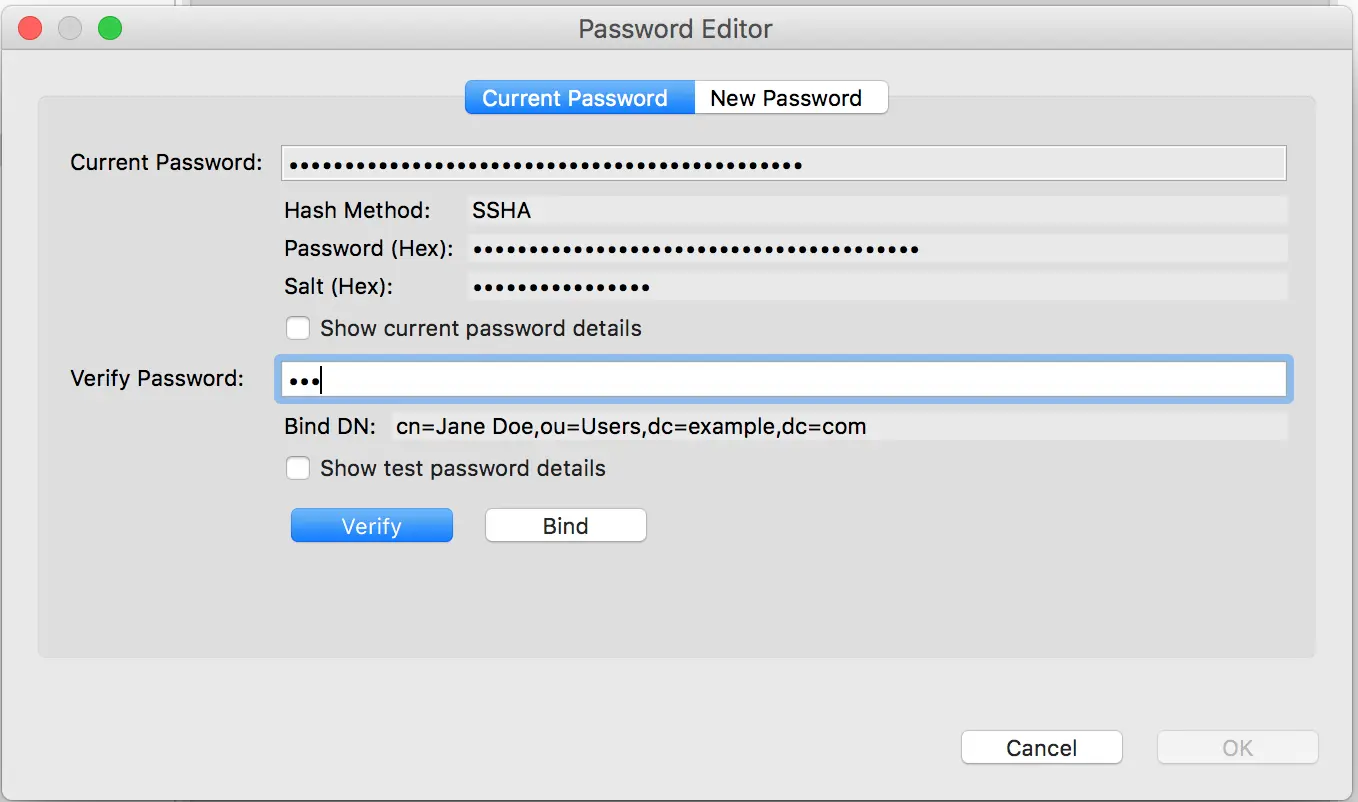
When successful, a dialog will appear that the password was verified successfully
Repeat the steps listed above for the rest of the users we added in to the LDAP server to change their password. After changing all the user’s passwords, we can now try to login to Crafter Studio using the credentials of the users we just added.
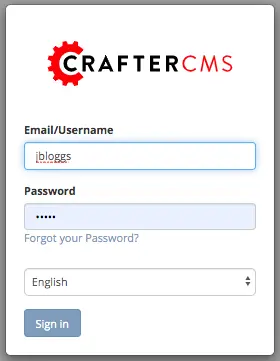
Logging in to Crafter Studio as an LDAP user
In your browser, enter localhost:8080\studio. Fill in the the username and password using one of the users we setup in the LDAP server. In the image below, we will log in the user jbloggs. If authentication is successful, the user should be taken to the Sites screen of Crafter Studio.