
Engine Configuration
Setup Engine to Deliver a Project
Server-based Delivery
In this section, we will be working in the delivery environment of CrafterCMS and describing how to setup your project for a delivery environment.
Setup Crafter Deployer Target
CrafterCMS out of the box has a script to help you create your deployer target for the delivery environment.
In the bin folder in your CrafterCMS delivery environment, we will use the script init-site.sh to help us create the deployer target.
From your command line, navigate to your {Crafter-CMS-delivery-environment-directory}/bin/ , and execute the init-site script. The following output of init-site.sh -h
explains how to use the script:
usage: init-site [options] [site] [repo-path]
 -a,--notification-addresses <addresses>   A comma-separated list of email
                                           addresses that should receive
                                           deployment notifications
 -b,--branch <branch>                      The name of the branch to clone
                                           (live by default)
 -f,--passphrase <passphrase>              The passphrase of the private
                                           key (when the key is passphrase
                                           protected)
 -h,--help                                 Show usage information
 -k,--private-key <path>                   The path to the private key, when
                                           using private-key authentication
                                           through SSH to the remote Git repo
 -p,--password <password>                  The password for the remote Git
                                           repo, when using basic
                                           authentication
 -u,--username <username>                  The username for the remote Git
                                           repo, when using basic
                                           authentication
 --addresses <>                            A comma-separated list of email
                                           addresses that should receive deployment notifications

EXAMPLES:
 Init a site from the default repo path (../../crafter-authoring/data/repos/sites/{sitename}/published)
     init-site mysite
 Init a site from a specific local repo path
     init-site mysite /opt/crafter/authoring/data/repos/sites/mysite/published
 Init a site from a specific local repo path, cloning a specific branch of the repo
     init-site -b master mysite /opt/crafter/authoring/data/repos/sites/mysite/published
 Init a site that is in a remote HTTPS repo with username/password authentication
     init-site -u jdoe -p jdoe1234 mysite https://github.com/jdoe/mysite.git
 Init a site that is in a remote SSH repo with public/private key authentication (specific private key path
 with no passphrase)
     init-site -k ~/.ssh/jdoe_key mysite ssh://myserver/opt/crater/sites/mysite
 Init a site that is in a remote SSH repo with public/private key authentication (specific private key path
 with passphrase)
     init-site -k ~/.ssh/jdoe_key -f jdoe123 mysite ssh://myserver/opt/crater/sites/mysite
Note
Remember that when using private key SSH authentication, the private key path must be set explicitly using
the -k option. Here’s an example:
init-site -k ~/.ssh/jdoe_key myeditorial ssh://myserver/opt/crater/sites/myeditorial
We recommend using Secure Shell (SSH) with your project’s published repo Git URL and for authentication, to use either username/password authentication or public/private key authentication.
The SSH Git URL format is: ssh://[user@]host.xz[:port]/path/to/repo/ where sections between [] are optional.
Example #1: ssh://server1.example.com/path/to/repo
Example #2: ssh://jdoe@server2.example.com:63022/path/to/repo
Note
When using ssh keys for authentication, the keys need to be generated using RSA as the algorithm and with no passphrase.
Crafter requires the key to be RSA and does not support keys generated using an algorithm other than RSA. The Jsch library that Jgit uses only supports RSA and does not support other keys such as OpenSSH. Crafter also currently doesn’t support using a passphrase with SSH keys.
To generate your Secure Shell (SSH) keys for authentication, run the following command ssh-keygen -m PEM -b 4096 -t rsa. Your output should look something like this:
✗ ssh-keygen -m PEM -b 4096 -t rsa
Generating public/private rsa key pair.
Enter file in which to save the key (/Users/myuser/.ssh/id_rsa):
Enter passphrase (empty for no passphrase):
Enter same passphrase again:
Your identification has been saved in /Users/myuser/.ssh/id_rsa.
Your public key has been saved in /Users/myuser/.ssh/id_rsa.pub.
.
.
Check that the file starts with the following header: -----BEGIN RSA PRIVATE KEY----- to verify that the key is using RSA.
After generating your private and public keys, you will need to add your new public key to where your remote git repository is located. If you are using GitHub, you will need to add your public key (e.g., id_rsa.pub) into your GitHub account. If your remote Git repository is hosted on a server, you will need to copy your public key (e.g., id_rsa.pub) to the host server.
If you are just working on another directory on disk for your delivery, you can just use the filesystem. When your repository is local, make sure to use the absolute path. Here is an example project’s published repo Git url when using a local repository:
/opt/crafter/authoring/data/repos/sites/my-project/published
Note
When using
ssh, you might see in the logscom.jcraft.jsch.JSchException: UnknownHostKeyerrors. These errors are common in Ubuntu, and are caused by known host keys being stored in non-RSA format. Please follow the instructions in Troubleshooting Deployer Issues underSSH Unknown Hostto resolve them.Gitneeds to be installed in authoring when using SSH to connect the delivery to the authoring.If you see the following error in the delivery Deployer: Caused by: java.io.IOException: bash: git-upload-pack: command not found you’ll need to add the location of git (usually /usr/bin) to your non-login shell startup file (e.g. ~/.bashrc).
To get the location of Git, run the following command:
which git-upload-packYou can limit SSH access by using Git Shell, see https://git-scm.com/docs/git-shell for more information.
Viewing your Site for Testing
To test viewing your project, open a browser and type in the URL of your project.
If you have multiple projects setup, to view a certain project, in your browser, enter the following:
{Server URL}?crafterSite={siteName}
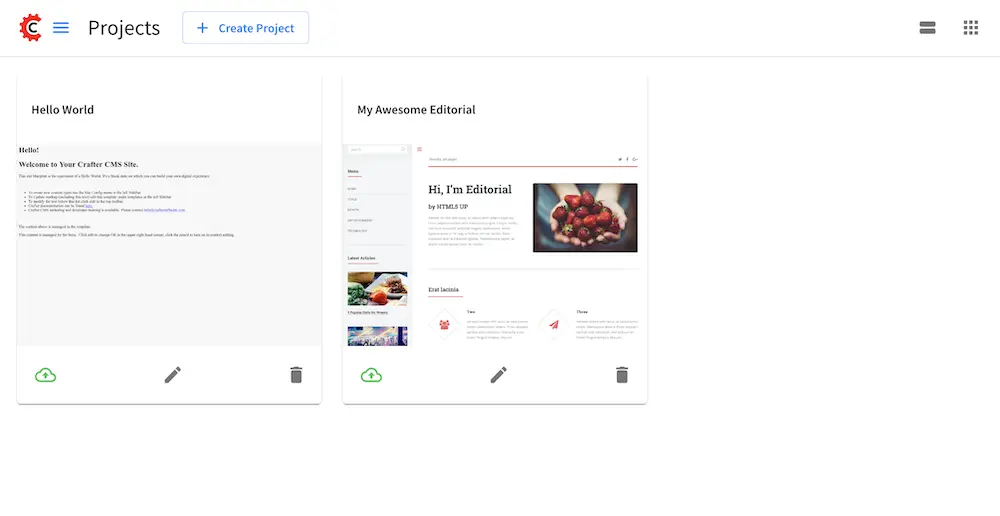
Here we have an example of a delivery setup in another directory on disk (local), where there are two projects, my-awesome-editorial and hello-world
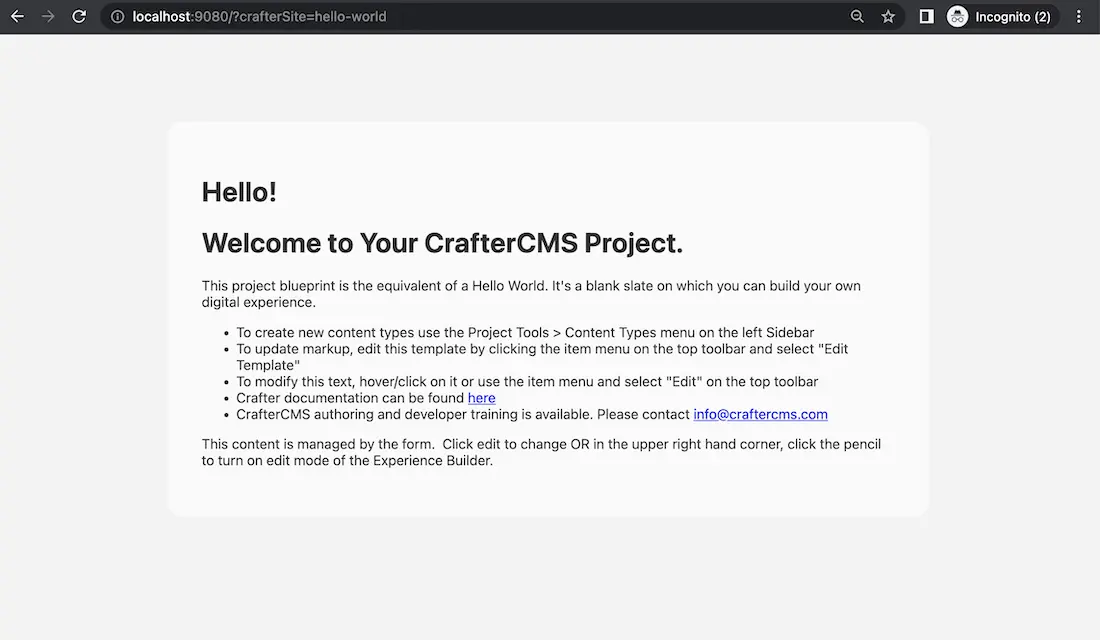
To set crafterSite to the hello-world project, in your browser, type in
http://localhost:9080?crafterSite=helloworld
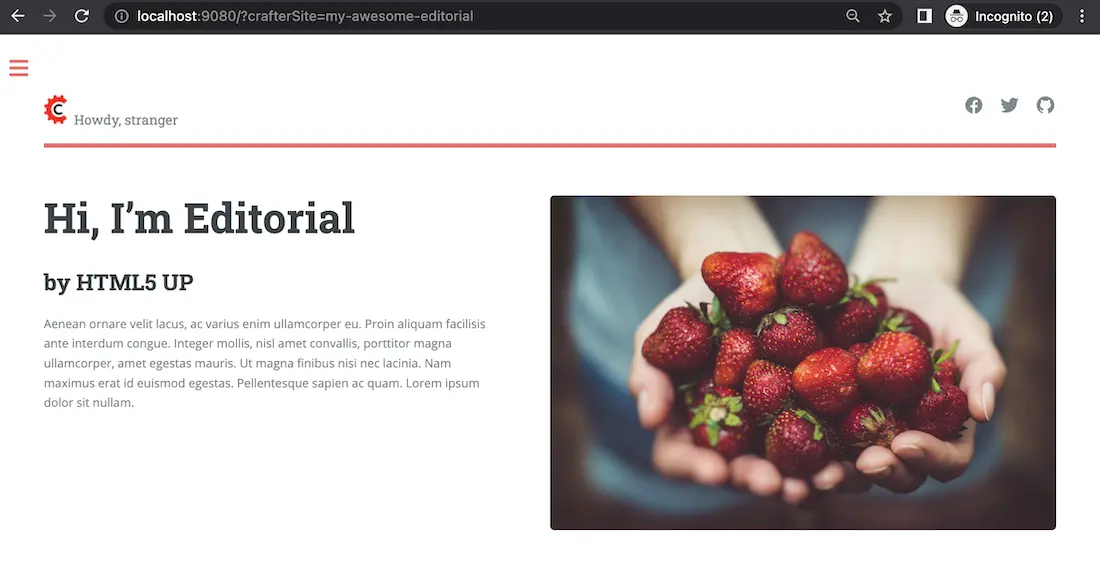
To set the site to the myawesomesite, in your browser, type in
http://localhost:9080?crafterSite=myawesomesite
Aside from the crafterSite parameter, a header can be sent to specify the site name, called
X-Crafter-Site for changing the current site. This is very useful when Crafter Engine is used
together with CDNs that can send headers, like AWS CloudFront
Warning
Using this configuration you need to be sure that the first request specifies the site name by
including the crafterSite parameter (or the X-Crafter-Site header) so that the site value
is set in the cookie for the next requests.
Note
- Crafter Engine identifies which project to render by the mechanisms (in this order of precedence):
Headers (
X-Crafter-Site={site})QSA (Query String Parameters:
crafterSite={site})Cookie (
crafterSite={site})
Additionally, if the cookie is not aligned with other parameters, the cookie will be reset to what precedes it. The above is only true when Crafter Engine is not in Preview mode.
Serverless Delivery
CrafterCMS can be configured to serve sites directly from AWS services, following this guide you will:
Create a AWS OpenSearch domain (optional)
Configure a Crafter Studio in an authoring environment to call the Crafter Deployer to create an AWS CloudFormation with a CloudFront and S3 bucket for each site
Configure a Crafter Engine in a delivery environment to read files from the S3 bucket and query to AWS OpenSearch (optional)
Prerequisites
An AWS account
A CrafterCMS authoring environment
A CrafterCMS delivery environment
Step 1: Create an OpenSearch Domain for Delivery (optional)
Since serverless delivery requires a single OpenSearch endpoint readable by all Engine instances, we recommend you create an AWS OpenSearch domain for delivery. If you don’t want to use an AWS OpenSearch domain then you should create and maintain your own OpenSearch cluster.
To create an AWS OpenSearch domain please do the following:
Important
The following are settings used in common Crafter deployments with AWS OpenSearch, and by no means should be considered the only way to configure AWS OpenSearch with Crafter.
In the top navigation bar of your AWS console, on the search bar, enter
Amazon OpenSearch Service.Click on
Create domain.Select
Standard CreateonDomain creation method.On
Templates, selectDev/test.
Important
Even for Production deployments, we recommend you pick the Dev/test template. We do this because that’s the only
way to avoid setting dedicated master nodes. AWS recommends in all Production environments to use dedicated master
nodes. From experience, most Crafter Production deployments don’t need dedicated master nodes, but that will depend
on your project’s search utilization.
On
Deployment Options, selectDomain without standbyand3-AZ.On the
Engine optionssection, selectInclude older versionsand pick2.9as the version.On
Data Nodes, pick a configuration for the nodes like the one showed in the image below. For volume size, most Crafter installations should be ok with 20 GB per node, but you can adjust the size based onnumber of projects * average project size in GB * 3 (for preview, authoring and delivery indices).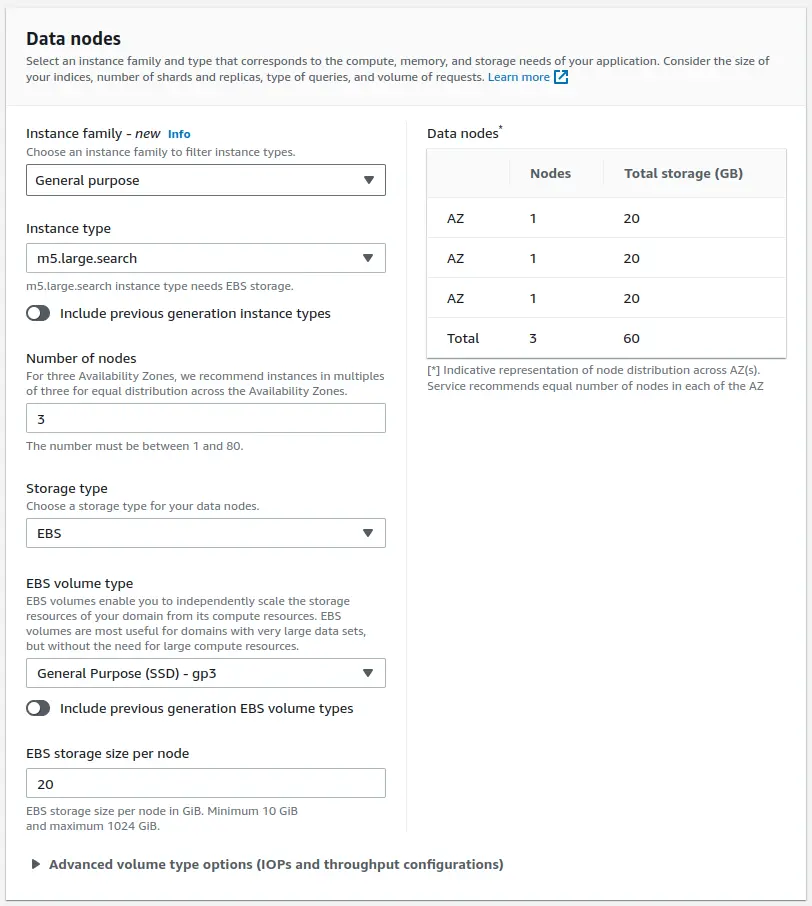
On
Network, we recommend you pick the VPC and subnets where your delivery nodes reside. Make sure that the security group only allows access to port 443 from the delivery nodes. If they’re not running on an Amazon VPC, then pickPublic AccessOn the
Fine-grained access control, selectCreate master user, and specify a username and password (save this for later).Select
Only use fine-grained access controlinAccess Policy.Adjust any other setting to your preferences, and click on
Createon the right sidebar.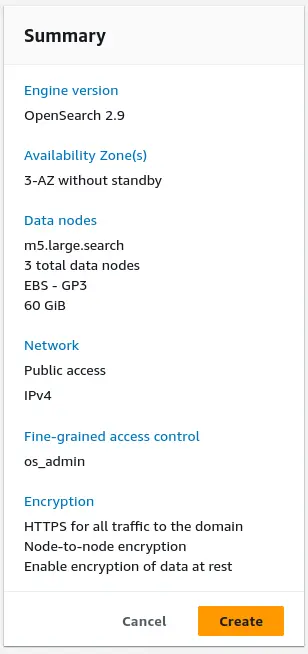
Wait until the domain has been created, then copy the
Domain Endpoint.
Step 2: Configure the Delivery for Serverless Mode
Edit the services override file to enable the Serverless S3 mode (
DELIVERY_INSTALL_DIR/bin/apache-tomcat/shared/classes/crafter/engine/extension/services-context.xml):<?xml version="1.0" encoding="UTF-8"?> <beans xmlns="http://www.springframework.org/schema/beans" xmlns:xsi="http://www.w3.org/2001/XMLSchema-instance" xsi:schemaLocation="http://www.springframework.org/schema/beans http://www.springframework.org/schema/beans/spring-beans.xsd"> <import resource="classpath*:crafter/engine/mode/multi-tenant/simple/services-context.xml" /> <!-- S3 Serverless Mode --> <import resource="classpath*:crafter/engine/mode/serverless/s3/services-context.xml" /> </beans>
Edit the properties override file to point Engine to consume the site content from S3 (
DELIVERY_INSTALL_DIR/bin/apache-tomcat/shared/classes/crafter/engine/extension/server-config.properties). The properties you need to update are the following:crafter.engine.site.default.rootFolder.pathcrafter.engine.s3.regioncrafter.engine.s3.accessKeycrafter.engine.s3.secretKey
An example of how the server-config.properties would look with configuration to read from an S3 bucket per site (which is the most common use case), is the following (values in
Xare not displayed since they’re sensitive):DELIVERY_INSTALL_DIR/bin/apache-tomcat/shared/classes/crafter/engine/extension/server-config.properties# Content root folder when using S3 store. Format is s3://<BUCKET_NAME>/<SITES_ROOT>/{siteName} crafter.engine.site.default.rootFolder.path=s3://serverless-delivery-test-site-{siteName} ... # S3 Serverless properties # S3 region crafter.engine.s3.region=us-east-1 # AWS access key crafter.engine.s3.accessKey=XXXXXXXXXX # AWS secret key crafter.engine.s3.secretKey=XXXXXXXXXXXXXXXXXXXX
As you can see, the bucket name portion of the root folder S3 URL contains a prefix and then the site name. This prefix is mentioned also as a “namespace” later on in the Studio serverless configuration.
Important
You can also provide the AWS region, access key and secret key without having to edit the config file properties. Please see Set up AWS Credentials and Region for Development.
We recommend that the AWS credentials configured belong to a user with just the following permission policy (all strings like
$VARare placeholders and need to be replaced):aws-serverless-engine-policy.json1{ 2 "Version": "2012-10-17", 3 "Statement": [ 4 { 5 "Effect": "Allow", 6 "Action": "s3:ListAllMyBuckets", 7 "Resource": "*" 8 }, 9 { 10 "Effect": "Allow", 11 "Action": [ 12 "s3:ListBucket", 13 "s3:GetBucketLocation", 14 "s3:GetObject" 15 ], 16 "Resource": "arn:aws:s3:::$BUCKET_NAME_PREFIX-*" 17 } 18 ] 19}
Edit the
SEARCH_URLinDELIVERY_INSTALL_DIR/bin/crafter-setenv.shto point to the OpenSearch endpoint you created in the previous step, and provide the OpenSearch master credentials:export SEARCH_URL="https://search-serverless-delivery-test-wyz36fsmutzsw2evgroc47lvve.us-east-1.es.amazonaws.com" export SEARCH_USERNAME="*****" export SEARCH_PASSWORD="**********"
Step 4: Create the Site in the Authoring Environment
Login to the Crafter Studio in the authoring environment from your browser.
Click the
Create SitebuttonChoose the
Editorialblueprint, enter theSite Id(e.g.editorial), and then review and create.Go to your AWS console in your browser and on the
Servicesdropdown search for CloudFormation. You should then see the CloudFormation for the site you just created with the statusCREATE_IN_PROGRESS. After several minutes, the status should change toCREATE_COMPLETE, which tells the Crafter Deployer that it is able to start uploading files to S3.
Wait at least 2 minutes for the Crafter Deployer to finish uploading the files and for the delivery Crafter Engine to warm up the new site in cache.
deployer.log12024-01-24 15:58:15.121 INFO 899353 --- [deployment-3] llCloudFormationStackUsableLifecycleHook : CloudFormation stack 'serverless-delivery-test-site-editorial' is usable (status 'CREATE_COMPLETE') 22024-01-24 15:58:15.122 INFO 899353 --- [deployment-3] org.craftercms.deployer.impl.TargetImpl : Creating deployment pipeline for target 'editorial-serverless-delivery' 32024-01-24 15:58:15.169 INFO 899353 --- [deployment-3] org.craftercms.deployer.impl.TargetImpl : Checking if deployments need to be scheduled for target 'editorial-serverless-delivery' 42024-01-24 15:58:15.169 INFO 899353 --- [deployment-3] org.craftercms.deployer.impl.TargetImpl : Deployments for target 'editorial-serverless-delivery' scheduled with cron 0 * * * * * 52024-01-24 15:59:00.002 INFO 899353 --- [deployment-6] org.craftercms.deployer.impl.TargetImpl : ============================================================ 62024-01-24 15:59:00.002 INFO 899353 --- [deployment-6] org.craftercms.deployer.impl.TargetImpl : Deployment for editorial-serverless-delivery started 72024-01-24 15:59:00.002 INFO 899353 --- [deployment-6] org.craftercms.deployer.impl.TargetImpl : ============================================================ 8... 9... 10... 112024-01-24 16:04:00.039 INFO 899353 --- [deployment-1] org.craftercms.deployer.impl.TargetImpl : ============================================================ 122024-01-24 16:04:00.039 INFO 899353 --- [deployment-1] org.craftercms.deployer.impl.TargetImpl : Deployment for editorial-serverless-delivery finished in 0.004 secs 132024-01-24 16:04:00.039 INFO 899353 --- [deployment-1] org.craftercms.deployer.impl.TargetImpl : ===========================================================
engine.log1[INFO] 2019-12-20T20:50:00,061 [pool-3-thread-10] [] [context.SiteContextManager] | ================================================== 2[INFO] 2019-12-20T20:50:00,061 [pool-3-thread-10] [] [context.SiteContextManager] | <Creating site context: editorial> 3[INFO] 2019-12-20T20:50:00,061 [pool-3-thread-10] [] [context.SiteContextManager] | ================================================== 4... 5... 6... 7[INFO] 2019-12-20T20:50:04,393 [pool-3-thread-10] [] [context.SiteContextManager] | ================================================== 8[INFO] 2019-12-20T20:50:04,393 [pool-3-thread-10] [] [context.SiteContextManager] | </Creating site context: editorial> 9[INFO] 2019-12-20T20:50:04,393 [pool-3-thread-10] [] [context.SiteContextManager] | ==================================================
Step 5: Test the Delivery Site
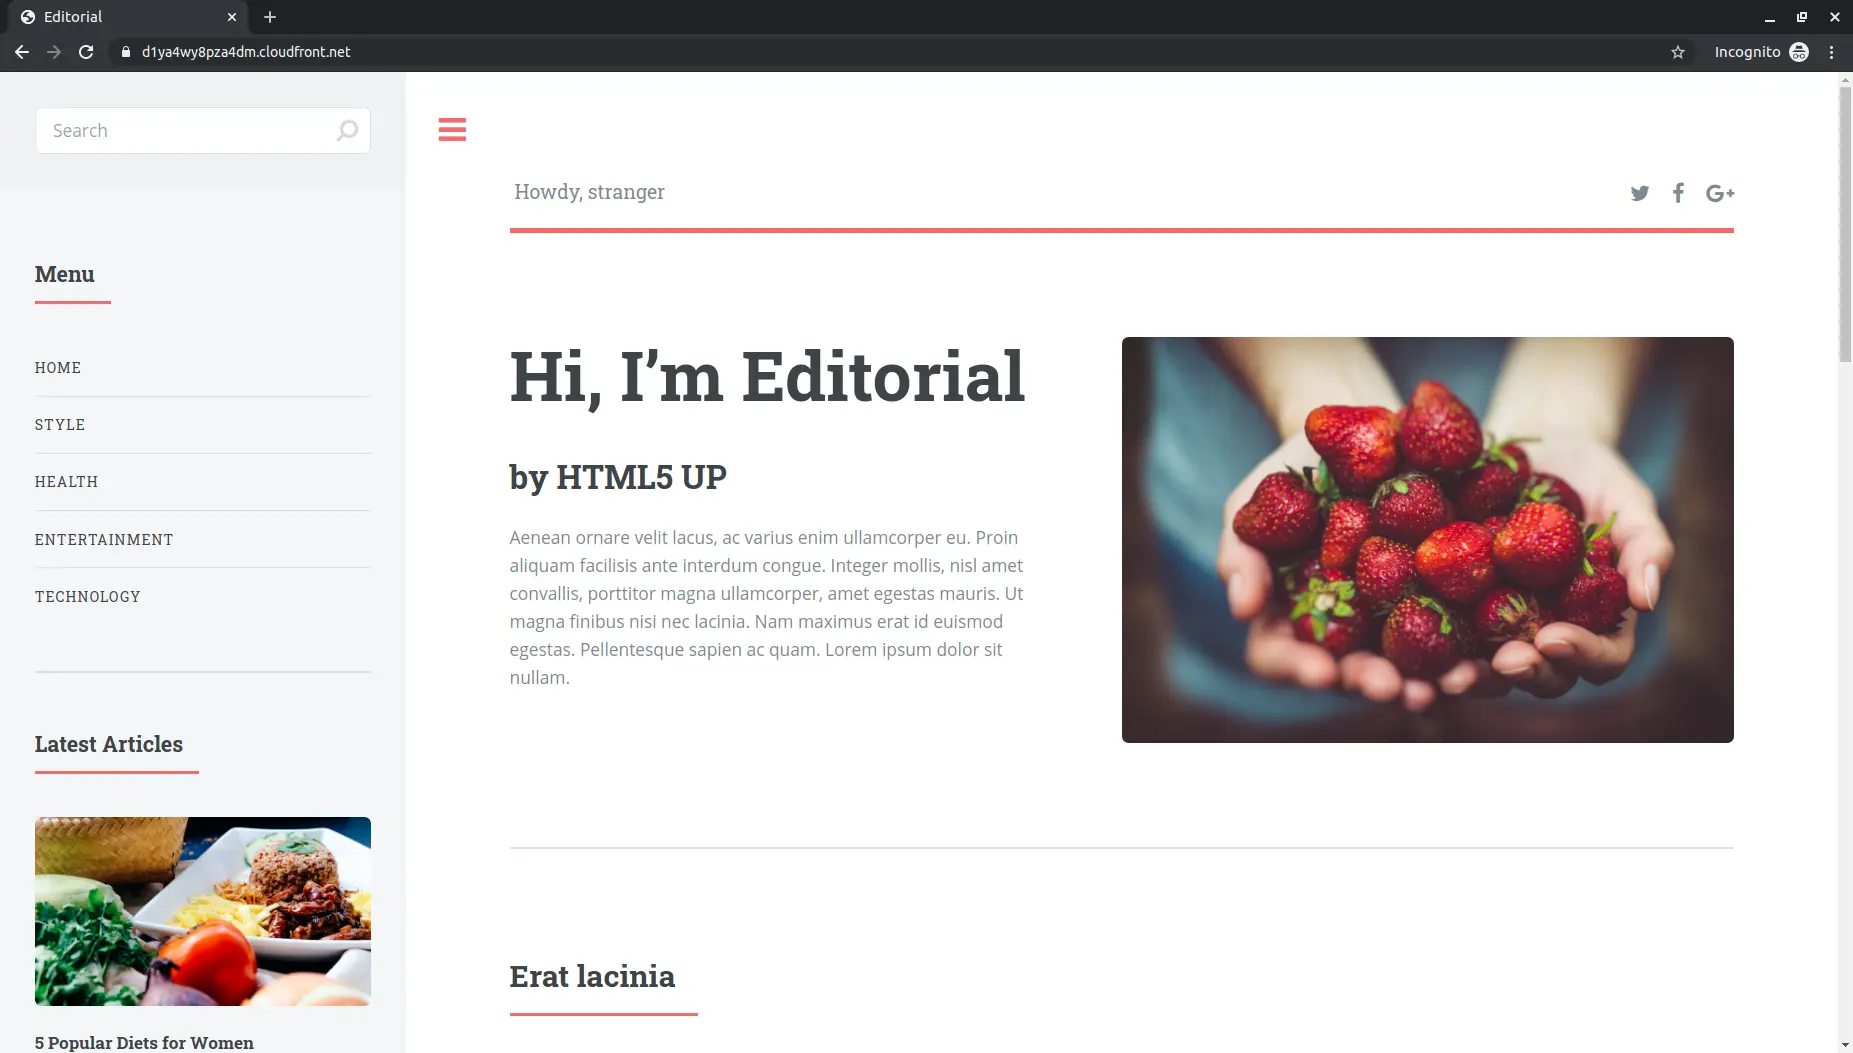
Open a browser and go to https://DOMAIN_OF_YOUR_CLOUDFRONT. You should be able to see your Editorial site!
Note
The following error appears in the deployer logs (CRAFTER_HOME/logs/deployer/crafter-deployer.out) when a site hasn’t been published:
2020-07-07 15:33:00.004 ERROR 22576 --- [deployment-9] l.processors.AbstractDeploymentProcessor : Processor 'gitDiffProcessor' for target 'ed-serverless-delivery' failed
org.craftercms.deployer.api.exceptions.DeployerException: Failed to open Git repository at /home/ubuntu/craftercms/crafter-authoring/data/repos/sites/ed/published;
Once the site has been published, the error above will go away.
Configuration Files
Crafter Engine can be configured at the project/site level or at the instance level.
Project-level/Site-level Configuration Files
Crafter Engine provides a flexible configuration system that allows site administrators to change the behavior of the project without the need to modify any code. Some properties are used by Crafter Engine itself, but developers can also add any custom property they need for their code.
The main configuration files for a project/site can be edited within Crafter Studio’s Project Tools > Configuration UI or via Git. These files are:
Configuration File |
Description |
|---|---|
Engine Project Configuration ( |
Contains project properties used by Crafter Engine |
Engine Project Application Context ( |
Contains bean definitions for the site context associated with the Webapp |
URL Rewrite Configuration (XML Style) ( |
Contains URL rewrite rules |
Proxy Config ( |
Configures the proxy servers for the Preview server (Crafter Engine in Preview Mode) |
Note
All configuration files can be overridden by environment. Learn more about multi-environment support in Engine Multi-Environment Support.
The configuration file site-config.xml has some additional considerations. This file can be defined in:
/config/engine/env/{envName}/site-config.xml: This is the environment override, and is loaded first if present./config/engine/site-config.xml: This is the main configuration file for the project/site. This file is loaded if the environment override is not present.
Note
All properties will be available for developers in the Freemarker templates and Groovy scripts using the siteConfig variable. The siteConfig variable is an instance of the XMLConfiguration class.
Instance-level Configuration
The main files for configuring Crafter Engine at the instance level are:
Configuration File |
Description |
|---|---|
|
Contains server configurable parameters such as URLs, paths, etc. |
|
Contains the bean definition for services layer |
|
Contains the bean definition for rendering |
|
Contains loggers, appenders, etc. |
These configuration files for Crafter Engine is located under CRAFTER_HOME/bin/apache-tomcat/shared/classes/crafter/engine/extension, where CRAFTER_HOME is the install directory of your CrafterCMS authoring or delivery environment.
The files can be accessed by opening the files using a text editor. Any changes made to any of the files listed above will require a restart of Crafter Engine.
Engine Configuration Properties
In this section we will highlight some of the more commonly used properties in the configuration of Crafter Engine. For most properties, please see the server-config.properties file, and for additional configuration files and properties, see Configuration Files.
Property |
Purpose |
|---|---|
Allows you to set the content root folder |
|
Allows you to turn off showing errors in line with content |
|
Allows you to add headers to responses, such as caching policies |
|
Allows you to configure the Groovy sandbox to tweak the Groovy security layer |
|
Allows you to configure URL rewriting |
|
Allows you to configure SPA |
|
Allows you to configure CORS headers |
|
Allows you to configure the proxy for the Preview server (Crafter Engine in Preview Mode) |
|
Allows you to configure various cache related items such as items to be preloaded in cache, etc. |
|
Allows you to configure request filtering |
|
Allows you to configure forwarded headers |
|
Allows you to configure policy headers |
|
Allows you to configure a custom health check script |
|
Allows you to configure additional fields for dynamic navigation items |
|
Allows you to configure the search client connection timeout, socket timeout and number of threads |
|
Allows you to configure the content-length header |
|
Allows you to configure static methods in Freemarker templates |
|
Allows you to configure SpEL expressions for custom app contexts |
|
Allows you to configure logging levels |
|
Allows you to configure Spring application context |
|
Allows you to configure Crafter Engine access to MongoDB |
|
Allows you to configure Crafter Engine access to Crafter Profile APIs |
Engine Root Folder
Crafter Engine requires a root folder path to be configured if the defaults are not used.
The default root folder path has the pattern: crafter.engine.site.default.rootFolder.path=file:${CRAFTER_DATA_DIR}/repos/sites/{siteName}/ This relies on the CRAFTER_DATA_DIR environment variable being set. Crafter Engine will then resolve the {siteName} variable to the name of the site being requested.
To change the root folder path, you can either set the CRAFTER_DATA_DIR environment variable or change the default root folder path in the server-config.properties file (see more about that file in server-config.properties. The variable to modify is:
{delivery-env-directory}/bin/apache-tomcat/shared/classes/crafter/engine/extension/server-config.propertiescrafter.engine.site.default.rootFolder.path=file:${CRAFTER_DATA_DIR}/repos/sites/{siteName}/
Turn Off Show Error
Templates in CrafterCMS will display the errors in line with content as they encounter them to help the template developer during the coding process. On production environments, you do not want the errors to show up because it will highlight site issues and expose information that may be a security concern. To turn off showing errors in line with content, do the following:
Place the following property and value in the
server-config.propertiesfileCRAFTER_HOME/bin/apache-tomcat/shared/classes/crafter/engine/extension/server-config.propertiescrafter.engine.template.error.displayInView=false
Restart the Crafter Engine application or the Tomcat service.
Test by deploying an FTL file with an error in it. Note that the error will not show up but is printed out in the server’s log file.
HTTP Response Headers
CrafterCMS supports adding headers to responses when there are matched configuration patterns in
the Engine Project Configuration file
To setup HTTP response headers, do the following:
- Configure the Ant path pattern to match for adding headers to response in headerMappings.mapping.urlPattern
- Configure the <header> element and the <value>` element ` with your desired values under headerMappings.mapping.headers.
<headerMappings>
  <mapping>
    <urlPattern>/**/*.pdf</urlPattern>
    <headers>
      <header>
        <name>X-Crafter-Document</name>
        <value>true</value>
      </header>
    </headers>
  </mapping>
</headerMappings>
Setting Cache Headers
Cache headers allows specifying caching policies such as how an item is cached, maximum age before expiring, etc. These headers are extremely useful for indicating cache TTLs to CDNs and browsers on certain requests.
To setup cache headers, do the following:
Configure the Ant path pattern to match for adding headers to response in headerMappings.mapping.urlPattern
Configure the
<header>element with the valueCache-Controland the element<value>with your desired Cache-Control directive under headerMappings.mapping.headers.See here for a list of available directives to use with
Cache-Control.
Your configuration should look something like below:
<headerMappings>
  <mapping>
    <urlPattern>/articles/**</urlPattern>
    <headers>
      <header>
        <name>Cache-Control</name>
        <value>max-age=60\, s-maxage=300</value>
      </header>
    <headers>
  </mapping>
</headerMappings>
Please note that the Cache-Control header inserted to responses by default is set to No-Cache.
Groovy Sandbox Configuration
When a Groovy script is executed all code is validated against a blacklist of insecure expressions to prevent code that could compromise the system. When you try to execute a script that contains insecure expressions you will see an error similar to this:
UnsupportedOperationException: Insecure call staticMethod java.lang.Runtime getRuntime ...
It is recommended to keep the default configuration if possible. However, if access to one or more of the blacklisted expressions is required, it is possible to override the blacklist configuration. Configuration is global and affects all scripts on the server.
Warning
When you allow a script to make an insecure call you should make sure it can only be executed with known arguments and never with unverified user input.
Groovy Sandbox Properties
The following allows you to configure the Groovy sandbox.
The Groovy sandbox is enabled by default and can be disabled by changing the property crafter.engine.groovy.sandbox.enable to false.
1# Indicates if the sandbox should be enabled for all sites
2crafter.engine.groovy.sandbox.enable=true
3# Indicates if the blacklist should be enabled for all sites (this will have no effect if the sandbox is disabled)
4crafter.engine.groovy.sandbox.blacklist.enable=true
5# The location of the default blacklist to use for all sites (this will have no effect if the sandbox is disabled)
6crafter.engine.groovy.sandbox.blacklist.path=classpath:crafter/engine/groovy/blacklist
Using a Custom Blacklist
Crafter Engine includes a default blacklist that you can find here. Make sure you review the branch/tag you’re using.
To use a custom blacklist follow these steps:
Copy the default blacklist file to your classpath, for example:
CRAFTER_HOME/bin/apache-tomcat/shared/classes/crafter/engine/extension/groovy/blacklistRemove or comment (adding a
#at the beginning of the line) the expressions that your scripts requireUpdate the server-config.properties configuration file to load the custom blacklist:
CRAFTER_HOME/bin/apache-tomcat/shared/classes/crafter/engine/extension/server-config.properties# The location of the blacklist to use for all sites (this will have no effect if the sandbox is disabled) crafter.engine.groovy.sandbox.blacklist.path=classpath:crafter/engine/extension/groovy/blacklist
Note
In CrafterCMS v3.1.14 and prior, the name of the property is
crafter.engine.groovy.sandbox.blacklistRestart CrafterCMS
Now you can execute the same script without any issues.
Disabling the Sandbox Blacklist
It is possible to disable the blacklist to allow the execution of most expressions, in case you need to use a considerable number of the expression included in the blacklist while keeping some basic restrictions. To disable the blacklist for all projects/sites update the server configuration file server-config.properties:
# Indicates if the blacklist should be enabled for all sites (this will have no effect if the sandbox is disabled)
crafter.engine.groovy.sandbox.blacklist.enable=false
Important Notes
There are some limitations that should be noted when working with the Groovy Sandbox.
- One limitation is that an exception is thrown during execution when a Groovy class has a property and a getter method for the property. Here’s an example code that throws an exception during execution:
class Test {
  private String message

  public String getMessage() {
     return this.message
  }
}

def t = new Test()
t.message = "this is a test"

return t.getMessage()
Here’s the error thrown in the logs by the code above:
Caused by: java.lang.StackOverflowError
     at groovy.lang.GroovyClassLoader.loadClass(GroovyClassLoader.java:693)
     at groovy.lang.GroovyClassLoader$InnerLoader.loadClass(GroovyClassLoader.java:450)
     at groovy.lang.GroovyClassLoader.loadClass(GroovyClassLoader.java:812)
     at groovy.lang.GroovyClassLoader.loadClass(GroovyClassLoader.java:800)
     at sun.reflect.GeneratedMethodAccessor340.invoke(Unknown Source)
     at sun.reflect.DelegatingMethodAccessorImpl.invoke(DelegatingMethodAccessorImpl.java:43)
     at java.lang.reflect.Method.invoke(Method.java:498)
     at org.codehaus.groovy.reflection.CachedMethod.invoke(CachedMethod.java:98)
     at groovy.lang.MetaMethod.doMethodInvoke(MetaMethod.java:325)
     at groovy.lang.MetaClassImpl.getProperty(MetaClassImpl.java:1845)
     at groovy.lang.MetaClassImpl.getProperty(MetaClassImpl.java:3773)
     at Test.getProperty(test.get.groovy)
     at org.codehaus.groovy.runtime.InvokerHelper.getProperty(InvokerHelper.java:190)
     at org.codehaus.groovy.runtime.ScriptBytecodeAdapter.getProperty(ScriptBytecodeAdapter.java:469)
     at org.kohsuke.groovy.sandbox.impl.Checker$7.call(Checker.java:392)
     at org.kohsuke.groovy.sandbox.GroovyInterceptor.onGetProperty(GroovyInterceptor.java:68)
     at org.jenkinsci.plugins.scriptsecurity.sandbox.groovy.SandboxInterceptor.onGetProperty(SandboxInterceptor.java:297)
     at org.kohsuke.groovy.sandbox.impl.Checker$7.call(Checker.java:390)
     at org.kohsuke.groovy.sandbox.impl.Checker.checkedGetProperty(Checker.java:394)
     at org.kohsuke.groovy.sandbox.impl.Checker$checkedGetProperty$1.callStatic(Unknown Source)
     at Test.getMessage(test.get.groovy:5)
Workarounds
There are a couple of things you can do to get around the exception being thrown:
Do not use getter methods and instead access the property directly
Using the example above, we’ll access the property directly:class Test { private String message } def t = new Test() t.message = "this is a test" return t.message
Use a different name for the property and the getter method
Again, using the example above, we’ll use a different name from the property for the getter method:class Test { private String theMessage public String getMessage() { return this.theMessage } } def t = new Test() t.theMessage = "this is a test" return t.getMessage()
Engine URL Rewrite Configuration
URL rewriting turns hard to remember, long and complicated URLs into easier to remember URLs.
CrafterCMS comes with the Tuckey URLRewrite filter, a Java Web Filter with functionality like Apache’s mod_rewrite, that lets you setup rewrite rules for your site.
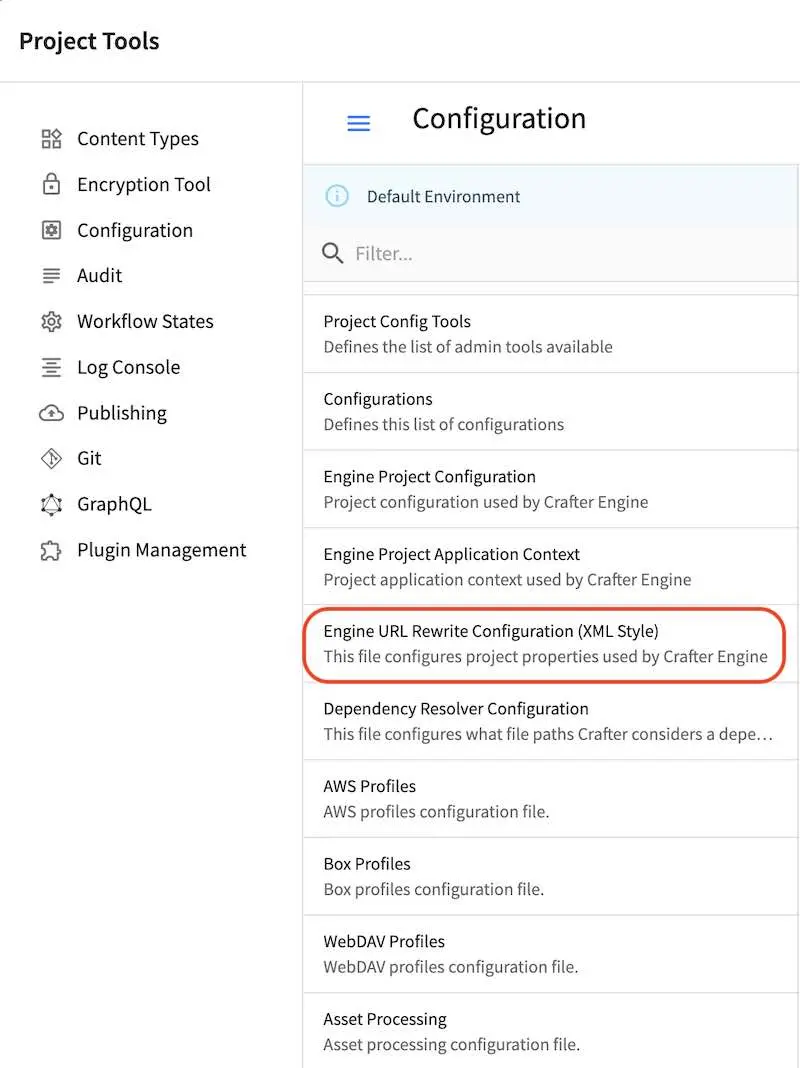
To add a URL rewrite rule, in Studio, open the Sidebar then click on ![]() . Click on Configuration
then select Engine URL Rewrite Configuration (XML Style).
. Click on Configuration
then select Engine URL Rewrite Configuration (XML Style).
Sample
Here’s a sample urlrewrite.xml file (click on the triangle on the left to expand/collapse):
Sample "urlrewrite.xml"
 1<?xml version="1.0" encoding="utf-8"?>
 2
 3<!--
 4  ~ Copyright (C) 2007-2022 Crafter Software Corporation. All Rights Reserved.
 5  ~
 6  ~ This program is free software: you can redistribute it and/or modify
 7  ~ it under the terms of the GNU General Public License version 3 as published by
 8  ~ the Free Software Foundation.
 9  ~
10  ~ This program is distributed in the hope that it will be useful,
11  ~ but WITHOUT ANY WARRANTY; without even the implied warranty of
12  ~ MERCHANTABILITY or FITNESS FOR A PARTICULAR PURPOSE.  See the
13  ~ GNU General Public License for more details.
14  ~
15  ~ You should have received a copy of the GNU General Public License
16  ~ along with this program.  If not, see <http://www.gnu.org/licenses/>.
17  -->
18
19<urlrewrite>
20
21    <rule>
22        <from>^/some/olddir/(.*)$</from>
23        <to type="redirect">/very/newdir/$1</to>
24    </rule>
25
26    <rule match-type="wildcard">
27        <from>/blog/archive/**</from>
28        <to type="redirect">/roller/history/$1</to>
29    </rule>
30
31</urlrewrite>
After making your changes and saving the configuration, remember to publish the configuration file just saved
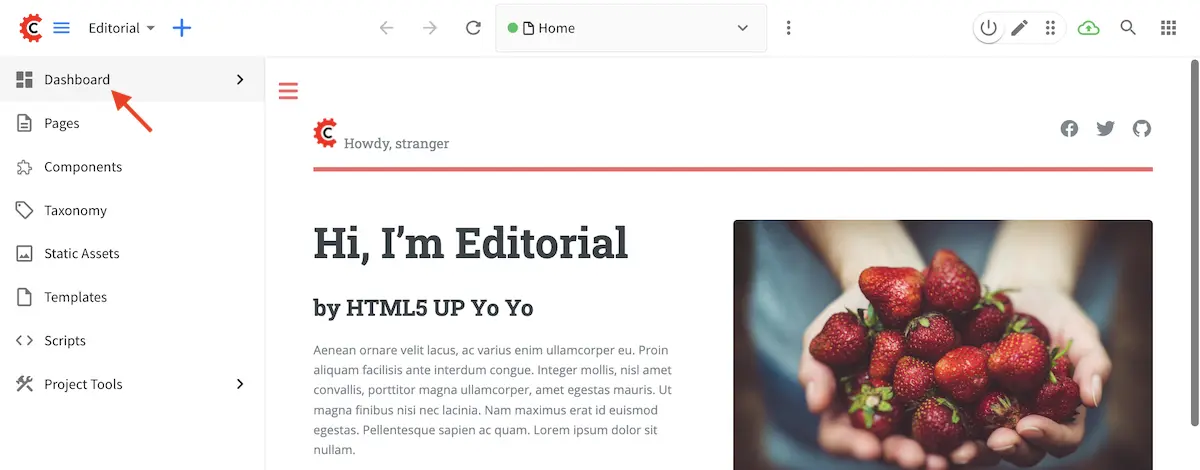
(urlrewrite.xml file). To publish the configuration file, from the Sidebar, click on Dashboard.
In the Unpublished Work dashlet, check the box next to the urlrewrite.xml file, and click Publish
from the context nav to publish.

For more information on the UrlRewriteFilter, see http://tuckey.org/urlrewrite/
Single Page Application (SPA)
The following section allows you to configure Single Page Application (SPA) mode and view name.
(Single Page Application Properties (React JS, Angular, Vue.js, etc.))
<spa>
    <enabled /> (Enable/disable SPA mode, default is false)
    <viewName /> (The view name for the SPA (Single Page Application). Current view names can be a page URL (like /) or a template name (like /template/web/app.ftl). Default is /)
</spa>
CORS
The following section allows you to configure CORS headers in REST API responses when not in preview mode.
(CORS Properties)
<cors>
    <enable>true</enable> (Enable/disable CORS headers, default is false)
    (Values for each of the headers that will be added to responses)
    <accessControlMaxAge>3600</accessControlMaxAge>
    <accessControlAllowOrigin>*</accessControlAllowOrigin>
    <accessControlAllowMethods>GET\, OPTIONS</accessControlAllowMethods>
    <accessControlAllowHeaders>Content-Type</accessControlAllowHeaders>
    <accessControlAllowCredentials>true</accessControlAllowCredentials>
</cors>
where:
<accessControlAllowOrigin>values are split using,. Remember that commas inside patterns need to be escaped with a\, like this:<accessControlAllowOrigin>http://localhost:[8000\,3000],http://*.other.domain</accessControlAllowOrigin><accessControlAllowMethods>and<accessControlAllowHeaders>values are split using,. Remember to escape the commas,separating the values like this:<accessControlAllowHeaders>X-Custom-Header\, Content-Type</accessControlAllowHeaders>or<accessControlAllowMethods>GET\, OPTIONS</accessControlAllowMethods>
Note
When engine is in preview mode, it is a proxy and therefore will not add CORS headers to REST API responses even if CORS is enabled.
Proxy Configuration
CrafterCMS supports a proxy system to proxy GraphQL, Engine, NodeJS or other application delivery systems. Whenever Crafter Engine receives a request, it is matched against the patterns of each server and the first match would then get the request sent to the server with the matching pattern. In some systems, multiple servers are used for search, Studio, etc. Using the proxy helps simplify the system.
One of the benefits of using the proxy in CrafterCMS is that it can connect to any remote server as the preview server, which allows for easier authoring of projects built with other programming languages and technology, React, Angular, or Vue for example.
The proxy configuration file contains configuration for the preview proxy servers.
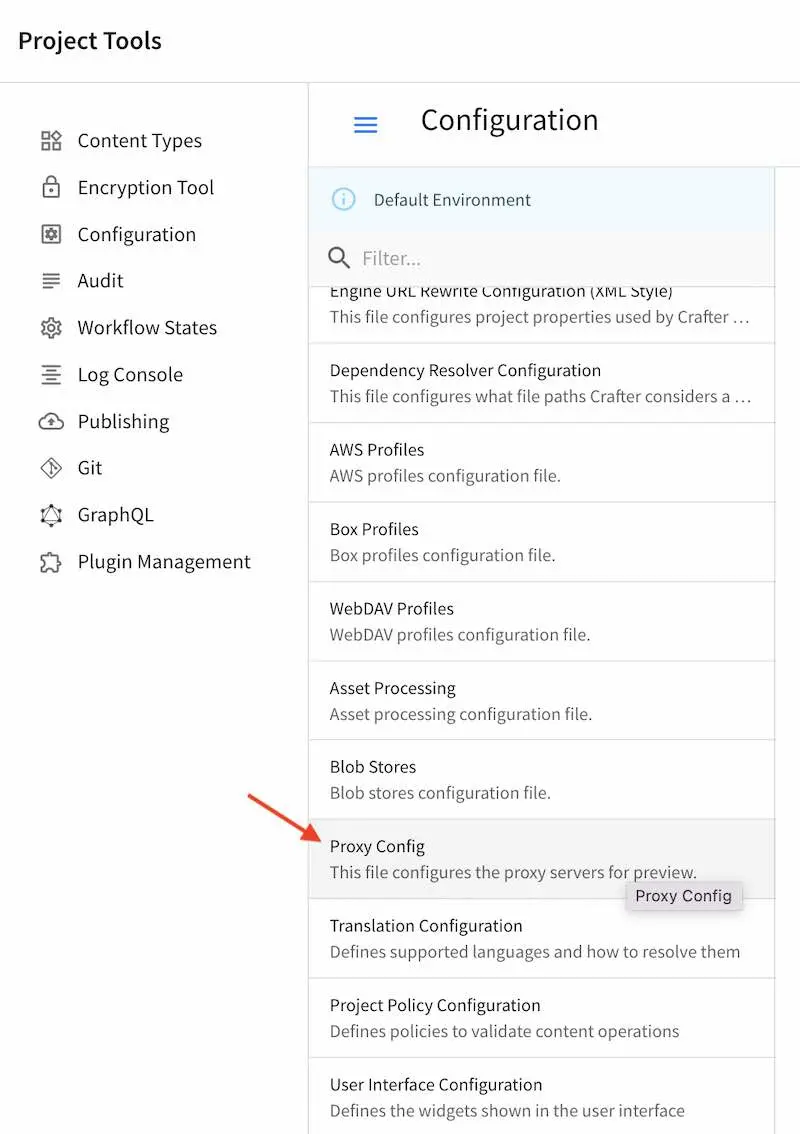
To modify the proxy configuration, click on ![]() from the bottom of the Sidebar, then click on Configuration and select Proxy Config from the dropdown list.
from the bottom of the Sidebar, then click on Configuration and select Proxy Config from the dropdown list.
Here’s a sample Proxy Configuration file (click on the triangle on the left to expand/collapse):
Sample "proxy-config.xml"
 1<?xml version="1.0" encoding="utf-8"?>
 2
 3<!--
 4  ~ Copyright (C) 2007-2022 Crafter Software Corporation. All Rights Reserved.
 5  ~
 6  ~ This program is free software: you can redistribute it and/or modify
 7  ~ it under the terms of the GNU General Public License version 3 as published by
 8  ~ the Free Software Foundation.
 9  ~
10  ~ This program is distributed in the hope that it will be useful,
11  ~ but WITHOUT ANY WARRANTY; without even the implied warranty of
12  ~ MERCHANTABILITY or FITNESS FOR A PARTICULAR PURPOSE.  See the
13  ~ GNU General Public License for more details.
14  ~
15  ~ You should have received a copy of the GNU General Public License
16  ~ along with this program.  If not, see <http://www.gnu.org/licenses/>.
17  -->
18
19<!--
20    This file configures the proxy servers for preview.
21
22    Every request received by Engine will be matched against the patterns of each server
23    and the first one that matches will be used as proxy.
24
25    <server>
26        <id/> (id of the server, can have any value)
27        <url/> (url of the server, if missing or empty the request will be executed locally)
28        <patterns>
29            <pattern/> (regex to match requests)
30        </patterns>
31    </server>
32-->
33
34<proxy-config>
35    <version>1</version>
36    <servers>
37        <!-- Proxy all GraphQL requests to this server (can be any HTTP compatible GraphQL server) -->
38        <server>
39            <id>graphql</id>
40            <url>http://my-graphql-server</url>
41            <patterns>
42                <pattern>/api/1/site/graphql.*</pattern>
43            </patterns>
44        </server>
45
46        <!-- Proxy all Crafter Engine API requests to this server -->
47        <server>
48            <id>engine</id>
49            <url>http://my-crafter-egine-server</url>
50            <patterns>
51                <pattern>/api/.*</pattern>
52            </patterns>
53        </server>
54
55        <!-- Proxy all Crafter Engine static-assets requests to this server -->
56        <server>
57            <id>static-assets</id>
58            <url>http://my-crafter-engine-server</url>
59            <patterns>
60                <pattern>/static-assets/.*</pattern>
61            </patterns>
62            <headersToServer>
63                <header>
64                    <name>authorization</name>
65                    <value>Bearer eyJhbGciOiJQQkVTMi1IUzUxMit...</value>
66                </header>
67            </headersToServer>
68            <headersToClient>
69                <header>
70                    <name>Cache-Control</name>
71                    <value>no-cache\, no-store\, max-age=0\, must-revalidate</value>
72                </header>
73                <header>
74                    <name>Access-Control-Allow-Origin</name>
75                    <value>http://my-crafter-engine-server</value>
76                </header>
77                <header>
78                    <name>Access-Control-Allow-Methods</name>
79                    <value>GET\, PUT</value>
80                </header>
81            </headersToClient>
82        </server>
83
84        <!-- Proxy any other request to this server (can be any web or application server) -->
85        <server>
86            <id>preview</id>
87            <url>http://my-web-server</url>
88            <patterns>
89                <pattern>.*</pattern>
90            </patterns>
91        </server>
92    </servers>
93</proxy-config>
Note
Deleting the config file (proxy-config.xml) from the repo completely disables the proxy feature.
Proxy Example: React
For example, you would like to work on a React application within Studio. What is normally included inside Studio is the build output of the React application, so that a user making edits to the React code would need to build the React code then copy it into Studio in order to preview the changes. This becomes cumbersome when developing, as many edits are normally done before reaching the final version of the React app. Using the proxy, the user can preview the React app in Studio and is able to work on both the React app and CrafterCMS.
Let’s take a look at an example of setting up the proxy for a React application.
We’ll look at the Video Center Blueprint, a React application available from the public marketplace, that runs on localhost:3000, then setup the Studio proxy so we can preview the React application inside Studio. Finally, we’ll make some changes in the React application and view the changes made inside Studio.
Let’s begin:
Setup the React application.
Clone the video center blueprint by running
git clone https://github.com/craftercms/video-center-blueprint.git➜ git clone https://github.com/craftercms/video-center-blueprint.git Cloning into 'video-center-blueprint'... remote: Enumerating objects: 6433, done. remote: Total 6433 (delta 0), reused 0 (delta 0), pack-reused 6433 Receiving objects: 100% (6433/6433), 77.12 MiB | 4.92 MiB/s, done. Resolving deltas: 100% (4041/4041), done.
Run the React application
Inside the video center blueprint folder that we just cloned above, navigate to
video-center-blueprint/sources/app. We needyarninstalled in your system. Runningyarnwith no command will runyarn install. In the example below, yarn is already installed in the system➜ app git:(master) yarn yarn install v1.22.4 [1/4] 🔍 Resolving packages... success Already up-to-date. ✨ Done in 0.68s.
Build the React application by running
yarn start➜ app git:(master) yarn start VITE v4.5.0 ready in 242 ms ➜ Local: http://localhost:3000/ ➜ Network: http://192.168.1.8:3000/ ➜ press h to show help
The command above will open a browser window where we can view the app

Setup Studio
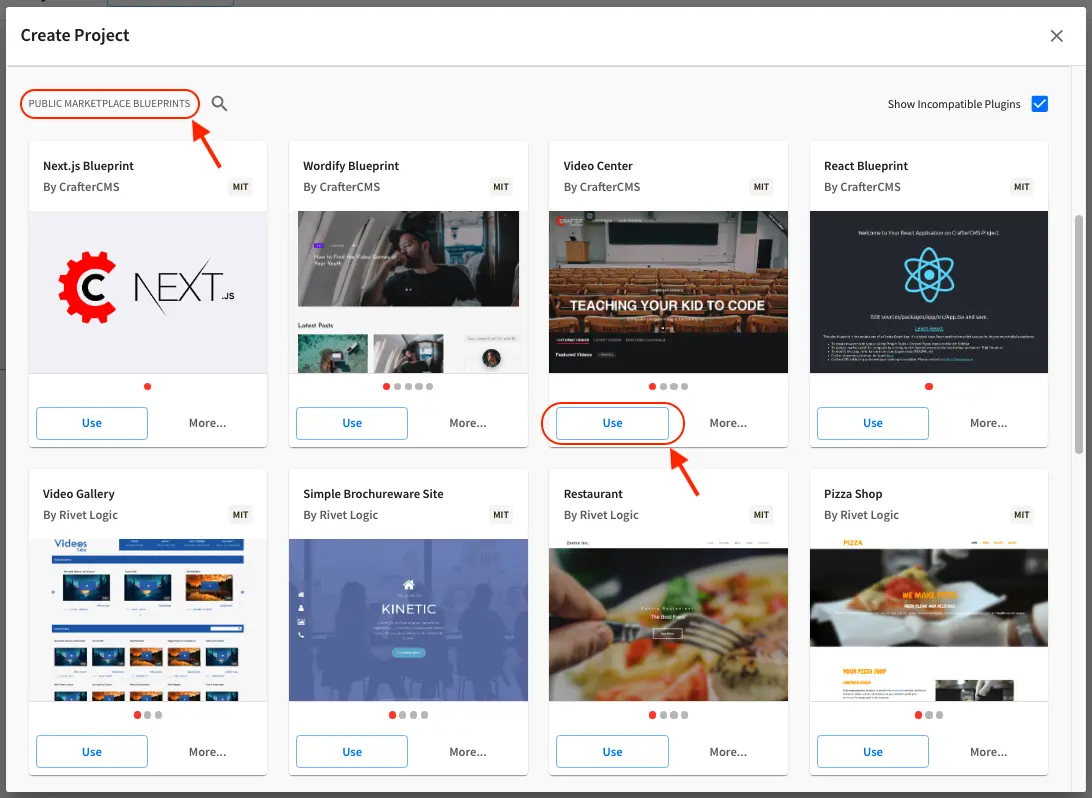
Create a project using the video center blueprint from the Public Marketplace.
From the Main Menu, click on Project, then click on the Create Project button. This will open the Create Project dialog. Look for Video Center, then click on the Use button, fill in the required information then click on the Review button, then finally the Create Project button. This Video Center blueprint we selected from the Marketplace is the same react application
Setup the proxy for the video center React application we started above
Open the Sidebar, click on
 , then click on Configuration. Select Proxy Config from the dropdown menu.
Copy and paste the configuration below. Scroll down to the
previewserver and notice thaturlpoints to the url used for the React application (localhost:3000) we setup in the beginning. Save your changes.CRAFTER_HOME/data/repos/sites/sandbox/SITENAME/sandbox/config/engine/proxy-config.xml<proxy-config> <version>4.0.1</version> <servers> <server> <id>static-assets</id> <url /> <patterns> <pattern>/static-assets/.*</pattern> </patterns> </server> <server> <id>graphql</id> <url /> <patterns> <pattern>/api/1/site/graphql.*</pattern> </patterns> </server> <server> <id>engine</id> <url /> <patterns> <pattern>/api/.*</pattern> </patterns> </server> <server> <id>preview</id> <url>http://localhost:3000</url> <patterns> <pattern>.*</pattern> </patterns> </server> </servers> </proxy-config>
For users running Studio on Docker, use
http://host.docker.internal:3000for theurlof the React application. Docker containers can access local services running on the host by connecting tohost.docker.internal. See https://docs.docker.com/docker-for-windows/networking/#use-cases-and-workarounds for more information on connecting from a container to a service on the host.At this point, the preview we are seeing in Studio should be the one from our React application.
Modify the React application then verify that we can preview the changes made inside Studio.
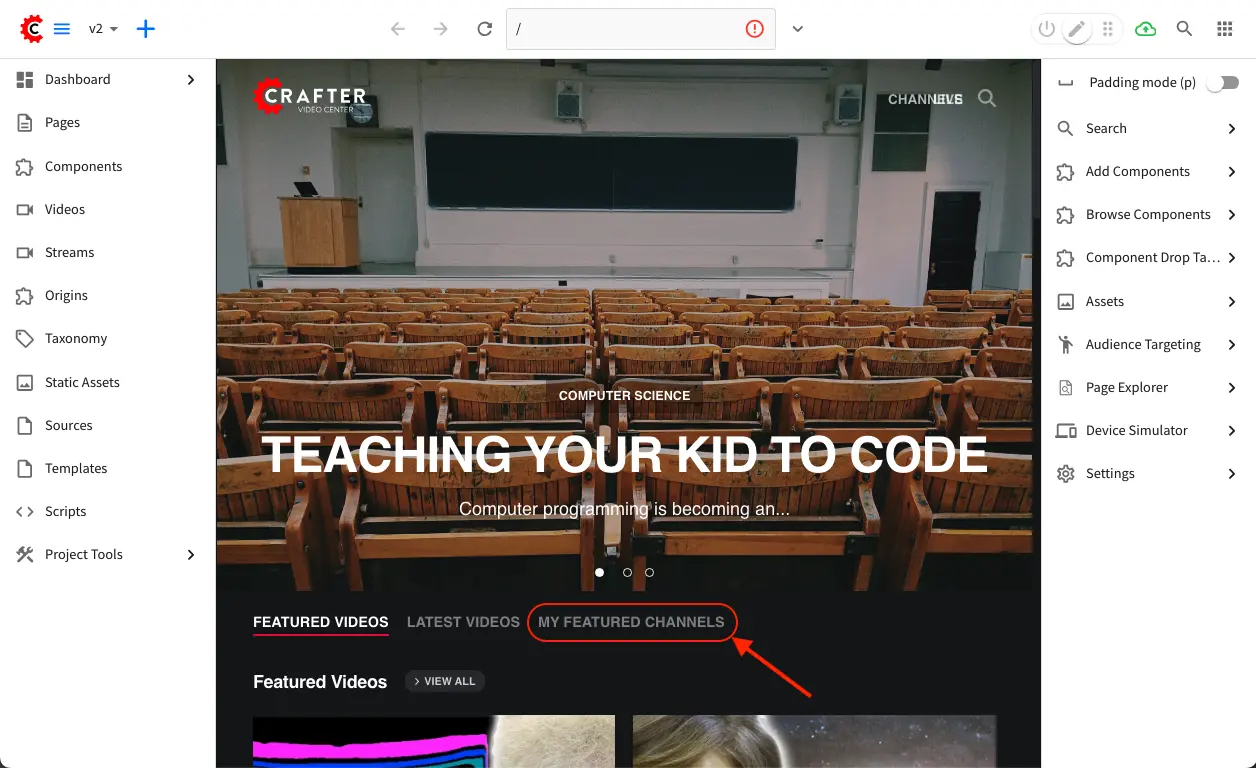
For this part, we’ll change the text
Featured Channelsin the home page toMy Featured Channels. Using your favorite editor, in your React app, navigate tovideo-center-blueprint/sources/app/src/containers/Homeand open theHome.jsxfile. Scroll down to the line withkey: 'featured-channels'and edit thevalue:{ key: 'featured-channels', value: 'My Featured Channels', type: 'channel-card-alt', ...
Save your changes. Notice that in the React app preview (localhost:3000), the page is reloaded with our changes now visible. Now let’s take a look at Studio. Notice that Studio preview has reloaded and the changes we made in the React app is now visible.
Proxy Example: Next.js
Let’s take a look at another example of setting up the proxy, this time for a Next.js application.
We’ll look at the Next.js Blueprint, a Next.js application available from the public marketplace, that runs on localhost:3000, then setup the Studio proxy so we can preview the Next.js application inside Studio. Finally, we’ll make some changes in the Next.js application and view the changes made inside Studio.
Setup Studio
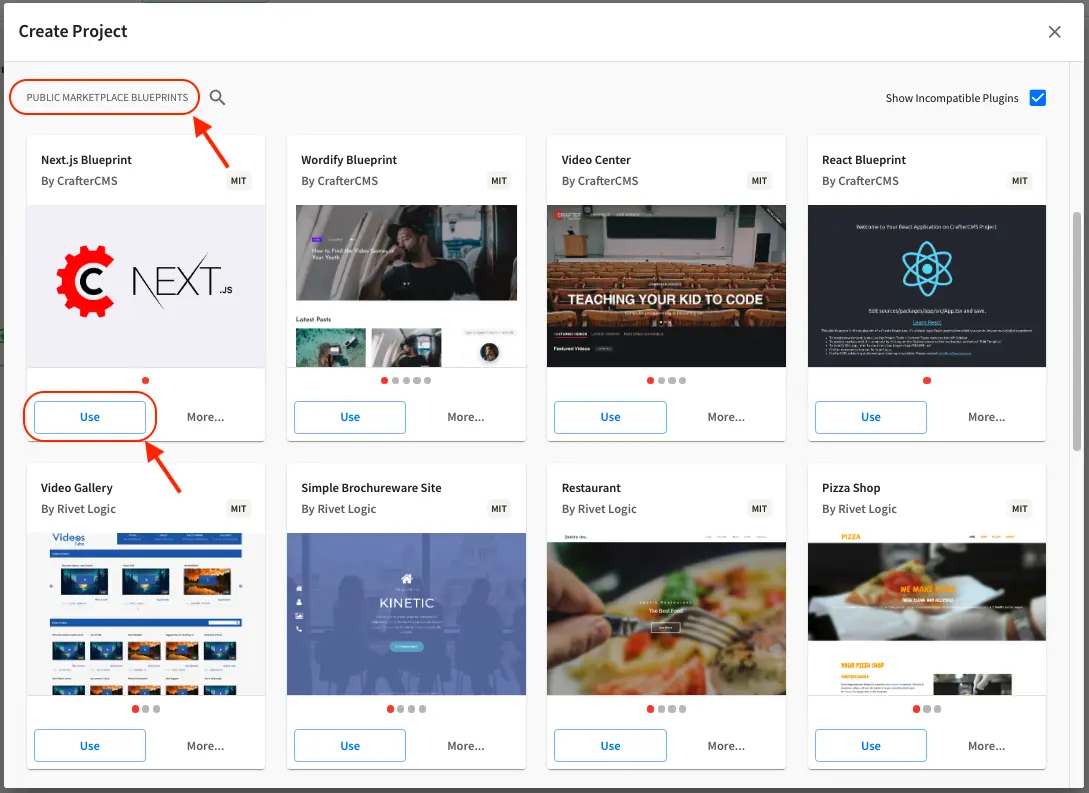
Create a project using the Next.js blueprint from the Public Marketplace.
From the Main Menu, click on Project, then click on the Create Project button. This will open the Create Project dialog. Look for Next.js, then click on the Use button, fill in the required information then click on the Review button, then finally the Create Project button. This Next.js blueprint we selected from the Marketplace contains the Next.js application that we will be proxying to Studio and the instructions for configuring the proxy.
Follow the instructions listed in the README to run the Next.js application
1. In the CrafterCMS site sandbox directory, you'll find a directory called app, which is the Next.js app. Visit that directory on your terminal and run ``yarn``
2. Create a copy of ``app/.env.local.example`` to produce ``app/.env.local``. If you named your project ``nextjs`` and CrafterCMS is running on ``localhost:8080``, no further edits are necessary; otherwise, change the file accordingly.
3. Run ``yarn dev`` to start the node server on localhost:3000
In your terminal, navigate to
CRAFTER_HOME/data/repos/sites/nextjs/sandbox/appthen runyarnCRAFTER_HOME/data/repos/sites/nextjs/sandbox/app➜ app git:(master) yarn yarn install v1.22.4 [1/4] 🔍 Resolving packages... success Already up-to-date. ✨ Done in 0.68s.
Create a copy of
app/.env.local.exampleto produceapp/.env.localCRAFTER_HOME/data/repos/sites/nextjs/sandbox/app➜ cp .env.local.example .env.local
Start the node server on
localhost:3000by runningyarn devCRAFTER_HOME/data/repos/sites/nextjs/sandbox/app➜ yarn dev ▲ Next.js 14.0.1 - Local: http://localhost:3000 - Environments: .env.local ✓ Ready in 9.6s
If you point your browser to
http://localhost:3000we can view the app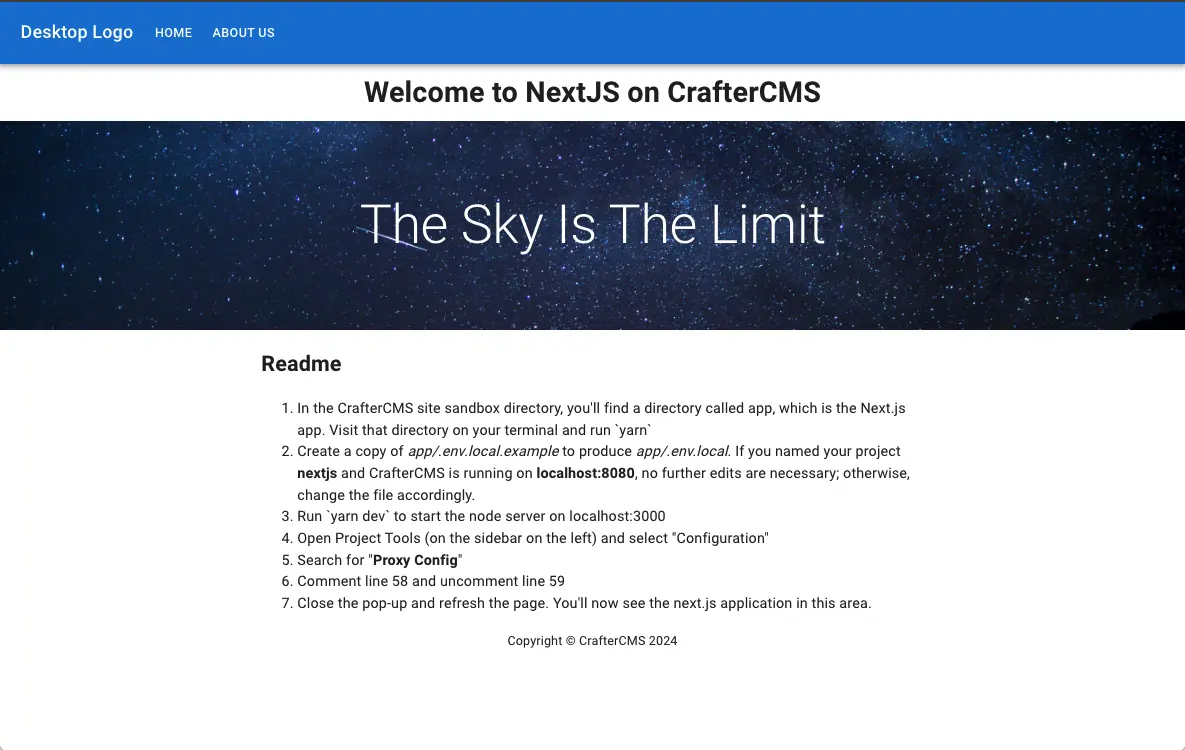
Setup the proxy for the Next.js application we started above
4. Open Project Tools (on the sidebar on the left) and select "Configuration"
5. Search for "Proxy Config"
6. Comment line 58 and uncomment line 59
7. Close the pop-up and refresh the page. You'll now see the next.js application in this area.
Open the Sidebar, click on
, then click on Configuration. Select Proxy Config from the dropdown menu.
The proxy configuration included in the Next.js blueprint is very similar to the proxy configuration listed in the React example above. Comment line 58 and uncomment line 59 in the configuration:<server> <id>preview</id> <!--url/--> <url>http://localhost:3000</url> <patterns> <pattern>.*</pattern> </patterns> </server>
After saving your changes in the configuration file, close the dialog and refresh the page. You will now see the next.js application inside Studio.
Cache
Crafter Engine sports a built-in cache engine with an LRU (least recently used) cache eviction policy. The cache is used to store an active set to help render content from memory whenever possible.
Note
When running in Preview Mode (inside Studio for preview purposes), Crafter Engine’s cache is disabled to help authors see their changes immediately.
Max Items
The following allows you to configure the maximum number of objects in Engine’s cache:
# The max number of items that each site cache can have
crafter.engine.site.default.cache.maxAllowedItems=250000
Cache Warming
The following allows you to configure items to be warmed up (preloaded) in the cache:
#################
# Cache Warm Up #
#################
# Indicates if cache warming should be enabled. This means the site cache will be warmed up (according to a list of
# cache warmers) on context init and instead of cache clear, a new cache will be warmed up and switched with the
# current one
crafter.engine.site.cache.warmUp.enabled=false
# The descriptor folders that need to be preloaded in cache, separated by comma. Specify the preload depth with
# :{depth} after the path. If no depth is specified, the folders will be fully preloaded.
crafter.engine.site.cache.warmUp.descriptor.folders=/site:3
# The content folders that need to be preloaded in cache, separated by comma. Specify the preload depth with
# :{depth} after the path. If no depth is specified, the folders will be fully preloaded.
crafter.engine.site.cache.warmUp.content.folders=/scripts,/templates
where:
The descriptor folders are paths that contain XML that needs to be parsed, loaded and merged e.g. for inheritance. Most of the time this would be folders under
/siteThe content folders are mostly static, non-processed content, e.g. scripts, templates, static-assets
For all projects, the cache is preloaded using the above configuration. CrafterCMS warms up the cache on every publish and startup. Note also that what’s cache warmed will be warmed on every publish and startup and will live as long as nothing kicks it out of the cache due to least recently used (LRU) cache.
URL Transformations Cache
The following allows you to configure whether the URL transformation performed by the view resolver will be cached:
# Flag that indicates if the URL transformations performed by the view resolver should be cached
crafter.engine.page.view.resolver.url.transformation.cache=false
S3 Object
Since 4.1.0The following allows you to configure a white list of paths for caching in memory when using S3 store and also the maximum content length for S3 objects allowed to be cached in memory
# Maximum content length (in bytes) for S3 objects to be cached in memory. Larger files will be retrieved
# directly from S3 every time they are requested.
# Default set to 10M = 10 * 1024 * 1024
crafter.engine.store.s3.cache.contentMaxLength=10485760
# White list of paths to be cached in memory when using S3 store.
crafter.engine.store.s3.cache.allowedPaths=\
  /config/.*,\
  /site/.*,\
  /scripts/.*,\
  /templates/.*,\
  /static-assets/css/.*,\
  /static-assets/js/.*,\
  /static-assets/fonts/.*
Request Filtering Configuration
Since 4.1.0The following allows you to setup a filter to deny access to any request matching the value/s defined in the property.
crafter.security.forbidden.urls=/templates/**
Forwarded Headers
The following section allows you to configure forwarded headers to resolve the actual hostname and protocol when it is behind a load balancer or reverse proxy. Forwarded headers are disabled by default.
1# Indicates if Forwarded or X-Forwarded headers should be used when resolving the client-originated protocol and
2# address. Enable when Engine is behind a reverse proxy or load balancer that sends these
3crafter.engine.forwarded.headers.enabled=false
Policy Headers
Since 4.1.2Referer Policy
The following allows you to configure what information is made available in the Referer header in a request. This can be set to a different value as needed.
1# The value of the Referer-Policy header that should be set in all requests. Supported
2# values are: no-referrer, no-referrer-when-downgrade, same-origin, origin, strict-origin,
3# origin-when-cross-origin, strict-origin-when-cross-origin, unsafe-url
4crafter.security.headers.referrerPolicy.value=no-referrer
Content Security Policy
The following allows you to configure which resources can be loaded (e.g. JavaScript, CSS, Images, etc.) and the URLs that they can be loaded from. This should be tuned to the specific requirements of each project.
1# The value of the Content-Security-Policy header that should be set in all requests.
2crafter.security.headers.contentSecurityPolicy.value=default-src 'self' 'unsafe-inline'
3# Set to true to enable the Content-Security-Policy-Report-Only header (this will report in the user agent console instead of actually blocking the requests)
4crafter.security.headers.contentSecurityPolicy.reportOnly=true
To block offending requests, set crafter.security.headers.contentSecurityPolicy.reportOnly to false.
This property is set to true by default.
X-Permitted-Cross-Domain-Policies
The following allows you to configure what other domains you want to allow access to your domain.
The X-PERMITTED-CROSS-DOMAIN-POLICIES header is set to none (do not allow any embedding) by default.
1# The value of the X-PERMITTED-CROSS-DOMAIN-POLICIES header that should be set in all requests
2crafter.security.headers.permittedCrossDomainPolicies.value=none
Custom Health Check
Each project can be configured to provide a custom health check script. By default, Engine will look for a file
/scripts/health-check.groovy containing your custom script for a health check in your project that will run
when status is checked for the project. The
location of your health check custom script, is configured in your project’s site-config.xml file as seen below:
# The path of the Groovy script for site health check
crafter.engine.site.default.health-check.script.path=/scripts/health-check.groovy
Search Timeouts
The following allows you to configure the search client connection timeout, socket timeout and number of threads.
1# The connection timeout in milliseconds, if set to -1 the default will be used
2crafter.engine.search.timeout.connect=-1
3# The socket timeout in milliseconds, if set to -1 the default will be used
4crafter.engine.search.timeout.socket=-1
5# The number of threads to use, if set to -1 the default will be used
6crafter.engine.search.threads=-1
Content-Length Headers
The following allows you to configure the content-length header sent for responses. The content-length header is sent for all responses by default.
1# Indicates if the 'etag' header should be added
2crafter.engine.header.etag.enable=false
3# Indicates the urls that will have the 'etag' header (comma separated ant matchers)
4crafter.engine.header.etag.include.urls=/**
Static Methods in Freemarker Templates
The following allows you to configure access to static methods in Freemarker templates. Access to static methods in Freemarker templates is disabled by default.
1# Indicates if access for static methods should be allowed in Freemarker templates
2crafter.engine.freemarker.statics.enable=false
Spring Expression Language
The following allows you to configure SpEL expressions for custom app contexts. SpEL expressions support is disabled by default.
1# Indicates if the custom site application contexts should support SpEL expressions
2crafter.engine.context.expressions.enable=false
3# Indicates if the whole servlet & spring context should be available for templates & scripts
4crafter.engine.disableVariableRestrictions=false
5# Patterns for beans that should always be accessible from the site application context
6crafter.engine.defaultPublicBeans=crafter\\.(targetIdManager|targetedUrlStrategy)
Spring Configuration
Each project can have it’s own Spring application context. Just as with site-config.xml, beans
can be overwritten using the following locations:
- Spring Configuration Files
/config/engine/application-context.xml(This file can be accessed easily from any project created through the out-of-the-box blueprints, by navigating from the Studio sidebar toProject Tools>Configuration, and finally picking up theEngine Project Application Contextoption from the dropdown).
/config/engine/env/{envName}/application-context.xml
The application context inherits from Engine’s own service-context.xml, and any class in Engine’s
classpath can be used, including Groovy classes declared under /scripts/classes/*.
As an example, assuming you have defined a Groovy class under /scripts/classes/mypackage/MyClass.groovy,
you can define a bean like this:
 1      <?xml version="1.0" encoding="UTF-8"?>
 2      <beans xmlns="http://www.springframework.org/schema/beans"
 3             xmlns:xsi="http://www.w3.org/2001/XMLSchema-instance"
 4             xsi:schemaLocation="http://www.springframework.org/schema/beans http://www.springframework.org/schema/beans/spring-beans.xsd">
 5
 6  <bean class="org.springframework.context.support.PropertySourcesPlaceholderConfigurer" parent="crafter.properties"/>
 7
 8  <bean id="greeting" class="mypackage.MyClass">
 9    <property name="myproperty" value="${myvalue}"/>
10  </bean>
11
12</beans>
A org.springframework.context.support.PropertySourcesPlaceholderConfigurer (like above) can be
specified in the context so that the properties of site-config.xml can be used as placeholders,
like ${myvalue}. By making the placeholder configurer inherit from crafter.properties, you’ll
also have access to Engine’s global properties (like crafter.engine.preview).
Note
Crafter Engine will not be able to load your Project Context if your context file contains invalid XML, incorrect configuration or if your beans do not properly handle their own errors on initialization.
Configure Engine to use MongoDB
There are times when you may need access to MongoDB. This section details how you can access MongoDB by configuring Engine.
Here are the steps for configuring Engine to use mongoDB:
Configure the MongoDB URI
To define the connection between MongoDB and Engine, add the URI in the config file /config/engine/site-config.xml. (This file can be accessed easily from any project created through the out-of-the-box blueprints, by navigating from the Studio sidebar to Project Tools > Configuration, and finally picking up the Engine Project Configuration option from the dropdown).
<site>
<db>
<uri>mongodb://{host}:{port}/{database}?readPreference=primary&maxPoolSize=50&minPoolSize=5&maxIdleTimeMS=1000&waitQueueMultiple=200&waitQueueTimeoutMS=100&w=1&journal=true</uri>
</db>
</site>
- where:
{host} - required, server address to connect to
{port} - optional, with a default value of :27020 in CrafterCMS Authoring
{database} - optional, name of the database to authenticate if the connection string includes authentication credentials.
For more details on the Connection String URI format, see https://docs.mongodb.com/manual/reference/connection-string/
Create a GMongo Client
To access Mongo from Groovy, we’ll use a GMongo client. We’ll need to add some beans in /config/engine/application-context.xml. (This file can be accessed easily from any project created through the out-of-the-box blueprints, by navigating from the Studio sidebar to Project Tools > Configuration, and finally picking up the Engine Site Application Context option from the dropdown).
 1<beans xmlns="http://www.springframework.org/schema/beans"
 2   xmlns:xsi="http://www.w3.org/2001/XMLSchema-instance"
 3   xsi:schemaLocation="http://www.springframework.org/schema/beans http://www.springframework.org/schema/beans/spring-beans.xsd">
 4
 5   <bean class="org.springframework.context.support.PropertySourcesPlaceholderConfigurer" parent="crafter.properties"/>
 6
 7   <bean id="mongoUri" class="com.mongodb.MongoClientURI">
 8     <constructor-arg value="${db.uri}"/>
 9   </bean>
10
11   <bean id="mongoClient" class="com.gmongo.GMongoClient">
12     <constructor-arg ref="mongoUri"/>
13   </bean>
14
15</beans>
Use the Client From a Groovy Script
We can now use the client from a Groovy script. Here’s a simple script that runs a query:
1def mongo = applicationContext.mongoClient
2def db = mongo.getDB("{database}")
3def result = null
4def record = db.{collection}.findOne(_id: "{some id}")
5if (record) {
6    result = record.name
7}
8return result
- where:
{database} - the name of an existing database
{collection} - collection name
{some id} - id you’re searching for depending on your database
Publish Configuration to Delivery
Until this point all changes have been made from Crafter Studio so they will only affect immediately the authoring environment, for a delivery environment you will need to publish the changed files.
This can be done from the Studio project dashboard with the following steps:
Go to Studio’s project dashboard via the Navigation Menu on the top right or via the Sidebar
Locate the
Unpublished Workdashlet
Select all configuration files updated in the previous sections
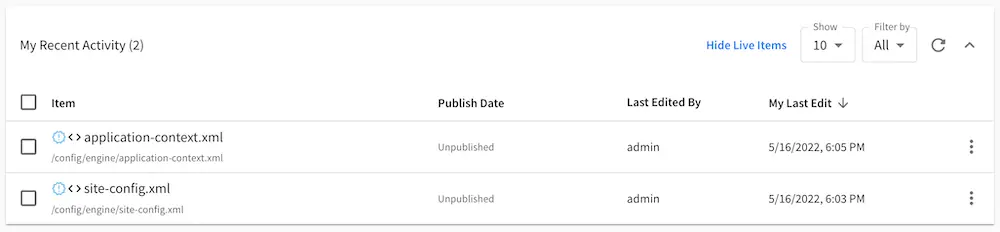
Click
Publishfrom the contextual menu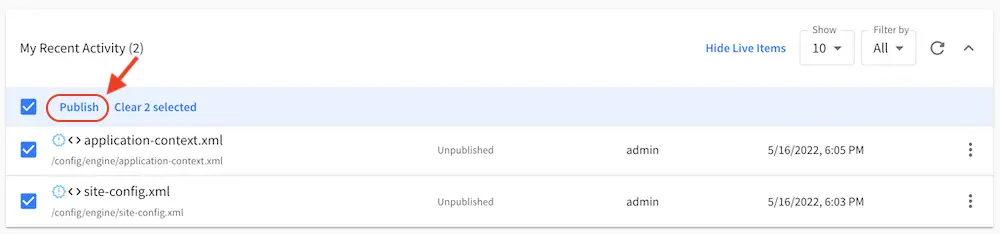
Click
Publishto close the publish dialog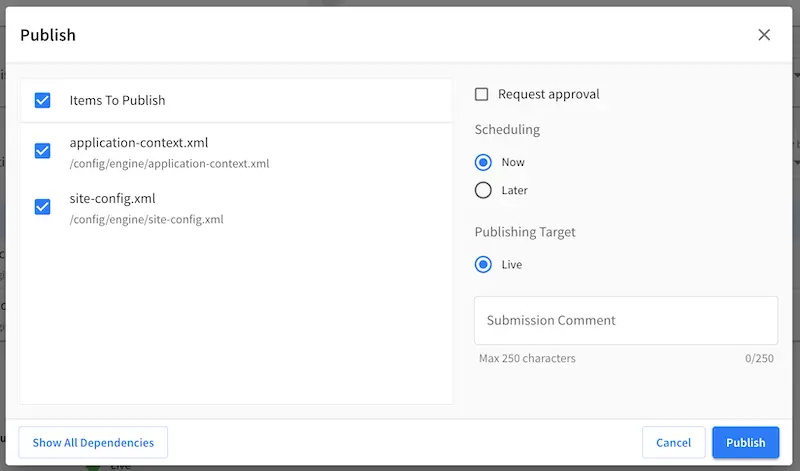
Once the files are deployed to the delivery node and the project context is reloaded the new Configuration will take effect.
Delivery Specific Configurations
If you need to manage different values for the configuration files depending on the environment you can find more detailed information in the Engine Multi-Environment Support section.
Engine Multi-Environment Support
The following engine configuration files can be setup for different environments:
site-config.xmlapplication-context.xmlurlrewrite.xml
To setup an environment for engine configuration files, do the following:
Create a folder under
data/repos/sites/${site}/sandbox/config/enginecalledenvInside the folder, create a directory called
myenv(or whatever you want to call the environment)Copy the configuration file you want to override in the new environment you are setting up, inside your
myenvfolderRemember to commit the files copied so Studio will pick it up.
In the
crafter-setenv.shfile inTOMCAT/binset the following property to desired environment:bin/crafter-setenv.sh# -------------------- Configuration variables -------------------- export CRAFTER_ENVIRONMENT=${CRAFTER_ENVIRONMENT:=myenv}
Restart Crafter
Examples
Creating a Custom Environment Example
Let’s take a look at an example of creating a new environment, called mycustomenv with the urlrewrite.xml
file overridden in the new environment for a project created using the Website Editorial blueprint. This example
is very similar to the example shown above for Studio except for the location of the custom configuration file:
We’ll create a folder called
envunderdata/repos/sites/my-editorial/sandbox/config/engine1data/ 2 repos/ 3 sites/ 4 my-editorial/ 5 sandbox/ 6 config/ 7 engine/ 8 env/
Inside the
envfolder, create a directory calledmycustomenvWe will now create the configuration file for the
urlrewrite.xmlthat we want to override in the new environment we are setting up, inside ourmycustomenvfolder:env/ mycustomenv/ urlrewrite.xmlWe will redirect the page to
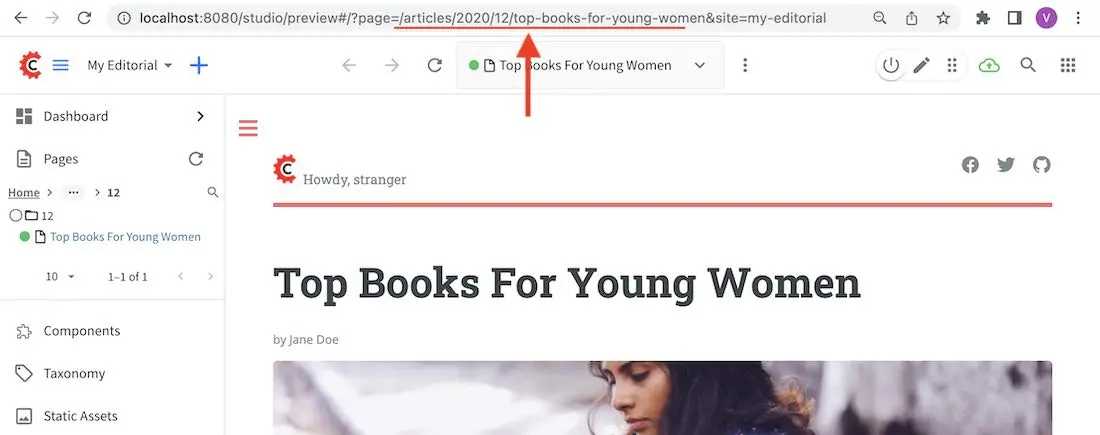
/articles/2021/12/Top Books For Young Womenwhen the page/articles/2020/12/Top Books For Young Womenis previewed. Copy the following inside theurlrewrite.xmlfile.Urlrewrite.xml file for environment mycustomenv1<?xml version="1.0" encoding="utf-8"?> 2<urlrewrite> 3 <rule> 4 <from>/articles/2020/12/(.*)$</from> 5 <to type="redirect">/articles/2021/12/$1</to> 6 </rule> 7</urlrewrite>
For our example, the folder
articles/2020/12was copied toarticles/2021with the page underarticles/2021/12, modified to display the title as a dupe. This was done so when we click on the page underarticles/2020/12, we can easily tell that it’s being redirected to the page underarticles/2021/12. Of course, you can also just look at the url of the page previewed to verify that it was redirected to the right page.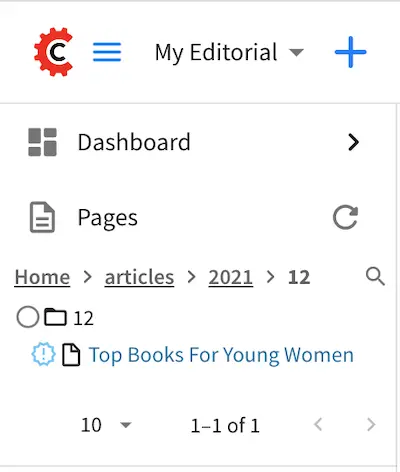
Here’s the original page:
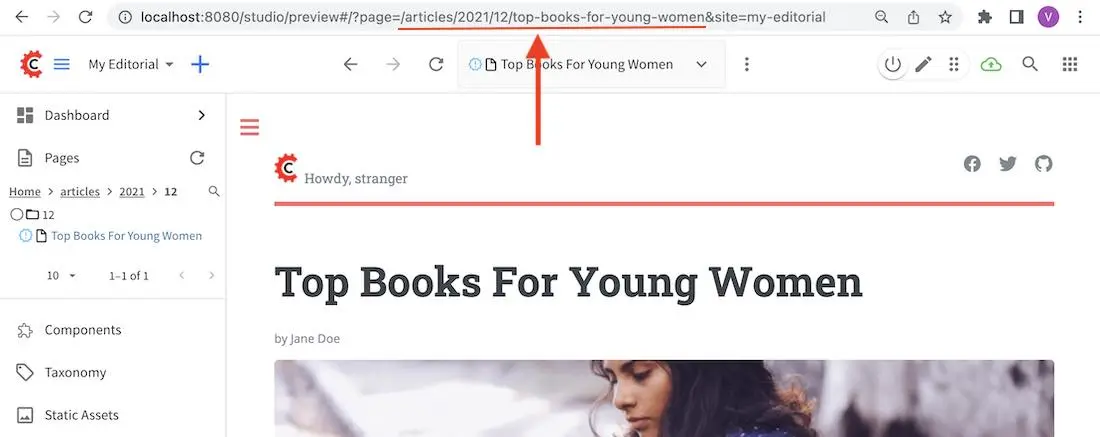
Here’s the page we want to be redirected to when previewing the page above:
Remember to commit the files copied so Studio will pick it up.
➜  sandbox git:(master) ✗ git add .
➜  sandbox git:(master) ✗ git commit -m "Add urlrewrite.xml file for mycustomenv"
Open the
crafter-setenv.shfile inTOMCAT/binand set the value ofCRAFTER_ENVIRONMENTto the environment we setup above (myenv) to make it the active environment:bin/crafter-setenv.sh# -------------------- Configuration variables -------------------- export CRAFTER_ENVIRONMENT=${CRAFTER_ENVIRONMENT:=mycustomenv}
Restart Crafter. To verify our newly setup environment, open the
Sidebarand click on, then select Configuration. Notice that the active environmentmycustomenvwill be displayed on top of the configurations drop-down box and when you select the Engine URL Rewrite Configuration (XML Style), it should display the file we created in one of the previous step:
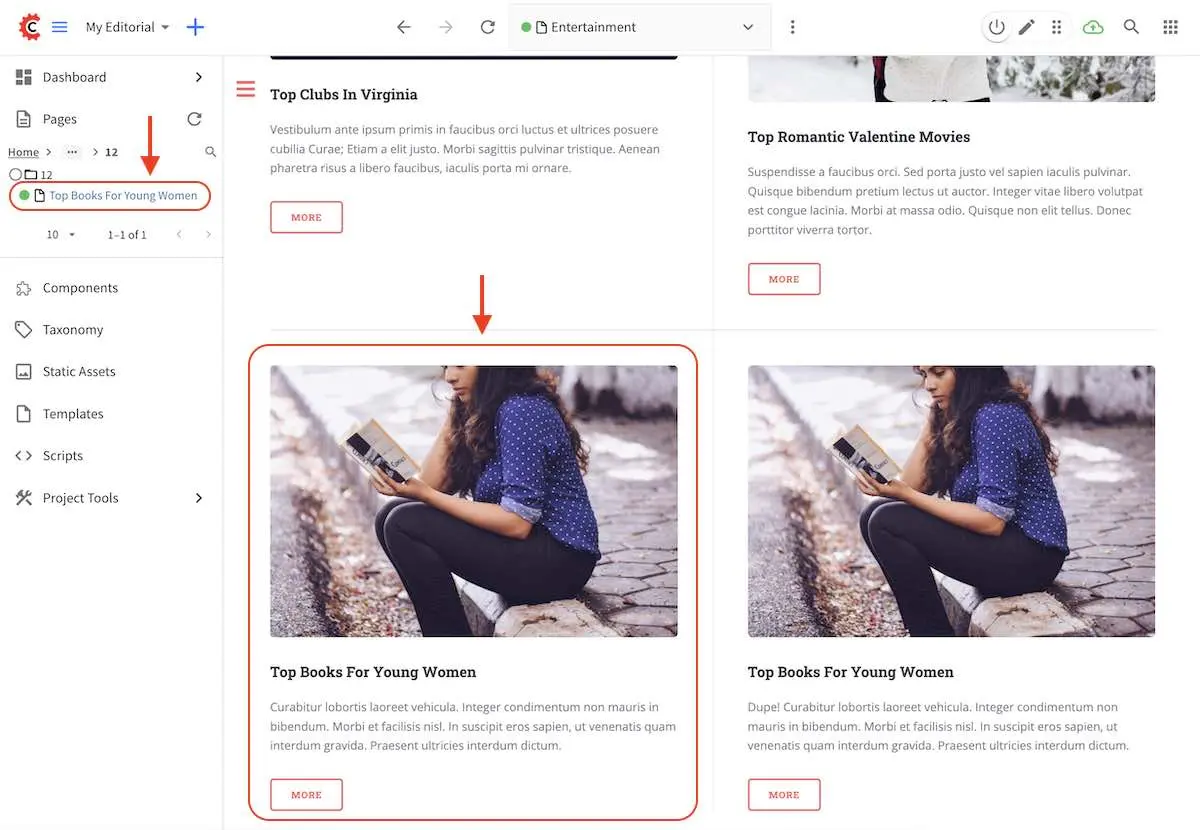
Let’s verify that our urlrewrite.xml is in effect. From the Sidebar, click on Home -> Entertainment -> Top Books For Young Women or, navigate to /articles/2020/12/ and click on Top Books For Young Women.
The preview page should take you to /articles/2021/12/Top Books For Young Women
Environment Specific Configurations Example
Environments are useful for managing values such as paths or database connections without the need to change any code directly in the servers.
In this example, we show how to manage a database connection that will change depending on the server
where the project is deployed. We will have three environments dev, auth and delivery
First create the environments by following the example above for creating the environments. We’ll then have the following folders called
dev,authanddeliveryunderCRAFTER_HOME/data/repos/sites/SITENAME/sandbox/config/engine/envNext, include the appropriate connection string for each environment in the
site-config.xmlfile:Local Development Configuration: /config/engine/env/dev/site-config.xml1<?xml version="1.0" encoding="UTF-8"?> 2<site> 3 <db> 4 <uri>mongodb://localhost:27017/mydb?maxPoolSize=1&minPoolSize=0&maxIdleTimeMS=10000</uri> 5 </db> 6</site>
Authoring Configuration: /config/engine/env/auth/site-config.xml1<?xml version="1.0" encoding="UTF-8"?> 2<site> 3 <db> 4 <uri>mongodb://localhost:27020/mydb?maxPoolSize=5&minPoolSize=2&maxIdleTimeMS=10000</uri> 5 </db> 6</site>
Delivery Configuration: /config/engine/env/delivery/site-config.xml1<?xml version="1.0" encoding="UTF-8"?> 2<site> 3 <db> 4 <uri>mongodb://delivery-db-server:27020/delivery-db?maxPoolSize=10&minPoolSize=5&maxIdleTimeMS=1000</uri> 5 </db> 6</site>
Remember to commit the files copied so Studio will pick it up.
Finally, notice when using this approach the code is completely independent of the environment so we only need one bean that will always connect to the right database:
Default Application Context: /config/engine/application-context.xml (shared by all environments)1<?xml version="1.0" encoding="UTF-8"?> 2<beans xmlns="http://www.springframework.org/schema/beans" 3 xmlns:xsi="http://www.w3.org/2001/XMLSchema-instance" 4 xsi:schemaLocation="http://www.springframework.org/schema/beans http://www.springframework.org/schema/beans/spring-beans.xsd"> 5 6 <bean class="org.springframework.context.support.PropertySourcesPlaceholderConfigurer" parent="crafter.properties"/> 7 8 <bean id="mongoUri" class="com.mongodb.MongoClientURI"> 9 <constructor-arg value="${db.uri}"/> 10 </bean> 11 12 <bean id="mongoClient" class="com.gmongo.GMongoClient"> 13 <constructor-arg ref="mongoUri"/> 14 </bean> 15 16</beans>
Engine Multi-target Support
There are some cases where the Engine configuration files need to have different values per publishing target. Say for a production environment where you have staging to test out your project and live , the project to be used by end users, you may need different SAML authentication mechanics or different URL rewrites.
The Engine Multi-Environment Support section detailed how to setup Engine configuration files per environment. CrafterCMS supports overriding Engine configuration files, not just per environment, but also per publishing target. It supports a base configuration per environment with the ability to override per publishing target.
The following engine configuration files can be setup for different publishing targets:
site-config.xml
application-context.xml
urlrewrite.xml
Here are the available publishing targets for the configuration files listed above:
preview
staging
live
Overriding Engine Configuration Files per Publishing Target
To override a configuration file in any of the publishing targets
Add the new configuration file/s for overriding to Configurations under
-> Configuration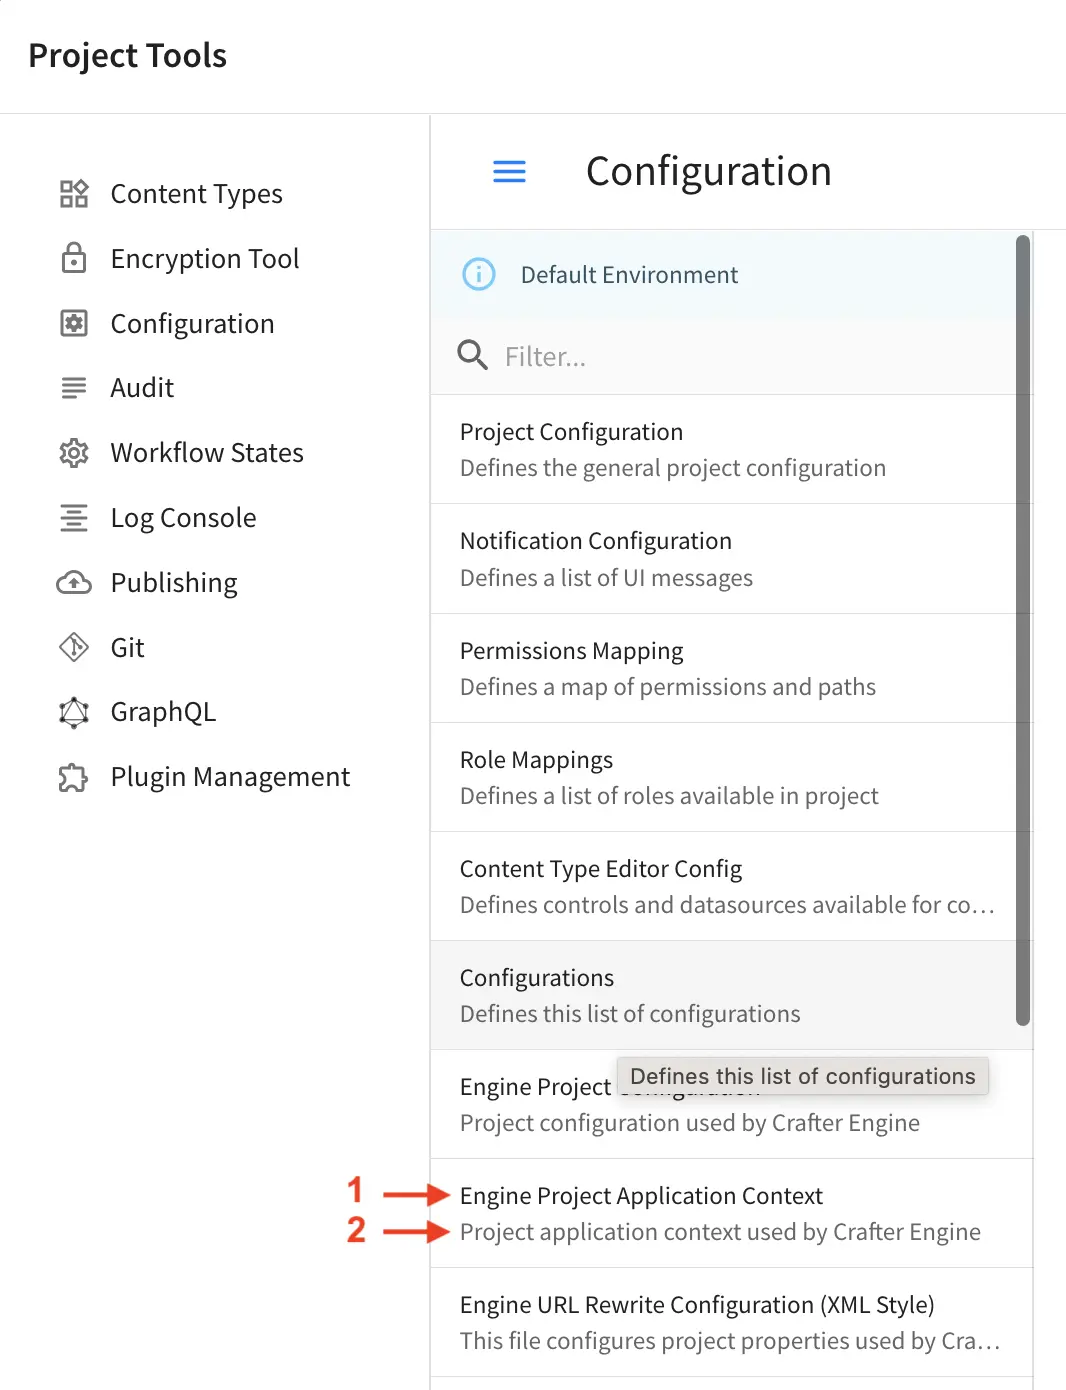
The overriding configuration file should be named configuration-to-be-overridden.publishing-target.xml. Depending on the publishing target you wish the configuration file to override, the files should look like one of the following:
configuration-to-be-overridden.preview.xml
configuration-to-be-overridden.staging.xml
configuration-to-be-overridden.live.xml
Say, to add a
urlrewrite.xmlfile override for staging, add the following in the ConfigurationsConfigurations - SITENAME/config/studio/administration/config-list.xml<file> <module>engine</module> <path>urlrewrite.staging.xml</path> <title>Engine URL Rewrite (XML Style) Staging</title> <description>Engine URL Rewrite (XML Style) Staging</description> <samplePath>sample-urlrewrite.xml</samplePath> </file>
For more information on Configurations config file, see Project Tools Configuration
Fill in your desired additions/modifications to the override configuration file. Refresh your browser. The configuration file you added from above should now be available from
-> Configuration. Open the new configuration file and make the necessary additions/modifications for the override file then save your changes.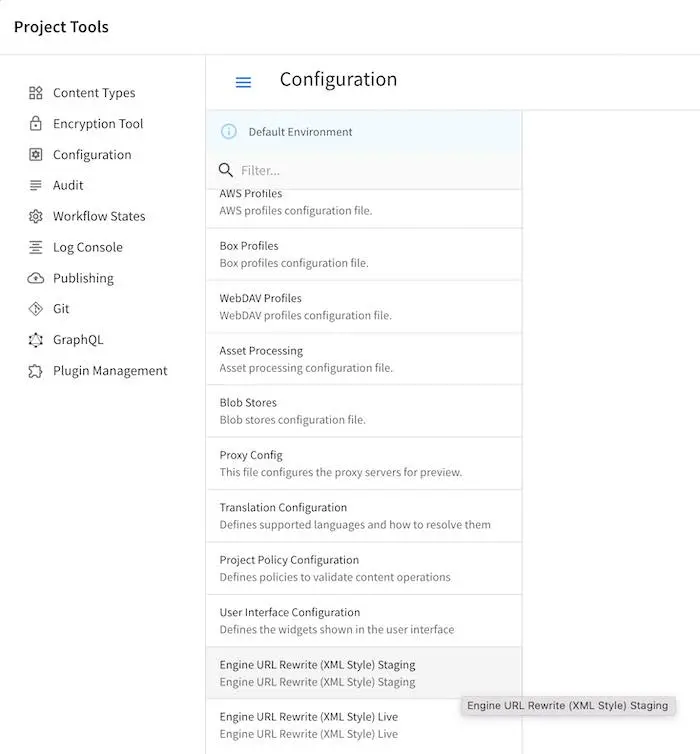
If the configuration file to be overridden is not for preview, publish the configuration file to the intended publishing target, staging or live
Example
Let’s take a look at an example of overriding the Project Configuration used by Engine site-config.xml for the staging and live publishing targets so that each target has a different SAML authentication mechanics (different identity provider in staging and live). In our example, we will use a project created using the Website Editorial blueprint named mysite
Add the new configuration file/s for overriding to Configurations under
-> Configuration. We will be overriding the site-config.xmlfile in the staging and live publishing targets, so we will add to the configuration asite-config.staging.xmlandsite-config.live.xmlfiles.Configurations - SITENAME/sandbox/config/studio/administration/config-list.xml1<file> 2 <module>engine</module> 3 <path>site-config.staging.xml</path> 4 <title>Engine Project Configuration Staging</title> 5 <description>Project Configuration used by Engine for the Staging publishing target</description> 6 <samplePath>sample-engine-site-config.xml</samplePath> 7</file> 8<file> 9 <module>engine</module> 10 <path>site-config.live.xml</path> 11 <title>Engine Project Configuration Live</title> 12 <description>Project Configuration used by Engine for the Live publishing target</description> 13 <samplePath>sample-engine-site-config.xml</samplePath> 14</file>
The configurations we added above will now be available from
-> Configuration.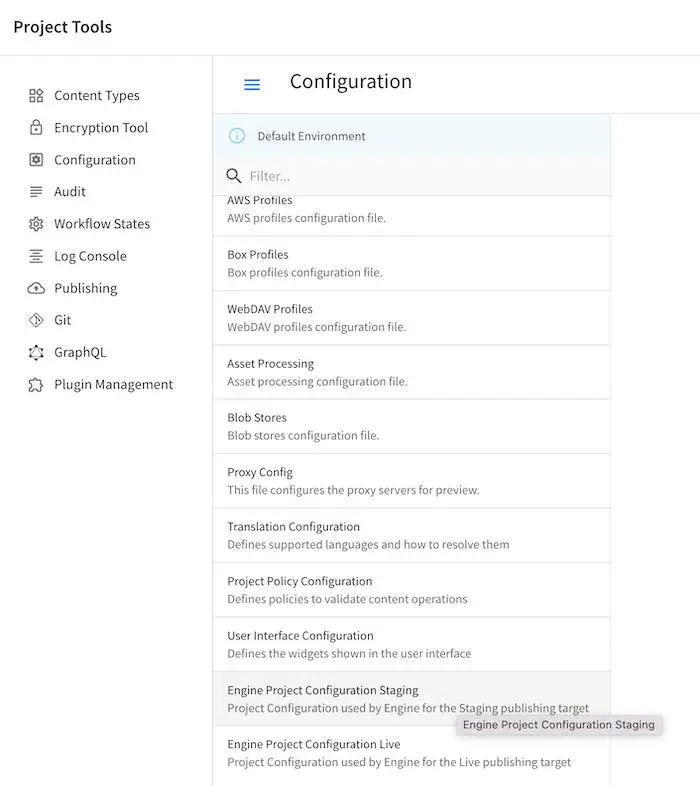
Enable SAML2 in the configuration with identity provider My IDP1 for the
site-config.staging.xmland use identity provider My IDP2 for thesite-config.live.xml.SITENAME/sandbox/config/engine/site-config.staging.xml1<site> 2 <version>4.0.1</version> 3 4 <security> 5 <saml2> 6 <enable>true</enable> 7 <attributes> 8 <mappings> 9 <mapping> 10 <name>DisplayName</name> 11 <attribute>fullName</attribute> 12 </mapping> 13 </mappings> 14 </attributes> 15 <role> 16 <mappings> 17 <mapping> 18 <name>editor</name> 19 <role>ROLE_EDITOR</role> 20 </mapping> 21 </mappings> 22 </role> 23 <keystore> 24 <defaultCredential>my-site</defaultCredential> 25 <password>superSecretPassword</password> 26 <credentials> 27 <credential> 28 <name>my-site</name> 29 <password>anotherSecretPassword</password> 30 </credential> 31 </credentials> 32 </keystore> 33 <identityProviderName>My IDP1</identityProviderName> 34 <serviceProviderName>Crafter Engine</serviceProviderName> 35 </saml2> 36 </security> 37 38</site>
For more information on SAML2 configuration, see Engine SAML2 Configuration
Publish
site-config.live.xmlto live andsite-config.staging.xmlto staging.To publish the override configuration files setup above, open the Dashboard via the Navigation Menu on the top right or via the Sidebar. Scroll to the Unpublished Work dashlet.
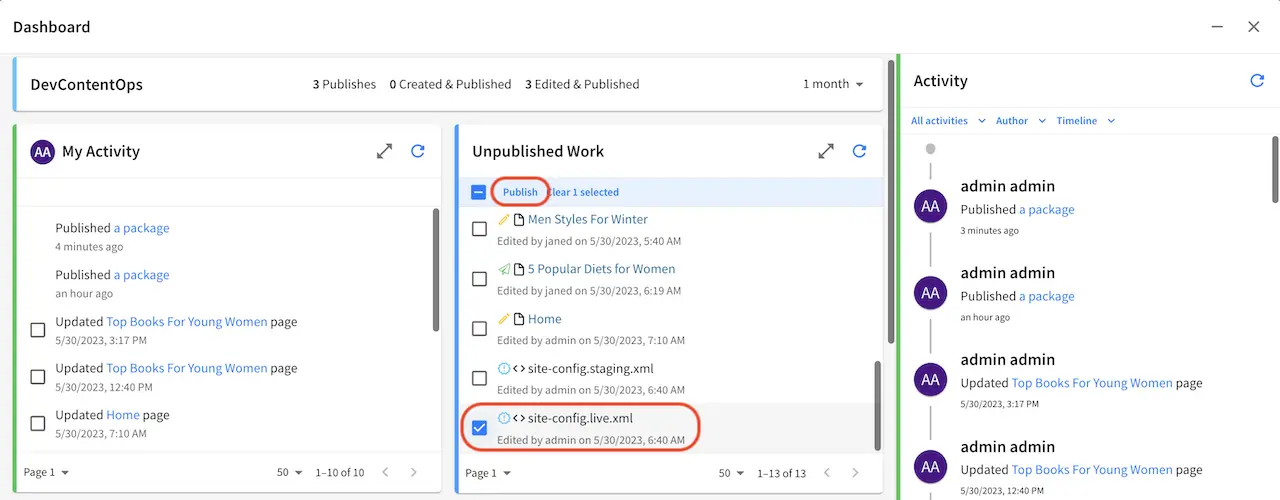
To publish the
site-config.live.xmlconfiguration file to publishing targetlive, put a check mark next to the file in the dashlet, then click onPublishfrom the context nav. Remember to set thePublishing Targetto live in thePublishdialog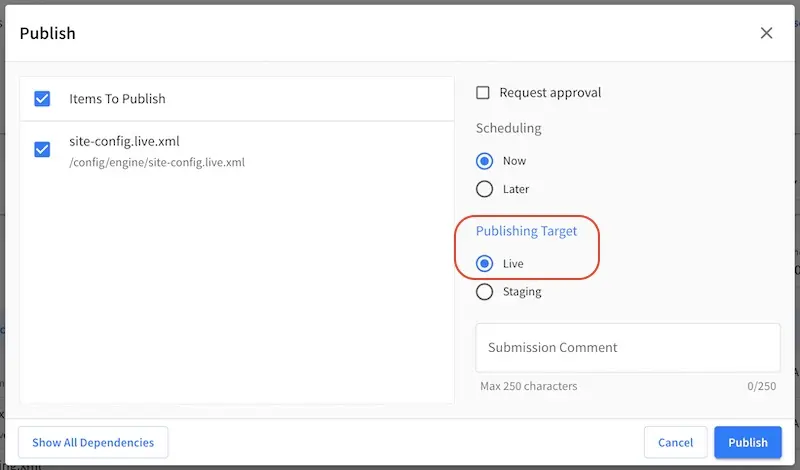
To publish the
site-config.staging.xmlfile to publishing targetstagingput a check mark next to the file in the dashlet, then click onPublishfrom the context nav. Remember to set thePublishing Targetto staging in thePublishdialog.The Engine
site-config.live.xmlconfiguration will now be loaded when viewing your project inliveand the Enginesite-config.staging.xmlconfiguration will now be loaded when viewing your project instaginginstead of the default Enginesite-config.xmlfiles
Configure Custom Services
When developing templates or scripts only a small list of services are available to use. You can expose other services with the following steps.
CrafterCMS Services
If your project/site includes a custom application context with services, you can make them available by adding them to the comma-separated list in the server-config.properties configuration file:
CRAFTER_HOME/bin/apache-tomcat/shared/classes/crafter/engine/extension/server-config.properties# Patterns for beans that should be accessible from the site application context
crafter.engine.defaultPublicBeans=crafter\\.(targetIdManager|targetedUrlStrategy),someOtherBean
Note
The value from the configuration is used as a regular expression, if the value contains special
characters you will need to escape them with backslashes \\.
System Services
Warning
This setting will disable restrictions for all projects/sites
System objects like servletContext cannot be exposed by adding them to a list, instead you will need to change
the following configuration in the server-config.properties file:
CRAFTER_HOME/bin/apache-tomcat/shared/classes/crafter/engine/extension/server-config.properties# Expose all services
crafter.engine.disableVariableRestrictions=true
Adding Dependencies with Grape
If your Groovy code need to use external dependencies you can use Grapes, however, when the Groovy sandbox is enabled
dependencies can only be downloaded during the initial compilation and not during runtime. For this reason it is
required to add an extra parameter initClass=false in the annotations to prevent them to be copied to the classes:
@Grab(group='org.apache.commons', module='commons-pool2', version='2.8.0', initClass=false)
@Grab(value='org.apache.commons:commons-pool2:2.8.0', initClass=false)