
Using Components in the Rich Text Editor (RTE)
RTE Components are components just like any other component in the CMS. This section details how to setup and configure Crafter components to use in the Rich Text Editor (RTE).
Basic Setup and Configuration
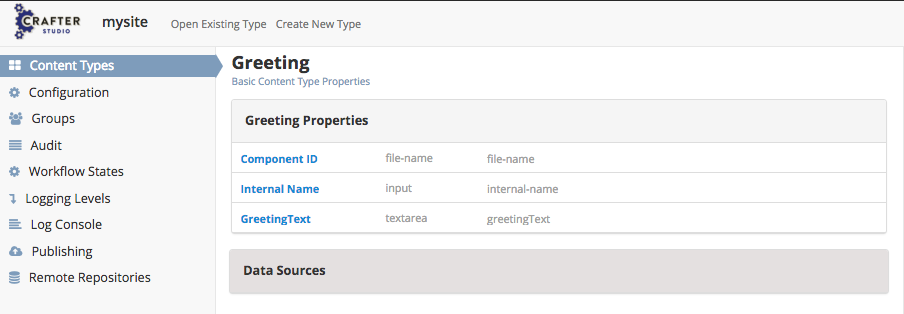
Create the component content type. Open the Sidebar and click on
 and select Content Types. Click on Create New Type, fill in the required fields and you will then be taken to the content model definition. We’ll create a simple component that displays a greeting. Here are the values that we’ll fill-in:
Component ID: file-name
Internal Name: internal-name
Greeting Text: greetingText
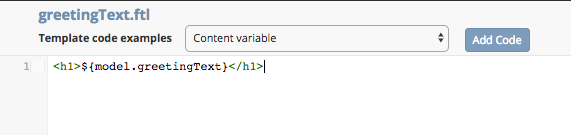
Create the component template. From the content model definition, go to the Properties Explorer panel and select the Display Template field. Click on the pencil which will open a Create Template dialog. Provide a filename for the template then it will open a blank template that we can then fill in with the following:
<h1>${model.greetingText}</h1>
Configure component to be available in RTE. Add the component to RTE configuration by following the steps here: Inserting Crafter Components
Make sure component support code is called in your site templates. We will call the component support code in the articles, so we’ll edit article.ftl
Near the bottom of your page, in the Freemarker template place the following include: <#include “/templates/system/common/components-support.ftl”/>
In your page template be sure to include the following JS file: /static-assets/js/jquery.min.js /static-assets/js/crafter-support-1-0-0.js
On document ready this will move the component from it’s rendered location to the location it belongs at in the flow of the RTE text.
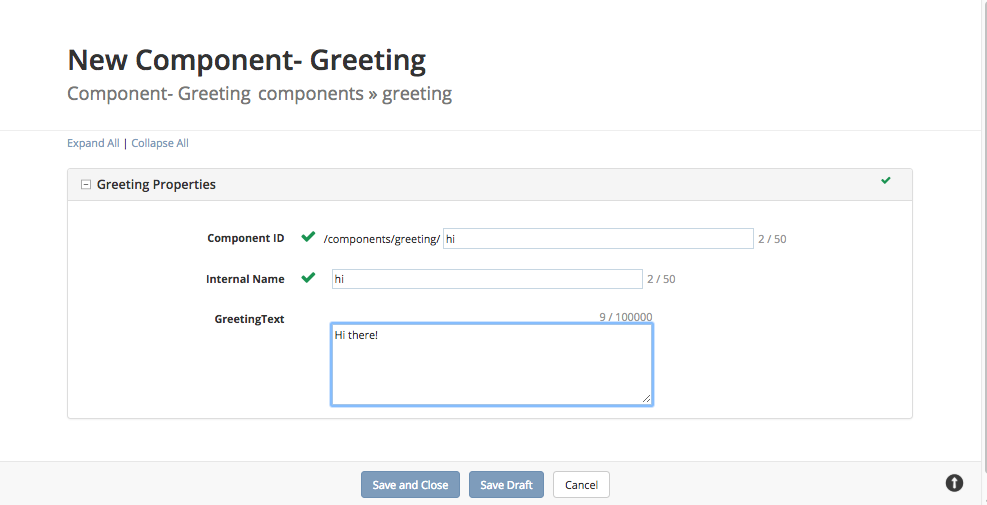
Using the RTE insert a component

Fill out the form, then click save and close
Verify that the component renders in the RTE
Double click on the component to move, edit or delete the component
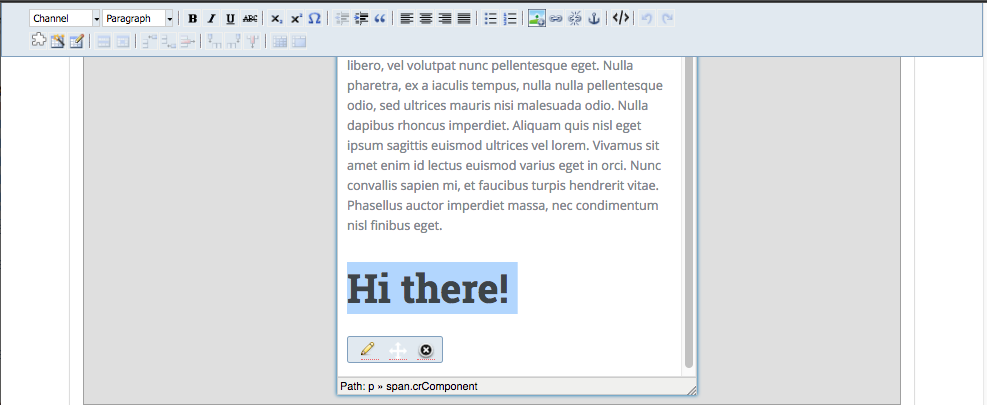
Save and preview the page to verify that the component is rendered properly and is visible in the location chosen in the RTE
Note that RTE components are rendered at the location of the include tag (crafter support) and then hidden from the user
The crafter-support Javascript file moves the hidden component rendering to the position specified in the RTE.
While this technique requires JS in order to work, the solution allows for the exact positioning of widgets in the RTE and provides a better flow of content for SEO purposes.
Advanced Use Notes
It is sometimes appropriate to put a section in your content model for the component that allows the author to choose formatting options such as:
Float right
Float left
padding (top, right, bottom, left)
It is also common to provide different display mode options for the component to the author. The template then uses the model and the authors selection to render the component in the selected fashion
Example Video modes
As Link
As thumbnail
In Line
Lightbox