Inserting Links to Pages in the Rich Text Editor (RTE)
Users sometimes need to link to a page in the site to selected text in their document. This section details how to setup the Rich Text Editor (RTE) to allow a user to browse or search for pages and insert links to them.
Basic Setup and Configuration
Open the content type with the Rich Text Editor (RTE) to be setup. Open the Sidebar and click on
 and select Content Types. Click on Open Existing Type, and select the content type with the RTE you’d like to setup, then click on the Open Type button.
Setup the data source to select a page from the site. From the content model definition, go to the Data Sources panel and drag
File Browseto the theData Sourcessection of the form and fill in the following properties:Title : Data source title to show on the form e.g.
PagesName : Name of variable to store the final result in e.g.
pagesRepository Path : Path where to browse the pages from e.g.
/site/website
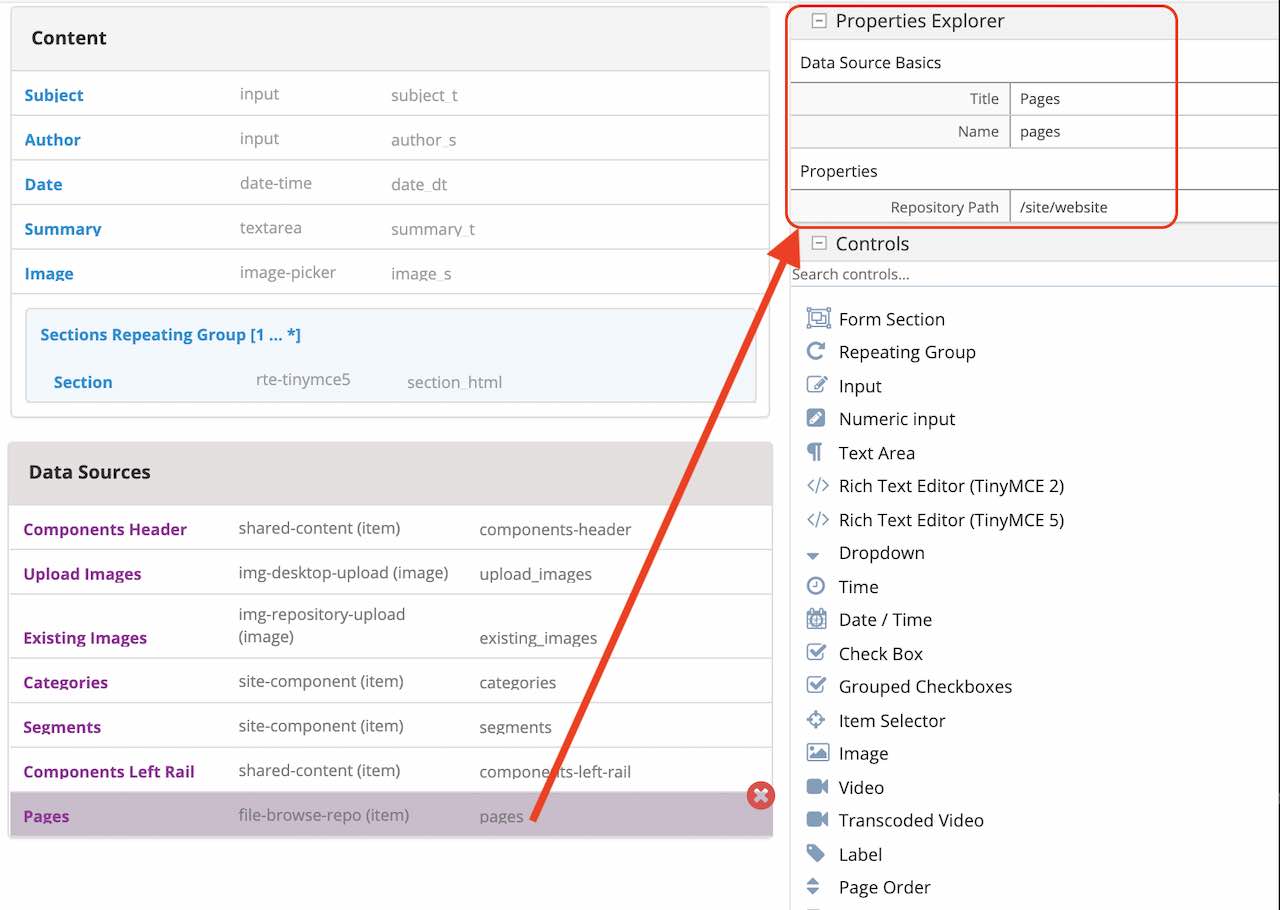
Bind the data source setup above to the RTE. From the content model definition, click on the RTE you want to be able to browse or search for pages and insert links to them. Next, go to the Properties Explorer panel and scroll to the
File Managerproperty. Put a check mark on the box next to the data source previously setup to bind it to the RTE.Click on the Save button to save your changes. The RTE is now setup to allow a user to browse or search for pages and insert links to them.
Example
Let’s take a look at an example using a site created using the Website Editorial blueprint. We will setup the RTE in the Page - Article content type to allow a user to browse or search for pages and insert links to them. We will first setup the RTE, then see it in action.
Open the content type with the Rich Text Editor (RTE) to be setup. Open the Sidebar and click on
and select Content Types. Click on Open Existing Type, and select the content type Page - Articlethen click on the Open Type button.Setup the data source to select a page from the site. From the content model definition, go to the Data Sources panel and drag
File Browseto the theData Sourcessection of the form.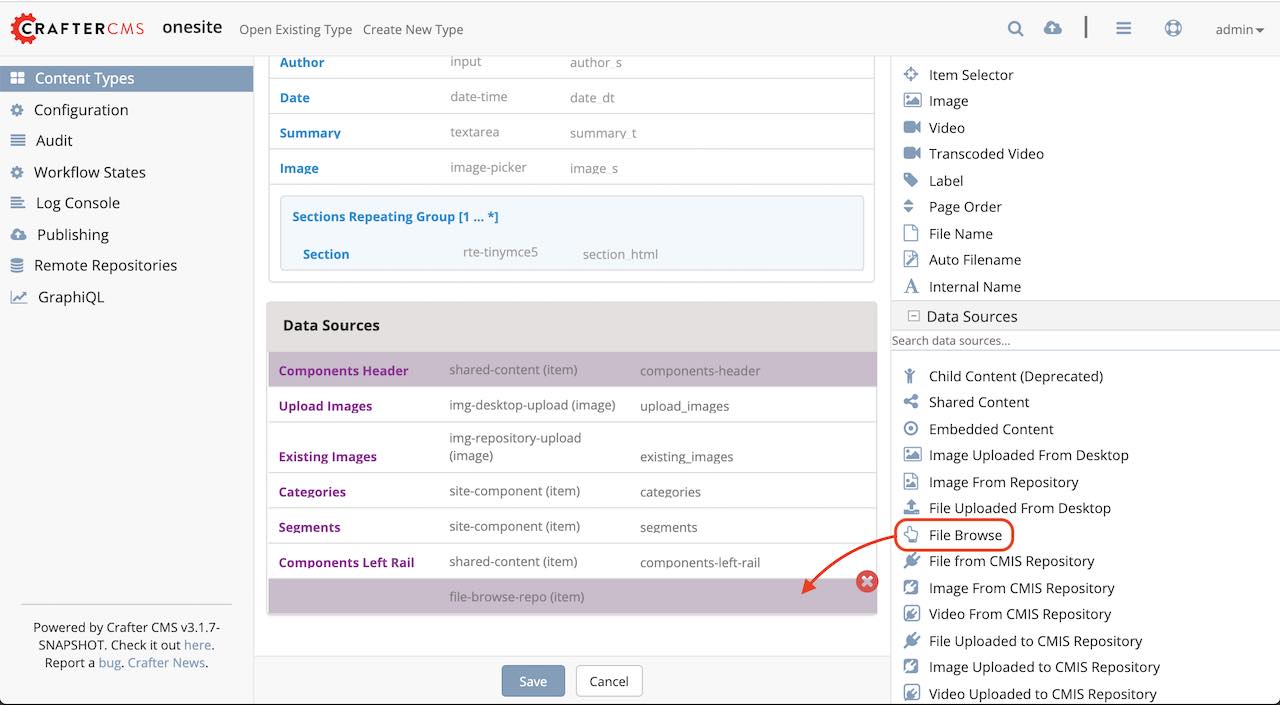
Fill in the following properties:
Title : Pages
Name : pages
Repository Path : /site/website
Bind the data source setup above to the RTE. From the content model definition, click on the RTE
Section. Next, go to the Properties Explorer panel and scroll to theFile Managerproperty. Put a check mark on the box next toPages, the data source previously setup, to bind it to the RTE.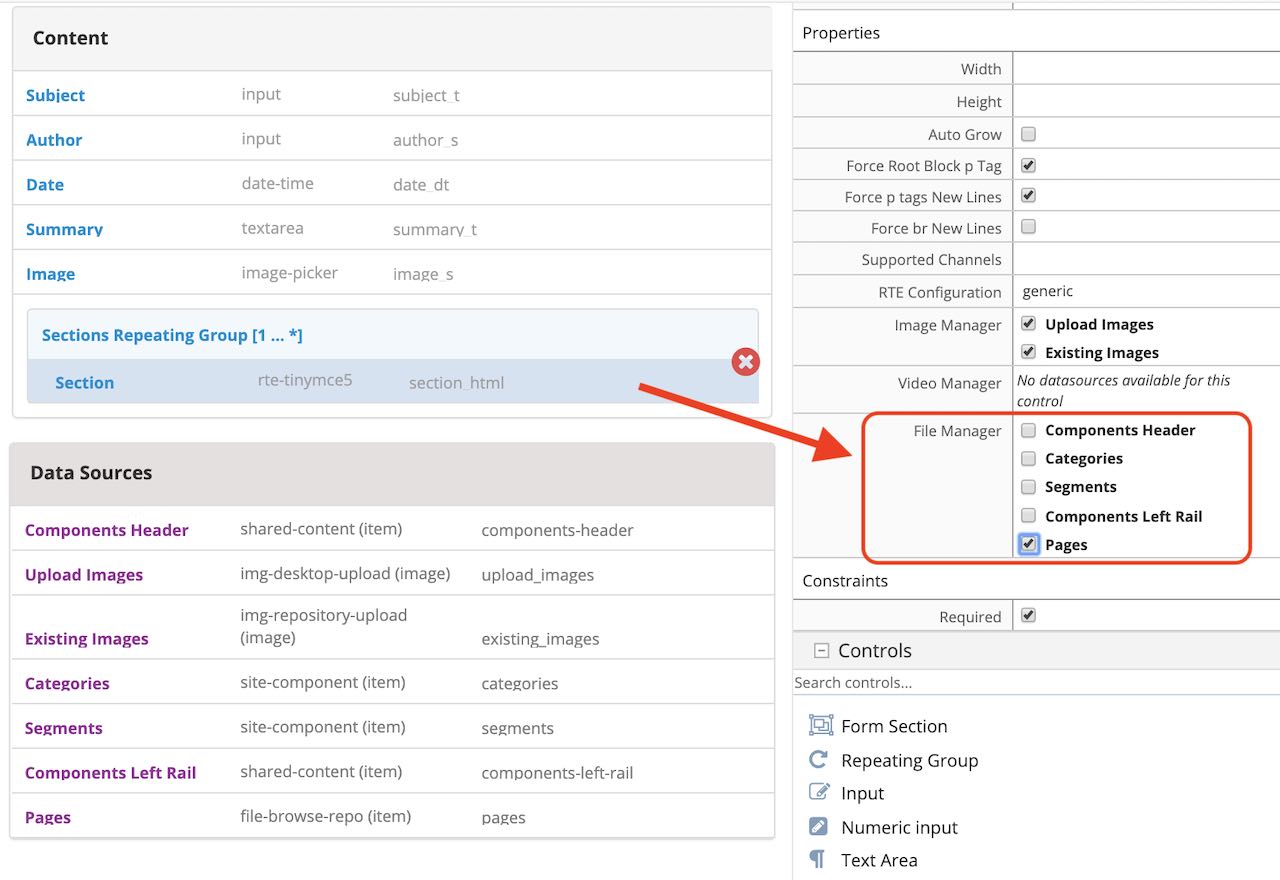
Click on the
Savebutton.
Let’s now take a look at the data source we setup and bound to the RTE in action.
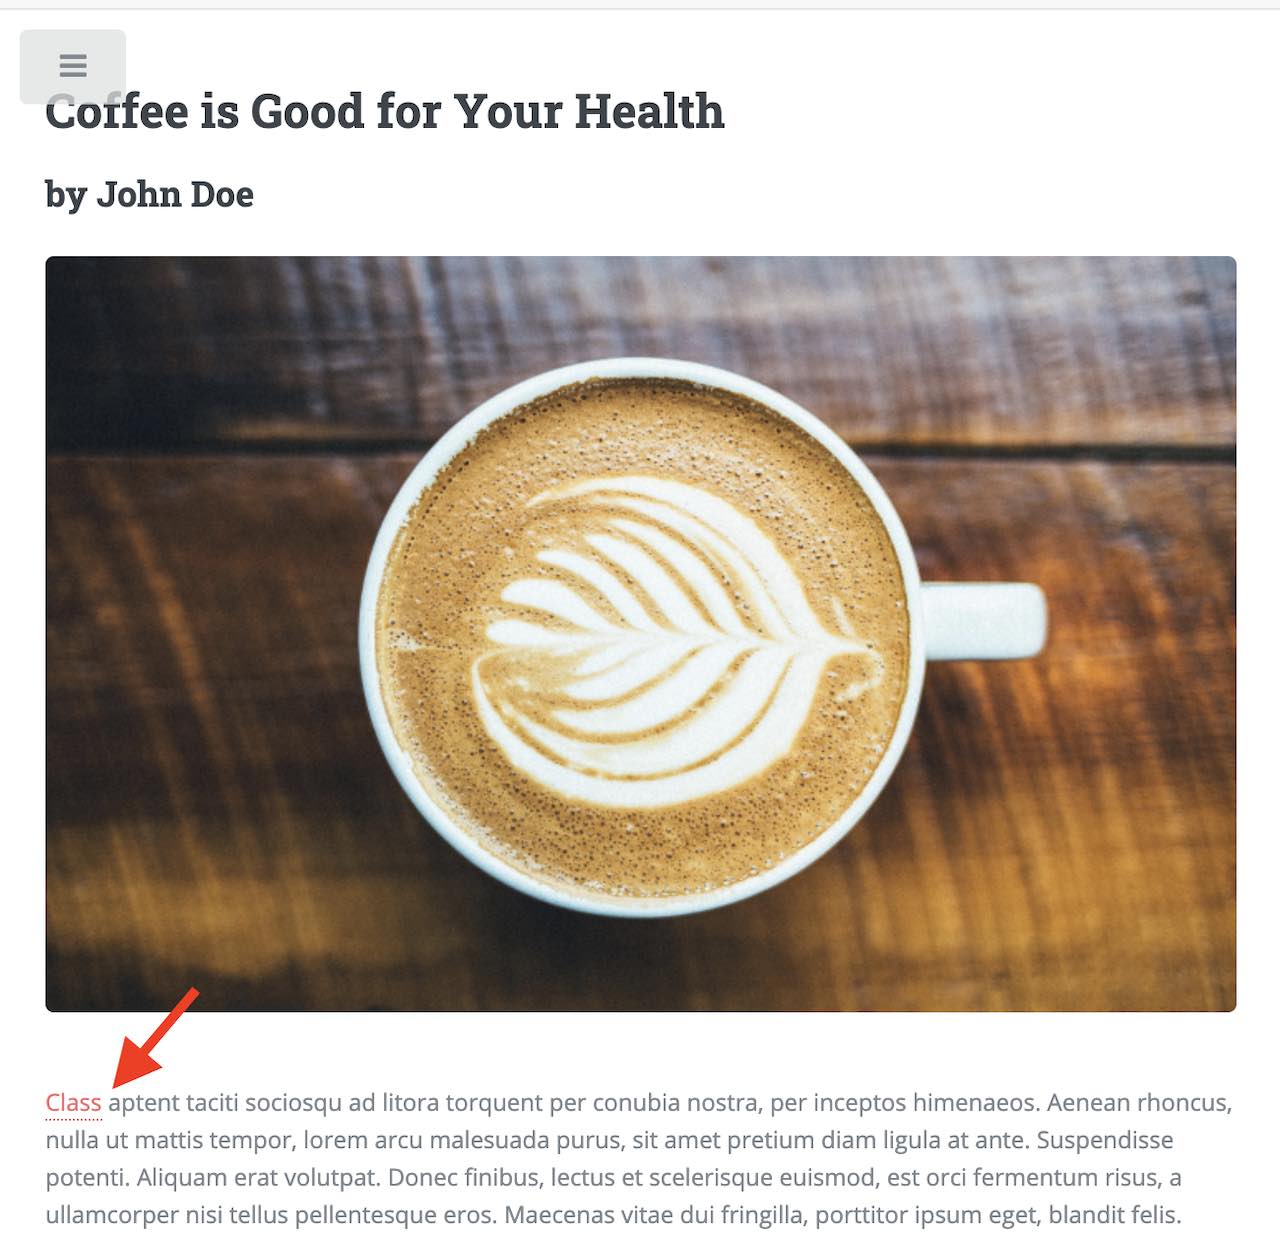
Preview the article
Coffee is Good for Your Healthby either opening the Sidebar and navigating to/articles/2016/6/coffee-is-good-for-your-healthor, from theHomepage, click on theHealthcategory, then click onCoffee is Good for Your HealthEdit the article, then scroll down to the
SectionSelect a word in the RTE. For our example, let’s highlight the first word,
Class, then click onInsert/edit linkfrom the toolbar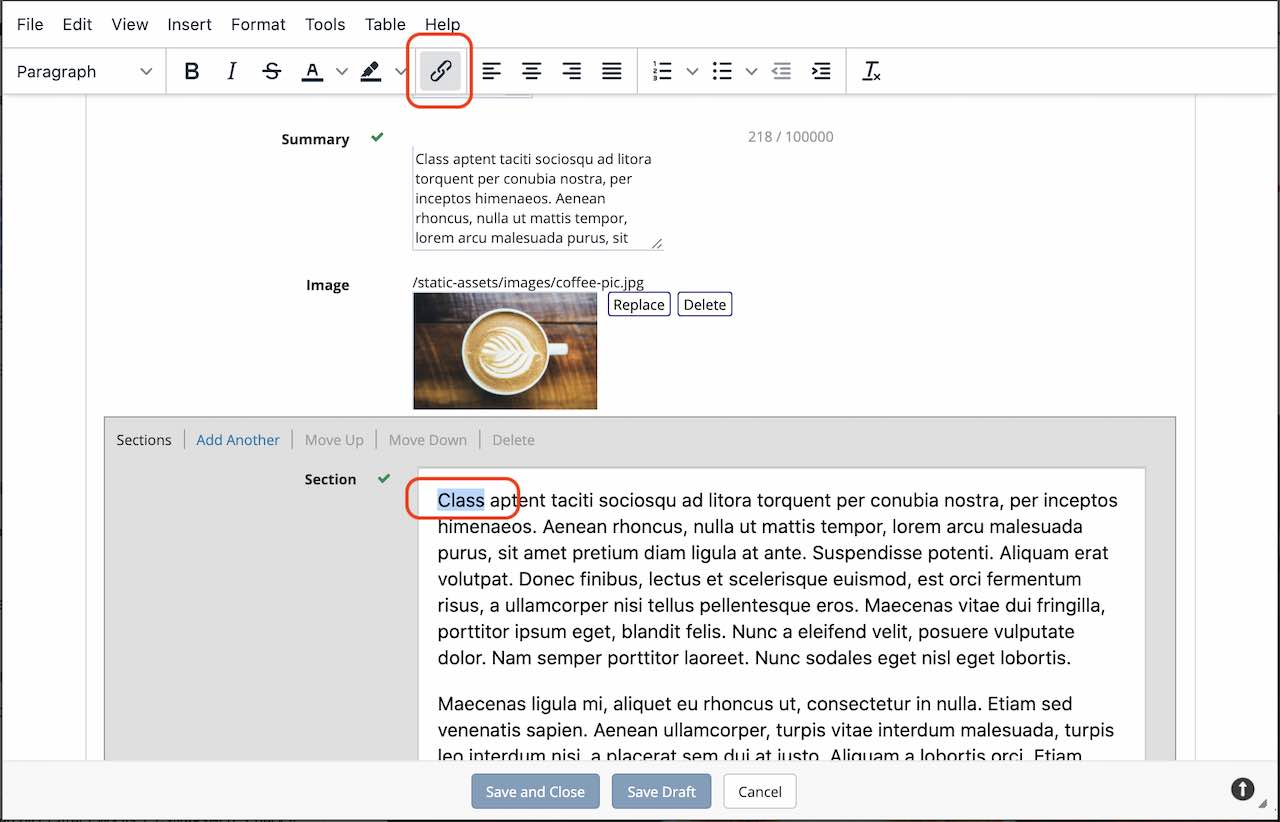
Click on the button next to
URLthen selectPages. This is the data source we setup.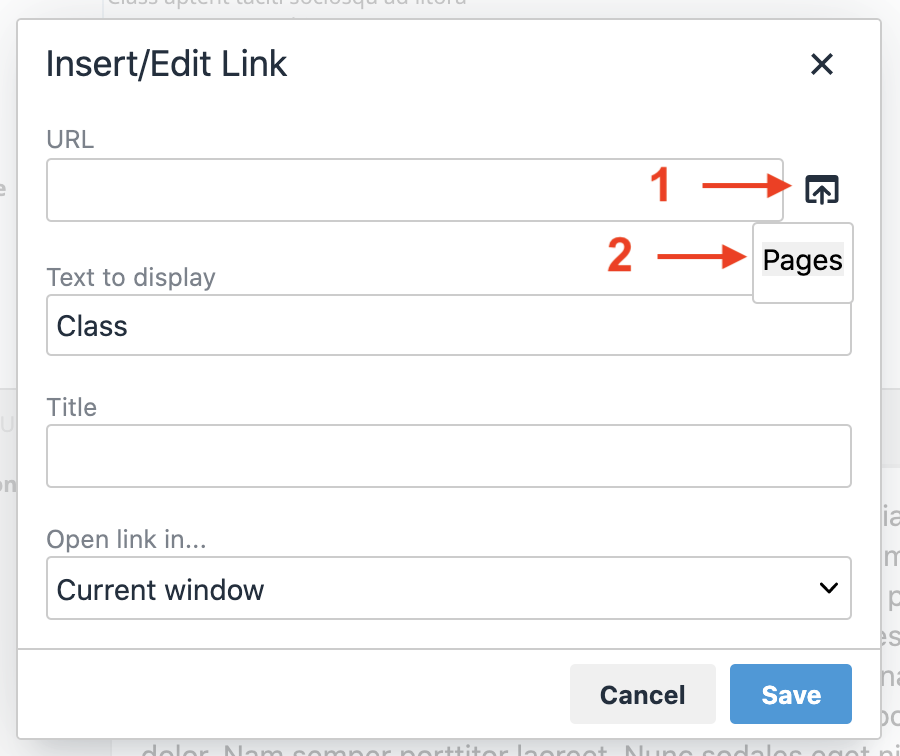
Select a page to link to. We will link the page
/article/2017/2/top-romantic-valentine-moviesto the selected text in our RTE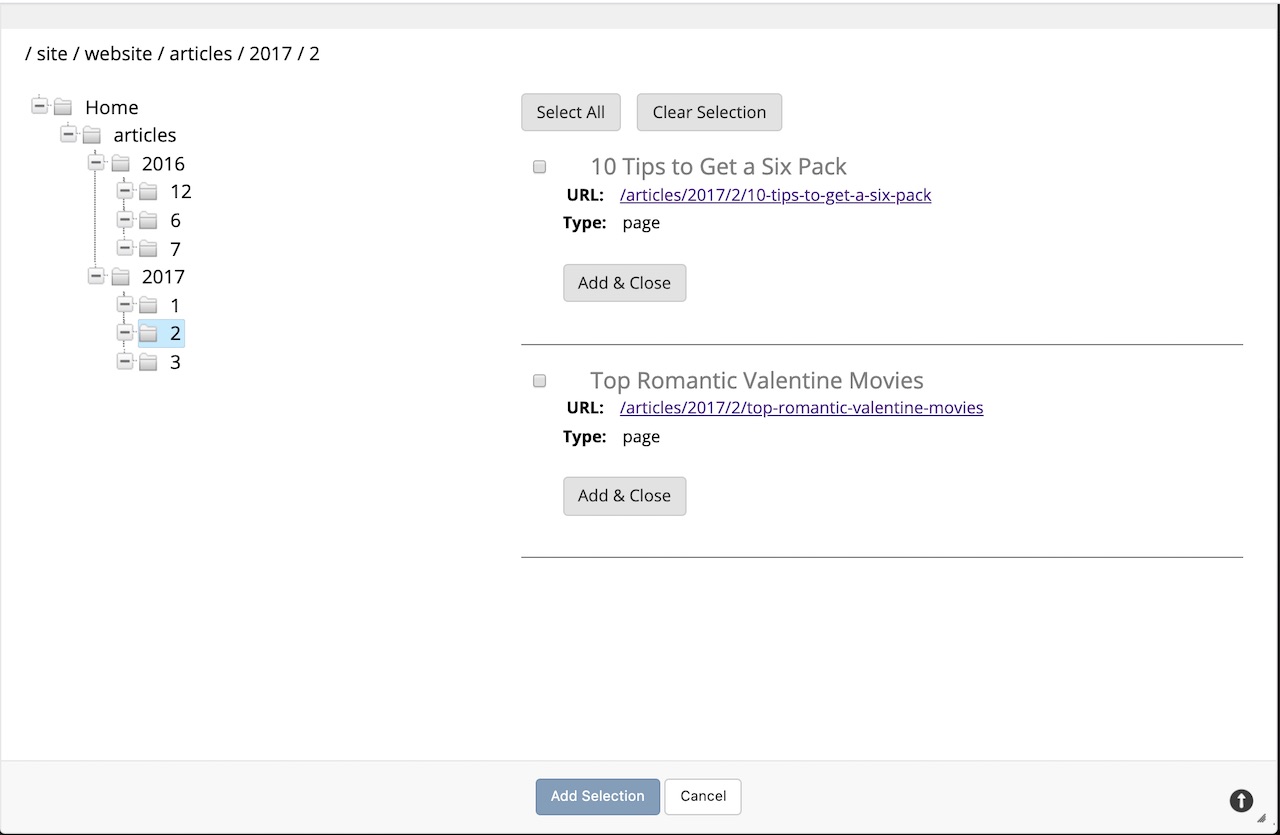
Save the link.
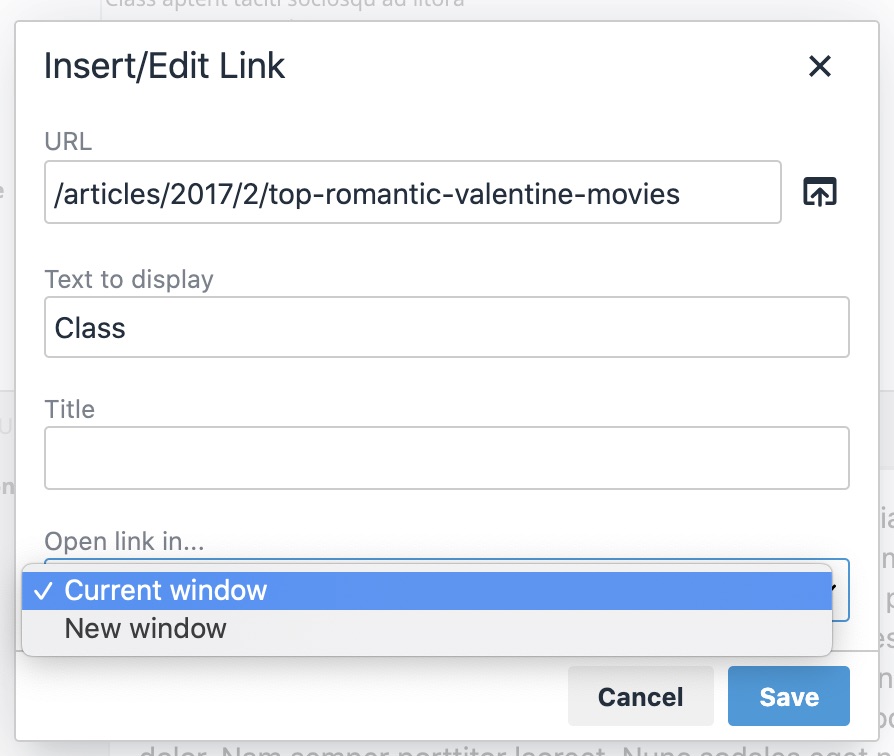
The link is now setup.