
Security
Change the Defaults
CrafterCMS installations are pre-configured with default passwords, tokens, keys, etc. These default values are intended for initial testing, installation and configuration. We recommend changing the default values for the following parameters to secure your CrafterCMS installation:
Replace default values for configuration files encryption key and salt
CRAFTER_HOME/bin/crafter-setenv.sh# -------------------- Encryption variables -------------------- # These variables are used to encrypt and decrypt values inside the configuration files. export CRAFTER_ENCRYPTION_KEY=${CRAFTER_ENCRYPTION_KEY:="default_encryption_key"} export CRAFTER_ENCRYPTION_SALT=${CRAFTER_ENCRYPTION_SALT:="default_encryption_salt"}
Replace the default values for database values encryption key and salt. Remember that these values should not be changed after CrafterCMS has been started if the installation has one or more of the following:
Remote repository passwords and keys
Cluster passwords and keys
CRAFTER_HOME/bin/crafter-setenv.sh# These variables are used by Studio to encrypt and decrypt values in the database. export CRAFTER_SYSTEM_ENCRYPTION_KEY=${CRAFTER_SYSTEM_ENCRYPTION_KEY:="s0meDefaultKey"} export CRAFTER_SYSTEM_ENCRYPTION_SALT=${CRAFTER_SYSTEM_ENCRYPTION_SALT:="s0meDefaultSalt"}
Replace default values for the management tokens used by Studio, Engine, Deployer, Search, Profile and Social
CRAFTER_HOME/bin/crafter-setenv.sh# -------------------- Management tokens ---------------- # Please update this per installation and provide these tokens to the status monitors. export STUDIO_MANAGEMENT_TOKEN=${STUDIO_MANAGEMENT_TOKEN:="defaultManagementToken"} export ENGINE_MANAGEMENT_TOKEN=${ENGINE_MANAGEMENT_TOKEN:="defaultManagementToken"} export DEPLOYER_MANAGEMENT_TOKEN=${DEPLOYER_MANAGEMENT_TOKEN:="defaultManagementToken"} export SEARCH_MANAGEMENT_TOKEN=${SEARCH_MANAGEMENT_TOKEN:="defaultManagementToken"} export PROFILE_MANAGEMENT_TOKEN=${PROFILE_MANAGEMENT_TOKEN:="defaultManagementToken"}/* export SOCIAL_MANAGEMENT_TOKEN=${SOCIAL_MANAGEMENT_TOKEN:="defaultManagementToken"}
Replace default values for the DB root password, the DB
crafteruser password and the DB replication user password (if running in a primary/replica cluster) before starting CrafterCMS for the very first time.CRAFTER_HOME/bin/crafter-setenv.sh# -------------------- MariaDB variables -------------------- ... export MARIADB_ROOT_PASSWD=${MARIADB_ROOT_PASSWD:="root"} ... export MARIADB_PASSWD=${MARIADB_PASSWD:="crafter"} ... export MARIADB_REPLICATION_PASSWD=${MARIADB_REPLICATION_PASSWD:="crafter_replication"}
To change the values after the initial start of CrafterCMS, do the following:
Manually change the DB passwords
First, login to the database as root. From the command line in the server, go to
CRAFTER_HOME/bin/dbms/binand run the following command:/mysql -u root -p --socket=/tmp/MariaDB4j.33306.sock
To change the
rootpassword, run the following command:ALTER USER 'root'@'localhost' IDENTIFIED BY 'MyNewPass';
Remember to replace
MyNewPasswith the actual password you want to set, and if you are connecting to the DB from another host, changelocalhostwith the remote hostname or IP address.To change the
crafteruser password, run the following command, similar to changing the root password.ALTER USER 'crafter'@'localhost' IDENTIFIED BY 'MyNewCrafterPass';
Again, remember to replace
MyNewCrafterPasswith the actual password you want to set, and if you are connecting to the DB from another host, changelocalhostwith the remote hostname or IP address.To change the
crafter_replicationreplication user password, run the following command, similar to changing the root password.ALTER USER 'crafter_replication'@'localhost' IDENTIFIED BY 'MyNewReplicationPass';
Again, remember to replace
MyNewReplicationPasswith the actual password you want to set, and if you are connecting to the DB from another host, changelocalhostwith the remote hostname or IP address.Stop Studio
Update the values in the configuration file
crafter-setenv.shwith the new password used in the previous stepCRAFTER_HOME/bin/crafter-setenv.sh# -------------------- MariaDB variables -------------------- ... export MARIADB_ROOT_PASSWD=${MARIADB_ROOT_PASSWD:="MyNewPass"} ... export MARIADB_PASSWD=${MARIADB_PASSWD:="MyNewCrafterPass"}
Restart Studio
Change the default Studio
adminuser password either by randomizing theadminpassword for a fresh install of Crafter Studio or by changing the password after logging in as useradmin. For more information on randomizing the admin password for a fresh install, see Randomize Authoring’s “admin” Password for CrafterCMS Fresh Install. For more information on changing user passwords, see User passwordsSet session cookies as
HTTP OnlyandSecureby setting the flags totruein your tomcatweb.xmlfileCRAFTER_HOME/bin/apache-tomcat/conf/web.xml1<session-config> 2 <session-timeout>1</session-timeout> 3 <cookie-config> 4 <http-only>true</http-only> 5 <secure>true</secure> 6 </cookie-config> 7</session-config>
Replace default values for all the variables used to control the access tokens used for Studio’s API
CRAFTER_HOME/bin/crafter-setenv.sh1# -------------------- Studio's access tokens --------------------- 2# ************************************************************************************* 3# ************************* IMPORTANT ************************************************* 4# The following variables are used to control the access tokens used for Studio's API, 5# please replace all default values to properly secure your installation 6# ************************************************************************************* 7 8# Issuer for the generated access tokens 9export STUDIO_TOKEN_ISSUER=${STUDIO_TOKEN_ISSUER:="Crafter Studio"} 10# List of accepted issuers for validation of access tokens (separated by commas) 11export STUDIO_TOKEN_VALID_ISSUERS=${STUDIO_TOKEN_VALID_ISSUERS:="Crafter Studio"} 12# The audience for generation and validation of access tokens (if empty the instance id will be used) 13export STUDIO_TOKEN_AUDIENCE=${STUDIO_TOKEN_AUDIENCE:=""} 14# Time in minutes for the expiration of the access tokens 15export STUDIO_TOKEN_TIMEOUT=${STUDIO_TOKEN_TIMEOUT:=5} 16# Password for signing the access tokens (needs to be equal or greater than 512 bits in length) 17export STUDIO_TOKEN_SIGN_PASSWORD=${STUDIO_TOKEN_SIGN_PASSWORD:="s0meDefaultTokenSignPasswd"} 18# Password for encrypting the access tokens 19export STUDIO_TOKEN_ENCRYPT_PASSWORD=${STUDIO_TOKEN_ENCRYPT_PASSWORD:="s0meDefaultTokenEncryptPasswd"} 20# Name of the cookie to store the refresh token 21export STUDIO_REFRESH_TOKEN_NAME=${STUDIO_REFRESH_TOKEN_NAME:="refresh_token"} 22# Time in seconds for the expiration of the refresh token cookie 23export STUDIO_REFRESH_TOKEN_MAX_AGE=${STUDIO_REFRESH_TOKEN_MAX_AGE:=300} 24# Indicates if the refresh token cookie should be secure (should be true for production environments behind HTTPS) 25export STUDIO_REFRESH_TOKEN_SECURE=${STUDIO_REFRESH_TOKEN_SECURE:="false"}
Configure SSL/TLS
To configure SSL/TLS for CrafterCMS authoring and delivery, do the following:
Step 1: Create a keystore file
$JAVA_HOME/bin/keytool -genkey -alias tomcat -keyalg RSA
Step 2: Edit the tomcat file to use the keystore file by uncommenting or adding the “SSL HTTP/1.1 Connector” entry
Step 3: Test your setup
From tomcat.apache.org :
Transport Layer Security (TLS) and its predecessor, Secure Sockets Layer (SSL), are technologies which allow web browsers and web servers to communicate over a secured connection. This means that the data being sent is encrypted by one side, transmitted, then decrypted by the other side before processing. This is a two-way process, meaning that both the server AND the browser encrypt all traffic before sending out data.*
CrafterCMS employs two deployment methods, traditional deployment and serverless deployment. Let’s take a look at an example of how to configure SSL/TLS in a traditional deployment and serverless (docker container) deployment:
Configuring SSL/TLS for CrafterCMS Authoring and Delivery in a Traditional Deployment with Tomcat
Step 1: Create a Keystore file
Java’s keytool file allows the user to create self signed certificates. For this example, we will be using a self signed certificate. Please remember that self signed certificates are not suitable for production use.
$JAVA_HOME/bin/keytool -genkey -alias tomcat -keyalg RSA

Enter keystore password:  password (it will be invisible)
Re-enter new password: password
What is your first and last name?
  [Unknown]:  {FIRST_LAST_NAME}
What is the name of your organizational unit?
  [Unknown]:  {ORGANIZATIONAL_UNIT}
What is the name of your organization?
  [Unknown]:  {ORGANIZATION_NAME}
What is the name of your City or Locality?
  [Unknown]:  {CITY}
What is the name of your State or Province?
  [Unknown]:  {STATE_PROVINCE}
What is the two-letter country code for this unit?
  [Unknown]:  {COUNTRY_CODE}
Is CN={FIRST_LAST_NAME}, OU={ORGANIZATIONAL_UNIT}, O={ORGANIZATION_NAME}, L={CITY}, ST={STATE_PROVINCE}, C={COUNTRY_CODE} correct?
  [no]:  yes

Enter key password for
    (RETURN if same as keystore password):  password
Re-enter new password: password
The command above will generate a file named .keystore in the users home directory. Take note of the location as it will be used in the next step.
Step 2: Configure Tomcat to use the Keystore file
The next step is to configure SSL/TLS Connector in the authoring/delivery tomcat file by uncommenting/adding the following:
 1<Connector port="8443"
 2  SSLEnabled="true"
 3  clientAuth="false"
 4  maxThreads="150"
 5  protocol="org.apache.coyote.http11.Http11NioProtocol"
 6  keystoreFile="/path/to/your/keystore"
 7  keystorePass="yourKeystorePassword"
 8  scheme="https"
 9  secure="true"
10  sslProtocol="TLS"
11/>
where:
port : port number to be secured by your new keystore file
keystoreFile : path to your keystore file created from the previous step
keystorePass : password used when keystore file was created from the previous step
We’ll use the above values for our CrafterCMS authoring example. Save the changes and restart CrafterCMS authoring/delivery.
For more information on configuring SSL/TLS on Tomcat, see https://tomcat.apache.org/tomcat-9.0-doc/ssl-howto.html
Step 3: Test your setup
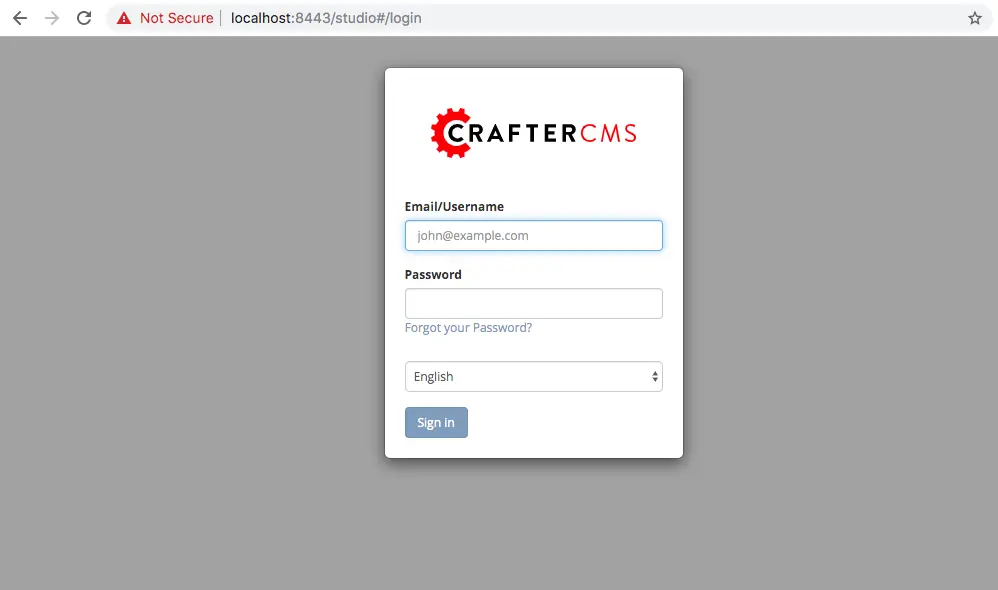
To test your CrafterCMS authoring, open your browser and type in:
https://localhost:8443/studio
Since we are using a self-signed certificate, you’ll get a message similar to this depending on your browser:
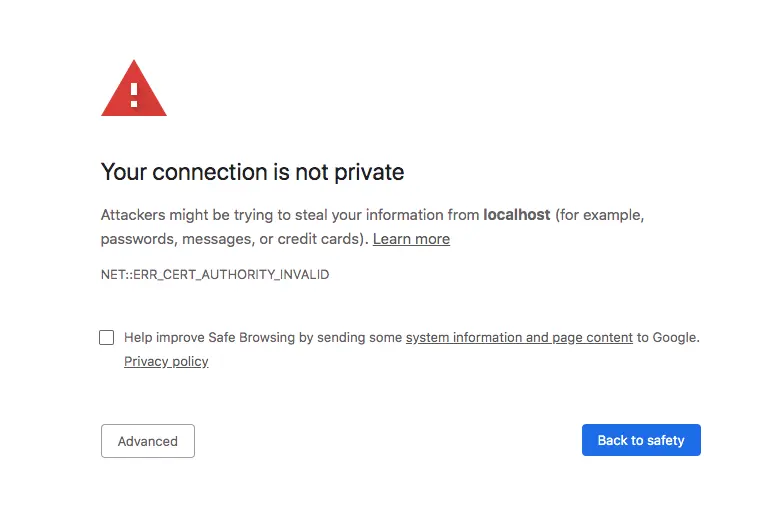
From the above screen, just click on Advanced, then allow it to proceed to localhost::8443, and you will then be taken to the login screen of Crafter Studio
Managing Secrets
There are a number of ways to manage secrets with CrafterCMS. The following sections describe the different options.
Note
A note on avoiding secrets. Whenever possible, storing secrets should be avoided as a best practice. For example, if you’re deploying to AWS or similar, it’s possible to have role-based authentication and authorization at the service level and avoid having to store secrets related to said service in configuration files.
External Secrets
CrafterCMS supports the use of external secrets. This means that you can store your secrets in a separate location and use these secrets in your configuration files. This is the recommended approach whenever possible.
For example, you can use AWS Secrets and solicit the secrets. You can also use a Vault server to store your secrets. Secrets can then be injected into CrafterCMS via environment variables or system properties.
Internal Secrets
When external secrets are not possible, CrafterCMS supports the use of encrypted internal secrets. This means that you can store your secrets in the configuration files themselves, and these secrets will be encrypted.
Note
The encryption keys are configurable and can be different per environment, having different keys for development, staging, and production environments.
CrafterCMS has a number of ways to encrypt secrets:
Automatic encryption of secrets in configuration files
Studio UI encryption tool
Project-level encryption tool
Admin UI encryption tool
CLI encryption tool
Encryption
Encrypting secrets can be done automatically within Studio-managed configuration files, via the UI, or using a CLI.
The encryption algorithm used is PBE (Password Based Encryption) with AES, in which a key and a salt are specified to generate the key used on encryption/decryption.
For encryption via Studio-managed configuration files and via the UI, Crafter Studio uses a default key and salt
for the encryption tool. To set the key and salt to desired values, in your Authoring installation directory,
open CRAFTER_HOME/bin/crafter-setenv.sh and modify the following values
# -------------------- Encryption variables --------------------
export CRAFTER_ENCRYPTION_KEY=${CRAFTER_ENCRYPTION_KEY:="default_encrytption_key"}
export CRAFTER_ENCRYPTION_SALT=${CRAFTER_ENCRYPTION_SALT:="default_encrytption_salt"}
Automatic Encryption of Secrets in Configuration Files
This section details how to encrypt passwords, access keys or other sensitive information in a configuration file managed through Crafter Studio.
Examples of project configuration files where encryption would make sense include:
Engine Project Configuration (
/config/engine/site-config.xml)Studio AWS Profiles (
/config/studio/aws/aws.xml)Studio Box Profiles (
/config/studio/box/box.xml)Studio WebDAV Profiles (
/config/studio/webdav/webdav.xml)
How to Encrypt Text in Configuration File
To encrypt passwords, access keys or other sensitive information in a configuration file managed through Crafter Studio:
Open the configuration file that has the text/information that you would like to encrypt
Find the entry you would like to encrypt and add the attribute
encrypted=""Click on the
Encrypt Markedbutton to encrypt textYour sensitive text should now be encrypted and displayed with the attribute
encrypted="true"and you may now save your file
Example
Let’s take a look at an example of encrypting the accessKey and securityKey for the AWS Profiles configuration.
Open the
AWS Profilesconfiguration file by clicking on ->
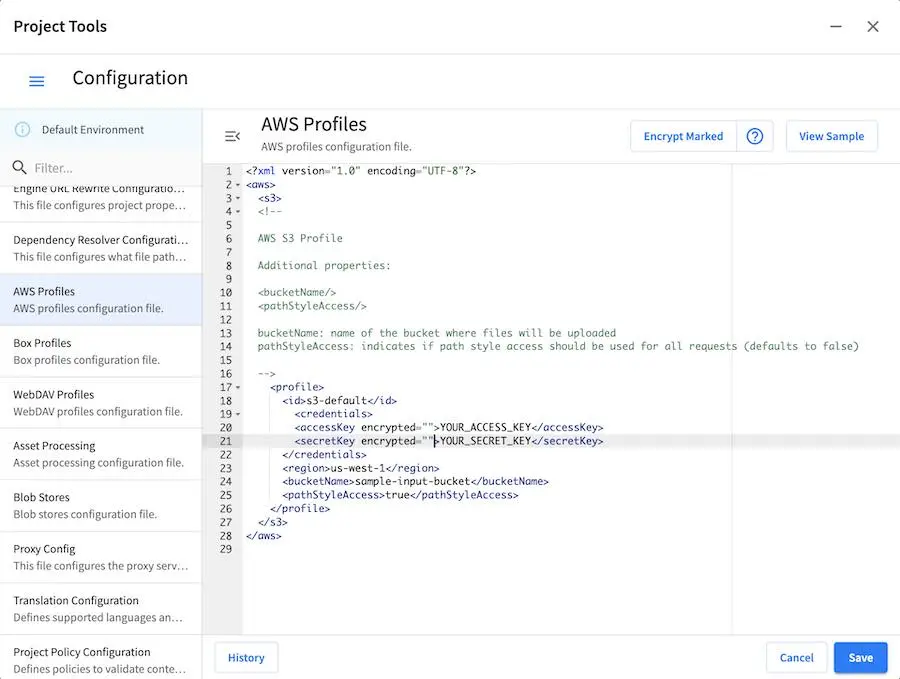
-> Configuration, then selectAWS Profilesfrom the dropdown boxWe will add an
AWS S3 profile. Notice that theaccessKeyandsecureKeyis in the clear.{REPOSITORY_ROOT}/sites/SITENAME/config/studio/aws/aws.xml1<?xml version="1.0" encoding="UTF-8"?> 2<aws> 3 <s3> 4 <!-- 5 6 AWS S3 Profile 7 8 Additional properties: 9 10 <bucketName/> 11 <pathStyleAccess/> 12 13 bucketName: name of the bucket where files will be uploaded 14 pathStyleAccess: indicates if path style access should be used for all requests (defaults to false) 15 16 --> 17 <profile> 18 <id>s3-default</id> 19 <credentials> 20 <accessKey>YOUR_ACCESS_KEY</accessKey> 21 <secretKey>YOUR_SECRET_KEY</secretKey> 22 </credentials> 23 <region>us-west-1</region> 24 <bucketName>sample-input-bucket</bucketName> 25 <pathStyleAccess>true</pathStyleAccess> 26 </profile> 27 </s3> 28</aws>
We will now mark items to be encrypted by adding the attribute
encrypted="". For our example, we will markaccessKeyandsecretKeyfor encryption.{REPOSITORY_ROOT}/sites/SITENAME/config/studio/aws/aws.xml<accessKey encrypted="">YOUR_ACCESS_KEY</accessKey> <secretKey encrypted="">YOUR_SECRET_KEY</secretKey>
Click on the
Encrypt Markedbutton to encrypt the marked items, the attribute for the marked items will change toencrypted="true":{REPOSITORY_ROOT}/sites/SITENAME/config/studio/aws/aws.xml<accessKey encrypted="true">${enc:ENCRYPTED_ACCESS_KEY}</accessKey> <secretKey encrypted="true">${enc:ENCRYPTED_SECRET_KEY}</secretKey>
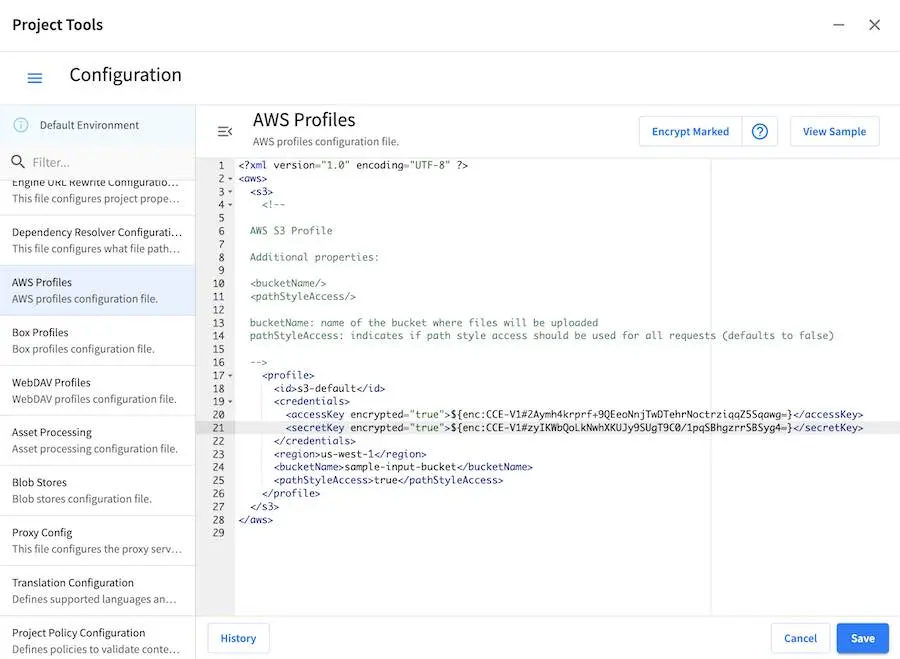
The
accessKeyandsecureKeyis now encrypted and will be decrypted by Crafter Studio as needed
Studio UI Encryption Tool
Crafter Studio provides an encryption tool for encrypting configuration properties like access keys or password, to keep these sensitive data, available only to developers and administrators.
There are two ways to access the encryption tools in Studio. Via Studio’s Navigation Menu and a project’s Project Tools
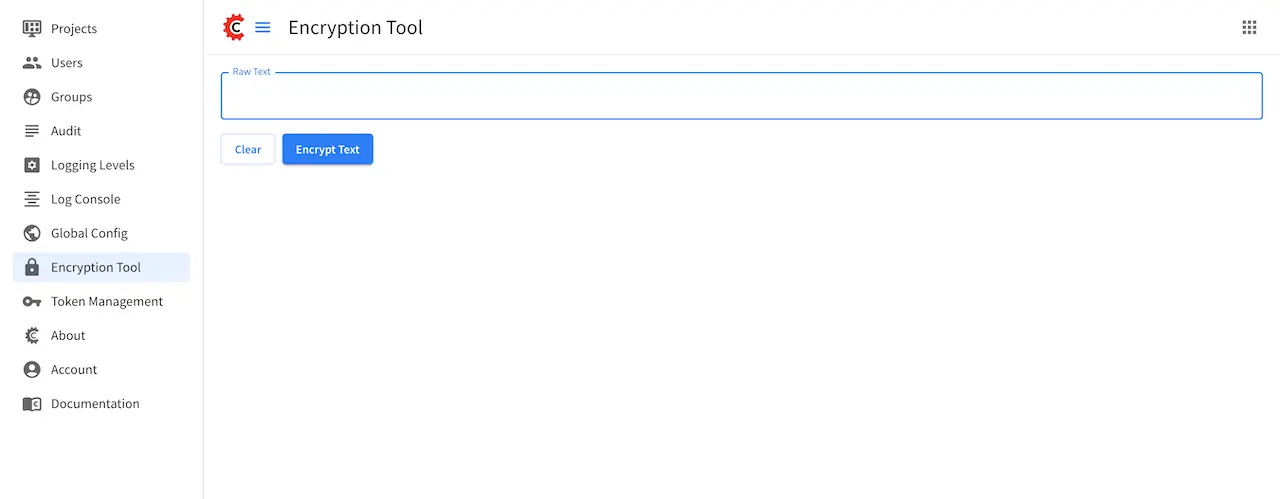
To access the encryption tool via Studio’s Navigation Menu, from the top right of your browser, click on the Navigation Menu icon  , then click on
 Encryption Tool under Global.
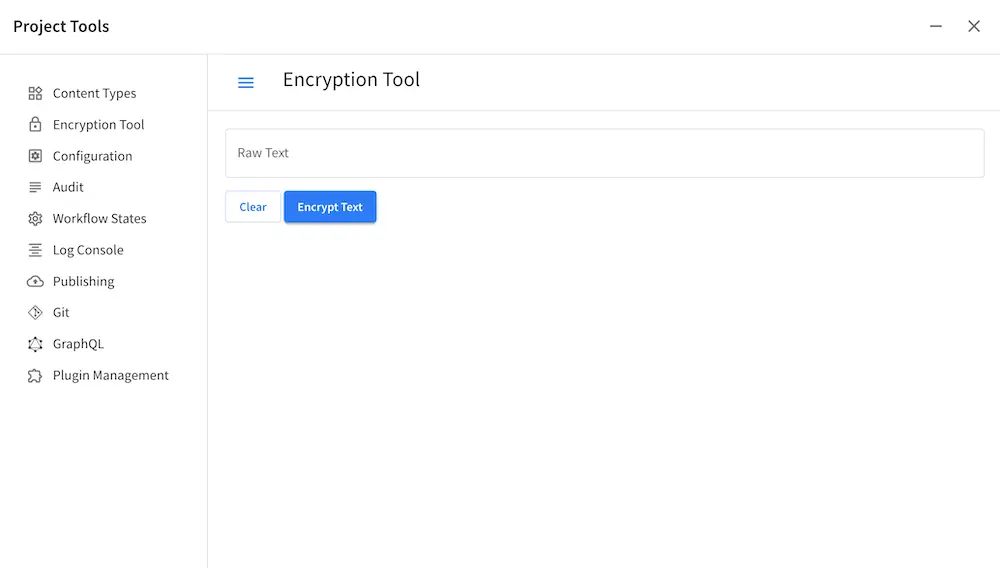
To access the encryption tool from a project’s Project Tools, open the Sidebar and click on ![]() ,
then click on
,
then click on Encryption Tool.
To encrypt a password, access key, etc., simply enter the password, access key, etc. in the Raw Text field, then click on Encrypt Text. This will generate the encrypted password, access key, etc. that you then simply need to paste in the configuration file.
Crafter Studio also provides the encryption tool to encrypt passwords, access keys or other sensitive information in a configuration file managed through Crafter Studio in ![]() ->
-> Configuration. See Automatic Encryption of Secrets in Configuration Files for more information.
Example
Let’s take a look at an example of using the Studio encryption tool to encrypt a password. From the Navigation Menu, click on Global Config and scroll down to the SMTP Configuration (Email) section. We’re going to encrypt the value for studio.mail.password:
##################################################
##        SMTP Configuration (Email)            ##
##################################################
# Default value for from header when sending emails.
# studio.mail.from.default: admin@example.com
# SMTP server name to send emails.
# studio.mail.host: ${env:MAIL_HOST}
# SMTP port number to send emails.
# studio.mail.port: ${env:MAIL_PORT}
# SMTP username for authenticated access when sending emails.
# studio.mail.username:
# SMTP password for authenticated access when sending emails.
# studio.mail.password:
# Turn on/off (value true/false) SMTP authenticated access protocol.
# studio.mail.smtp.auth: false
# Enable/disable (value true/false) SMTP TLS protocol when sending emails.
# studio.mail.smtp.starttls.enable: false
# Enable/disable (value true/false) SMTP EHLO protocol when sending emails.
# studio.mail.smtp.ehlo: true
# Enable/disable (value true/false) debug mode for email service. Enabling debug mode allows tracking/debugging communication between email service and SMTP server.
# studio.mail.debug: false
Let’s begin:
Encrypt the password
To encrypt the
studio.mail.password, click on, then click on Encryption ToolEnter the password in the
Raw Textfield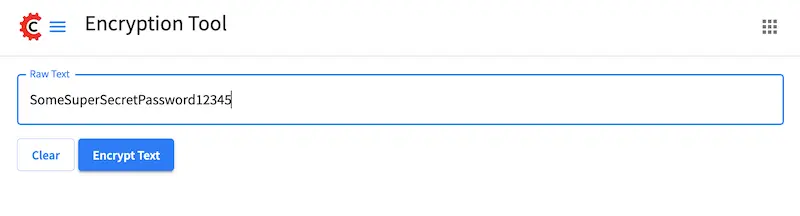
Click on the
Encrypt Textbutton. The encrypted text will be displayed below theRaw Textfield and copied onto the clipboard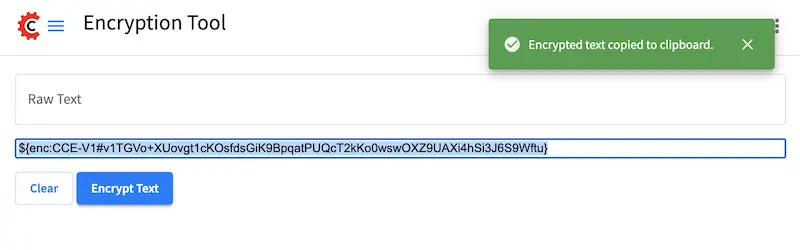
Use the encrypted password
Click on
, then click on Global Configand scroll down to theSMTP Configuration (Email)section.Paste the encrypted password
CRAFTER_HOME/data/repos/global/configuration/studio-config-override.yaml# SMTP password for authenticated access when sending emails. studio.mail.password: ${enc:q2gqrm8R6Z0Xg77J6wzHH4i4qqMSlrcFcSkshS+RZ9s=}
Your password is now encrypted and will be decrypted by Crafter Studio as needed.
Command Line Interface (CLI) Encryption Tool
Crafter Commons provides a command line tool that can be used to encrypt/decrypt text. It’s especially useful for encrypting values that will be used in configuration files. The encryption algorithm used is PBE (Password Based Encryption) with AES, in which a password and a salt are specified to generate the key used on encryption/decryption.
Using the tool is very simple. First build the Crafter Commons source code and go to the target folder of the utilities
sub-module, where you should find the JAR with the -enctool suffix. Then you can run any of the following commands:
Encode text in Base 64:
java -jar {JARNAME} -e64 CLEAR_TEXTjava -jar crafter-commons-utilities-3.0.1-enctool.jar -e64 KniOddyi Encoded text in Base 64: S25pT2RkeWk=
Encrypt text:
java -jar {JARNAME} -e CLEAR_TEXT -p PASSWORD -s BASE64_SALTjava -jar crafter-commons-utilities-3.0.1-enctool.jar -e c852cb30cda311e488300800200c9a66 -p klanFogyetkonjo -s S25pT2RkeWk= Cipher text (in Base 64): VkHxBsaSZ9DXrXk52uK9And+CEZlqiy7Wb23GxBFOSXD6KBOCh1ojp8fUw7w11IxpxBipiI4HsSg3cdl9TgTQg==
Decryption
CrafterCMS will automatically decrypt secrets as it needs them. If, however, you wanted to decrypt a secret manually you can use the CLI encryption/decryption tool:
Decode Base 64 text:
java -jar {JARNAME} -d64 BASE64_TEXTjava -jar crafter-commons-utilities-3.0.1-enctool.jar -d64 S25pT2RkeWk= Decoded Base 64 text: KniOddyi
Decrypt text:
java -jar {JARNAME} -d CIPHER_TEXT -p PASSWORD -s BASE64_SALTjava -jar crafter-commons-utilities-3.0.1-enctool.jar -d VkHxBsaSZ9DXrXk52uK9And+CEZlqiy7Wb23GxBFOSXD6KBOCh1ojp8fUw7w11IxpxBipiI4HsSg3cdl9TgTQg== -p klanFogyetkonjo -s S25pT2RkeWk= Clear text: c852cb30cda311e488300800200c9a66
Configure Studio Security
Crafter Studio supports a number of authentication methods to ensure secure access. Learn more about securing Crafter Studio in the article Studio Security.
Configure Engine Security
Crafter Engine supports a number of authentication methods to ensure secure access. Learn more about securing Crafter Engine in the article Engine Security.