
Studio Configuration
Crafter Studio is primarily configured via a single configuration file, studio-config.yaml, and 2 override files that can be used to override the settings in the core configuration file.
The core configuration file for Crafter Studio studio-config.yaml is located under CRAFTER_HOME/bin/apache-tomcat/webapps/studio/WEB-INF/classes/crafter/studio and contains pre-configured settings.
Warning
Do not change the studio-config.yaml file directly; override the settings you want to change in one of the override files.
The override files are:
Studio Configuration Override file studio-config-override.yaml located under
CRAFTER_HOME/bin/apache-tomcat/shared/classes/crafter/studio/extensioncan be accessed by opening the file using your favorite editorGlobal Studio Configuration Override file studio-config-override.yaml located under
CRAFTER_HOME/data/repos/global/configurationcan be accessed from Studio from theNavigation MenuunderGlobal Config
The configuration loading order is as follows:
studio-config.yamlfrom the WAR file is loaded firststudio-config-override.yamlfrom the shared folder is loaded next (if it exists)studio-config-override.yamlfrom the global configuration folder is loaded last (if it exists)
If the same property is present in multiple files, the value from the last configuration file will be used.
You’ll note that the first override file from the CRAFTER_HOME/bin/apache-tomcat/shared/classes/crafter/studio/extension folder resides on the local file system. This makes it easy for system admins but will not replicate across a cluster. The second override file from the CRAFTER_HOME/data/repos/global/configuration folder is a repository item and will replicate across a cluster. Furthermore, the second override file can be managed from Studio without the need to access the file system. See Navigation Menu Global Config for more information on how to access the global configuration file from Studio.
Note
Changing the configuration files requires a restart of Crafter Studio for the changes to take effect.
Note
Environment variables can be used to override any property defined as ${env:ENVIRONMENT_VARIABLE} in the configuration files. This allows you to inject these properties into a vanilla installation without modifying any actual files, which is especially useful when using Docker or Kubernetes. See here for a list of environment variables used by CrafterCMS.
Studio Configuration Properties
In this section, we will highlight some of the more commonly used properties in the configuration of Crafter Studio. For a complete list of all the properties, see the studio-config.yaml file.
Property |
Purpose |
|---|---|
Configure the SMTP server to be used by Crafter Studio when sending emails |
|
Configure CORS |
|
Configure internally managed static asset stores to handle very large files |
|
Configure constraints for content being added to the project |
|
Configure the MIME-types that are editable directly in Crafter Studio |
|
Configure your project/site configuration |
|
Configure the Studio UI |
|
Configure the default RTE |
|
Configure your deployer URLs |
|
Configure your search URLs |
|
Configure Studio search |
|
Configure the cache control settings for templates and assets |
|
Configure forwarded headers |
|
Configure policy headers |
|
Configure the |
|
Configure serverless delivery |
|
Configure the regex used for validating various inputs |
|
Configure the workflow notifications |
|
Configure the commit messages used by Crafter Studio |
|
Configure whether to enable/disable the Studio audit log job for operations not performed through Crafter Studio |
|
Configure the publishing blacklist |
|
Configure the maximum length of configuration content |
|
Configure the content types |
|
Configure the dependency resolver |
|
Configure the project tools |
|
Configure asset processing |
|
Configure AWS integration |
|
Configure Box integration |
|
Configure WebDAV integration |
SMTP Configuration (Email)
This section allows the user to set up a mail client by configuring the SMTP server to send emails from Crafter Studio, such as when authors request to publish content or when a request to publish has been approved.
 1##################################################
 2##        SMTP Configuration (Email)            ##
 3##################################################
 4# Default value for from header when sending emails.
 5# studio.mail.from.default: admin@example.com
 6# SMTP server name to send emails.
 7# studio.mail.host: ${env:MAIL_HOST}
 8# SMTP port number to send emails.
 9# studio.mail.port: ${env:MAIL_PORT}
10# SMTP username for authenticated access when sending emails.
11# studio.mail.username:
12# SMTP password for authenticated access when sending emails.
13# studio.mail.password:
14# Turn on/off (value true/false) SMTP authenaticated access protocol.
15# studio.mail.smtp.auth: false
16# Enable/disable (value true/false) SMTP TLS protocol when sending emails.
17# studio.mail.smtp.starttls.enable: false
18# Enable/disable (value true/false) SMTP EHLO protocol when sending emails.
19# studio.mail.smtp.ehlo: true
20# Enable/disable (value true/false) debug mode for email service. Enabling debug mode allows tracking/debugging communication between email service and SMTP server.
21# studio.mail.debug: false
CORS
The following section of Studio’s configuration overrides allows you to set CORS
 1################################################################
 2##                             CORS                           ##
 3################################################################
 4# This is configured as permissive by default for ease of deployment
 5# Remember to tighten this up for production
 6
 7# Disable CORS headers completely
 8# studio.cors.disable: false
 9# Value for the Access-Control-Allow-Origin header
10# studio.cors.origins: '*'
11# Value for the Access-Control-Allow-Headers header
12# studio.cors.headers: '*'
13# Value for the Access-Control-Allow-Methods header
14# studio.cors.methods: '*'
15# Value for the Access-Control-Allow-Credentials header
16# studio.cors.credentials: true
17# Value for the Access-Control-Max-Age header
18# studio.cors.maxage: -1
The CORS origins accept regex patterns. Values are split using ,. Remember that commas inside
patterns need to be escaped with a \ like:
studio.cors.origins: 'http://localhost:[8000\,3000],http://*.other.domain'
Blob Stores
Configure internally managed static asset stores to handle very large files using the Blob Stores configuration. To learn more, read the article Blob Stores.
Project Policy
The project policy configuration file allows the administrator to configure conditions for adding content to the project. (via uploads), such as filename constraints, minimum/maximum size of files, permitted content types or file types (MIME-types), etc.
Learn more about project policy in the article Project Policy Configuration.
Editable Mime Types
Here’s the default list of MIME-types editable in Studio:
# Item MIME-types that are editable directly in Crafter Studio
studio.content.item.editableTypes:
- text/plain
- text/html
- text/css
- text/x-freemarker
- application/javascript
- application/json
- application/xml
- application/xhtml+xml
These can be updated as needed by overriding the property in one of the override files.
Project/Site Configuration
Crafter Studio allows to configure many aspects of a project/site. Learn more about project/site configuration in the article Project Configuration.
UI Configuration
Crafter Studio’s UI is highly configurable and allows you to customize the look and feel of the UI per project to suit your needs. Learn more about Studio UI configuration in the article User Interface Configuration.
RTE Configuration
RTEs are more effective/productive for authors when they are configured properly for the specific type of content the author is managing. A properly and effectively configured RTE has the right styles, menu options and so on. Learn more about configuring Studio’s default RTE in the article Rich Text Editor Configuration.
Preview Deployer Configuration
The following section of Studio’s configuration overrides allows you to setup your deployer URLs
 1############################################################
 2##                    Preview Deployer                    ##
 3############################################################
 4
 5# Default preview deployer URL (can be overridden per site)
 6studio.preview.defaultPreviewDeployerUrl: ${env:DEPLOYER_URL}/api/1/target/deploy/{siteEnv}/{siteName}
 7# Default preview create target URL (can be overridden per site)
 8studio.preview.createTargetUrl: ${env:DEPLOYER_URL}/api/1/target/create_if_not_exists
 9# Default preview create target URL (can be overridden per site)
10studio.preview.deleteTargetUrl: ${env:DEPLOYER_URL}/api/1/target/delete-if-exists/{siteEnv}/{siteName}
11# URL to the preview repository (aka Sandbox) where authors save work-in-progress
12studio.preview.repoUrl: ${env:CRAFTER_DATA_DIR}/repos/sites/{siteName}/sandbox
Preview Search Configuration
The following section of Studio’s configuration overrides allows you to set URLs for search in preview.
1############################################################
2##                   Preview Search                       ##
3############################################################
4
5studio.preview.search.createUrl: ${env:SEARCH_URL}/api/2/admin/index/create
6studio.preview.search.deleteUrl: ${env:SEARCH_URL}/api/2/admin/index/delete/{siteName}
Search
The following section of Studio’s configuration overrides allows you to setup the url for search
 1################################################################
 2##                           Search                           ##
 3################################################################
 4# URLs to connect to Search
 5studio.search.urls: ${env:SEARCH_URL}
 6# The username for Search
 7studio.search.username: ${env:SEARCH_USERNAME}
 8# The password for Search
 9studio.search.password: ${env:SEARCH_PASSWORD}
10# The connection timeout in milliseconds, if set to -1 the default will be used
11studio.search.timeout.connect: -1
12# The socket timeout in milliseconds, if set to -1 the default will be used
13studio.search.timeout.socket: -1
14# The number of threads to use, if set to -1 the default will be used
15studio.search.threads: -1
16# Indicates if keep alive should be enabled for sockets used by the search client, defaults to false
17studio.search.keepAlive: false
Cache Settings
Here are the cache control settings for templates and assets:
# If Studio should cache its FreeMarker templates
studio.cache.templates: true
# Indicates if the browser should cache responses for static-assets
studio.cache.assets.enabled: true
# The max age in seconds that the browser should cache responses for requests matching `studio.cache.assets.maxAge.includeUrls`
studio.cache.assets.maxAge: 3600
# The urls that should include max-age=<studio.cache.assets.maxAge> in Cache-Control header. Other urls will be set to default max-age=0, must-revalidate
studio.cache.assets.maxAge.includeUrls: /static-assets/**,/1/plugin/file/**
Forwarded Headers
The following section of Studio’s configuration overrides allows you to configure forwarded headers to resolve the actual hostname and protocol when it is behind a load balancer or reverse proxy. This is especially useful when setting up Studio behind a load balancer in AWS.
1##################################################
2##             Forwarded Headers                ##
3##################################################
4# Indicates if Forwarded or X-Forwarded headers should be used when resolving the client-originated protocol and
5# address. Enable when Studio is behind a reverse proxy or load balancer that sends these.
6studio.forwarded.headers.enabled: false
Policy Headers
Content Security Policy
Since 4.1.2The following allows you to configure which resources can be loaded (e.g. JavaScript, CSS, Images, etc.) and the URLs that they can be loaded from.
1# Value for the Content-Security-Policy header
2studio.security.headers.contentSecurityPolicy.value: default-src 'unsafe-inline'
3# Set to true to enable the Content-Security-Policy-Report-Only header (this will report in the user agent console instead of actually blocking the requests)
4studio.security.headers.contentSecurityPolicy.reportOnly: true
To block offending requests, set studio.security.headers.contentSecurityPolicy.reportOnly to false.
This property is set to true by default
X-Permitted-Cross-Domain-Policies
The following allows you to configure what other domains you want to allow access to your domain.
The X-PERMITTED-CROSS-DOMAIN-POLICIES header is set to none (do not allow any embedding) by default.
1# Value for the X-PERMITTED-CROSS-DOMAIN-POLICIES header
2studio.security.headers.permittedCrossDomainPolicies.value: none
Serverless Delivery Targets
The following section of Studio’s configuration overrides allows you to set up serverless delivery.
 1##########################################################
 2##                 Serverless Delivery                  ##
 3##########################################################
 4# Indicates if serverless delivery is enabled
 5# studio.serverless.delivery.enabled: false
 6# The URL for the serverless delivery deployer create URL
 7# studio.serverless.delivery.deployer.target.createUrl: ${studio.preview.createTargetUrl}
 8# The URL for the serverless delivery deployer delete URL
 9# studio.serverless.delivery.deployer.target.deleteUrl: ${studio.preview.deleteTargetUrl}
10# The template name for serverless deployer targets
11# studio.serverless.delivery.deployer.target.template: aws-cloudformed-s3
12# Replace existing target configuration if one exists?
13# studio.serverless.delivery.deployer.target.replace: false
14# The URL the deployer will use to clone/pull the site's published repo. When the deployer is in a separate node
15# (because of clustering), this URL should be an SSH/HTTP URL to the load balancer in front of the Studios
16# studio.serverless.delivery.deployer.target.remoteRepoUrl: ${env:CRAFTER_DATA_DIR}/repos/sites/{siteName}/published
17# The deployer's local path where it will store the clone of the published site. This property is not needed if
18# the deployer is not the preview deployer, so you can leave an empty string ('') instead
19# studio.serverless.delivery.deployer.target.localRepoPath: ${env:CRAFTER_DATA_DIR}/repos/aws/{siteName}
20# Parameters for the target template. Please check the deployer template documentation for the possible parameters.
21# The following parameters will be sent automatically, and you don't need to specify them: env, site_name, replace,
22# disable_deploy_cron, local_repo_path, repo_url, use_crafter_search
23# studio.serverless.delivery.deployer.target.template.params:
24#   # The delivery search endpoint (optional is authoring is using the same one, specified in the SEARCH_URL env variable)
25#   search_url:
26#   aws:
27#     # AWS region (optional if specified through default AWS chain)
28#     region: us-east-1
29#     # AWS access key (optional if specified through default AWS chain)
30#     default_access_key:
31#     # AWS secret key (optional if specified through default AWS chain)
32#     default_secret_key:
33#     cloudformation:
34#       # AWS access key (optional if aws.accessKey is specified)
35#       access_key:
36#       # AWS secret key (optional if aws.secretKey is specified)
37#       secret_key:
38#       # Namespace to use for CloudFormation resources (required when target template is aws-cloudformed-s3)
39#       namespace: myorganization
40#       # The domain name of the serverless delivery LB (required when target template is aws-cloudformed-s3)
41#       deliveryLBDomainName:
42#       # The SSL certificate ARN the CloudFront CDN should use (optional when target template is aws-cloudformed-s3)
43#       cloudfrontCertificateArn:
44#       # The alternate domains names (besides *.cloudfront.net) for the CloudFront CDN (optional when target template is aws-cloudformed-s3)
45#       alternateCloudFrontDomainNames:
Workflow Notifications Configuration
Crafter Studio provides a simple workflow option that includes submission, review, approve or reject, and publish immediately or publish on a schedule.
Learn more about Crafter Studio’s workflow in the article Configure Simple Workflow Notifications and Dialog Messages.
Validations Regex
Since 4.0.3CrafterCMS validates API requests related to users and groups through regex restrictions to avoid malicious payloads.
The following section of Studio’s configuration overrides allows you to configure the regex used for validating user names and group names to suit your needs.
##########################################################
##                  Input Validations                   ##
##########################################################
# These properties override default validation regex patterns
# from crafter common validations.
# Key should have the form `studio.validation.regex.KEY_NAME`
# Value should be a valid java regex.
#
# studio.validation.regex.HTTPParameterName: "^[a-zA-Z0-9_\\-]{1,32}$"
# studio.validation.regex.SITEID: "^[a-z0-9\-_]*$"
# studio.validation.regex.EMAIL: "^([\\w\\d._\\-#])+@([\\w\\d._\\-#]+[.][\\w\\d._\\-#]+)+$"
# studio.validation.regex.USERNAME: "^[a-zA-Z][\\w.\\-@+]+$"
# studio.validation.regex.GROUP_NAME: "^[a-zA-Z][\\w.\\-]*$"
# studio.validation.regex.ALPHANUMERIC: "^[a-zA-Z0-9]*$"
# studio.validation.regex.SEARCH_KEYWORDS: "^[\\w\\s\\-\\\"\\.\\*]*$"
# studio.validation.regex.CONTENT_PATH_WRITE: "^/?([\\w\\- ]+/?)*(((crafter\\-level\\-descriptor\\.level)|([\\w\\- ]))+\\.[\\w]+)?$"
# studio.validation.regex.CONTENT_PATH_READ: "^/?([\\w\\p{IsLatin}@$%^&{}\\[\\]()+\\-=,.:~'`]+(\\s*[\\w\\p{IsLatin}/@$%^&{}\\[\\]()+\\-=,.:~'`])*(/?))*$"
# studio.validation.regex.CONTENT_FILE_NAME_WRITE: "^((crafter\\-level\\-descriptor\\.level)|([a-z0-9_\\-])+)\\.xml$"
# studio.validation.regex.CONFIGURATION_PATH: "^([a-z0-9\\-_/]+([.]*[a-z0-9\\-_])+)*(\\.[\w]+)?/?$"
Commit Message
Here are the default commit messages when someone makes content changes and can be customized by overriding them using one of the override files.
 1# Repository commit prologue message
 2studio.repo.commitMessagePrologue:
 3# Repository commit postscript message
 4studio.repo.commitMessagePostscript:
 5# Sandbox repository write commit message
 6studio.repo.sandbox.write.commitMessage: "User {username} wrote content {path}"
 7# Published repository commit message
 8studio.repo.published.commitMessage: "Publish event triggered by {username} on {datetime} via {source}.\n\nPublish note from user: \"{message}\"\n\nCommit ID: {commit_id}\n\nPackage ID: {package_id}"
 9# Commit message to mark commit not to process when syncing database
10studio.repo.syncDB.commitMessage.noProcessing: "STUDIO: NO PROCESSING"
11# Create new repository commit message
12studio.repo.createRepository.commitMessage: "Create new repository."
13# Create sandbox branch commit message
14studio.repo.createSandboxBranch.commitMessage: "Create {sandbox} branch."
15# Initial commit message
16studio.repo.initialCommit.commitMessage: "Initial commit."
17# Create as orphan commit message
18studio.repo.createAsOrphan.commitMessage: "Created as orphan."
19# Blueprints updated commit message
20studio.repo.blueprintsUpdated.commitMessage: "Blueprints updated."
21# Create folder commit message
22studio.repo.createFolder.commitMessage: "Created folder site: {site} path: {path}"
23# Delete content commit message
24studio.repo.deleteContent.commitMessage: "Delete file {path}"
25# Move content commit message
26studio.repo.moveContent.commitMessage: "Moving {fromPath} to {toPath}"
27# Copy content commit message
28studio.repo.copyContent.commitMessage: "Copying {fromPath} to {toPath}"
Audit Log
Since 4.1.3CrafterCMS allows disabling the job for populating the audit log from external git changes. When disabled, the audit table will not log external operations synced from git. Crafter Studio updates and changes are always audited. Disabling this job improves performance for large git pull operations.
To disable populating the audit log, set the studio.clockJob.task.auditLogProcessing.disableAudit property to true.
# Disable the db audit log population
studio.clockJob.task.auditLogProcessing.disableAudit: false
Publishing Blacklist
CrafterCMS allows the creation of a publishing blacklist to prevent certain unwanted items from being published.
A comma-separated list of regexes is used to configure items that should not be published.
To configure the publishing blacklist, using your favorite editor open CRAFTER_HOME/bin/apache-tomcat/shared/classes/crafter/studio/extension/studio-config-override.yaml or open the Global Studio Configuration Override file studio-config-override.yaml located under CRAFTER_HOME/data/repos/global/configuration that can be accessed from Studio from the Main Menu under Global Config.
Add the following lines with the regex for the item you wish not to be published. By default, .keep files are not published by CrafterCMS. Just add a , then your regex after .*/\.keep:
# Publishing blacklist configuration, items matching regexes on this list will never be published
studio.configuration.publishing.blacklist.regex: >-
    .*/\.keep
Items in the publishing blacklist will not be published but will instead be marked as published and logged (debug level) in the tomcat log, why the item was not published.
[DEBUG] 2021-04-22T08:16:01,023 [studio.clockTaskExecutor-42] [deployment.PublishingManagerImpl] | File /static-assets/css/.keep of the site mysite will not be published because it matches the configured publishing blacklist regex patterns.
Example
Let’s take a look at an example.
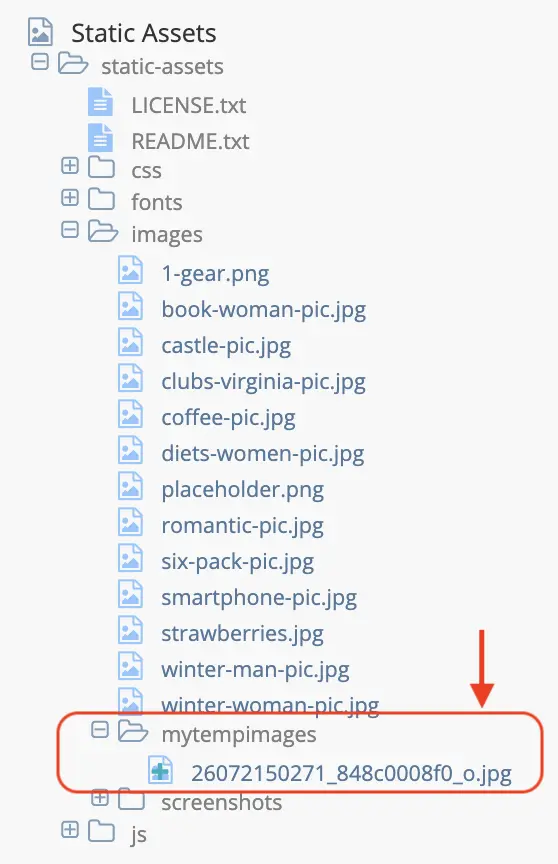
Create a site using the website editorial blueprint, then create the folder mytempimages under /static-assets/images.
Say, you do not want files under /static-assets/images/mytempimages to be published when a user performs a bulk publish or Approve & Publish of multiple items from the dashboard. We’ll add to the studio.configuration.publishing.blacklist.regex the regex for items under /static-assets/images/mytempimages
# Publishing blacklist configuration, items matching regexes on this list will never be published
studio.configuration.publishing.blacklist.regex: >-
    .*/\.keep,\/static-assets\/images\/mytempimages\/.*
Save your changes and restart Studio.
Upload an image under /static-assets/images/mytempimages
Publish the uploaded image by right-clicking on the image, then select Approve & Publish. The Approve for Publish dialog will open up. Select Items should be published now, then click on the Submit button.
After publishing, open the Sidebar again and navigate to /static-assets/images/mytempimages. Notice that your file has been marked published.

Let’s take a look at the tomcat log, notice that it was logged that the file we uploaded will not be published because it is in the publishing blacklist:
[INFO] 2021-04-22T12:48:24,903 [studio.clockTaskExecutor-36] [job.StudioPublisherTask] | Starting publishing on environment live for site mysite
[DEBUG] 2021-04-22T12:48:28,990 [studio.clockTaskExecutor-36] [deployment.PublishingManagerImpl] | Environment is live, transition item to LIVE state mysite:/static-assets/images/mytempimages/26072150271_848c0008f0_o.jpg
[DEBUG] 2021-04-22T12:48:28,992 [studio.clockTaskExecutor-36] [deployment.PublishingManagerImpl] | File /static-assets/images/mytempimages/26072150271_848c0008f0_o.jpg of the site mysite will not be published because it matches the configured publishing blacklist regex patterns.
[INFO] 2021-04-22T12:48:29,014 [studio.clockTaskExecutor-36] [job.StudioPublisherTask] | Finished publishing environment live for site mysite
Configuration Files Maximum
Since 4.1.4To set the maximum size of a project/site configuration file for the write_configuration API, set the following property:
# The maximum length of configuration content for the configuration service. Default to 512kB -> 512 * 1024
studio.configuration.maxContentSize: 524288
Content Type Editor Config
The Content Type Editor Config configuration file defines what tools are available in the Content Type Editor. Learn more about Content Type Editor configuration in the article Content Type Editor Config.
Dependency Resolver Configuration
Crafter Studio extracts and tracks dependencies between content items to assist authors with publishing, workflow, and core content operations like copy and delete. Learn more about configuring the dependency resolver in the article Dependency Resolver Configuration.
Project Tools Configuration
Studio’s Project Tools can be configured to list/de-list configuration files. Learn more about this in the article Project Tools Configuration.
Asset Processing Configuration
Asset processing allows you to define transformations for static assets (currently only images), through a series of processor pipelines that are executed when the assets are uploaded to Studio. Learn more about asset processing configuration in the article Asset Processing Configuration.
AWS Profiles Configuration
CrafterCMS has many integrations with AWS. Learn how to configure AWS Profiles in the article AWS Profiles Configuration.
Box Profiles Configuration
CrafterCMS integrates with Box. Learn how to configure Box Profiles in the article Box Profiles Configuration.
WebDAV Profiles Configuration
CrafterCMS integrates with WebDAV. Learn how to configure WebDAV Profiles in the article WebDAV Profiles Configuration.
Studio Multi-environment Support
To set up a Studio environment, do the following:
Create a folder under
CRAFTER_HOME/data/repos/sites/${site}/sandbox/config/studiocalledenvInside the folder, create a directory called
myenv(or whatever you want to call the environment)Copy the configuration file you want to override in the new environment you are setting up, inside your
myenvfolder following the folder structure underconfig/studio.Remember to commit the files copied so Studio will pick it up.
In the
crafter-setenv.shfile inTOMCAT/binset the following property to desired environment:CRAFTER_HOME/bin/crafter-setenv.sh# -------------------- Configuration variables -------------------- export CRAFTER_ENVIRONMENT=${CRAFTER_ENVIRONMENT:=myenv}
Restart Studio
Note
All configuration files under CRAFTER_HOME/data/repos/sites/${site}/sandbox/config/studio can be overridden by environment, except for the Project Policy Configuration (site-policy-config.xml) and Content Types (items under the content-types folder).
Example
Let’s take a look at an example of creating a new environment, called mycustomenv with the rte-setup-tinymce5.xml file overridden in the new environment:
We’ll create a folder called
envunderCRAFTER_HOME/data/repos/site/my-awesome-editorial/sandbox/config/studio1data/ 2 repos/ 3 sites/ 4 my-awesome-editorial/ 5 sandbox/ 6 config/ 7 studio/ 8 administration/ 9 content-types/ 10 data-sources/ 11 dependency/ 12 env/ 13 permission-mappings-config.xml 14 role-mappings-config.xml 15 site-config.xml 16 studio_version.xml 17 translation-config.xml 18 ui.xml 19 workflow/
Inside the
envfolder, create a directory calledmycustomenvWe will now copy the configuration file for the
ui.xmlthat we want to override in the new environment we are setting up, inside ourmycustomenvfolder, following the folder structure underconfig/studio. For our example, theui.xmlfile is underconfig/studio/:env/ mycustomenv/ ui.xmlRemember to commit the files copied so Studio will pick it up.
➜  sandbox git:(master) ✗ git add .
➜  sandbox git:(master) ✗ git commit -m "Add updated ui.xml file for mycustomenv"
Open the
crafter-setenv.shfile inTOMCAT/binand set the value ofCRAFTER_ENVIRONMENTto the environment we setup above to make it the active environment:CRAFTER_HOME/bin/crafter-setenv.sh# -------------------- Configuration variables -------------------- export CRAFTER_ENVIRONMENT=${CRAFTER_ENVIRONMENT:=mycustomenv}
Restart Studio. To verify our newly setup environment, open the
Sidebarand click on , then select
 Configuration. Notice that the active environmentmycustomenvwill be displayed on top of the configurations list:
Access and Permissions
To configure access to Crafter Studio beyond adding groups and users, you’ll need to configure the following files:
Global Permission Mappings Config
The global permission mappings configuration file lets you configure the permissions to a role globally for the entire application
Permissions per project are managed within Crafter Studio’s UI. See Permission Mappings for more information on project permissions.
Here’s the default global permissions configuration (click on the triangle on the left to expand/collapse). It contains the permissions mappings for the roles defined in the global role mappings configuration file. To access the file, using your favorite editor, navigate to CRAFTER_HOME/data/repos/global/configuration/ then open the file global-permission-mappings-config.xml. Remember to restart CrafterCMS so your changes to the file will take effect.
Sample "permission-mappings-config.xml"
  1<?xml version="1.0" encoding="UTF-8"?>
  2<!--
  3  ~ Copyright (C) 2007-2022 Crafter Software Corporation. All Rights Reserved.
  4  ~
  5  ~ This program is free software: you can redistribute it and/or modify
  6  ~ it under the terms of the GNU General Public License version 3 as published by
  7  ~ the Free Software Foundation.
  8  ~
  9  ~ This program is distributed in the hope that it will be useful,
 10  ~ but WITHOUT ANY WARRANTY; without even the implied warranty of
 11  ~ MERCHANTABILITY or FITNESS FOR A PARTICULAR PURPOSE.  See the
 12  ~ GNU General Public License for more details.
 13  ~
 14  ~ You should have received a copy of the GNU General Public License
 15  ~ along with this program.  If not, see <http://www.gnu.org/licenses/>.
 16  -->
 17
 18<!--
 19    This file contains global permissions configuration for Crafter Studio. Permissions per site are managed
 20    within Crafter Studio's UI.
 21
 22    The structure of this file is:
 23    <permissions>
 24        <site id="###GLOBAL###"> (global management)
 25            <role name="">
 26                <rule regex="/.*">
 27                    <allowed-permissions>
 28                        <permission>Read</permission>
 29                        <permission>Write</permission>
 30                        <permission>Delete</permission>
 31                        <permission>Create Folder</permission>
 32                         <permission>Publish</permission>
 33                    </allowed-permissions>
 34                </rule>
 35            </role>
 36        </site>
 37    </permissions>
 38
 39    This binds a set of permissions to a role globally for the entire application.
 40-->
 41<permissions>
 42    <role name="system_admin">
 43        <rule regex="/.*">
 44            <allowed-permissions>
 45                <permission>content_read</permission>
 46                <permission>content_copy</permission>
 47                <permission>content_write</permission>
 48                <permission>folder_create</permission>
 49                <permission>publish</permission>
 50                <permission>create_site</permission>
 51                <permission>duplicate_site</permission>
 52                <permission>read_groups</permission>
 53                <permission>create_groups</permission>
 54                <permission>update_groups</permission>
 55                <permission>delete_groups</permission>
 56                <permission>read_users</permission>
 57                <permission>create_users</permission>
 58                <permission>update_users</permission>
 59                <permission>delete_users</permission>
 60                <permission>read_cluster</permission>
 61                <permission>create_cluster</permission>
 62                <permission>update_cluster</permission>
 63                <permission>delete_cluster</permission>
 64                <permission>audit_log</permission>
 65                <permission>read_logs</permission>
 66                <permission>add_remote</permission>
 67                <permission>list_remotes</permission>
 68                <permission>pull_from_remote</permission>
 69                <permission>push_to_remote</permission>
 70                <permission>rebuild_database</permission>
 71                <permission>remove_remote</permission>
 72                <permission>s3_read</permission>
 73                <permission>s3_write</permission>
 74                <permission>content_delete</permission>
 75                <permission>webdav_read</permission>
 76                <permission>webdav_write</permission>
 77                <permission>write_configuration</permission>
 78                <permission>write_global_configuration</permission>
 79                <permission>encryption_tool</permission>
 80                <permission>get_children</permission>
 81                <permission>edit_site</permission>
 82                <permission>manage_access_token</permission>
 83                <permission>search_plugins</permission>
 84                <permission>list_plugins</permission>
 85                <permission>install_plugins</permission>
 86                <permission>remove_plugins</permission>
 87                <permission>delete_site</permission>
 88                <permission>unlock_repository</permission>
 89                <permission>item_unlock</permission>
 90                <permission>publish_status</permission>
 91                <permission>repair_repository</permission>
 92                <permission>content_search</permission>
 93                <permission>view_logs</permission>
 94                <permission>view_log_levels</permission>
 95                <permission>configure_log_levels</permission>
 96                <permission>content_create</permission>
 97                <permission>get_publishing_queue</permission>
 98                <permission>cancel_publish</permission>
 99                <permission>change_content_type</permission>
100                <permission>site_status</permission>
101                <permission>resolve_conflict</permission>
102                <permission>site_diff_conflicted_file</permission>
103                <permission>commit_resolution</permission>
104                <permission>cancel_failed_pull</permission>
105                <permission>publish_clear_lock</permission>
106            </allowed-permissions>
107        </rule>
108    </role>
109    <role name="site_admin">
110        <rule regex="/.*">
111            <allowed-permissions>
112                <permission>search_plugins</permission>
113            </allowed-permissions>
114        </rule>
115    </role>
116</permissions>
Description
List of available permissions
Permission |
Description |
|---|---|
add_remote |
User is permitted to add a remote repository |
audit_log |
User is permitted to access the audit log |
cancel_failed_pull |
User is permitted to cancel a failed pull from a repository |
cancel_publish |
User is permitted to cancel a publish request |
change_content_type |
User is permitted to change content type |
commit_resolution |
User is permitted to commit resolution |
configure_log_levels |
User is permitted to configure log levels |
content_copy |
User is permitted to copy content |
content_create |
User is permitted to create new content |
content_delete |
User is permitted to delete content |
content_read |
User is permitted to read content |
content_search |
User is permitted to search for content |
content_write |
User is permitted to edit content |
duplicate_site |
User is permitted to duplicate a project |
folder_create |
User is permitted to create new folder |
create_cluster |
User is permitted to create cluster |
create_groups |
User is permitted to create new groups |
create_users |
User is permitted to create new users |
create_site |
User is permitted to create projects |
delete_site |
User is permitted to delete projects |
delete_cluster |
User is permitted to delete clusters |
delete_groups |
User is permitted to delete groups |
delete_users |
User is permitted to delete users |
edit_site |
User is permitted to edit sites |
encryption_tool |
User is permitted to access the encryption tool |
get_children |
User is permitted to call getChildren* APIs for browsing project content |
get_publishing_queue |
User is permitted to get the list of packages in the publishing queue |
install_plugins |
User is permitted to install plugins |
item_unlock |
User is permitted to unlock items |
list_plugins |
User is permitted to list installed plugins |
list_remotes |
User is permitted to list remote repositories for a project |
manage_access_token |
User is permitted to manage the access tokens |
publish |
User is permitted to approve submitted content for publishing or publish content |
publish_status |
User is permitted to get the publishing status |
publish_clear_lock |
User is permitted to clear publishing locks |
pull_from_remote |
User is permitted to pull content from remote repository to project content repository |
push_to_remote |
User is permitted to push content to remote repository from project content repository |
read_configuration |
user is permitted to read configuration content for project |
read_cluster |
User is permitted to read cluster |
read_groups |
User is permitted to read groups |
read_logs |
User is permitted to read logs |
read_users |
User is permitted to read users |
rebuild_database |
User is permitted to rebuild Crafter Studio’s database and object state with the underlying repository |
remove_plugins |
User is permitted to remove installed plugins |
remove_remote |
User is permitted to remove remote repository from project content repository |
repair_repository |
User is permitted to repair the repository |
resolve_conflict |
User is permitted to resolve a conflict for a file by accepting ours or theirs |
s3_read |
User is permitted to get a list of items from an S3 bucket |
s3_write |
User is permitted to upload a file to an S3 bucket |
search_plugins |
User is permitted to search for plugins |
set_item_states |
User is permitted to set item states |
site_diff_conflicted_file |
User is permitted to get the difference between |
site_status |
User is permitted to get status of repository for a project |
start_stop_publisher |
User is permitted to start/stop the publisher |
unlock_repository |
User is permitted to unlock the repository |
update_cluster |
User is permitted to update cluster |
update_groups |
User is permitted to update groups |
update_users |
User is permitted to update users |
view_logs |
User is permitted to view logs |
view_log_levels |
User is permitted to view log levels |
webdav_read |
User is permitted to get a list of items from a WebDAV server |
webdav_write |
User is permitted to upload a file to a WebDAV server |
write_configuration |
User is permitted to write configuration content for project |
write_global_configuration |
User is permitted to write global configuration content for Studio |
where:
/permissions/site/role@nameRole name/permissions/site/role/rule@regexRegular expression to filter paths where permission is applied. The valueregex="~DASHBOARD~"is a special regular expression applied for content displayed in dashboard widgets only/permissions/site/role/rule/allowed-permissions/permissionAllowed permission for role and rule (possible values given in the table above)
Global Role Mappings Config
The global role mappings config contains the role mappings for groups created in CrafterCMS that need global permissions. For more information on groups, see Groups Management
To access the global role mappings config file, using your favorite editor, navigate to CRAFTER_HOME/data/repos/global/configuration/ then open the file global-role-mappings-config.xml. Remember to restart Crafter so your changes to the file will take effect.
Here’s the default global role mappings configuration (click on the triangle on the left to expand/collapse):
Sample "global-role-mappings-config.xml"
 1<?xml version="1.0" encoding="UTF-8"?>
 2<!--
 3  ~ Copyright (C) 2007-2022 Crafter Software Corporation. All Rights Reserved.
 4  ~
 5  ~ This program is free software: you can redistribute it and/or modify
 6  ~ it under the terms of the GNU General Public License version 3 as published by
 7  ~ the Free Software Foundation.
 8  ~
 9  ~ This program is distributed in the hope that it will be useful,
10  ~ but WITHOUT ANY WARRANTY; without even the implied warranty of
11  ~ MERCHANTABILITY or FITNESS FOR A PARTICULAR PURPOSE.  See the
12  ~ GNU General Public License for more details.
13  ~
14  ~ You should have received a copy of the GNU General Public License
15  ~ along with this program.  If not, see <http://www.gnu.org/licenses/>.
16  -->
17
18<!--
19
20
21-->
22
23<role-mappings>
24    <groups>
25        <group name="system_admin">
26            <role>system_admin</role>
27        </group>
28        <group name="site_admin">
29            <role>site_admin</role>
30        </group>
31    </groups>
32</role-mappings>
Default Global Role
CrafterCMS comes with a predefined global role system_admin out of the box.
Users with the system_admin role have access to everything in the CMS such as all the modules in the Main Menu for managing users, groups, etc., all the sites and configuration files, creating/editing layouts, templates, taxonomies, content types, scripts, etc. in addition to creating and editing content, as well as the ability to approve and reject workflow.
See Global Permission Mappings Config for more information on all items accessible for the system_admin role.