
Configuration and Implementation Production Content Repository <–> Code Repository Sync and Code Release Publishing
The following section describes the steps required to configure the core mechanics of Crafter’s DevContentOps process.
As a recap, here’s a diagram of the Developer Workflow within the DevContentOps process:

Configuring Code Repositories as Remotes in Studio (Per Environment)
Any environment with a Studio will want to configure that environment’s Sandbox repository to use the correlated environment branch. This step has been completed in all environments.
The following process is used to configure the upstream remote:
Shut down Studio and configure it to work for a specific branch, then restart it
TODO
Log in to Crafter Studio
Make sure that the remote does not exist
- Issue the List Remotes API
Assuming the remote does not exist, add it
- Issue the Add Remote API
Parameter values listed in table below
Issue pull to get the latest content from the remote
- Issue the Pull Remote API
Parameter values listed in table below
Issue push to get the latest content to the remote
- Issue the Push Remote API
Parameter values listed in table below
Env
|
Upstream and Branch
|
|
|---|---|---|
DEV
|
List Remote
|
GET /studio/api/2/repository/list_remotes
siteId=mycom
|
Add Remote
|
POST /studio/api/2/repository/add_remote
siteId=mycom
remoteName=origin
remoteUrl=https://github.com/mycom/web-content
|
|
Pull Remote
|
POST /studio/api/2/repository/pull_from_remote
siteId=mycom
remoteName=origin
remoteBranch=env-dev
|
|
Push Remote
|
POST /studio/api/2/repository/push_to_remote
siteId=mycom
remoteName=origin
remoteBranch=env-dev
|
|
QA
|
List Remote
|
GET /studio/api/2/repository/list_remotes
siteId=mycom
|
Add Remote
|
POST /studio/api/2/repository/add_remote
siteId=mycom
remoteName=origin
remoteUrl=https://github.com/mycom/web-content
|
|
Pull Remote
|
POST /studio/api/2/repository/pull_from_remote
siteId=mycom
remoteName=origin
remoteBranch=env-qa
|
|
Push Remote
|
POST /studio/api/2/repository/push_to_remote
siteId=mycom
remoteName=origin
remoteBranch=env-qa
|
Configuring Content Repository <–> Code Repository Sync in Production
The synchronization of the Production content repository (Sandbox) on Production Authoring and the Production Code repository (Master Branch) on your Git repository is performed via execution of Crafter Studio APIs. You can find a full listing of Crafter Studio APIs here: Crafter Studio API
Automating the Pull / Push of Code and Content
We will use Jenkins in our example here to automate DevOps (sync the Authoring Code Repository with the Remote Code Repository).
Sync Script
The following bash script is called by a Jenkins job either in an on-demand or scheduled fashion:
codeforward-contentback-sync.sh
 1 #!/usr/bin/env bash
 2 studioUsername=$1
 3 studioPassword=$2
 4 studioserver=$3
 5 project=$4
 6 remote=$5
 7 branch=$6
 8
 9 echo "Authenticating with authoring"
10 rm session.txt
11
12 curl -d '{ "username":"'$studioUsername'", "password":"'$studioPassword'" }' --cookie-jar session.txt --cookie "XSRF-TOKEN=A_VALUE" --header "X-XSRF-TOKEN:A_VALUE" --header "Content-Type: application/json"  -X POST $studioserver/studio/api/1/services/api/1/security/login.json
13 echo "Pull from remote (get code waiting to come to sandbox)"
14 curl -d '{ "siteId" :"'$project'", "remoteName":"'$remote'", "remoteBranch":"'$branch'" }' --cookie session.txt --cookie "XSRF-TOKEN=A_VALUE"  --header "Content-Type: application/json" --header "X-XSRF-TOKEN:A_VALUE" -X POST  $studioserver/studio/api/2/repository/pull_from_remote
15
16 echo "Push to remote (send content waiting to go to development)"
17 curl -d '{ "siteId" :"'$project'", "remoteName":"'$remote'", "remoteBranch":"'$branch'" }' --cookie session.txt --cookie "XSRF-TOKEN=A_VALUE"  --header "Content-Type: application/json" --header "X-XSRF-TOKEN:A_VALUE" -X POST  $studioserver/studio/api/2/repository/push_to_remote
Usage of the script:
1codeforward-contentback-sync.sh [USERNAME] [PASSWORD] [AUTHOR_SERVER_AND_PORT] [SITE_ID] [REMOTE_NAME] [BRANCH_NAME]
where:
Here’s an example using the script:
1codeforward-contentback-sync.sh devops mydevopspw http://localhost myprojectID origin master
The script authenticates to Crafter Studio, performs a pull from the Remote Code Repository and then if there are no conflicts, performs a push. These two operations move code updates forward to the production Sandbox (not yet live) and content back to the development process. Only approved code that’s been moved to the “master” branch with the intention to release is moved forward.
Calling the Script in Jenkins
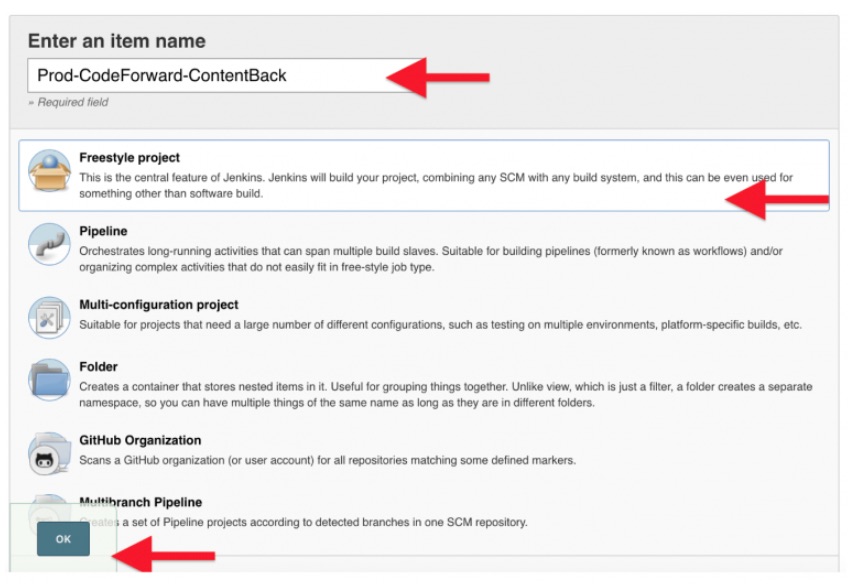
The following instructions show how to create a project in Jenkins that will execute the sync on a schedule and that can also be manually invoked.
The first step is to create a project. Give the project a clear name and select the Freestyle project then click OK to continue.
There is no Source Code Management (SCM) aspect of the project. The most typical use case for “content back” workflow is a scheduled event: Every hour, day, week etc.
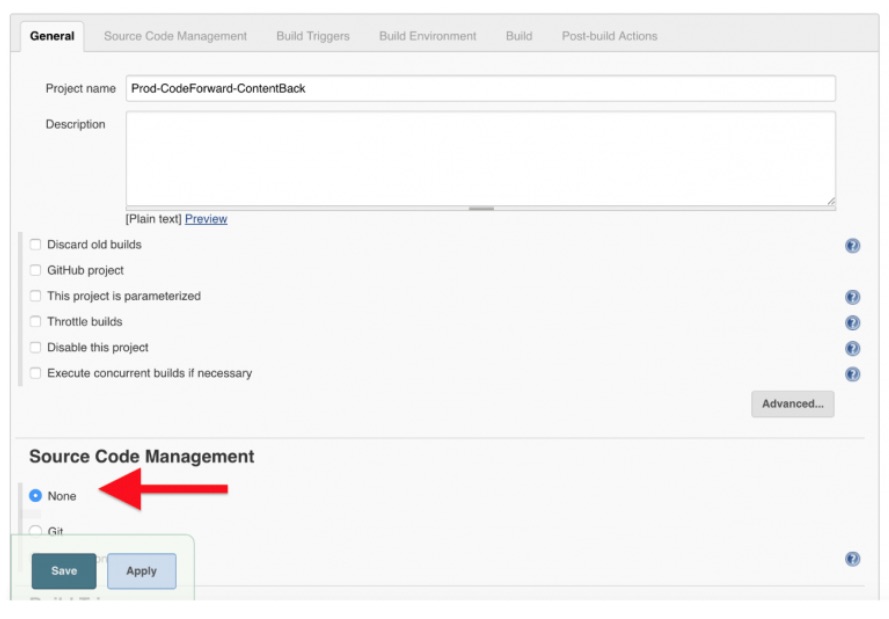
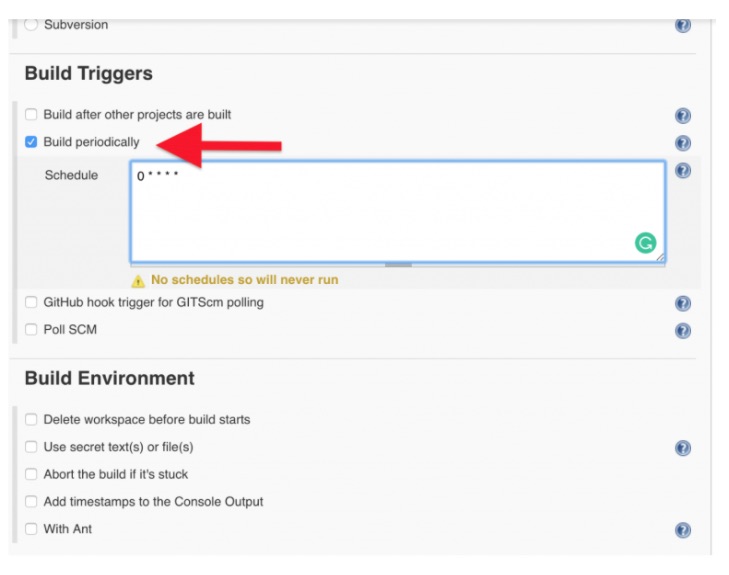
The next step is to define build triggers. Since you are calling APIs here and “content back” is most likely based on some schedule you define, you want to indicate that there is no Source Code Management (SCM) aspect of the project.
We want content from authoring to flow backward regularly, so we’ll configure the job to run periodically. Select “Build Periodically” and define your schedule. Schedule definitions use standard Cron/Quartz configuration. In the example, we’ll run every hour.
Finally, you must define that you want Jenkins to call your script:
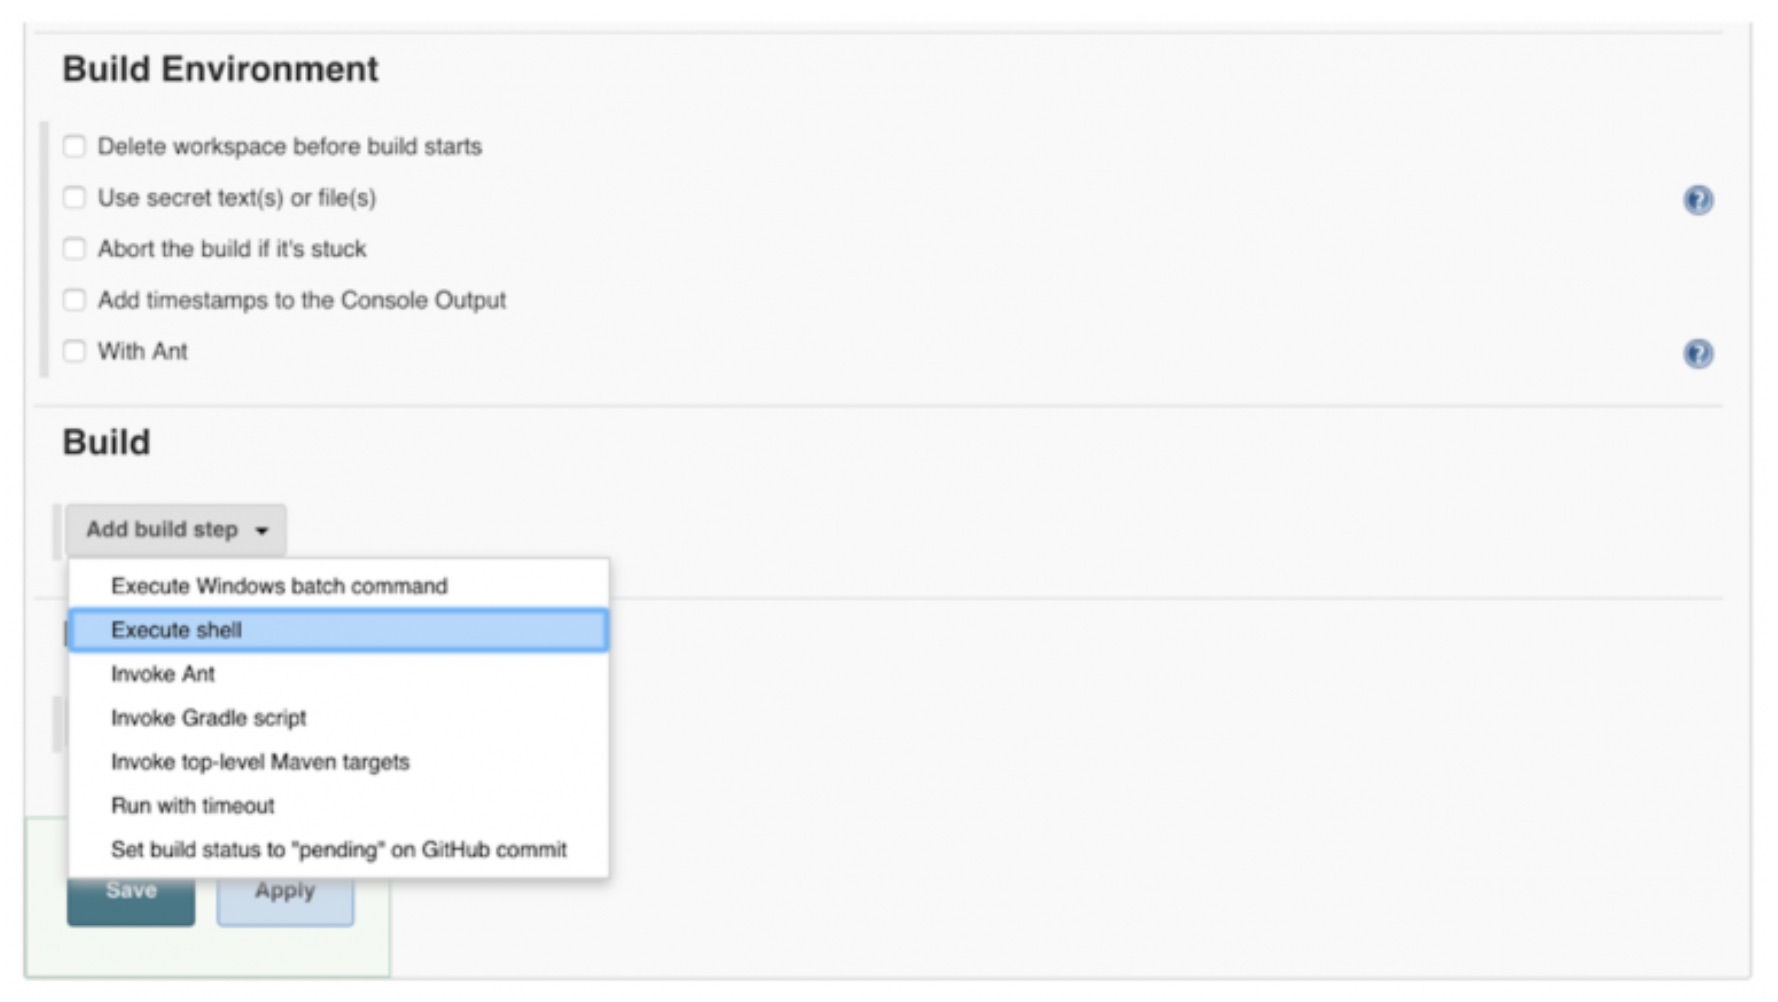
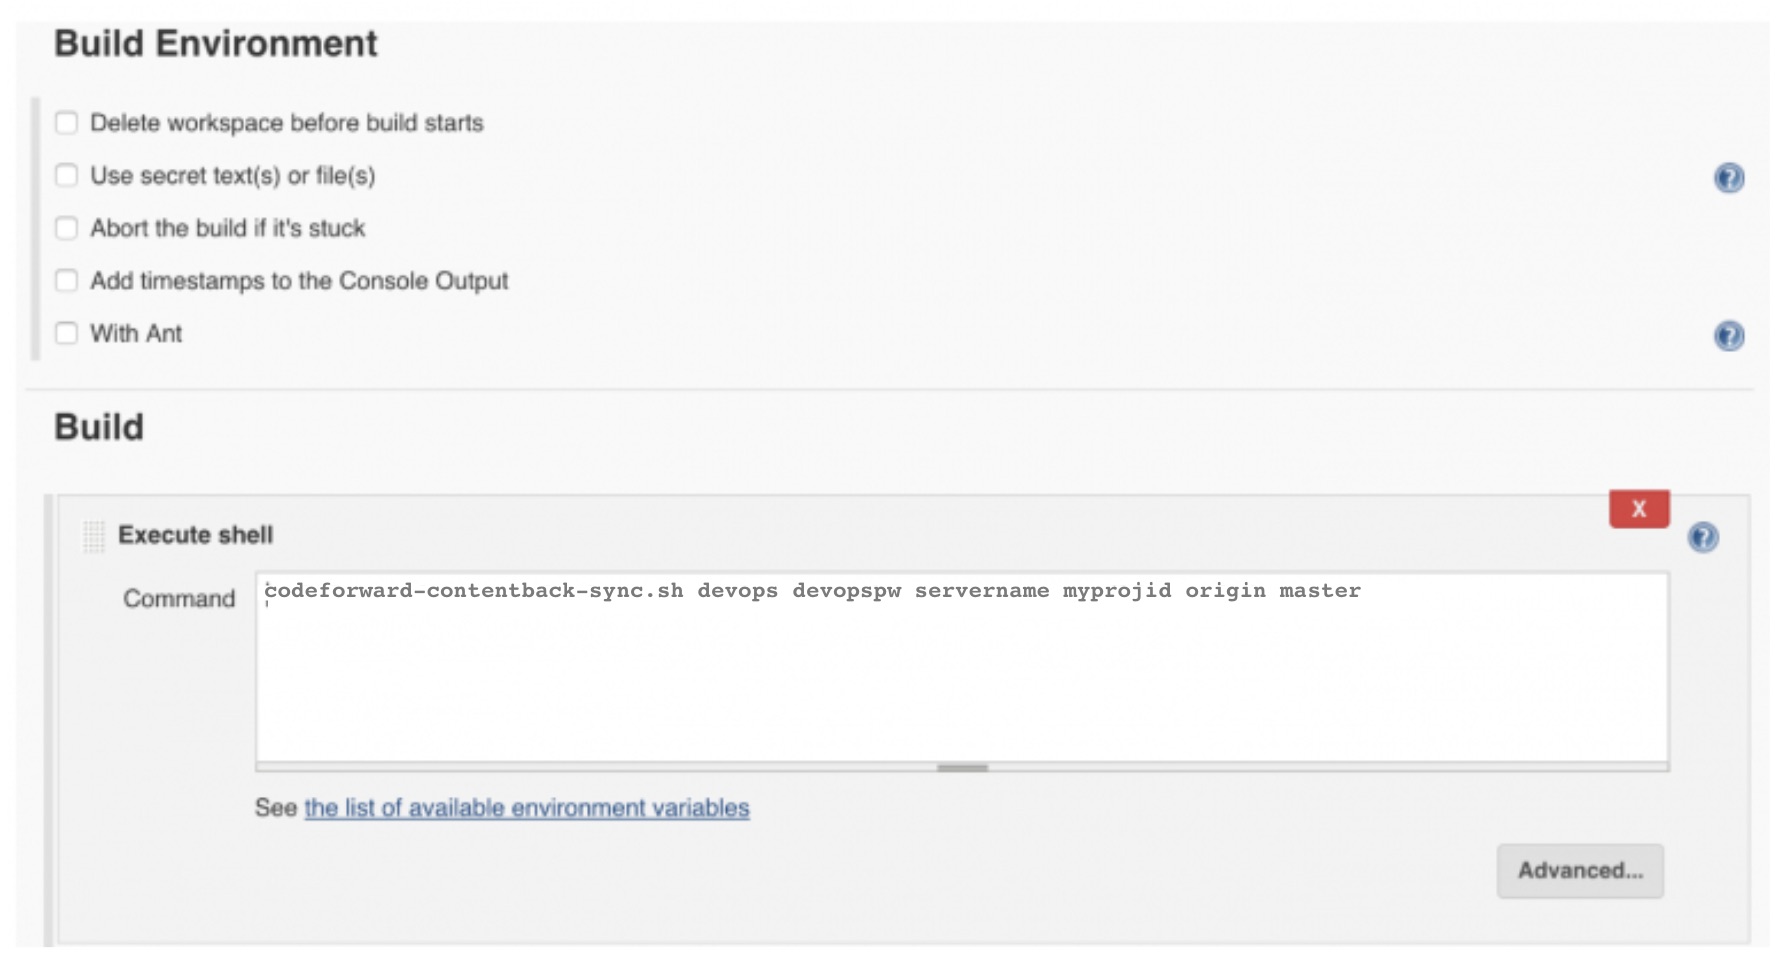
Once you have done these steps you are ready to go. Manually invoke this build any time you want directly through the Jenkins console. We recommend testing it to make sure your parameters and schedule are correct.
Publishing Code That’s Been Sync’d to Sandbox
When you run the “code forward, content back” process, code in the remote code repository is moved to the production authoring sandbox (content repository). This code is now staged for publishing. It is not yet live. Crafter Studio may be used to publish the code, making it available to your delivery servers.
Crafter Studio provides an API that allows you to publish commit IDs. You can provide a single commit ID or you can provide a list. It’s typical as part of your release process to “Squash” all of the commits in a given release into a single commit ID. This allows you to address all of the work as a single ID/moniker which makes it very easy to move, publish and roll back without missing anything.
These APIs are easily invoked by a script. You can use the following example script in your own implementation:
publish-code.sh
 1#!/usr/bin/env bash
 2 studioUsername=$1
 3 studioPassword=$2
 4 xsrf=AUTOMATED
 5 studioserver=$3
 6 project=$4
 7 env="Live"
 8 commit=$5
 9
10 echo "Authenticating with authoring"
11 rm session.txt
12 curl -d '{ "username":"'$studioUsername'", "password":"'$studioPassword'" }' --cookie-jar session.txt --cookie "XSRF-TOKEN=A_VALUE" --header "X-XSRF-TOKEN:A_VALUE" --header "Content-Type: application/json"  -X POST $studioserver/studio/api/1/services/api/1/security/login.json
13
14 echo "Publishing Commit $commit"
15 curl -d '{ "site_id" :"'$project'", "environment":"'$env'", "commit_ids": ["'$commit'"] }' --cookie session.txt --cookie "XSRF-TOKEN=A_VALUE"  --header "Content-Type: application/json" --header "X-XSRF-TOKEN:A_VALUE" -X POST $studioserver/studio/api/1/services/api/1/publish/commits.json
Usage of the script:
1 publish-code.sh [USERNAME] [PASSWORD] [AUTHOR_SERVER_AND_PORT] [SITE_ID] [COMMIT_ID]
where:
Example:
1publish-code.sh devops mydevopspw http://localhost myprojectID 378d0fc4c495b66de9820bd9af6387a1dcf636b8
The script authenticates to Crafter Studio and invokes a publish for the provided commit.
Calling the Script in Jenkins
See configuration of sync script above (codeforward-contentback-sync.sh). The steps are exactly the same with the following differences:
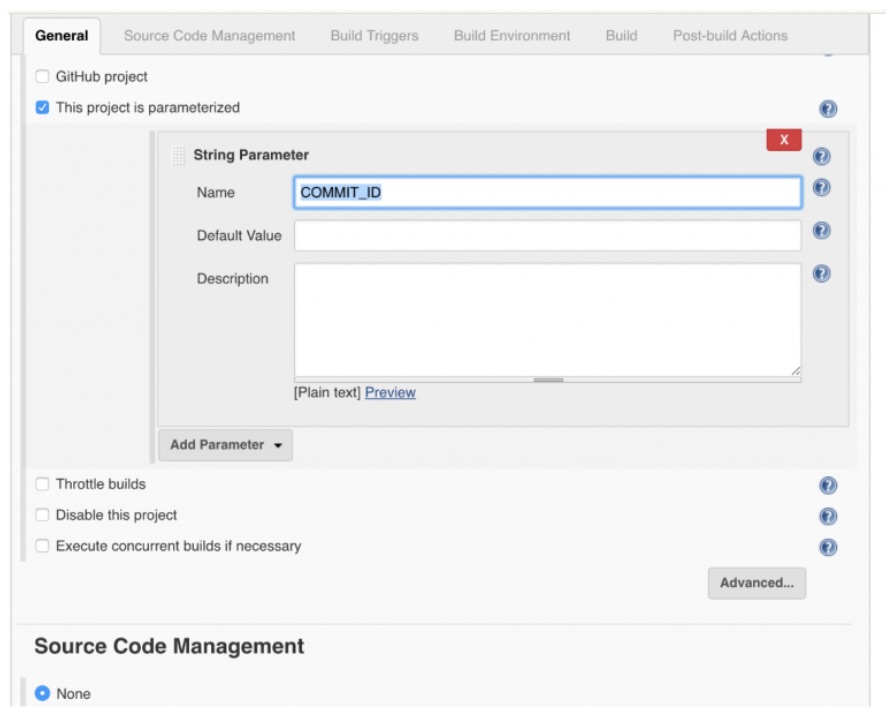
You will call the publish-code script instead of the codeforward-contentback-sync script.
You will ask the user for a parameter value COMMIT_ID via the UI on each invocation and pass that to the command line as the COMMIT_ID parameter value

That’s it! You can now publish your code releases via commits to your entire delivery infrastructure regardless of its size or distribution.