Building Form Engine Control Plugins
In Build a Form Engine Control, we learned how to build form engine controls placed in the Studio war file. Crafter Studio also allows plugins for form engine controls through the getPluginFile API found here getPluginFile
The anatomy of a Control Plugin
Form Engine Control consist of (at a minimum)
A single javascript file which implements the control interface.
Unlike in the previous section Build a Form Engine Control, the JS file name and the control name in the configuration does not need to be the same. The JS file name can be any meaningful name, different from the control name in the configuration.
Configuration in a Crafter Studio project to make that control available for use
Interface
See Control Interface for more information on form engine control interface.
Plugin Directory Structure
When using plugins, the JS files location for the plugins uses a convention where the files needs to go in the following location:
Controls : CRAFTER_HOME/data/repos/sites/SITE_NAME/sandbox/config/studio/plugins/control/CONTROL_NAME/JS_FILE.js
where:
CRAFTER_HOME : Studio location
SITE_NAME : Name of site where the plugin is to be added
CONTROL_NAME : Name of form engine control plugin
JS_FILE.js : JavaScript file containing the control/data source interface implementation
Note
When using an out-of-the-box blueprint to create your site, the plugins/control folder does not exist under CRAFTER_HOME/data/repos/sites/SITE_NAME/sandbox/config/studio/ and will need to be created by the user creating the plugins.
Form Engine Control Example
Let’s take a look at an example of a control plugin. We will be adding a control named text-input.
Form Engine Control Code
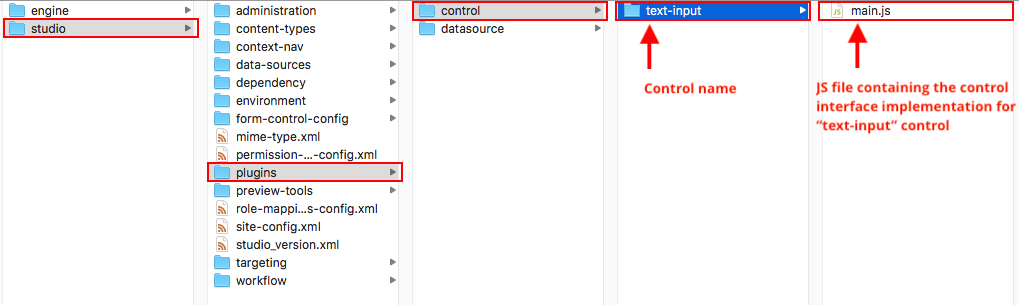
The first thing we have to do is to create the folder structure where we will be placing the JS file for our control. We’ll follow the convention listed above in Plugin Directory Structure
Under CRAFTER_HOME/data/repos/sites/SITE_NAME/sandbox/config/studio, create the folder plugins. Under the plugins folder, create the folder control. Under the control folder, create the folder text-input, which is the name of the control we’re building. We will be placing the JS file implementing the control interface under the text-input folder. In the example below, the JS file is main.js
In the JS file, please note that the CStudioAuthoring.Module is required and that the prefix for CStudioAuthoring.Module.moduleLoaded must be the name of the control. For our example, the prefix is text-input as shown in the example.
 1CStudioForms.Controls.textInput = CStudioForms.Controls.textInput ||
 2function(id, form, owner, properties, constraints, readonly)  {
 3    this.owner = owner;
 4    this.owner.registerField(this);
 5    this.errors = [];
 6    this.properties = properties;
 7    this.constraints = constraints;
 8    this.inputEl = null;
 9    this.patternErrEl = null;
10    this.countEl = null;
11    this.required = false;
12    this.value = "_not-set";
13    this.form = form;
14    this.id = id;
15    this.readonly = readonly;
16
17    return this;
18}
19
20YAHOO.extend(CStudioForms.Controls.textInput, CStudioForms.CStudioFormField, {
21
22    getLabel: function() {
23        return CMgs.format(langBundle, "Text Input");
24    },
25    .
26    .
27    .
28
29    getName: function() {
30            return "text-input";
31    },
32
33    getSupportedProperties: function() {
34        return [
35                { label: CMgs.format(langBundle, "displaySize"), name: "size", type: "int", defaultValue: "50" },
36                { label: CMgs.format(langBundle, "maxLength"), name: "maxlength", type: "int",  defaultValue: "50" },
37                { label: CMgs.format(langBundle, "readonly"), name: "readonly", type: "boolean" },
38                { label: "Tokenize for Indexing", name: "tokenize", type: "boolean",  defaultValue: "false" }
39        ];
40    },
41
42    getSupportedConstraints: function() {
43        return [
44                { label: CMgs.format(langBundle, "required"), name: "required", type: "boolean" },
45                { label: CMgs.format(langBundle, "matchPattern"), name: "pattern", type: "string" },
46        ];
47    }
48
49});
50
51CStudioAuthoring.Module.moduleLoaded("text-input", CStudioForms.Controls.textInput);
After placing your JS file, we need to commit the new file to the repo ({CRAFTER_HOME}/data/repos/sites/SITENAME/sandbox/) by using git so the control will appear in the site content types.
Crafter uses a vanilla version of Git, so regular Git commands work as intended. To commit your changes so Crafter can see it, head to {CRAFTER_HOME}/data/repos/sites/SITENAME/sandbox/ and git add your new files like this
git add <filename>
for each filename. Or, if multiple controls were added, to add all at once use:
git add --all
And once you are done, commit them with the following command:
git commit -m "<the commit’s description>"
You can also use any Git client. Now, it will be available when you edit or create a new content type in your site. Remember that whenever you edit directly in the filesystem, you need to commit your changes to ensure they are properly reflected.
Saving additional form control elements to XML
To save additional elements from your form control into the XML content, call registerDynamicField from the form when initializing the form control. When updateField is called, your element will be saved into the XML content.
this.form.registerDynamicField(this.timezoneId);
See here for an example of calling registerDynamicField in the date-time form control code.
Configuring the Control to show up in Crafter Studio
Add the plugin control’s name to the list of controls in the content type editor configuration
Location (In Repository) SITENAME/config/studio/administration/site-config-tools.xml
 1<controls>
 2    <control>
 3        <name>auto-filename</name>
 4        .
 5        .
 6    </control>
 7    .
 8    .
 9    <control>
10        <plugin>
11            <type>control</type>
12            <name>text-input</name>
13            <filename>main.js</filename>
14        </plugin>
15        <icon>
16            <class>fa-pencil-square-o</class>
17        </icon>
18    </control>
19</controls>
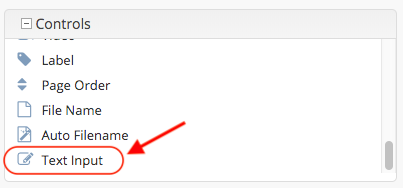
Here’s our plugin control added to the list of controls in the site content types