
Rich Text Editor (RTE TinyMCE 5) Setup
CrafterCMS provides support for TinyMCE 5. This section details how to setup RTE (TinyMCE 5).
What Out-of-the-Box Functionality Does Crafter Studio’s RTE (TinyMCE 5) Support?
Our RTE is based on TinyMCE (https://www.tiny.cloud/) and can leverage all configurations and plugins designed for the TinyMCE editor. You can find the documentation for these TinyMCE configurations and settings here: https://www.tiny.cloud/docs/
TinyMCE plugins
Crafter Studio uses standard TinyMCE plugins. To see the list of TinyMCE plugins available in Studio, look for the <plugins /> tag in the configuration:
<plugins>
  print preview searchreplace autolink directionality visualblocks visualchars fullscreen image link media template
  codesample table charmap hr pagebreak nonbreaking anchor toc insertdatetime advlist lists wordcount
  textpattern help acecode
</plugins>
See https://www.tiny.cloud/docs/plugins/opensource/ for more information on the TinyMCE plugins.
To add TinyMCE plugins to the toolbar, add the names listed in the toolbar tag in the TinyMCE plugin documentation to one of the toolbarItem tags in the configuration: <toolbarItems1>, <toolbarItems2>, <toolbarItems3> or <toolbarItems4>.
See https://www.tiny.cloud/docs/configure/editor-appearance/#toolbarn for more information on the toolbar(n) option of Tiny MCE
TinyMCE Plugin Example
Let’s take a look at an example of using one of the TinyMCE plugins.
The default editor instance contains a menubar with most of the commonly used editing tools. Sometimes, you want handy buttons available so you don’t have to find the tool you need from the menubar. We’ll add a media button to our editor instance to be able to embed a YouTube video:
Add the button name media to one of the toolbarItem tags:
<toolbarItems1>. An Insert/Edit Embedded Media button will now be available for users of the RTE.
Click on the
button to add the link to the YouTube video you’d like to embed in the RTE and to setup other parameters. In the General tab, fill in the Source field with the URL of the YouTube video you’d like to embed and finally, fill in the Dimensions field to the size desired. Click on the Ok button.
Note
On TinyMCE, buttons can be added through toolbar(n) or toolbar but the rte config only supports toolbarItems(n).
Tiny’s toolbar(n) are available only up to 4 through our toolbarItems{1,2,3,4}
Save your changes, and your video should now be embedded in your page
TinyMCE Plugin Template Example
Let’s take a look at another example of using the TinyMCE plugin, template.
The template plugin adds support for custom templates. The default editor instance only adds the menu item Insert template... under the Insert menu. On TinyMCE, it adds a menu item Insert template under the Insert menu and a toolbar button.
To add a template to the RTE, simply add <template /> under <setup /> in the RTE configuration.
Under <template />, add title, description and content:
Let us take a look at an example of adding two templates to the RTE configuration
Open the RTE configuration file in your site by opening the Sidebar, then click on
 -> Configuration -> RTE Configuration
Add in the following templates under
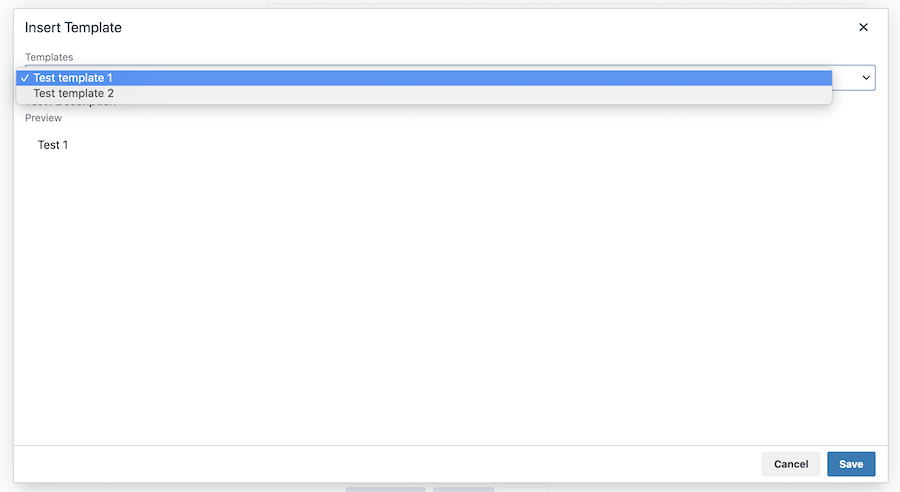
<setup />:CRAFTER_HOME/data/repos/sites/SITENAME/sandbox/config/studio/form-control-config/rte/rte-setup-tinymce5.xml<templates> <template> <title>Test template 1</title> <content>Test 1</content> <description>Test1 Description</description> </template> <template> <title>Test template 2</title> <content><![CDATA[ <div class="test"> <h1>This is a title</h1> <p>Look at this paragraph!</p> </div> ]]> </content> <description>Test 2 description</description> </template> </templates>
Save your changes. The configured templates should now be available under
Insert templates` of the ``Insertmenu.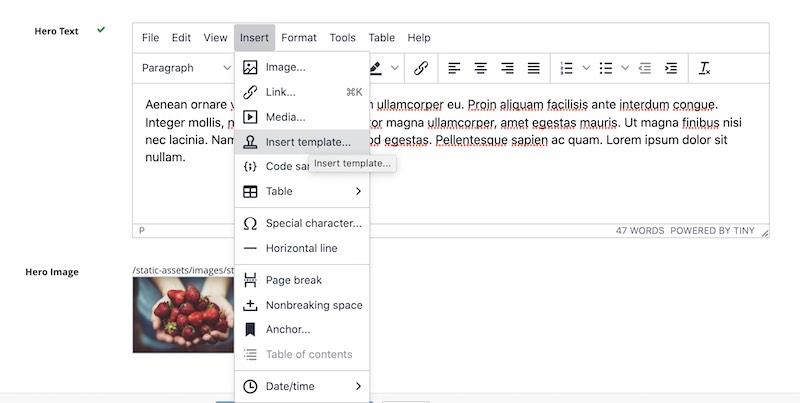
See https://www.tiny.cloud/docs/plugins/opensource/template/ for more information on the template plugin.
TinyMCE paste plugin callback hooks
The TinyMCE paste plugin enables you to modify the pasted content before it gets inserted into the editor (paste_preprocess) and before it gets inserted into the editor but after it’s been parsed into a DOM structure (paste_postprocess). For more information on these options, see https://www.tiny.cloud/docs/plugins/opensource/paste#paste_preprocess.
In order to hook into the callback (paste_preprocess and paste_postprocess), do the following in the RTE configuration:
Add the default
pasteplugin in the<plugins />tagCRAFTER_HOME/data/repos/sites/SITENAME/sandbox/config/studio/form-control-config/rte/rte-setup-tinymce5.xml<plugins> print preview searchreplace autolink directionality visualblocks visualchars fullscreen image link media template codesample table charmap hr pagebreak nonbreaking anchor toc insertdatetime advlist lists wordcount textpattern help acecode paste </plugins>
Create an external plugin by following the structure of the example plugin here. To modify the pasted content, add your code under
paste_preprocess()orpaste_postprocess()depending on your needs.Add the plugin created in the previous step as an external plugin under the
craftercms_tinymce_hookstag.CRAFTER_HOME/data/repos/sites/SITENAME/sandbox/config/studio/form-control-config/rte/rte-setup-tinymce5.xml<external_plugins> <craftercms_tinymce_hooks><![CDATA[/studio/api/2/plugin/file?siteId={site}&type=tinymce&name=craftercms_paste_extension&filename=samplepasteplugin.js]]></craftercms_tinymce_hooks> </external_plugins>
For more information on
craftercms_tinymce_hooks, see here
Note
When Tiny’s paste plugin is included, craftercms_paste_cleanup extension is also enabled. CrafterCMS’ extension performs some additional paste cleanup from what Tiny’s plugin does. To disable these additional processing of the paste input, you may add <craftercms_paste_cleanup>false</craftercms_paste_cleanup> to the RTE configuration
Adding Allowable Elements
Tiny MCE allows only a certain set of elements (HTML tags) as valid (rule set) by default in the code editor and will strip elements not in the allowable list when it outputs its HTML. For example, if you try adding in the <script /> element , or the <iframe /> element, it will be stripped out of the HTML output. To add specific elements that should also be valid, in addition to the existing rule set, we use the <extendedElements /> in the RTE configuration. Simply add the elements you would like added to the existing rule set in the <extendedElements /> tag in RTE Configuration file.
<extendedElements>script,mycustomtag</extendedElements> <!-- elements whitelist (won't be stripped out) -->
Example allowing script element
Let’s take a look at an example of adding <script /> to the allowable elements (rule set). We’ll be using a site created using the Website Editorial blueprint.
Open the RTE (TinyMCE 5) configuration file in Studio by opening the Sidebar, then click on
-> Configuration -> RTE (TinyMCE 5) ConfigurationScroll down to
<extendedElements />tag and addscriptand save.<extendedElements>script</extendedElements> <!-- elements whitelist (won't be stripped out) -->
We’ll now add
<script />in the RTE to verify it works.Open the Sidebar and edit one of the articles. Navigate to
/articles/2016/7/then right click onNew ACME Phone Released Todayand selectEdit.Scroll down to the
Contentpart of the form and UnderSections, click onAdd AnotherClick on the newly added section, then click on
Tools->Code Editorfrom the RTE menubar.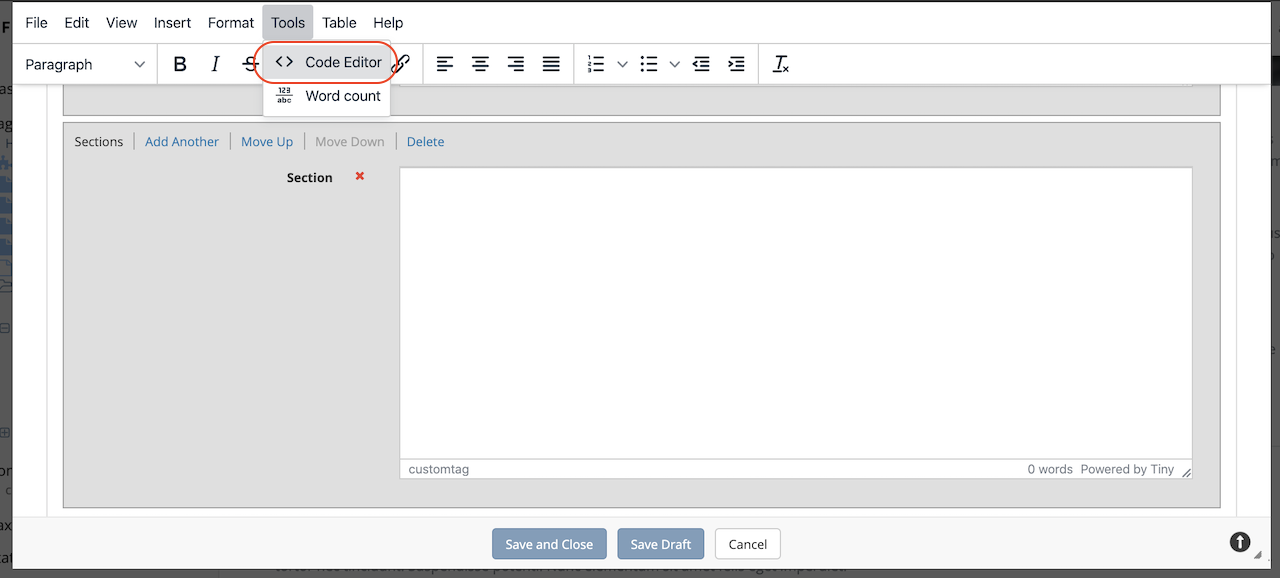
Add a script in the code editor then save the changes. This will display a dialog saying
Hellowhen you preview the articleNew ACME Phone Released Today<script>alert('Hello!')</script>
Preview the page. A dialog saying
Helloshould pop up before the page is displayed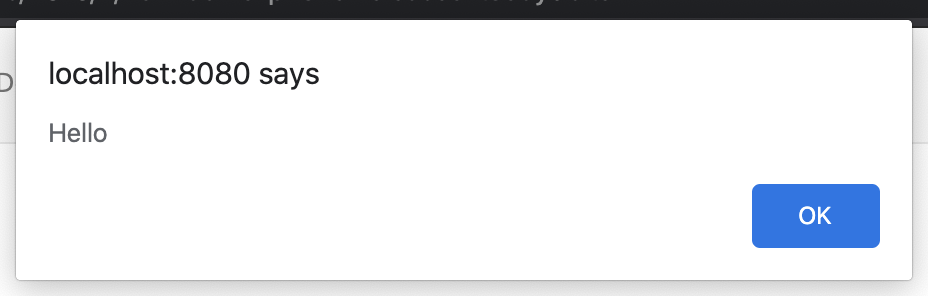
Please note that TinyMCE gives this warning when allowing script elements (<script />):
Warning
Allowing script elements (<script>) in TinyMCE exposes users to cross-site scripting (XSS) attacks.
Example allowing a custom element
You can also add custom elements to the rule set and can be done by simply adding the custom tag to <extendedElements />. Let’s take a look at an example of adding the tag mycustomtag to the rule set.
Note
Case sensitive custom elements are not supported in TinyMCE 5. Remember to use only lowercase for custom elements (e.g.
myattris supported but myAttr is not supported).
Open the RTE (TinyMCE 5) configuration file in Studio by opening the Sidebar, then click on
-> Configuration -> RTE (TinyMCE 5) ConfigurationScroll down to
<extendedElements />tag and addmycustomtagand save.<extendedElements>script,mycustomtag</extendedElements> <!-- elements whitelist (won't be stripped out) -->
We’ll now add the
<mycustomtag />in the RTE to verify it works.Open the Sidebar and edit one of the articles. Navigate to
/articles/2016/7/then right click onNew ACME Phone Released Todayand selectEdit.Scroll down to the
Contentpart of the form and UnderSections, click on one of the section, then click onTools->Code Editorfrom the RTE menubar, then use<mycustomtag /><mycustomtag>my custom tag</mycustomtag>

Adding External Plugins
TinyMCE provides an option to specify URLS to plugins outside the tinymce plugins directory. These external plugins allow the user to extend TinyMCE. For example, you can create custom dialogs, buttons, menu items, etc.
For more information on the Tiny MCE external_plugins option, see https://www.tiny.cloud/docs/configure/integration-and-setup/#external_plugins
The Crafter Studio developer does not have full control of the tinymce initialization. To add a custom button to the toolbar in Crafter Studio, it would be done using the external plugin route since, what TinyMCE docs advise – i.e. using the setup function to add the button – is not viable in Studio without creating a form control plugin where they’d have full control of tinymce initialization.
To add an external plugin, use the tag <external_plugins /> in the RTE configuration.
Use the Crafter Studio API that gets a file for a given plugin, the getPluginFile API found here https://app.swaggerhub.com/apis/craftercms/studio/3.1.14.0#/plugin/getPluginFile to get the Tiny MCE external plugin file to pass to the RTE.
Example External Plugin
Let’s take a look at an example of a simple external plugin that creates a custom button which inserts text in the RTE.
We’ll load our external plugin (a custom button) and add it to the RTE’s toolbar. For our example, we’ll be using a site created using the empty blueprint named hello.
Open the RTE (TinyMCE 5) configuration file in Studio by opening the Sidebar, then click on
-> Configuration -> RTE (TinyMCE 5) ConfigurationWe’ll add the configuration for TinyMCE to load the plugin using Crafter Studio’s getPluginFile API. We achieve this by using the
<external_plugins />tag and adding child tags with the id of the plugin as tag name and the target URL as the tag’s content<external_plugins> <my_button><![CDATA[/studio/api/2/plugin/file?siteId={site}&type=tinymce&name=my_button&filename=plugin.js]]></my_button> </external_plugins>
where:
{site}: a macro that inserts the current siteId
Add the custom button we’re creating to the toolbar of the RTE. Scroll to the
<toolbarItems2 />tag and add the custom button we are creatingmy_button<toolbarItems2>my_button</toolbarItems2>
Finally, we’ll create our plugin file and add it in to Studio. See Crafter Studio Plugins for more information on creating a Crafter Studio plugin.
Using information from step 2 for our external plugin, create the required directory structure for the plugin file, then create our plugin file named
plugin.js$CRAFTER_HOME/data/repos/sites/SITE_NAME/sandbox/config/studio/plugins/tinymce/my_button/plugin.js1(function () { 2 3 'use strict'; 4 5 tinymce.PluginManager.add("my_button", function (editor, url) { 6 7 function _onAction() 8 { 9 // Write something in the RTE when the plugin is triggered 10 editor.insertContent("<p>Content added from my button.</p>") 11 } 12 13 // Define the Toolbar button 14 editor.ui.registry.addButton('my_button', { 15 text: "My Button", 16 onAction: _onAction 17 }); 18 }); 19 20 // Return details to be displayed in TinyMCE's "Help" plugin, if you use it 21 // This is optional. 22 return { 23 getMetadata: function () { 24 return { 25 name: "My Button example", 26 url: "http://exampleplugindocsurl.com" 27 }; 28 } 29 }; 30})();
We recommend minimizing the
plugin.jsfile. If your plugin is minimized, remember to change the external_plugins > my_button URL in the RTE configuration to load the minified version.Remember to commit the new file so Studio will pick it up by doing a
git addthen agit commit. Whenever you edit directly in the filesystem, you need to commit your changes to ensure they are properly reflected.
Let’s see the TinyMCE external plugin we created in action.
Edit the
Homepage by opening theSidebarthen underPages, right-click onHome, then select edit.
Scroll down to theMain Contentsection of the form to view the RTE. Notice that the button we created is in the toolbar.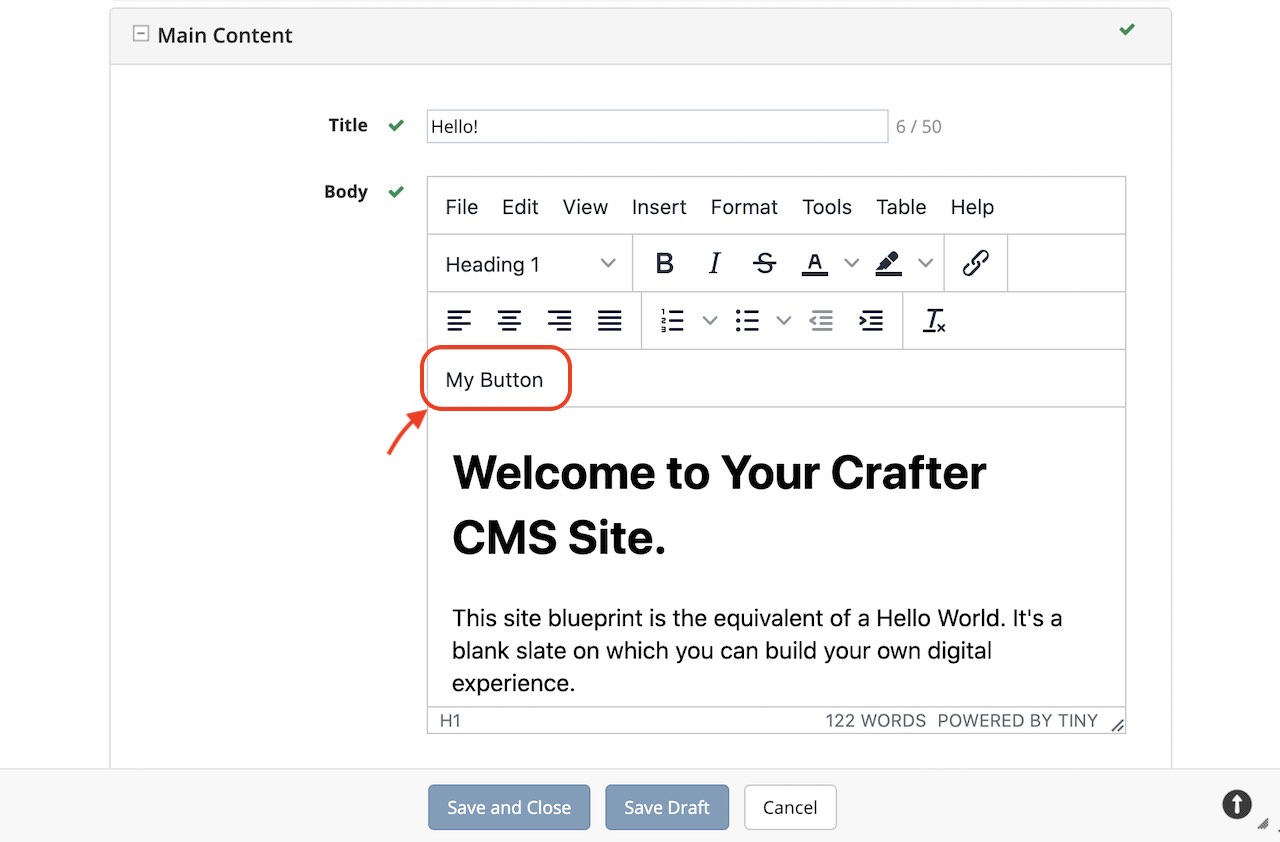
Click on our custom button in the RTE
My Button, and the line Content added from my button. will be inserted into the RTE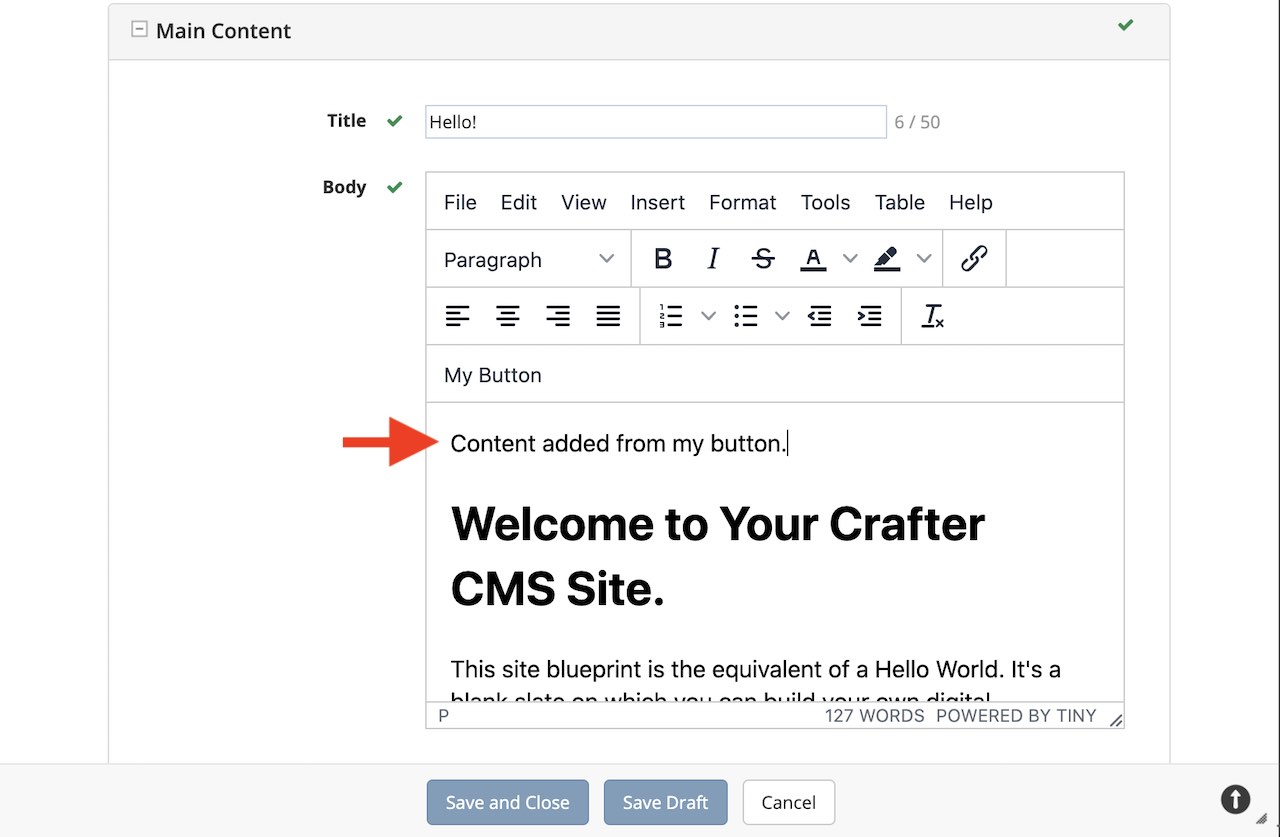
Adding configuration options to the init function
Crafter Studio uses standard TinyMCE configuration options.
The default editor instance contains most of the commonly used configuration options such as the selector, toolbar,
plugin, etc. Sometimes, you may want to use a configuration option that is not in the default editor instance. To add
a configuration option to an editor instance, we use <extendedOptions /> in the RTE configuration.
Simply add the configuration options you would like to add in the <extendedOptions /> tag.
<extendedOptions>
  <![CDATA[
    {
      "preview_styles": "font-size color"
    }
  ]]>
</extendedOptions>
Most of the TinyMCE configuration options can be used except for the following which are set to read only:
target inline setup base_url encoding autosave_ask_before_unload autosave_interval
autosave_prefix autosave_restore_when_empty autosave_retention file_picker_callback height
file_picker_callback paste_postprocess images_upload_handler code_editor_inline
See https://www.tiny.cloud/docs/configure/ for more information on the configuration options of TinyMCE.
Example adding a configuration option
Let’s take a look at an example of adding the fontsize_formats option to the init function to override the font
sizes displayed in the fontsizeselect dropdown toolbar button and the fontsizes menu item
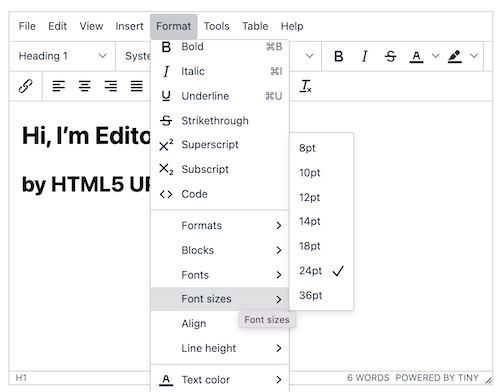
The default font sizes are: 8pt 10pt 12pt 14pt 16pt 18pt 24pt 36pt 48pt as seen above. For our example, we will add the following font sizes to the default: 9pt 11pt and 13pt
Open the RTE (TinyMCE 5) configuration file in Studio by opening the Sidebar, then click on
-> Configuration -> RTE (TinyMCE 5) ConfigurationAdd the configuration option
fontsize_formatsunder thesetuptag with the font sizes we want:<config> <setup> ... <extendedOptions> <![CDATA[ { "fontsize_formats": "8pt 9pt 10pt 11pt 12pt 13pt 14pt 16pt 18pt 24pt 36pt 48pt" } ]]> </extendedOptions> ...
Let’s see the font sizes we added in action. Preview a page with an RTE and start editing. Click on the RTE toolbar menu
Formatthen selectFont sizes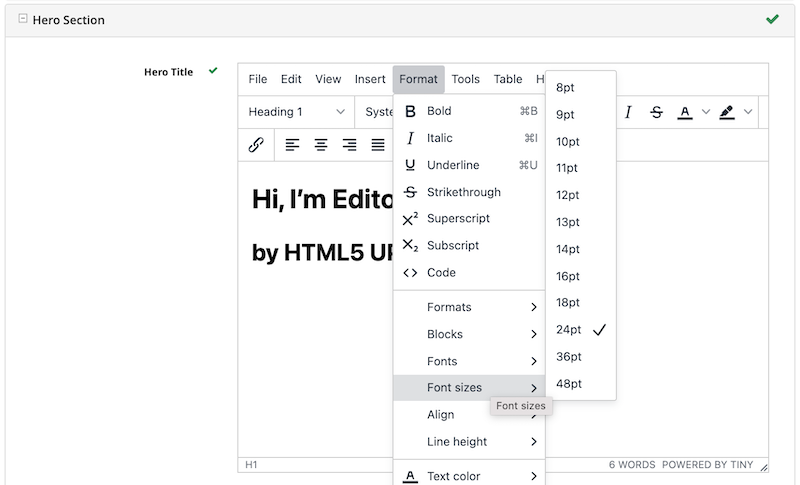
Creating an RTE Setup
The RTE’s configuration file looks like this:
 1<?xml version="1.0" encoding="UTF-8"?>
 2<!--
 3  This file configures Studio's Rich Text Editor (RTE), and it supports several configuration profiles, where the
 4  content model selects which profile to use for which RTE field in the forms.
 5-->
 6<config>
 7  <setup>
 8    <id>generic</id> <!-- This starts a profile configuration -->
 9
10    <rteStylesheets> <!-- This informs the RTE to use the CSS files -->
11      <!-- <link>/static-assets/css/rte/rte.css</link> -->
12    </rteStylesheets>
13
14    <rteStyleOverride>
15      body {
16        <!-- styles -->
17      }
18    </rteStyleOverride>
19
20    <plugins>
21      print preview searchreplace autolink directionality visualblocks visualchars fullscreen image link media template
22      codesample table charmap hr pagebreak nonbreaking anchor toc insertdatetime advlist lists wordcount
23      textpattern help acecode
24    </plugins>
25
26    <extendedElements>script,mycustomtag</extendedElements>   <!-- elements whitelist (won't be stripped out) -->
27
28    <toolbarItems1>
29      formatselect | bold italic strikethrough forecolor backcolor | link | alignleft aligncenter alignright alignjustify | numlist bullist outdent indent | removeformat
30    </toolbarItems1>
31    <toolbarItems2></toolbarItems2>
32    <toolbarItems3></toolbarItems3>
33    <toolbarItems4></toolbarItems4>
34  </setup>
35</config>
You can access the RTE (TinyMCE 5) Configuration file by going to the Sidebar then clicking on ![]() . In the Site Config, click on Configuration, then from the dropdown list, select
. In the Site Config, click on Configuration, then from the dropdown list, select RTE (TinyMCE 5) Configuration

Inside the <config> tag, there can be multiple <setup> tags. Each represents a possible RTE configuration that can be specified to be used by a RTE control. To add your own configuration, create a new <setup> tag. Each <setup> tag contains:
An
<id>tag with the name that must be specified for an RTE control to use this configuration.
<rteStylesheets>tag that may contain multiple<link>tags. Each link tag represents a link to a CSS stylesheet that will be used so that the RTE matches the look and feel of the site.<link> <loadFromPreview>true</loadFromPreview> <url>/static-assets/css/main.css</url> </link>
<rteStyleOverride>tag that may contain other tags for changing the looks and feel of your site.
<plugins>contains the plugins available to the editor. You can specify any plugin as named in Tiny MCE Plugins List. Separate items from one another with a space “ “.
<toolbarItems1>and similar contain the toolbar buttons in the RTE. You can specify any plugin toolbar item listed in the plugins above. They will be featured in the same order as specified here, and separators can be specified with|. Separate toolbar items as well as|separators from one another with a space “ “.
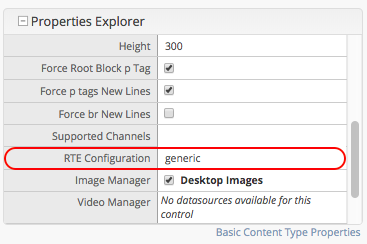
Attaching an RTE in a Form to an RTE Setup
To attach an RTE setup to an RTE in a form, open the content type that you want to add an RTE to, then go to the Properties Explorer and click on RTE Configuration and type in an RTE setup name.
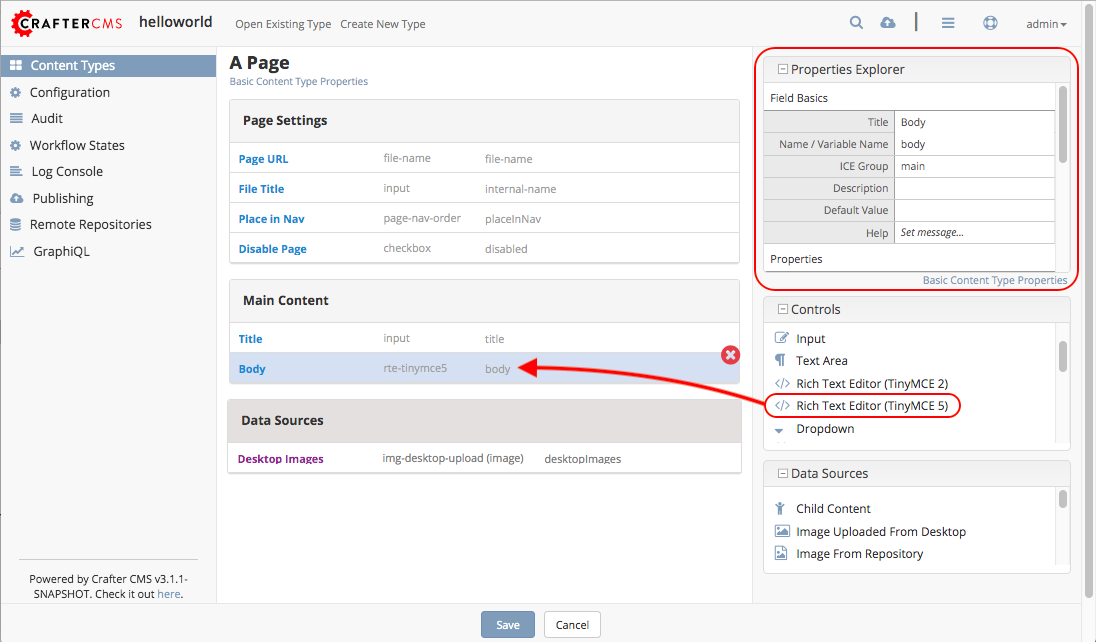
In the image below, the RTE setup name used is generic. Please see the section above on how to create an RTE Setup, where the example shows an RTE Setup named generic.
Extending TinyMCE
CrafterCMS provides a general tool for extending TinyMCE via the craftercms_tinymce_hooks. It currently allows for hooking into the following (as shown by the example here):
paste_preprocesscallbackpaste_postprocesscallbacksetupfunction
To hook into the paste pre/post process of TinyMCE, see here.